Category: General Welding

  • Nobody Starts With a Perfect Bead: What the First Weeks of Welding School Really Build

    Nobody Starts With a Perfect Bead: What the First Weeks of Welding School Really Build

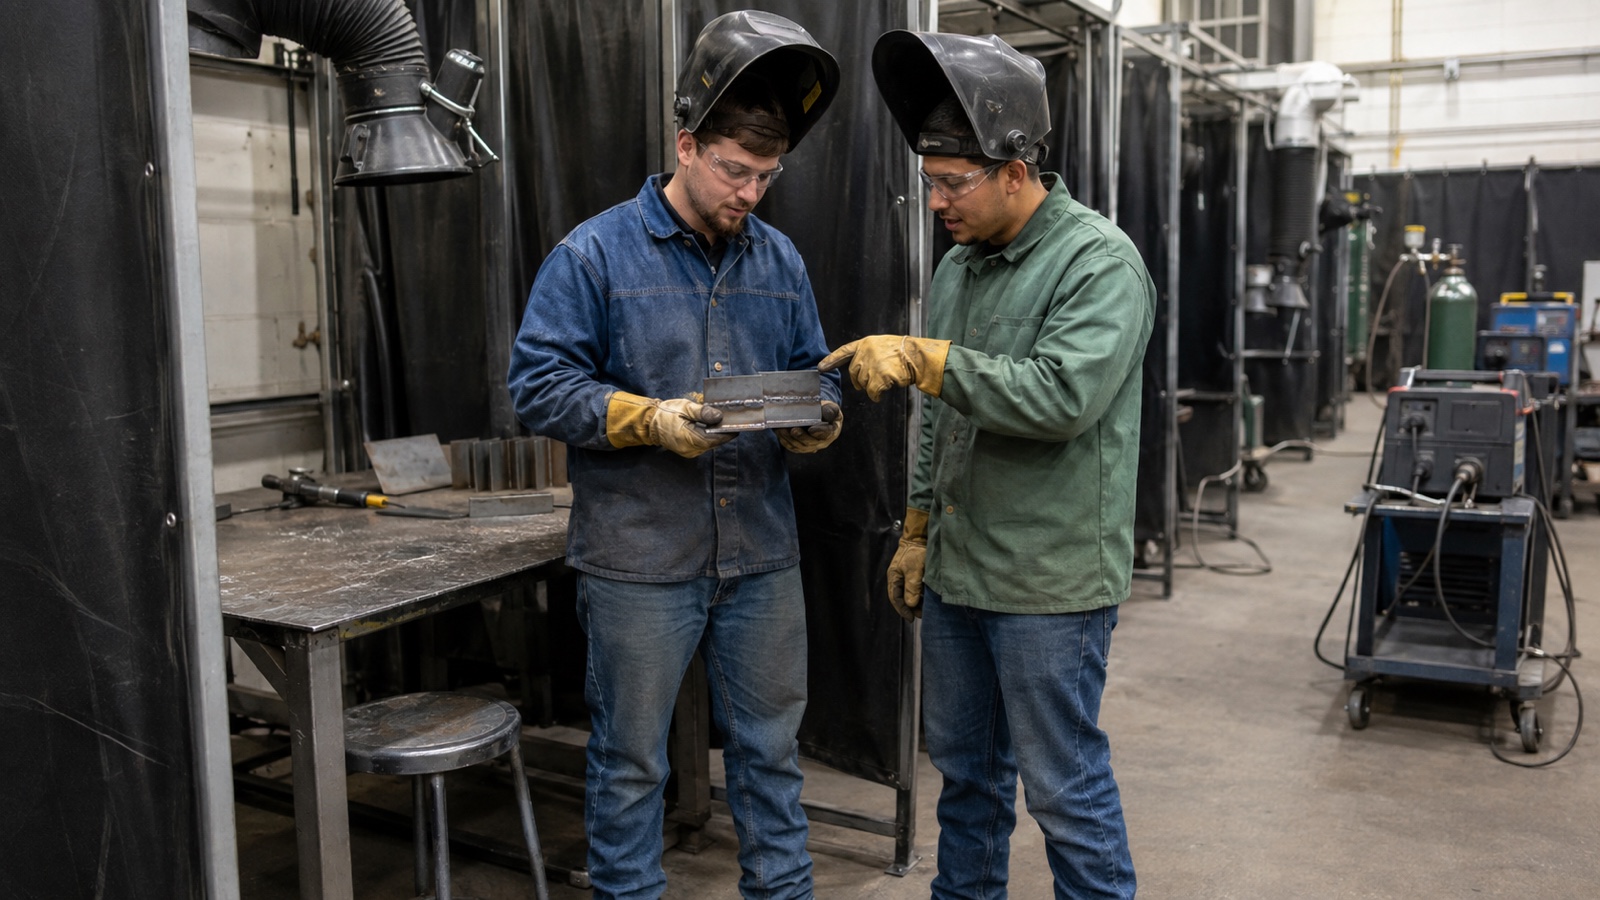
    The first practice plate has a way of telling the truth. The bead wanders. The starts are heavy. The stops leave craters. You lift the hood, look at the coupon, and wonder whether everyone else in the lab understands something you missed.

    They probably do not. They are learning, too.

    The opening weeks of welding school are not a highlight reel. They are an introduction to repetition, observation, safety, and the strange experience of training your hands to follow what your eyes are only beginning to see. Nobody walks into that booth with years of hood time already earned.

    The First Lesson Is Not About Looking Talented

    New welders often arrive carrying an invisible pressure to prove they belong. Maybe a parent welded. Maybe friends already work in the trades. Maybe this is a career change, and starting over feels heavier than expected.

    But the booth does not care about anybody’s backstory. It responds to preparation, position, consistency, and time. That can be humbling, but it is also fair. The work gives immediate feedback. A rough bead is not a verdict on your future; it is information about the next attempt.

    You Begin by Learning to See

    Before a student develops smooth travel, there is a more basic skill taking shape: noticing. You start seeing the difference between clean and contaminated material. You notice how body position changes control. You begin to recognize when the puddle is doing what you intended and when you are simply chasing it.

    This is why an instructor may spend more time asking what you see than telling you exactly what to do. Good feedback teaches a student to diagnose the work instead of waiting for somebody else to rescue every pass. The goal is not to memorize one magic motion. It is to build judgment that travels with you to the next joint, process, and job.

    Safety Becomes Part of the Craft

    Early training can make safety feel like a long list that stands between the student and the arc. Experienced welders understand it differently. PPE, ventilation, fire prevention, cylinder handling, housekeeping, and awareness of the people around the booth are part of doing the work correctly.

    The Occupational Safety and Health Administration’s welding overview organizes welding, cutting, and brazing requirements around recognized hazards and protective measures. A student does not need to memorize every standard in the first week, but the habits start immediately: protect your eyes and skin, understand the space, respect hot material, and ask when something is unclear.

    Feedback Is Where Confidence Actually Starts

    Real confidence is not announcing that you have it figured out. It is being willing to hear why a pass failed, make one deliberate change, and try again. That process can be frustrating because improvement rarely arrives in a straight line. One plate looks better. The next one falls apart. Then something clicks that you could not force the day before.

    The students who keep progressing are not always the loudest or fastest. They are often the ones who stay curious. They compare attempts. They keep notes. They watch a demonstration closely. They ask a specific question instead of hiding a mistake. Humility is not weakness in a welding lab; it is a practical tool.

    There Is More Than One Door Into the Trade

    Welding careers do not begin through one universal route. The U.S. Bureau of Labor Statistics describes a mix of technical education and on-the-job training, with opportunities through vocational programs, community colleges, private schools, military training, employers, and apprenticeships. The American Welding Society’s student resources also include education, certification information, and a school directory.

    That variety matters. A seventeen-year-old in a career center and a forty-year-old changing industries may stand at neighboring booths with different goals and the same assignment. Neither path makes the first plate easier. Both deserve room to learn.

    The Culture Is Being Built Around You

    The first weeks also reveal what kind of shop culture a class will create. Does somebody explain a setup without making the new person feel foolish? Do students clean the booth for whoever comes next? Does the class treat safety as shared responsibility? Can people laugh at a rough practice plate without laughing at the person who made it?

    Those small choices matter because welding is rarely a completely solitary trade. Even when one person holds the torch, the work depends on fitters, inspectors, operators, supervisors, helpers, instructors, and customers. Skill earns respect, but so does being the person others can trust around the work.

    Keep the First Plate

    If the program allows it, keep an early practice coupon. Months later, it becomes evidenceโ€”not of where you failed, but of how far repetition carried you. The wandering bead, the ugly restart, and the uneven rhythm are part of the record.

    That is the part of Arc Life worth remembering: pride in the trade does not begin when the work looks perfect. It begins when you decide the work is worth learning. Read more about the community behind Arc Life Co., built around people who keep showing up for the craft.

    Shop question: What did your first practice weld teach you that you still remember?

    Sources and further reading

  • What Arc Life Means: The Culture Welders Carry Beyond the Booth

    What Arc Life Means: The Culture Welders Carry Beyond the Booth

    A clean bead is easy to admire. What most people never see is everything behind it: the early starts, the hood time, the rework, the burnt sleeves, and the quiet satisfaction of leaving a joint better than you found it.

    That is the heart of Arc Life. It is bigger than a welding process and more lasting than a good day in the booth. It is the culture welders carry with themโ€”into the shop, onto the jobsite, and home at the end of a shift.

    The Work Has a Way of Shaping You

    Welding teaches patience in a hurry. You learn that rushing fit-up usually creates more work, that preparation matters, and that a small mistake can announce itself all the way down the joint. You also learn to keep going when the position is awkward, the weather is ugly, or the first attempt does not land the way you wanted.

    Those lessons do not stay under the hood. They show up in how welders solve problems, how they judge their own work, and how quickly they notice when something was built with careโ€”or without it. Pride in the trade is not about pretending every weld is perfect. It is about caring enough to improve the next one.

    Every Process Has Its People

    Ask a group of welders about their favorite process and the conversation rarely stays technical for long. MIG has its production rhythm. TIG rewards control and focus. Stick carries a reputation for going where the work is rough and access is limited. Flux-cored welding has its own loyal crowd, too.

    The differences create plenty of shop talk, but the common ground matters more. Everyone remembers learning to read a puddle. Everyone has lifted a hood and known immediately that a pass was rightโ€”or that it was time to grind. Process pride can be fun without turning into a contest. The arc is the shared language.

    Shop Culture Is Built in the Small Moments

    The welding community is not held together by slogans. It is built through small acts: somebody lending a marker, explaining a machine setting without making a new welder feel small, calling out a hazard before it becomes an injury, or staying a few minutes to help finish a difficult fit-up.

    Good crews make room for high standards and good humor at the same time. They know when to give someone a hard time and when to step in. They respect the person doing the work, not just the job title on the badge. That sense of belonging is one reason welding becomes more than a paycheck for so many people.

    Arc Life is the pride of knowing what the work demandsโ€”and choosing to do it well anyway.

    Why Welders Wear the Trade

    A welding shirt, hat, sticker, or hoodie can look simple from the outside. To another welder, it can say a lot. It can recognize the process you prefer, the hours you have put in, or the kind of people you want to represent. It can start a conversation in a parking lot or earn a knowing nod across a counter.

    That is the idea behind Arc Life Co.: apparel and gear shaped by shop-floor experience and pride in the craft. The best welding culture does not need to shout. It simply feels familiar to the people who have lived it.

    Beyond the Booth

    When the helmet comes off, the identity does not disappear. Welders bring the trade into garages, side projects, family conversations, and the way they look at anything made from metal. They notice brackets, handrails, trailer repairs, and structural connections that everyone else walks past.

    Arc Life belongs in those off-the-clock moments, too. It is the story behind a toolbox sticker, the reason a process-specific shirt makes a good gift, and the shared pride that connects apprentices, instructors, fabricators, pipe welders, artists, repair technicians, and weekend builders.

    A Standard Worth Passing On

    Trade culture stays healthy when experience is passed forward. A veteran welder who explains the reason behind a habit gives a new hand more than a shortcut. An instructor who demands clean preparation teaches that quality begins before the arc starts. A coworker who treats safety as part of craftsmanship helps set the standard for the whole crew.

    That does not mean everyone has to work the same way or follow the same career path. Welding is broad enough for production, construction, repair, inspection, education, art, and entrepreneurship. The connection is a respect for the skillโ€”and a willingness to leave the trade stronger for the people coming next.

    Keep the Arc Alive

    The strongest version of welding culture is welcoming, skilled, safety-minded, and proud without being closed off. It remembers where it came from while making room for the next person learning to strike an arc. It respects the old hands, encourages the new ones, and never forgets that every expert once had an unsteady first bead.

    If that sounds like your kind of community, explore the current Arc Life collection and find the piece that fits how you live the trade.

  • KOHLER 47 883 03-S1 Engine Air Filter With Pre-Cleaner Kit: Replacement Part Breakdown

    The KOHLER 47 883 03-S1 Engine Air Filter With Pre-Cleaner Kit is a replacement air intake service item, not a repair for deeper engine problems. For maintenance buyers and shop support teams, the main job is simple: keep dirt out of the engine, match the correct service part, and verify the filter is installed in a way that does not bypass sealing surfaces.

    This guide breaks down the part at a practical level. It is written for inspection, replacement planning, and troubleshooting. It does not assume compatibility beyond the product listing itself. If fitment is uncertain, verify against the engine model, current parts manual, and the equipment serial number before ordering or installing.

    Key Takeaways

    • This is an air filter plus pre-cleaner kit. It is meant for routine intake service.
    • Do not assume universal fit. Verify the engine model and OEM parts listing first.
    • Inspect the air box, sealing surfaces, and intake tract when changing the filter.
    • A dirty pre-cleaner can shorten service intervals, even if the main filter still looks usable.
    • If dirt ingestion is suspected, replace the filter and inspect downstream components before returning the engine to service.

    What This Part Does

    An engine air filter removes airborne dust and debris before it reaches the intake system. The pre-cleaner is a first-stage element that can help trap larger debris before it reaches the main filter. In dusty maintenance environments, both parts matter. A damaged seal, loose housing, or incorrect installation can allow unfiltered air into the engine even if the filter media itself looks acceptable.

    Buyer and Support Checkpoints

    Before ordering or installing the KOHLER 47 883 03-S1 kit, use this check list:

    • Check the engine model number. Do not rely on visual similarity alone.
    • Inspect the current filter dimensions and housing shape. Match against the parts listing and manual.
    • Verify the sealing edge. A distorted seal can be more harmful than a dirty element.
    • Confirm whether the pre-cleaner is included in the service kit. This listing is a kit, but always verify the exact contents at purchase.
    • Check for dust tracking. Powdery dirt downstream of the filter points to bypass or a poor seal.

    Troubleshooting: When to Replace or Inspect Further

    If an engine starts to lose power, runs rich, or shows unusual dust buildup in the intake path, the air filter is one of the first items to inspect. Use the following sequence:

    Check

    • Check the filter media for heavy dust loading, tears, or collapse.
    • Check the pre-cleaner for excessive dirt, oil saturation, or damage.
    • Check the housing for cracks, missing clips, warped covers, or loose fasteners.

    Inspect

    • Inspect the sealing rim and mating surface for sand, debris, or compression set.
    • Inspect the intake tube and clamps for leaks or loose fit.
    • Inspect the old filter for evidence of dirt passing around the element rather than through it.

    Verify

    • Verify the replacement part number against the engineโ€™s official parts record.
    • Verify the filter seats fully and the housing closes without forcing.
    • Verify engine response after service. If performance problems remain, the issue may be fuel, ignition, governor, or mechanical, not the air filter.

    Replacement Part Breakdown

    For maintenance planning, think of this item as three service functions in one package:

    • Main air filter element: Primary barrier for fine particulate.
    • Pre-cleaner: Secondary stage for larger dust and debris.
    • Service fitment: The physical shape and seal interface that must match the engine air box.

    Unknown (Verify): exact media type, dimensions, and engine compatibility. Do not fill those gaps from guesswork. Confirm from the OEM listing or the equipment manual.

    Install and Service Notes

    Use clean hands and a clean work area. Do not tap a damaged filter back into service if the media is torn or the frame is distorted. If the pre-cleaner is reusable on the specific engine setup, inspect it first and follow the OEM service instructions. If service instructions are not available, treat the pre-cleaner as Unknown (Verify) and confirm with the manual.

    Practical install steps:

    1. Shut the engine down and let it cool.
    2. Open the air cleaner housing carefully so debris does not fall into the intake.
    3. Remove the old filter and pre-cleaner.
    4. Clean the housing and sealing surfaces with a dry, lint-free method.
    5. Install the new filter so it seats evenly.
    6. Install the pre-cleaner as specified by the equipment manual, if applicable.
    7. Close the cover and confirm all retainers are secure.
    8. Start the engine and check for abnormal intake noise or leaks.

    Product and Parts Section

    The verified Amazon product associated with this draft is the KOHLER 47 883 03-S1 Engine Air Filter With Pre-Cleaner Kit, ASIN B000H5ZWEC. Use the provided product box for the current listing:

    No products found.

    Do not assume this kit fits every KOHLER-powered machine. Buyer teams should confirm the engine model, serial range, and parts manual before purchase.

    Safety Notes

    • Stop the engine before servicing the air filter.
    • Keep loose dirt out of the intake opening during removal.
    • Do not use compressed air on a filter unless the OEM procedure explicitly allows it.
    • Do not run an engine with a missing filter or open air box.
    • If dust ingestion is suspected, inspect the engine for follow-on wear before placing it back in service.

    FAQ

    How do I know if this is the correct replacement?

    Verify the engine model, the parts manual, and the OEM part number. Do not rely on appearance alone. If any detail does not match, treat fitment as Unknown (Verify).

    Should I replace the pre-cleaner at the same time as the filter?

    For maintenance planning, yes, inspect both together. Replace whichever component is dirty, damaged, or no longer sealing correctly. If the OEM service method is unclear, verify the replacement interval in the manual.

    What if the engine still runs poorly after filter replacement?

    Then the air filter is probably not the only issue. Check fuel delivery, ignition, governor response, intake leaks, and engine condition. Do not keep replacing filters as a substitute for diagnosis.

    Can I use this kit on a different KOHLER engine?

    Unknown (Verify). Use only documented fitment from the OEM parts listing or manual. Similar housings can have different seals and dimensions.

    Sources Checked

    • Provided Amazon product reference: B000H5ZWEC
    • Provided product name: KOHLER 47 883 03-S1 Engine Air Filter With Pre-Cleaner Kit
    • Task instructions and allowed product data only

    Disclosure: As an Amazon Associate, Weld Support Parts may earn from qualifying purchases.

  • Kohler Nut Wing #KOH-12 100 01-S: Replacement Part Breakdown

    The Kohler Nut Wing #KOH-12 100 01-S is a replacement part reference that maintenance buyers and shop support teams may encounter when servicing equipment with Kohler components. For a wing nut, the important question is not just the part name. It is whether the thread, material condition, clamping face, and fit match the application you are repairing. If any of those points are uncertain, verify before installation.

    This draft keeps the focus on practical identification and support steps. It does not assume compatibility beyond the part reference provided. For equipment-specific use, confirm the machine model, thread match, and assembly requirements against the OEM documentation or an authorized parts source.

    Key Takeaways

    • Use the exact part reference when ordering or cross-checking: Kohler Nut Wing #KOH-12 100 01-S.
    • Do not assume fit from the part name alone. Verify thread, diameter, pitch, and seating style.
    • Inspect the mating stud or bolt before replacing the wing nut. A damaged stud will cause repeat failure.
    • If the application is on a machine or service panel, check for vibration, heat, corrosion, and hand-tightening requirements.
    • When details are unknown, mark them as Unknown (Verify) rather than guessing.

    What This Part Reference Tells You

    A wing nut is typically used where hand removal or frequent access is needed. The Kohler part reference suggests an OEM-style replacement component, but the reference alone does not confirm the thread size, finish, or material. Those details matter in field service because a wing nut that starts on the thread but does not seat correctly can loosen, gall the stud, or fail under vibration.

    If you are tracking down the correct replacement, document the following before you order:

    • Equipment model and serial number
    • Location of the fastener on the machine
    • Visible thread size and pitch, if measurable
    • Old part condition: intact, stripped, cracked, corroded, or heat damaged
    • Any washer, lock element, or spacer used with the nut

    Troubleshooting and Support Checks

    Use a simple inspect-verify routine before installing a replacement wing nut.

    Check

    • Check the removed nut for thread wear, flattening, cracks, and corrosion.
    • Check the stud or bolt for damaged crests, mushrooming, or cross-thread marks.
    • Check the mating surface for burrs, distortion, or debris that can prevent full seating.
    • Check whether the application is hand-tightened only or exposed to repeated vibration.

    Inspect

    • Inspect the thread start on the replacement part. The first few turns should not show deformation.
    • Inspect for any contamination such as paint, rust, or metal chips in the female or male thread.
    • Inspect nearby hardware for signs of looseness that could indicate a larger fastener issue.

    Verify

    • Verify thread match by measuring or test-fitting by hand. Do not force engagement.
    • Verify clearance around the wing tips so the nut can be turned without interference.
    • Verify the retained assembly still closes, clamps, or secures correctly after tightening.
    • Verify that any replacement maintains the same service access and does not interfere with covers or guards.

    If the wing nut begins to bind immediately, stop and recheck the thread. Cross-threading can damage both the nut and the stud. If the part spins freely but never tightens, the thread pitch or diameter may not match, or the stud may already be worn beyond serviceable condition.

    Replacement Part Breakdown

    For service planning, break the replacement decision into four parts:

    1. Identification: Confirm the exact part reference on the existing machine record or removed hardware.
    2. Fit: Confirm thread size, thread pitch, and required seating style. Unknown (Verify) if not documented.
    3. Condition of mating hardware: Replace or repair the stud, bolt, washer, or panel hardware if damaged.
    4. Application demands: Consider vibration, temperature, contamination, and frequency of removal.

    This is the point where many repair jobs go wrong. A wing nut is often treated as a generic item, but in maintenance work the wrong fastener can create repeat service calls. The cost of verifying fit is lower than repairing a stripped stud or a loose cover.

    Product / Parts Section

    The provided product reference is:

    • Product name: Kohler Nut Wing #KOH-12 100 01-S
    • ASIN: B00CSBT27G
    • Amazon affiliate shortcode:

      No products found.

    No compatibility, dimensions, material grade, or certification details are confirmed in the source data provided here. Treat those details as Unknown (Verify) until checked against the OEM parts documentation or the product listing from the approved source.

    Safety Notes

    • Lock out and tag out equipment before removing guards, covers, or retained assemblies when required by site procedure.
    • Do not substitute a wing nut in a load-bearing or critical retention point unless the application specifically allows it.
    • Do not force mismatched threads. Forced installation can damage the fastener and nearby components.
    • If corrosion is present, use appropriate eye protection and hand protection when cleaning or removing hardware.

    FAQ

    Is the Kohler Nut Wing #KOH-12 100 01-S a universal replacement?

    No. The part reference alone does not prove universal fit. Verify the thread, size, and application before use.

    What should I do if the new wing nut will not start by hand?

    Stop and inspect the stud or bolt for damage, contamination, or incorrect thread pitch. If needed, confirm the replacement against the OEM parts record. Do not force it.

    Can I reuse the old stud if the wing nut was stripped?

    Only if inspection shows the stud is still in serviceable condition. If the threads are flattened, galled, or deformed, replace the stud or related hardware as required.

    What details are still unknown?

    Material, finish, exact dimensions, and application-specific compatibility are Unknown (Verify) based on the provided source data.

    Sources Checked

    • Provided Amazon product reference for Kohler Nut Wing #KOH-12 100 01-S
    • Provided ASIN registry reference: B00CSBT27G

    Use this part only after fit and application checks are complete. For maintenance purchasing, the safest path is to confirm the mating hardware and the equipment model before release to the field.

    Disclosure: As an Amazon Associate, Weld Support Parts may earn from qualifying purchases.

  • How to Build a Basic Welding Maintenance Kit

    How to Build a Basic Welding Maintenance Kit

    Jackson Safety Respirator

    A welding maintenance kit should keep a machine, torch setup, and work area in service without guesswork. The goal is not to collect every accessory on the market. The goal is to keep basic wear items, cleaning tools, and inspection supplies in one place so a welder or maintenance tech can find what is needed before a job starts.

    For a buyer, the best kit is the one that matches the processes used in the shop. A light fabrication bay does not need the same contents as a multi-shift maintenance department. Start with the items that support cleaning, inspection, routine wear replacement, and safe housekeeping. Then build from actual use.

    Key Takeaways

    • Build the kit around the processes in use: SMAW, GMAW, FCAW, GTAW, or mixed service.
    • Stock common wear and cleaning items first, then add process-specific parts.
    • Keep inspection tools in the same kit so problems are found before downtime starts.
    • Use labeled containers and a simple checklist so the kit can be verified quickly.
    • Do not buy parts based on assumptions. Verify torch model, liner size, tip size, and connector type before ordering.

    Basic kit categories

    A practical welding maintenance kit usually includes five categories.

    1. Cleaning and prep items

    These help remove spatter, dust, soot, and surface contamination. Common items include a chipping hammer, wire brush, nozzle cleaning tools, shop rags, and a non-flammable cleaner approved by your site. If solvent use is allowed, verify compatibility with painted surfaces, plastics, cable jackets, and seals. Unknown (Verify) for any cleaner not listed by your site procedure.

    2. Wear parts and consumables

    Keep the items that fail most often. For MIG and flux-cored setups, that usually means contact tips, nozzles, diffusers, liners, drive rolls, and O-rings where applicable. For TIG setups, include collets, collet bodies, cups, back caps, and tungstens if your procedure allows onsite sharpening and replacement. For stick welding, keep electrode holders, cable lugs, and spare lead hardware in mind. Do not assume compatibility. Verify machine brand, torch series, and part numbering before stocking anything.

    3. Inspection tools

    Inspection tools help prevent failures that look like bad welding but are actually maintenance issues. A basic set can include a flashlight, tape measure, feeler gauges, multimeter, temperature indicator if used by your shop, and a magnifier for connector or tip inspection. If your department uses torque-critical hardware, verify torque values from the equipment manual. Unknown (Verify) if the manual is not available.

    4. Cable and connection hardware

    Damage to power cables, ground clamps, and connectors can stop production. Keep spare lugs, heat-shrink, electrical tape approved for the application, replacement clamps, and strain-relief hardware. Inspect cable jackets for cuts, flattened sections, exposed conductor, and heat damage. Verify that replacement components match conductor size and connector style before installation.

    5. Storage and labeling supplies

    The kit should stay organized. Use bins, labeled pouches, or a hard case with compartments. Add a contents list, reorder list, and date tracking for high-use items. Maintenance kits fail when parts are thrown in loose and no one knows what was removed. A simple inventory sheet is better than a large box with no control.

    Check, inspect, verify: build the kit step by step

    Check: list the welding processes and machines in use. Note torch models, feeder types, lead lengths, and common failure points. This defines the kit.

    Inspect: review the current spare parts drawer or tool cabinet. Separate what is used, what is obsolete, and what is unlabeled.

    Verify: confirm model numbers, cable sizes, tip sizes, and connector types from manuals, nameplates, or internal records. Do not rely on memory.

    Check: identify consumables that are replaced weekly, monthly, or after a known failure mode.

    Inspect: make sure cleaning tools are not damaged. A worn brush or cracked nozzle tool becomes wasted space.

    Verify: that each item in the kit has a clear use case. If no one can explain why it is there, remove it.

    Troubleshooting support: what the kit should help you catch

    A maintenance kit should support fast diagnosis, not just replacement.

    • Poor arc stability: Check contact tips, cable connections, and work clamp condition. Inspect for heat damage and loose fittings. Verify correct consumable size and wire diameter.
    • Wire feed issues: Check liner condition, drive roll wear, spool tension, and gun cable routing. Inspect for birdnesting, debris, or sharp bends. Verify the liner and drive roll match the wire type and diameter.
    • Gas coverage problems: Check for clogged nozzles, damaged gas hoses, loose fittings, and excessive drafts. Inspect seals and O-rings. Verify gas flow settings and leak-free connections per shop procedure.
    • Overheating or intermittent output: Check duty-cycle use, cable condition, and terminal tightness. Inspect for discoloration, brittleness, and hot spots. Verify the machine is not being operated outside its intended service range.

    WSP lookup section

    For respiratory safety support, the only provided WSP lookup page is the Jackson Safety Respirator page. This is useful as a reference point for PPE-related maintenance planning, but the available page data is limited. Product fit, respirator type, filter compatibility, and certification details are Unknown (Verify). Confirm all respirator selection and replacement-part requirements directly from the product page and site documentation before purchase or use.

    Safety notes

    • Do not service energized equipment unless your site lockout/tagout procedure allows it and the machine is verified safe.
    • Replace damaged cables, cracked insulation, burned connectors, and loose clamps before reuse.
    • Keep compressed air, solvents, and cleaning chemicals within site safety rules.
    • Verify PPE requirements before using wire brushes, grinders, or chemical cleaners.
    • If a part shows heat damage, corrosion, or deformation, do not return it to service without inspection by a qualified person.

    FAQ

    What is the most important part of a welding maintenance kit?
    The most important part is the set of wear items and inspection tools tied to your actual process. A kit that matches your machines is more useful than a larger generic box.

    Should every shop use the same kit?
    No. A maintenance kit should be built around the equipment in service, the wire or electrode types used, and the failure modes seen in that shop.

    How often should the kit be checked?
    Check it on a fixed schedule, such as weekly or at the start of each shift rotation. Verify missing items, damaged tools, and expired or obsolete supplies.

    Can I stock universal replacement parts?
    Only if compatibility is verified. Many welding parts look similar but are not interchangeable. Confirm series, size, and connector type before stocking universal items.

    Sources Checked

    • Provided WSP lookup page: Jackson Safety Respirator
    • Task instructions and allowed source limits
    • No additional product pages, ASINs, or internal links were provided

    A basic welding maintenance kit is not complicated. It is a controlled set of cleaning tools, wear parts, inspection items, and labeled storage built around actual shop use. Keep it simple, verify compatibility before buying, and review it often enough that missing parts are caught before they stop production.

  • Why Weld Beads Look Inconsistent

    ALCOTEC ER4043 Spool general purpose aluminum welding wire size
    “>ALCOTEC ER4043 Spool general purpose aluminum welding wire size

    Inconsistent weld beads usually come from variation in heat input, travel speed, arc length, wire feed, shielding gas coverage, or joint preparation. The visible bead pattern is often the result of one or more process inputs changing during the weld. Start with the basics and isolate each variable before changing more than one setting at a time.

    Key Takeaways

    • Check process settings first: voltage, amperage, wire feed speed, and polarity.
    • Keep travel speed and torch angle consistent from start to finish.
    • Clean base metal and remove contamination before welding.
    • Verify shielding gas flow and look for drafts or leaks.
    • Use one change at a time so the cause can be identified.

    Why Weld Beads Look Inconsistent

    A bead can look uneven, ropey, washed out, narrow, wide, convex, or irregular when the arc is not stable. That instability can come from operator technique, equipment setup, or material conditions. The same symptom can appear across MIG, TIG, and stick processes, but the root cause may differ.

    Common Causes and Checks

    1) Travel speed changes

    If the torch or electrode moves too fast, the bead can look narrow and underfilled. If travel slows down, the bead can become wide and convex. Uneven hand motion creates bead ripple changes and inconsistent tie-in.

    • Mark a short practice line and maintain a steady pace.
    • Watch the puddle, not just the arc.
    • Keep pauses and speed changes out of corners and starts.

    2) Arc length varies

    An arc that gets longer or shorter changes heat input and bead shape. A long arc can create spatter, undercut, and a rough bead. A short arc can cause stubbing, instability, or excess buildup depending on the process.

    • Hold a consistent arc length for the process in use.
    • Check for worn tips, poor contact, or torch positioning issues.

    3) Incorrect machine settings

    Voltage, amperage, wire feed speed, and polarity all affect bead consistency. If settings do not match material thickness, electrode size, or transfer mode, the bead profile will vary across the joint.

    • Confirm the machine setup against the procedure or weld schedule.
    • Verify that wire feed is stable and not surging.
    • Check drive roll pressure and liner condition if using MIG.

    4) Poor joint preparation

    Mill scale, rust, oil, moisture, paint, and oxide layers can disrupt wetting and cause bead irregularity. Poor fit-up also changes the puddle from one section of the joint to the next.

    • Clean both sides of the joint to bare, sound metal when required by the process.
    • Check gap, bevel, and root opening for consistency.
    • Remove oxide from aluminum before welding.

    5) Shielding gas problems

    Gas flow that is too low, too high, or blocked can make the arc unstable and the bead inconsistent. Drafts, leaks, damaged nozzles, or poor cup coverage can also affect appearance and puddle behavior.

    • Inspect gas lines, fittings, and consumables for leaks or damage.
    • Check nozzle condition and spatter buildup.
    • Shield the weld area from air movement.

    6) Consumable wear

    Worn contact tips, damaged tungsten, dirty nozzles, and contaminated filler can all create irregular bead appearance. The problem may show up as spatter, wandering arc, uneven ripples, or erratic penetration.

    • Replace worn consumables before adjusting settings aggressively.
    • Keep filler metal clean and dry.

    7) Base material variation

    Mixed thickness, heat sinking, gaps, and dirty edges can make the bead look inconsistent even if the machine settings are unchanged. Thin-to-thick transitions often require technique correction and heat control.

    • Expect bead changes when material thickness changes.
    • Use test coupons for setup when the joint conditions are not uniform.

    Troubleshooting Sequence

    1. Inspect the joint and clean the base metal.
    2. Check consumables, wire delivery, and gas coverage.
    3. Confirm machine settings and polarity.
    4. Run a short test bead with steady travel speed.
    5. Adjust one variable at a time and record the result.

    When the Bead Looks Different by Process

    MIG: Inconsistency often points to wire feed instability, stickout changes, gas coverage issues, or travel speed variation.

    TIG: Inconsistency often points to arc length changes, tungsten condition, filler timing, or torch angle variation.

    Stick: Inconsistency often points to arc length control, rod manipulation, moisture in electrodes, or changes in travel speed.

    Process-specific causes can overlap. If the bead pattern changes from one section of the joint to the next, check the operator inputs first before changing the machine.

    Product / Parts Support

    For aluminum wire applications, the provided product is:

    ALCOTEC ER4043 Spool general purpose aluminum welding wire size

    ALCOTEC ER4043 Spool general purpose aluminum welding wire size

    Introducing the ALCOTEC ER4043 Spool Aluminum Welding Wire, a premium choice for your welding needs. Known for its exceptional quality, this 1 lb spool is designed to provide optimal performance in various aluminum welding applications. Whether you're working in automotive, aerospace, or recreational industries, the ALCOTEC ER4043 is the perfect solution for achieving clean, smut-free welds. The ER4043 alloy featu…

    View at Arc Weld Store

    This may be relevant when inconsistent bead appearance is tied to aluminum filler selection or wire condition. Exact fit, wire diameter, and process compatibility are Unknown (Verify).

    Safety Notes

    • De-energize equipment before inspection, maintenance, or consumable replacement.
    • Use proper PPE, including helmet, gloves, flame-resistant clothing, and eye protection.
    • Ventilate the work area and control fumes.
    • Do not weld on contaminated, pressurized, or unknown materials without proper verification.

    FAQ

    Why does my weld bead change halfway through the joint?
    Usually the cause is travel speed, arc length, heat buildup, or a change in joint fit-up or material thickness.

    Can dirty metal make a weld bead inconsistent?
    Yes. Contamination can change puddle wetting, arc stability, and bead shape.

    Will gas flow alone fix an inconsistent bead?
    No. Gas coverage is one variable. Check setup, technique, and joint condition as well.

    What should I check first?
    Start with cleaning, consumables, wire feed or electrode condition, and machine settings.

    Sources Checked

    • General welding process diagnostics
    • Operator setup checks for MIG, TIG, and stick welding
    • Consumable and shielding gas troubleshooting practices
  • 2025 Welder Certification Changes: What You Need to Know

    2025 Welder Certification Changes: What You Need to Know

    Welding certifications are tightening in 2025. AWS, ANSI, and industry regulators have rolled out updated requirements focused on fatigue prevention, longer-term inflammation risks, exposure limits, and more robust process testing. If you were certified under pre-2025 rules, you may not meet current standards.

    Hereโ€™s what changedโ€”and what welders, shops, and buyers need to understand right now.


    Key Takeaways

    • New AWS/ANSI updates increase documentation, safety, and exposure-control requirements
    • Older certs may require renewal or supplemental testing
    • Emphasis on fatigue prevention, inflammation risk, and fume-exposure management
    • Structural, pipe, and automotive codes now reference expanded testing
    • Shops should plan for retraining and potential downtime

    What Changed for 2025

    AWS and ANSI updates donโ€™t overhaul the entire systemโ€”but several areas now demand more scrutiny.

    1. Fatigue Prevention & Ergonomics (New Focus Area)

    For the first time, AWS guidance ties welder conditioning, repetitive-strain exposure, and fatigue management to certification validity within certain shops.

    Whatโ€™s being emphasized:

    • Maximum allowable repetition cycles
    • Mandatory rest intervals for heavy-position welds
    • PPE requirements for vibration and joint stress
    • Documentation of overexertion incidents

    These arenโ€™t โ€œfitness tests,โ€ but they do affect shop compliance and jobsite audits.


    2. Chronic Inflammation & Long-Term Exposure

    ANSI Z49.1 references now highlight chronic inflammation risks from:

    • Metal fume inhalation
    • Heavy particulate exposure
    • Long-duration heat/UV exposure

    Shops are expected to update:

    • Fume extraction plans
    • Airflow documentation
    • Respiratory PPE fit-testing logs
    • Heat-stress protocols

    This ties directly into certification renewals for certain industries.


    3. Tighter Process Testing for Certification

    Across AWS D1.1 (structural), D1.3 (sheet steel), D17.1 (aerospace), and B31 pipe codes, many certs now require:

    • More detailed weld-procedure records
    • Updated documentation of parameters
    • Expanded visual exam criteria
    • New acceptance limits for cumulative defects

    Pre-2025 certifications may require requalification or supplemental weld tests.


    Old vs. New (Quick Breakdown)

    AreaPre-2025 Standard2025 Standard
    Fatigue PreventionMinimal mentionMandatory documentation + rest cycle guidelines
    Chronic Inflammation RiskGeneral fume guidanceExpanded exposure limits + detailed PPE compliance
    Fume ExtractionRecommendedRequired in most shop audits
    Cert Validity WindowsStandard intervalsSome industries shortened validity periods
    Process TestingVisual + bend testsTighter acceptance criteria and expanded documentation
    Medical Risk NotesRarely includedNow referenced in several AWS/ANSI publications

    Which Certifications Matter Most in 2025

    Different industries now lean heavily on updated standards. Hereโ€™s what welders and shops need to prioritize.

    Structural (AWS D1.1)

    Expect:

    • Stricter visual standards
    • Additional position testing for some shops
    • More documentation on parameters and heat input

    Pipe Welding (ASME / B31 Series)

    Tighter tolerance for:

    • Root reinforcement
    • Internal misalignment
    • Heat-affected zone integrity

    Automotive / Manufacturing (AWS D8/D9)

    New focus on:

    • Repetitive-strain prevention
    • Heat-stress logs
    • Exposure management for high-volume weld cells

    Aerospace (AWS D17.1)

    More stringent:

    • Visual inspection criteria
    • Traceability requirements
    • Operator-specific parameter logs

    Why It Matters for Welders

    1. Certifications from 2024 may not satisfy 2025 audit requirements

    Many shops will require updated test plates or documentation.

    2. Retraining budgets matter now

    Expect more formal training, especially around exposure prevention.

    3. Higher certification standards = higher labor rates

    Buyers should expect increased cost per hour for certified welders, especially in pipe, structural, and aerospace.


    Where to Buy Safety Upgrades

    With stricter exposure-control and fatigue-management rules, PPE and ventilation gear matter more than ever.

    ArcWeld Store PPE Essentials:
    www.arcweld.store


    Safety Notes (AWS/ANSI References)

    • Follow ANSI Z49.1 for exposure and fume-control guidelines
    • Ensure fit testing for respirators per OSHA 1910.134
    • Use NIOSH-approved PPE for metals containing Cr, Ni, Mn, or aluminum
    • Maintain proper airflow and extraction in accordance with AWS safety recommendations

    FAQ

    Do I need to retake my welding test in 2025?
    Possiblyโ€”especially for structural, pipe, and aerospace work. Many shops require updated certs.

    What if my employer still uses old standards?
    They may fail audits or be unable to bid certain jobs.

    Do these rules affect hobby welders?
    No, these updates primarily affect commercial shops and certified welders.

    How often should I renew my certification now?
    Depends on code. Some industries shortened validity windows under 2025 guidance.

  • Why Welders Are in Demand in 2025 (And What It Means for Your Shop)

    Why Welders Are in Demand in 2025 (And What It Means for Your Shop)

    The U.S. welding industry is entering a pressure zone: a massive labor shortage, an aging skilled workforce, and demand that keeps climbing. AWS projects a 400,000-welder shortage in 2025, and the average welder is now 55 years oldโ€”far older than the general workforce. Retirements are hitting faster than replacements can be trained, and shops are already feeling the squeeze.

    This post breaks down the shortage, what it means for wages and job security, and how shops are adapting.


    Key Takeaways

    • The U.S. welding trade faces a 400K worker shortage in 2025 (AWS).
    • Average welder age: ~55, vs. 42 for the general workforce.
    • Skilled welders are commanding premium rates, OT, and retention bonuses.
    • Shops are increasing training, embracing automation, and shifting workflows.
    • Buyers should expect labor-driven pricing pressure on fabricated products.

    The Numbers: A Shortage Years in the Making

    The American Welding Society has been warning about this for a decade, but the timeline is now real:

    • 400,000+ welders needed by 2025 to meet U.S. demand (AWS).
    • 61% of welding professionals are now over age 45.
    • Trade schools report enrollment backlogs for welding programs.
    • Large segments of the pipeline (especially structural and pipe welders) are aging out simultaneously.

    Why it matters:
    Shops are running leaner crews, projects are delayed, and labor costs are rising across the board.


    What This Means for Welders (Spoiler: Job Security)

    If youโ€™re a welderโ€”or training to become oneโ€”this is one of the strongest job markets in the tradeโ€™s history.

    Expect:

    • Higher hourly wages
    • More job options
    • More overtime
    • Better benefits and sign-on bonuses
    • Employers willing to invest in upskilling & certifications

    A young welder entering the industry in 2025 has a near-guaranteed job path for the next decade.


    What This Means for Shops & Buyers

    Shops are already adjusting operations:

    1. Automation Where It Makes Sense

    Not full replacementโ€”augmentation.
    Robotic cells, positioners, and fixturing tables are helping smaller crews produce more.

    Internal resource: Check out our guide to fixture tables and clamps for improving throughput.

    2. In-House Training Pipelines

    Shops are partnering with schools, offering apprenticeships, or training helpers into full welders.

    3. Higher Labor Costs

    Credentials (AWS D1.1, pipe certs, aluminum, stainless TIG) now carry premium value.
    Buyers should expect tighter project timelines and pricing pressure driven by labor scarcity.

    4. Retention Strategies

    • Tool stipends
    • Boot allowances
    • Consistent scheduling
    • Safer environments and updated PPE

    How Shops Can Stay Competitive in 2025

    Invest in Skill

    Retaining one high-skill welder is cheaper than retraining three inexperienced hires.

    Leverage Positioning & Fixturing

    Strong Handโ€“style modular tooling can cut setup time dramatically, making fewer hands more productive.

    Upgrade PPE and Comfort Gear

    A safer, more comfortable welder is a more consistent welder.
    (Internal link: MIG gloves, TIG gloves, helmet guides.)

    Cross-Train Where Practical

    Training helpers to tack, grind, and prep work reduces the load on certified welders.


    Safety Notes

    • Follow ANSI Z87.1 for all welding helmets/eye protection.
    • Use proper ventilation when welding stainless, galvanized, or aluminum.
    • For automation or mechanized welding, review the manufacturerโ€™s electrical grounding and guarding requirements.
    • Always cross-check equipment specs with OEM manuals.

    FAQ

    Is the welder shortage really 400,000 in 2025?

    Yesโ€”AWS projections place the gap at 360โ€“400K workers due to retirements, expanding infrastructure projects, and low trade school enrollment.

    Will robots replace welders?

    No. Automation supplements welding, but human welders remain vital for complex, variable, and out-of-position work.

    Are wages going up?

    In most regions, yesโ€”especially for pipe, structural, and TIG welders with current certs.

    What can shops do to attract welders?

    Better tools, consistent hours, PPE allowances, clean shops, and clear advancement paths.


    Sources Checked

    • American Welding Society (AWS) labor reports
    • Bureau of Labor Statistics (BLS) welder demographics
    • Manufacturer data sheets (Strong Hand Tools)
    • Industry training program enrollment reports (2023โ€“2025)
  • Watch with Prime Video