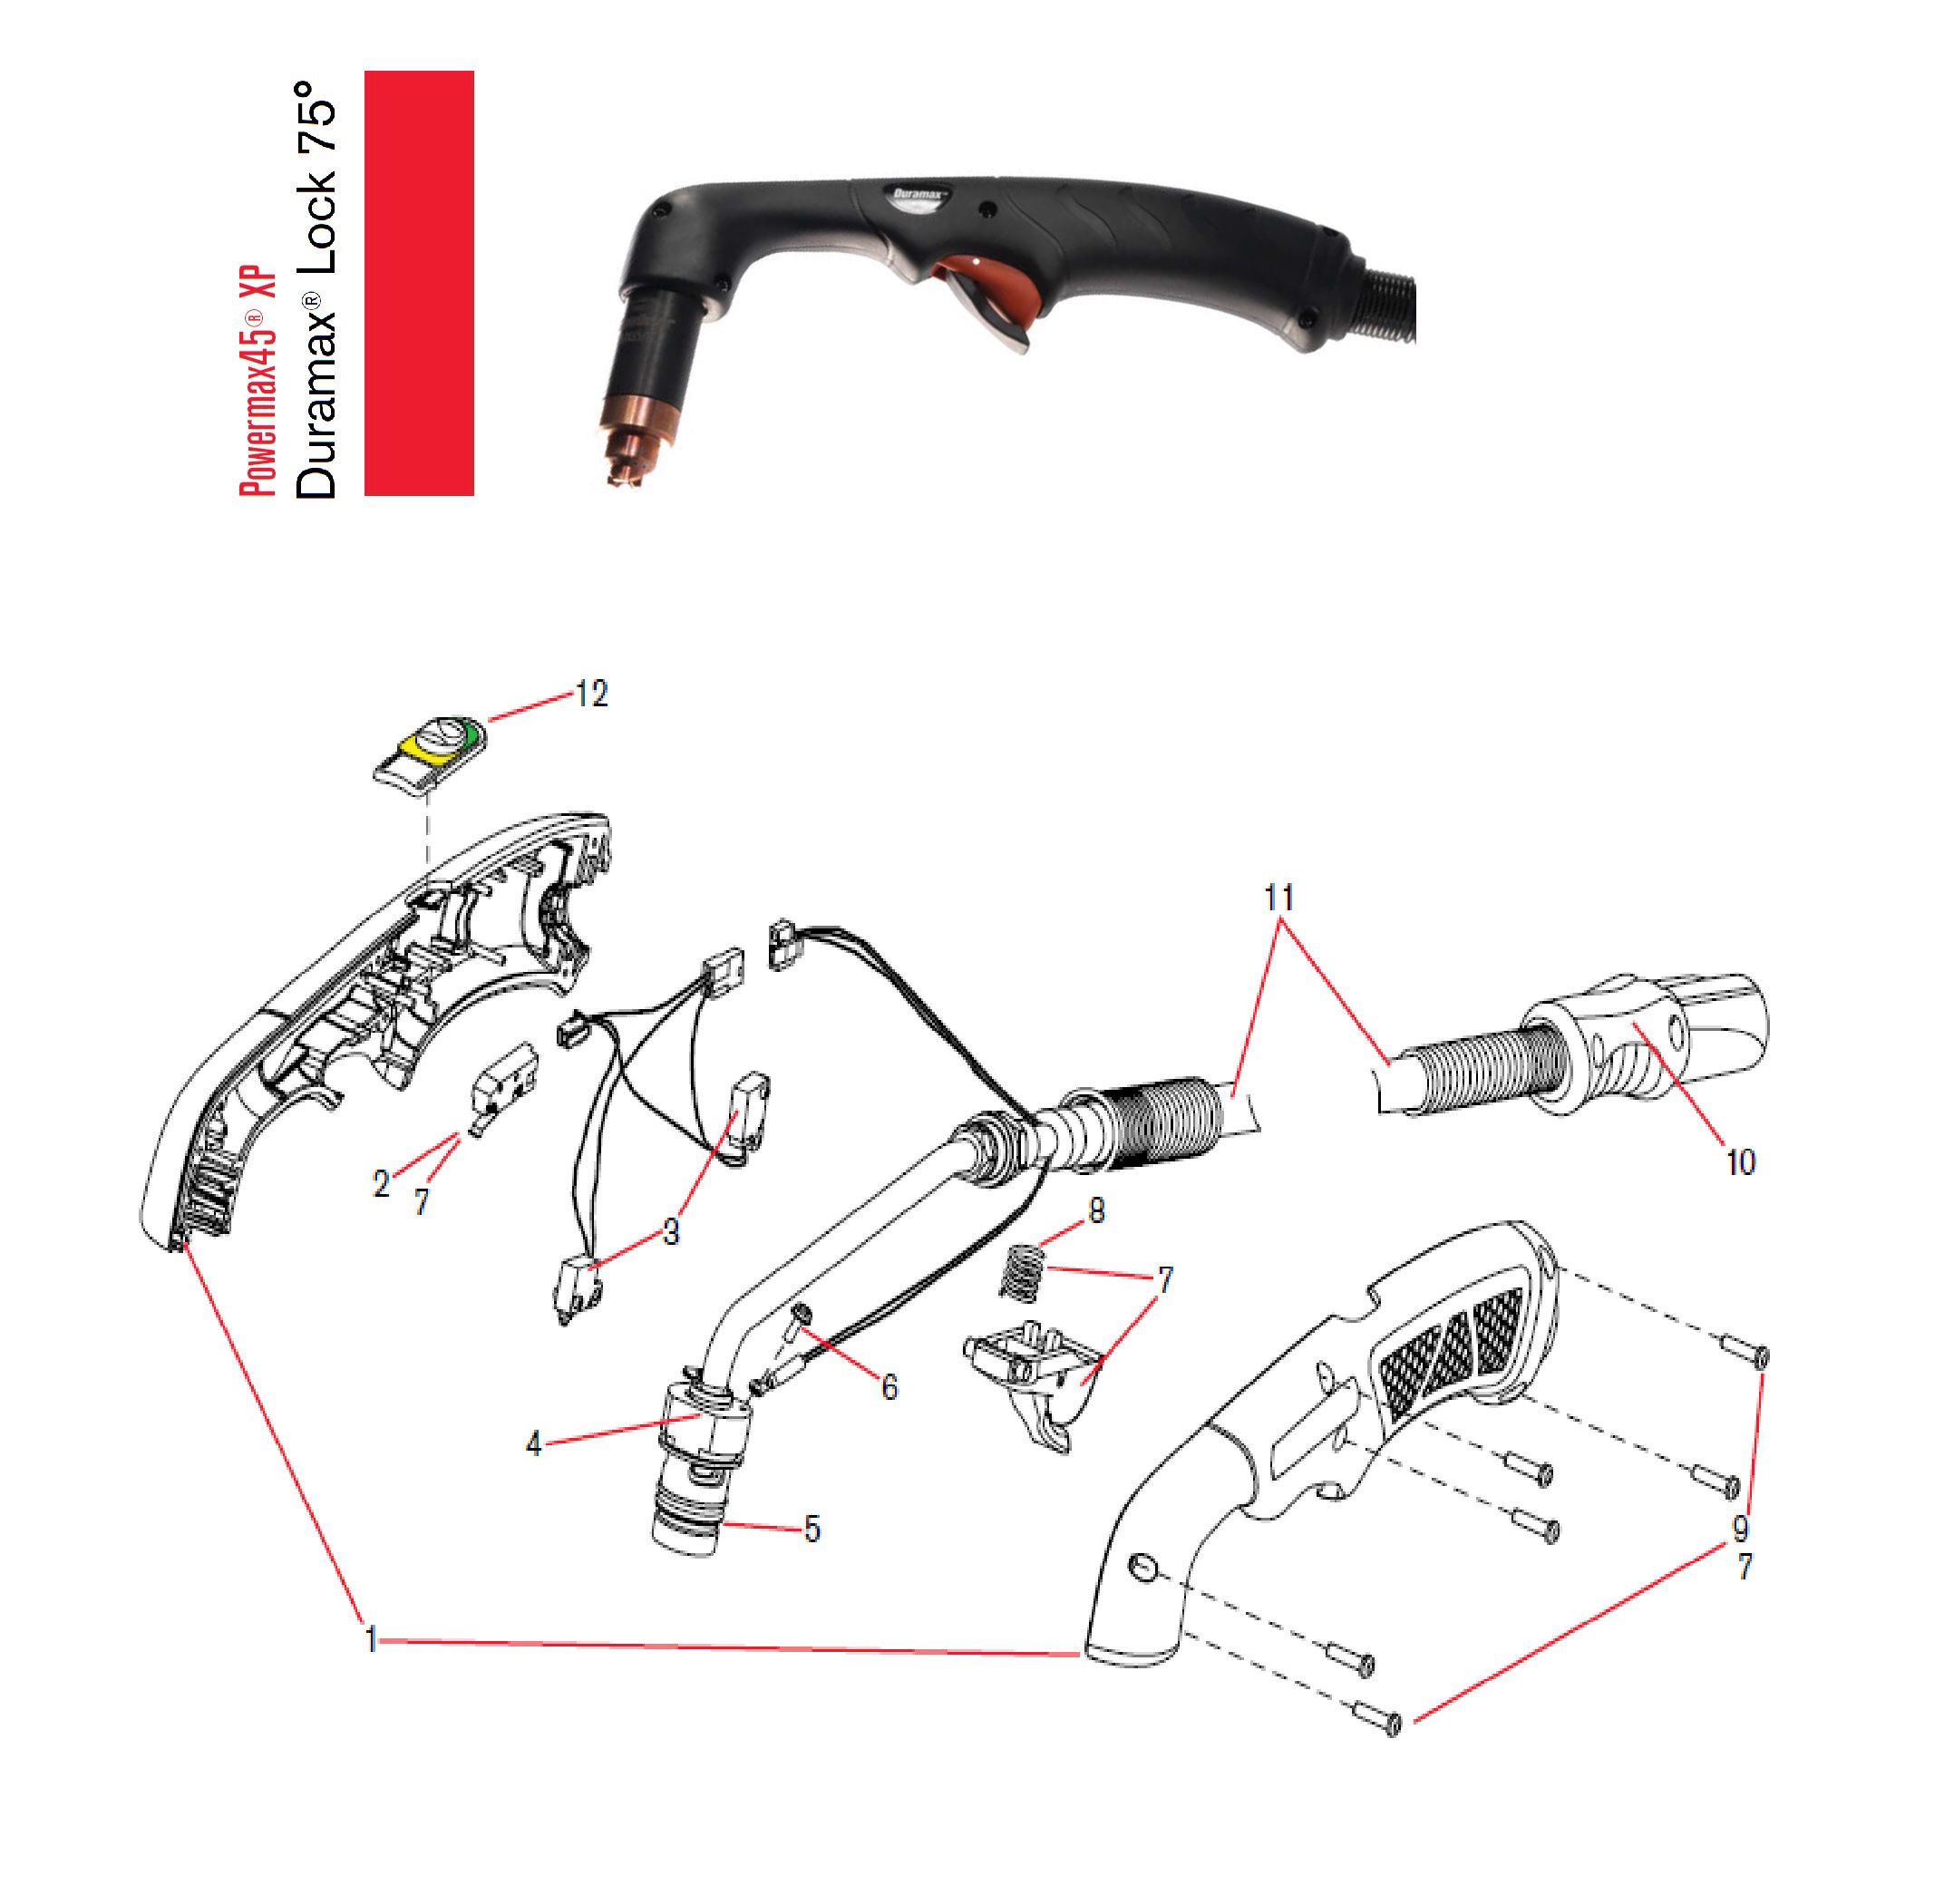

If a Hypertherm Duramax Lock 75 degree hand torch is cutting poorly, the first problem is often not the power source. In many cases the issue is in the torch head, consumables, lead connection, or shield/nozzle stack. This guide gives a practical parts breakdown and a buying check process for maintenance teams and support staff who need to verify what to inspect before ordering replacements.
Key Takeaways
- Start with the torch side: consumables, retaining hardware, and visible damage around the head.
- Confirm the torch family and cut mode before ordering anything.
- Use the WSP lookup page as the source-backed starting point for part identification.
- Do not assume a consumable is correct because it looks similar; verify against the torch and machine context.
- If fit is uncertain, mark it Unknown (Verify) and keep the review with the manufacturer or approved supplier.
Parts breakdown: what to inspect first
For a 75 degree hand torch setup, begin at the working end and move back toward the lead. The exact internal stack can vary by torch family and machine context, so treat this as a check sequence, not a universal assembly map.
- Shield or drag shield: Inspect for heat damage, heavy spatter, distortion, and worn edges.
- Nozzle: Check for orifice wear, pitting, ovality, and side damage.
- Electrode: Look for deep wear, abnormal erosion, and arc instability symptoms.
- Swirl ring / gas distribution part: Verify that it is present, seated correctly, and free of cracks or burn marks.
- Retaining cap or retaining hardware: Confirm threads, seating faces, and torque condition are not damaged.
- Torch head and locking interface: Inspect for looseness, cracked plastic, damaged seals, or signs of overheating.
- Lead and strain relief: Check for cuts, kinks, softened insulation, or intermittent operation near the handle.
Troubleshooting sequence: check, inspect, verify
1) Check the symptom pattern
Before replacing parts, identify the failure mode. A no-start condition, weak pilot arc, arc dropout, poor cut quality, or excessive dross can point to different causes. Do not jump to a torch-head replacement until the symptom is matched to the wear pattern.
2) Inspect consumables as a set
Remove the front-end parts and inspect them together. A single damaged nozzle may be the visible fault, but a worn electrode or damaged swirl ring can be the root cause. Check for:
- Mismatch in wear between electrode and nozzle.
- Evidence of overheating, such as discoloration or warped edges.
- Carbon tracking, spatter buildup, or contamination in the torch head.
- Loose fit or poor seating that could interrupt gas flow.
Verify that the parts being removed match the torch family in service. If the part numbers are not clearly readable, Unknown (Verify) applies until the WSP lookup or approved documentation confirms the match.
3) Inspect the torch head and lock interface
The 75 degree hand torch head can see mechanical stress from repeated handling, workpiece contact, and lead movement. Check the lock area for wear that may prevent the consumables from seating correctly. If the retaining cap does not tighten smoothly, do not force it. Cross-threading, damaged threads, or a heat-warped seat can create intermittent arc faults.
4) Verify gas and electrical continuity indirectly
Without assuming hidden specs, verify the practical conditions that support a stable arc: the front-end parts are clean, seated, and undamaged; the lead is not pinched; and the machine displays no unrelated fault that points away from the torch. If the torch behavior changes when the lead is moved, treat the lead and strain relief as suspect.
WSP lookup: use it before buying
The WSP lookup page for this torch family is the best source-backed starting point for parts identification and buying checks:
Hypertherm Duramax Lock 75 Degree Hand Torch Parts Breakdown on WSP
Use that page to confirm the torch family, part naming, and catalog-backed item numbers where shown. Do not treat a visual match alone as enough proof. If a component is listed in the lookup but your torch head shows a different geometry, mark the fit as Unknown (Verify) and confirm with the supplier or manufacturer before ordering.
Buying checks for maintenance teams
When purchasing torch parts, use these checks in order:
- Match the torch family: Confirm the torch is the Hypertherm Duramax Lock 75 degree hand torch variant referenced by the lookup page.
- Match the machine context: Use the actual machine and torch pairing in service, not a similar setup from another bay.
- Match the wear pattern: Replace the damaged front-end part plus any companion part that shows related wear.
- Check the lock and seating surfaces: If the interface is damaged, parts alone may not fix the fault.
- Verify the buy link path: Use only approved links from the source page or internal support references.
If a replacement is being considered because of repeated arc failure, review the torch-side troubleshooting first. Related guidance is available here: Plasma Cutter Pilot Arc Failure Troubleshooting and Plasma Drag Shield Compatibility Guide.
Safety notes
- De-energize the system before removing or handling consumables.
- Allow hot parts to cool before inspection.
- Do not file, force, or modify front-end parts to make them fit.
- If a torch head is cracked, burned, or electrically unstable, remove it from service until reviewed.
- Use manufacturer review for any fit or safety-critical uncertainty.
FAQ
Why does a new consumable set still cut poorly?
A new set can still perform badly if the torch head is damaged, the retaining hardware does not seat correctly, the lead is compromised, or the wrong consumable family was installed. Inspect the whole front end, not just the nozzle.
What should I replace first when the torch shows arc dropout?
Start with the consumables and the torch-side seating surfaces. If those are clean and the problem continues, inspect the lead, strain relief, and the machine-side fault indications. Do not assume the power source is the root cause.
How do I confirm I am buying the right part?
Use the WSP lookup page, confirm the torch family and item naming, and compare the existing installed parts to the lookup record. If anything does not align, mark it Unknown (Verify) and confirm before purchase.
Can I use a similar-looking shield or nozzle from another torch?
No. Similar appearance is not enough. Verify the exact torch family, geometry, and use case before ordering or installing any replacement part.
Sources Checked
- WSP lookup page: Hypertherm Duramax Lock 75 Degree Hand Torch Parts Breakdown
- Internal reference: Plasma Cutter Pilot Arc Failure Troubleshooting
- Internal reference: Plasma Drag Shield Compatibility Guide
Where exact fit or part identity could not be confirmed from the provided source record, the correct status is Unknown (Verify).
Disclosure: As an Amazon Associate, Weld Support Parts may earn from qualifying purchases.
Leave a Reply