Tag: plasma cutting
-
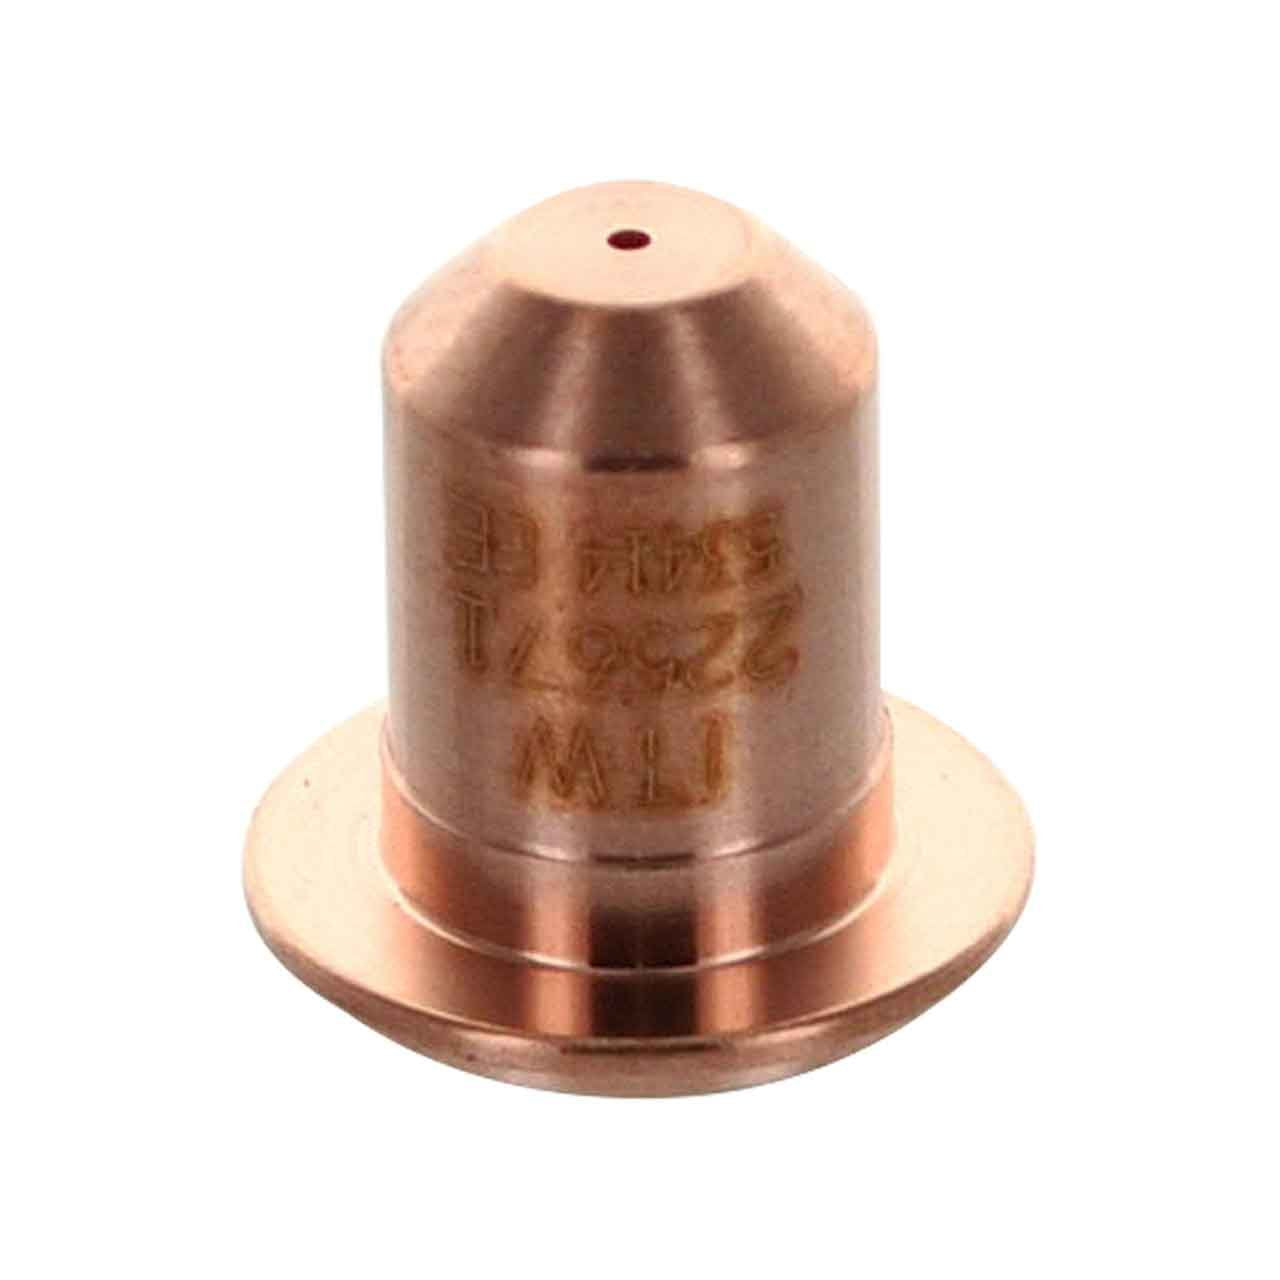
Miller 225671 Tip, ICE- 27C/27T 25Amp, 5 pack: Product Breakdown
“>
The Miller 225671 Tip, ICE- 27C/27T 25Amp, 5 pack is a torch consumable package for plasma cutting support work. For buyers and maintenance teams, the key question is not just whether the tip is on the shelf, but whether it matches the torch system, amperage range, and wear pattern your crew is actually running. This part is listed as an extended tip for the ICE-27C plasma cutter torch and is associated with Miller Spectrum 375 and 3765 X-tremes plasma cutters based on the product source provided. Confirm the torch model on the equipment before ordering or installing.
Key takeaways
- This is a 5-pack of consumable tips.
- It is identified as an extended tip for the ICE-27C torch.
- Source material ties it to Miller Spectrum 375 and 3765 X-tremes plasma cutters.
- Do not assume fit from the machine name alone. Verify torch model and consumable designation at the unit.
- Use wear checks, not guesswork, to decide when to replace the tip.
What this part does
Plasma tips focus the cutting arc and help control cut quality. As the tip wears, cut performance can shift in ways that are easy to spot in the field: rougher edges, more dross, unstable arc starts, or visible damage at the orifice. The right replacement restores the torch’s intended arc shape, but only if the whole consumable stack and torch are in proper condition.
Because this is a consumable, the buying decision is usually about consistency and uptime. Maintenance teams should stock tips based on actual torch usage, not only on machine count. If a torch is heavily used on production cuts, tips should be treated as planned replacement items, not emergency parts.
Check, inspect, verify before install
Use this sequence before installing a new tip:
- Check the torch model. Confirm the torch is ICE-27C or ICE-27T as applicable to your setup. If the torch designation is unclear, mark it as Unknown (Verify) and stop until the model is confirmed.
- Inspect the consumable stack. Look at the electrode, shield, swirl ring, retaining hardware, and tip seat. A new tip will not correct damage elsewhere in the stack.
- Verify amperage use. The product title identifies 25Amp. Verify your operating setup against the torch and machine manual before use.
- Check for heat and contamination. Carbon, spatter, moisture, and torch body damage can shorten tip life. Clean the torch components only according to the machine manual.
- Verify correct seating. Install the tip fully and evenly. If seating feels inconsistent, stop and inspect the torch body and mating parts.
Troubleshooting support for poor cut quality
If cut quality drops after a tip change, do not assume the new tip is defective. Work through the torch system first.
Problem: rough edge or heavy dross
- Check whether the tip is worn, damaged, or installed incorrectly.
- Inspect the work speed, standoff, and material condition.
- Verify the torch components are the correct series for the machine.
Problem: unstable arc or hard starts
- Check the electrode and tip together. A new tip with a worn electrode can still misbehave.
- Inspect for contamination in the torch or air delivery path.
- Verify air quality, machine settings, and torch compatibility against the manual. Unknown (Verify) if documentation is not available at the work area.
Problem: repeated short tip life
- Check for contact with the workpiece or excessive drag.
- Inspect the torch body for heat damage, cracked components, or loose parts.
- Verify operator technique and consumable handling. Tips should not be forced into place.
Parts and application notes
This product listing identifies the part as a Miller consumable for the ICE-27C torch, with application to Miller Spectrum 375 and 3765 X-tremes plasma cutters per the source data provided. That is the safest level of identification available here. Any further compatibility detail is Unknown (Verify) until checked against the machine manual, torch label, or internal maintenance record.
For buyers, the main control points are straightforward:
- Match the torch designation first.
- Match the amperage and consumable family second.
- Confirm the replacement count in the package before issuing stock.
- Record the tip as a tracked wear item so ordering is based on usage, not panic replacement.
How maintenance teams should stock it
Consumables like this tip are best managed with a simple issue-and-replace process. Keep the package sealed until needed, label inventory by torch family, and separate plasma consumables by system if your shop uses more than one torch platform. Mixing tips by appearance alone is a common cause of downtime. Use the part number and torch designation for stock control.
If your site uses a formal parts approval process, tie the tip to the machine asset record and the torch serial or family record where possible. If that record is missing, the compatibility status is Unknown (Verify) and should be confirmed before release to production.
Safety notes
- De-energize the equipment before servicing consumables.
- Allow hot components to cool before handling.
- Follow the machine and torch manual for installation, cleaning, and replacement steps.
- Do not force consumables into a torch body.
- Wear suitable hand and eye protection for plasma service work.
FAQ
Is this tip only for the ICE-27C torch?
The source listing identifies it as an extended tip for the ICE-27C plasma cutter torch. Any use beyond that is Unknown (Verify) and should be checked against the torch and machine documentation.
Can I use this with a Spectrum 375 or 3765 X-tremes unit?
The provided source says the torch is on Miller Spectrum 375 and 3765 X-tremes plasma cutters. Verify your exact machine and torch configuration before ordering or installing.
What should I inspect if the new tip does not improve cut quality?
Inspect the electrode, shield, swirl ring, torch body, air quality, and operator technique. A new tip alone will not fix wear or contamination elsewhere in the system.
How should I decide when to replace the tip?
Replace it when wear is visible, cut quality declines, or the arc becomes unstable. If the condition is uncertain, mark it Unknown (Verify) and inspect the full consumable set.
Sources checked
- ArcWeld product source: Miller 225671 Tip, ICE- 27C/27T 25Amp, 5 pack
- Provided product short description and source URL
Related Arc Weld Part
Miller 225671 Tip, ICE- 27C/27T 25Amp, 5 pack
Miller 225671 Extended Tips. This is for the ICE-27C plasma cutter torch. Which is on the Miller Spectrum 375 and 3765 X-tremes plasma cutters. Package of 5
View at Arc Weld Store
ESAB PT-39 Torch Parts Breakdown: Parts Lookup and Buying Checks
The ESAB PT-39 Torch Parts Breakdown is a practical reference for maintenance buyers, welders, and support teams who need to identify replacement consumables before ordering. Plasma torches fail for simple reasons: worn electrodes, damaged nozzles, loose retaining parts, air leaks, or a torch assembly that does not match the machine setup. The right buying step is to verify the torch family and item number first, then inspect the worn parts against the parts breakdown before you place an order.
This guide is not a substitute for the machine manual or the torch documentation. Use it as a buying and inspection aid. If a detail is not confirmed, treat it as Unknown (Verify).
Key Takeaways
- Confirm the exact torch model before ordering any PT-39 replacement part.
- Match the item number on the parts breakdown to the worn component, not just the visual shape.
- Inspect electrodes, nozzles, shields, and retaining hardware as a set.
- Check lead condition, torch body damage, and air delivery before replacing consumables again.
- Use the WSP lookup page as the primary source for part identification.
How to Use the PT-39 Parts Breakdown
Start with the parts lookup page and identify the component by item number, not by assumption. On plasma torches, two parts can look similar but differ in thread style, length, seat profile, or torch-family match. If you only compare pictures, the risk of ordering the wrong part is high.
Check: the torch label, machine documentation, and worn part geometry.
Inspect: the nozzle orifice, electrode pit depth, shield face, and retaining cap threads.
Verify: the replacement item number against the WSP lookup page before purchase.
Troubleshooting and Support Checks
When a PT-39 torch starts cutting poorly, do not assume the consumables are the only issue. Plasma cut quality problems often come from a combination of wear and setup errors.
1) No start or weak start
- Check the torch lead connection and power source setup.
- Inspect the electrode and nozzle for heavy wear, burn marks, or contamination.
- Verify the consumables are seated correctly and tightened to the proper hand-tight condition per the equipment manual.
If the torch parts are new and the problem remains, the issue may be in air supply, trigger circuit, or internal torch damage. Unknown (Verify) if the source is torch-related until the upstream system is checked.
2) Arc dropout during cutting
- Check for loose retaining parts or poor contact between consumables.
- Inspect the nozzle opening for distortion and the electrode tip for uneven erosion.
- Verify that the air supply is stable and clean.
Arc dropout is often caused by consumable wear, but supply instability can produce the same symptom. Replace only the parts that are actually worn or damaged.
3) Poor cut edge or excessive dross
- Check cut speed, torch standoff, and work lead condition.
- Inspect nozzle wear and shield damage.
- Verify that the torch setup matches the intended cut mode and amperage range. Unknown (Verify).
Do not buy consumables only by amperage label or general appearance. Match the parts breakdown first, then compare the physical wear pattern.
Buying Checks Before Ordering Parts
For buyers and storeroom teams, the important step is reducing return risk. Use these checks before placing an order:
- Check the torch family: Confirm it is PT-39 and not another ESAB torch model.
- Check item numbers: Use the parts breakdown item number for the replacement part.
- Check wear history: If the torch repeatedly burns the same part, the upstream issue may be air quality or handling.
- Check the machine record: Match the torch to the cutter or power source documentation.
- Check packaging notes: If the listing does not clearly match the item number, do not guess.
If a part description is unclear, keep it as Unknown (Verify) until the item number and torch family are confirmed.
WSP Lookup Section
Use the official Weld Support Parts page for the ESAB PT-39 torch to review the parts breakdown and item-number lookup:
ESAB PT-39 Torch Parts Breakdown on Weld Support Parts
This page is the starting point for identifying replacement consumables and related torch parts. Use it to compare the worn component to the listed item number before you buy.
Practical Inspection Steps at the Torch
Before replacing consumables, do a short field inspection:
- Lock out the system and make sure the torch cannot fire.
- Remove the consumables and lay them out in order.
- Inspect the electrode for crater wear, pitting, and heat damage.
- Inspect the nozzle for ovality, enlarged orifice, or spatter damage.
- Inspect the shield/retaining parts for cracks, thread wear, and burn marks.
- Inspect the torch body for heat damage, cracks, and contamination.
- Verify that the part numbers on the replacement order match the lookup page.
This sequence helps prevent unnecessary parts swaps. If the consumables fail early, verify the air supply quality and torch handling before assuming the replacement parts are wrong.
Safety Notes
- De-energize the cutter before removing torch consumables or opening covers.
- Let hot parts cool before inspection. Plasma tips and electrodes can retain heat.
- Use eye protection and gloves when handling used consumables with sharp or hot edges.
- Do not fire a torch with missing or loose parts.
- If a torch shows burn-through, cracked insulation, or exposed conductors, remove it from service until repaired by qualified personnel.
FAQ
How do I confirm the correct PT-39 replacement part?
Use the WSP PT-39 parts breakdown, then match the item number to the worn component. Do not order by appearance alone.
What if the torch looks like another ESAB model?
Treat it as Unknown (Verify) until the torch label, machine manual, and parts breakdown all match. Similar torch parts are not interchangeable by default.
Should I replace only the electrode?
Only if inspection shows the electrode is the only worn part. If the nozzle or retaining hardware is damaged, replace the matching consumables as needed after verification.
Why do new consumables sometimes fail early?
Early failure can come from air contamination, improper torch setup, loose parts, or handling damage. Inspect the whole torch system before ordering the same parts again.
Sources Checked
- Weld Support Parts: ESAB PT-39 Torch Parts Breakdown — https://www.weldsupportparts.com/esab-pt-39-torch.html
- Internal link: Plasma Consumable Compatibility: How to Verify Torch Parts Before Ordering
- Internal link: Plasma Cutter Pilot Arc Failure Troubleshooting: No Start, Weak Spark, Arc Dropout, and Torch Consumable Checks
- Internal link: Plasma Drag Shield Compatibility Guide: Torch Family, Amperage, Nozzle, Retaining Cap, and Cut Mode Checks
Disclosure: As an Amazon Associate, Weld Support Parts may earn from qualifying purchases.
Related Weld Support Guides
- Plasma Consumable Compatibility: How to Verify Torch Parts Before Ordering
- Plasma Cutter Pilot Arc Failure Troubleshooting: No Start, Weak Spark, Arc Dropout, and Torch Consumable Checks
- Plasma Drag Shield Compatibility Guide: Torch Family, Amperage, Nozzle, Retaining Cap, and Cut Mode Checks
- ESAB MIG Gas Flow Troubleshooting: Porosity, Nozzle Blockage, Gas Leaks, Flowmeter Settings, and Torch Checks
ESAB PT-38 Torch Parts Breakdown: Parts Lookup and Buying Checks
If you are maintaining an ESAB PT-38 torch, the main job is not just finding a part number. The job is matching the torch body, head, consumables, shields, and accessory rows to the exact setup on the machine before you order. A wrong consumable can look close enough to install and still fail in cut quality, arc stability, or wear life.
This guide is a practical parts-lookup and buying-check article for the ESAB PT-38 Torch Parts Breakdown. Use it to verify what you have, compare the layout to the Weld Support Parts lookup page, and avoid ordering by appearance alone.
Key Takeaways
- Start with the torch family and item-number lookup, not the part photo.
- Verify the torch model, amperage class, and cut process before ordering consumables.
- Check the nozzle, electrode, shield, retaining cap, swirl ring, and handle-side accessories as a set.
- If any fitment detail is unclear, treat it as Unknown (Verify) until you confirm it against the lookup page or the torch itself.
- Use the parts breakdown for replacement planning, not as proof that two similar-looking parts are interchangeable.
What the PT-38 parts breakdown is good for
The Weld Support Parts page for the ESAB PT-38 is a lookup reference for replacement parts, consumables, kits, and accessory rows with item-number lookup. That makes it useful for maintenance buyers and shop support teams who need to match what is installed on the torch to what should be ordered next.
Use the page to identify:
- Consumable rows tied to the PT-38 torch family
- Replacement items for wear parts
- Kit rows or grouped accessory rows, if listed
- Item numbers that help cross-check your internal stock labels
Important: the lookup page is a starting point for identification. It is not a substitute for confirming the torch variant in the field.
Practical check steps before you order
Use these checks at the bench, not from memory.
- Check the torch nameplate or body marking. Verify that the torch is actually PT-38. If the marking is missing or worn, note it as Unknown (Verify).
- Inspect the consumable stack. Remove the nozzle, electrode, shield, and retaining components as needed and lay them out in order. Compare that stack to the parts breakdown.
- Verify wear pattern. Look for rounded nozzle orifice, heat distortion, pit marks, or thread damage. If the wear pattern is abnormal, do not assume the next size up or down is correct.
- Match item numbers. Use the Weld Support Parts lookup rows to confirm the item numbers before purchase.
- Check for accessory dependence. Some torch setups rely on specific shields, caps, or adapters. Verify each row individually.
- Confirm the machine-side connection. The torch body can only be matched correctly if the lead, connector, and machine interface are also verified. If you do not have that information, record it as Unknown (Verify).
Troubleshooting and support checks
If the torch is cutting poorly, do not start with the most expensive part. Start with the consumable stack and the torch condition.
No start or unstable start
- Inspect electrode condition and seating.
- Verify the nozzle is not damaged, clogged, or oversized from wear.
- Check shield and retaining parts for heat damage or loose fit.
- Verify the torch cable, trigger circuit, and machine connection. If the machine-side details are not known, mark them Unknown (Verify).
Weak arc or arc dropout
- Inspect the consumable stack for improper assembly.
- Verify that the parts match the PT-38 breakdown and not a similar torch family.
- Look for excessive nozzle erosion or electrode wear.
- Confirm gas or air delivery conditions only if your setup uses them and the machine instructions support that check.
Rough cut edge or rapid consumable wear
- Inspect nozzle alignment and seating.
- Verify the shield and retaining components are correct for the torch head.
- Check for contamination, heat damage, or mechanical impact.
- Compare the installed parts against the lookup page before ordering a full consumable kit.
How to use the WSP lookup page
Use the Weld Support Parts PT-38 lookup page here: ESAB PT-38 Torch Parts Breakdown.
Use that page as your first pass for part identification. Review each row carefully and compare the item number to the physical part in your hand. If a row is unclear, do not guess. Mark the detail Unknown (Verify) and confirm it against the torch body, existing packaging, or your maintenance records.
For shops managing multiple plasma torches, this page is useful for reducing mix-ups between similar torch families. The main check is still the same: torch model first, consumable stack second, order third.
Buying checks for maintenance teams
Before you release a purchase order, verify the following:
- Model match: PT-38 confirmed, or Unknown (Verify) if not confirmed.
- Part-level match: nozzle, electrode, shield, cap, and any adapter or spacer verified by row.
- Usage history: record whether the failed part was damaged by heat, impact, poor seating, or normal wear.
- Stock control: confirm the warehouse label matches the item number on the lookup page.
- Machine-side details: verify cable length, connector style, or system interface only from documented records. If not documented, use Unknown (Verify).
Do not approve a replacement just because the part looks close. Plasma torch consumables are often similar by appearance and still not interchangeable.
Safety notes
- Disconnect power and follow plant lockout procedures before opening torch assemblies.
- Allow hot parts to cool before handling.
- Wear eye protection and gloves when removing worn consumables.
- Do not reuse parts with cracked threads, heavy heat distortion, or visible structural damage.
- If the torch condition is uncertain, stop and verify rather than forcing a fit.
FAQ
How do I know which PT-38 part I need?
Start with the torch marking, then compare the installed consumables to the parts breakdown. Match the item numbers on the lookup page to the parts in your hand.
Can I order by appearance alone?
No. Similar plasma consumables can look alike and still differ in fitment or function. Verify the row, item number, and torch model first.
What if my torch label is missing?
Treat the model as Unknown (Verify) until you confirm it from records, machine documentation, or a direct parts comparison.
Is the parts breakdown enough to approve a replacement?
It is a good starting point, but not enough by itself if the torch or machine interface is unclear. Confirm all uncertain details before ordering.
Sources Checked
- Weld Support Parts: ESAB PT-38 Torch Parts Breakdown
- Plasma Consumable Compatibility: How to Verify Torch Parts Before Ordering
- Plasma Cutter Pilot Arc Failure Troubleshooting
- Plasma Drag Shield Compatibility Guide
For the ESAB PT-38, the safe buying process is simple: verify the torch, verify the consumable stack, verify the item number, then order. If any detail is not confirmed, keep it as Unknown (Verify) until you have the right match.
Disclosure: As an Amazon Associate, Weld Support Parts may earn from qualifying purchases.
Related Weld Support Guides
- Plasma Consumable Compatibility: How to Verify Torch Parts Before Ordering
- Plasma Cutter Pilot Arc Failure Troubleshooting: No Start, Weak Spark, Arc Dropout, and Torch Consumable Checks
- Plasma Drag Shield Compatibility Guide: Torch Family, Amperage, Nozzle, Retaining Cap, and Cut Mode Checks
- ESAB MIG Gas Flow Troubleshooting: Porosity, Nozzle Blockage, Gas Leaks, Flowmeter Settings, and Torch Checks

Thermal Dynamics 7-5200 Torch and Leads, SL60 1Torch, 75 Deg Head, 20 ft Leads, O2B Connection: Product Breakdown
“>
The Thermal Dynamics 7-5200 Torch and Leads, SL60 1Torch, 75 Deg Head, 20 ft Leads, O2B Connection is a plasma torch-and-leads assembly listed for support and replacement use. For buyers and maintenance teams, the main job is not just identifying the nameplate description. It is confirming fit, connection type, torch head orientation, lead length, and wear-part support before the torch goes into service.
Key Takeaways
- This is a torch-and-leads assembly, not a complete plasma system.
- The listed configuration includes an SL60 1Torch, 75 degree head, 20 ft leads, and O2B connection.
- Compatibility with a specific power supply is Unknown (Verify) unless confirmed from the equipment manual or a qualified distributor source.
- Before installation, verify connection style, lead condition, torch body orientation, and consumable availability.
- Use the exact product listing and part identifiers when ordering support items.
What this product is used for
This assembly is intended for plasma cutting support applications where a replacement torch and lead set is needed. The short product description states that the 1Torch RPT torch is designed to work with a wide range of plasma power supplies, including high frequency start, CD start, touch start, and moving parts or blow-back start systems. That statement comes from the product source, but exact machine compatibility for this specific setup remains Unknown (Verify) until the power source model is checked.
For maintenance buyers, the practical question is whether the torch matches the machine-side connection and the operational setup on the shop floor. If the connection or start method does not match, the torch may not function correctly or may require adapters or alternate parts that are not identified here.
Product and parts breakdown
- Product title: Thermal Dynamics 7-5200 Torch and Leads, SL60 1Torch, 75 Deg Head, 20 ft Leads, O2B Connection
- Product type: Torch and leads assembly
- Torch family: SL60 1Torch
- Head angle: 75 degree head
- Lead length: 20 ft
- Connection: O2B connection
Any deeper compatibility detail, duty rating, amperage range, or consumable set mapping is Unknown (Verify) from the provided source. Do not assume torch ratings from the name alone.
Check, inspect, verify before use
Check
- Check the torch body for cracked insulation, heat damage, or bent components.
- Check the 20 ft leads for cuts, flattened sections, burn marks, or loose outer jacket areas.
- Check the machine-side and torch-side connection points for contamination, damaged threads, or worn seals.
Inspect
- Inspect consumable seating and torch head alignment before energizing the system.
- Inspect the 75 degree head for fit-up clearance against the workpiece and fixture layout.
- Inspect the cable path for pinch points, hot surfaces, and sharp edges that could shorten service life.
Verify
- Verify the power supply connection matches O2B before installation.
- Verify the machine manual and torch documentation for approved start method and torch interface.
- Verify consumable type and part numbers using the actual torch identification and source documentation.
- Verify whether any adapter, lead extension, or mounting hardware is required. If not stated, treat this as Unknown (Verify).
Troubleshooting and support notes
If the torch does not operate as expected, isolate the problem in stages.
- No arc start: Check machine settings, connection integrity, and consumable condition. If the start method is unsupported, that is a system mismatch, not a torch defect.
- Intermittent operation: Inspect lead continuity, connector tightness, and any heat damage near the torch head or cable ends.
- Poor cut quality: Verify consumables, torch angle, work clamp quality, and travel speed. Poor cut quality is often caused by setup or wear, not the torch label alone.
- Excessive flex or handling issues: Evaluate the 75 degree head and 20 ft lead routing against the actual work area. If access is still poor, the issue may be fixture layout or torch style selection.
Support teams should document what was checked, what was replaced, and what remains Unknown (Verify) so the next service interval starts with clear traceability.
When to replace the torch and leads
Replace the assembly when the torch body is damaged, lead insulation is compromised, or the connection no longer holds securely. In many shops, recurring torch faults are caused by cable abuse, heat exposure, or connector wear. If the torch has repeated startup issues, first verify the system-side compatibility and torch condition before ordering a second replacement.
For stocking decisions, use the exact product title and internal part reference from the ArcWeld listing. Do not substitute based on appearance alone. If a related consumable family is needed, confirm it directly from the torch documentation or manufacturer source.
Safety notes
- De-energize the plasma power supply before inspection, removal, or installation.
- Allow the torch and consumables to cool before handling.
- Do not use damaged leads or compromised connectors.
- Keep cables clear of cut paths, molten material, and sharp workpiece edges.
- If the connection type or start method is uncertain, stop and verify before use.
FAQ
Is this a complete plasma cutter?
No. This is a torch and leads assembly for plasma cutting support. The power supply is not included in the provided product description.
Will this torch work on my plasma machine?
That is Unknown (Verify) from the provided source alone. Check the machine manual, torch interface, and connection type before ordering or installation.
What does O2B connection mean here?
The product title identifies an O2B connection, but the detailed interface specification is Unknown (Verify) from the available source. Match it to the machine-side connector before use.
Are consumables included?
The provided source does not confirm consumables included with the assembly. Treat inclusion as Unknown (Verify) until confirmed by the product listing or documentation.
Sources Checked
- ArcWeld product listing:
				Thermal Dynamics 7-5200 Torch and Leads, SL60 1Torch, 75 Deg Head, 20 ft Leads, O2B Connection
									The 1Torch RPT torch is the first Plasma cutting torch that performs with virtually all Plasma cutting power supplies. The 1Torch works with high frequency start systems, CD start systems, touch start systems and moving parts (blow back) start systems. Install the 1Torch on your current Plasma power supply and you immediately benefit from the latest in high performance torch technology available today. Look for th...
View at Arc Weld Store - Provided product source description for Thermal Dynamics 7-5200 Torch and Leads, SL60 1Torch, 75 Deg Head, 20 ft Leads, O2B Connection
For any unanswered fit or application question, confirm against the machine manual and the product listing before release to production.