Tag: MIG liner

  • Millermatic 211 PRO MIG Welder: Consumables Setup, Burnback Prevention, and Spare Parts Checklist

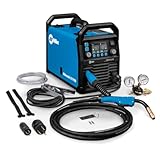
    The Millermatic 211 PRO is a portable dual-voltage MIG and flux-cored welder, but the machine is only part of the setup. Most day-to-day welding problems still come back to contact tips, nozzle spatter, liner drag, wire size mismatch, gas coverage, or poor work lead contact.

    This guide is for buyers comparing the Millermatic 211 PRO and for owners who want the right consumable strategy before burnback, birdnesting, sputtering, or porosity starts wasting tips and wire.

    Millermatic 211 PRO MIG Welder Machine – Dual-Voltage Welder with Dyna-Pulseโ„ข MIG, Auto-Set & Program Mode – Aluminum, Mild & Stainless Steel Wire Feed Gas Welder
    • Dyna-Pulse MIG Welding: Now with Dyna-Pulse MIG, this welder supports mild steel, stainless steel, aluminum (with spool gun), and flux-cored wire; powered by continually upgradable USB-enabled software
    • BeadVision & Auto-Set: Built-in BeadVision delivers real-time bead monitoring for greater control; Auto-Set simplifies setup while Smooth-Start eliminates spatter for clean arc starts every time
    • Program Memory & Weld Longer: Save and recall your most-used weld parameters with new Program Memory; weld longer with a higher duty cycle โ€” ideal for a dependable, high-performance MIG welding machine
    • Dual Voltage with MVP Plug: Easily switch between 120V and 240V with no tools needed; plug-and-play flexibility makes this a top choice for a portable MIG welder for shop or job site use
    • Heavy-Duty Drive System & Spool Gun Ready: Angled cast-aluminum drive, Quick Select drive roll, .024โ€“.035 in. wire support; auto-detects spool gun for seamless aluminum welding โ€” 15-ft MIG gun included

    Last update on 2026-06-26 / Affiliate links / Images from Amazon Product Advertising API

    Key Takeaways

    • The verified ASIN B0FFWV5DJG is associated with the Miller Millermatic 211 PRO MIG welder listing found in Amazon search results.
    • Miller lists the Millermatic 211 PRO for 120 V or 240 V input, solid/stainless wire from .024โ€“.035 in., flux-cored wire from .030โ€“.035 in., and 60โ€“600 IPM wire feed speed.
    • The first wear items to stock are contact tips, nozzles, wire liner, drive rolls matched to wire type, anti-spatter, and PPE.
    • Burnback is usually not a โ€œbad welderโ€ problem. Start with tip size, wire feed drag, nozzle spatter, stickout, and voltage/wire speed balance.
    • For best shop readiness, keep spare contact tips in every wire size you run and verify MDX-100 consumable compatibility before ordering.

    Problem / Context: Why a Good MIG Welder Still Needs a Consumables Plan

    A new MIG welder can feel like an upgrade right away, but consumable neglect will make even a capable machine act inconsistent. The symptoms usually show up as wire burning back into the tip, wire stubbing into the puddle, erratic arc starts, excess spatter, or weld porosity.

    The Millermatic 211 PRO gives you dual-voltage flexibility and enough wire-feed range for common shop work, but the gun still depends on correct fit-up: the contact tip must match the wire diameter, the liner must match the wire and gun length, the nozzle must stay clear, and the drive system must feed without crushing or slipping the wire.

    Verified Product Snapshot

    ProductMiller Millermatic 211 PRO MIG Welder
    Verified ASINB0FFWV5DJG
    Process focusMIG / GMAW and flux-cored welding
    Input voltage120 V or 240 V, per Miller product data
    Wire feed speed60โ€“600 IPM, per Miller product data
    Solid / stainless wire range.024โ€“.035 in., per Miller product data
    Flux-cored wire range.030โ€“.035 in., per Miller product data
    Included gun compatibilityMDX-100 MIG gun referenced in Miller literature; verify exact package contents and consumables before purchase

    Root Causes of Common Problems After Buying a Millermatic 211 PRO

    1. Contact Tip Burnback

    Burnback happens when the wire fuses to the contact tip. Common triggers include too little wire speed, too short stickout, wrong tip size, a worn tip bore, a clogged nozzle, poor work clamp contact, or wire drag inside the gun.

    Related internal guide: Why Does My MIG Wire Burn Back and Stick to the Contact Tip?

    2. Birdnesting at the Drive Rolls

    Birdnesting usually points to feed resistance downstream of the drive rolls. Check the contact tip first, then the liner, gun cable bends, drive roll groove, wire spool tension, and drive tension. Do not simply crank down the drive rolls; crushed wire sheds debris and can make the liner problem worse.

    3. Porosity from Poor Gas Coverage

    Porosity can come from contamination, wind, low shielding gas, wrong gas, leaks, a clogged nozzle, or an excessive stickout. Before blaming the machine, clean the base metal, inspect nozzle spatter, verify gas flow, and make a test bead on clean scrap.

    4. Sputtering and Inconsistent Arc

    Sputtering often looks like a settings problem, but worn contact tips, incorrect wire size, dirty liner, poor ground, and feed tension issues are frequent causes. Check consumables before making large voltage or wire speed changes.

    Related internal guide: MIG Settings Troubleshooting

    What Wears Out First

    Wear ItemWhat FailsTypical SymptomAction
    Contact tipBore wears, spatter sticks, wire fusesBurnback, erratic arc, wire dragReplace with correct wire diameter
    NozzleSpatter restricts gas flowPorosity, spatter, unstable arcClean or replace
    LinerDebris, kinks, wrong diameterSurging feed, birdnesting, burnbackReplace with compatible liner
    Drive rollsWrong groove or worn grooveWire slipping or shavingMatch roll to wire type and size
    Work clamp / cable connectionLoose or dirty contactHard starts, unstable arcClean and tighten
    Shielding gas setupLeaks, incorrect flow, empty cylinderPorosity, oxidation, dirty beadLeak-check and verify flow

    Visual Wear Indicators

    • Oval contact tip hole: replace the tip.
    • Wire welded into the tip: replace the tip and check feed drag.
    • Heavy spatter inside nozzle: clean or replace the nozzle.
    • Wire dust near drive rolls: reduce over-tension and inspect liner.
    • Arc surges when gun cable is bent: suspect liner drag or a kinked gun lead.
    • Porosity appears after several minutes of welding: check nozzle blockage, gas flow, and cylinder level.

    Solution: Millermatic 211 PRO Setup Checklist Before the First Weld

    1. Confirm input voltage and plug setup for the job.
    2. Install wire that falls within the machineโ€™s supported wire diameter range.
    3. Match the contact tip to the exact wire diameter.
    4. Match the drive roll groove to the wire type and size.
    5. Keep the gun cable as straight as practical while feeding wire.
    6. Set drive tension only tight enough to feed without slipping.
    7. Clean the base metal and attach the work clamp to clean metal.
    8. Verify shielding gas flow when using solid wire.
    9. Use flux-cored polarity only as specified by the wire and machine setup instructions.
    10. Run a test bead on scrap before welding the final part.

    Product Recommendations

    Best Overall Machine Pick: Millermatic 211 PRO MIG Welder

    For a buyer who wants a higher-quality portable MIG platform instead of a bargain welder, the Millermatic 211 PRO is the central pick for this page. It makes the most sense for a shop that wants 120 V convenience, 240 V capability, solid wire, stainless wire, flux-cored wire, and a consumables ecosystem that can be maintained over time.

    Millermatic 211 PRO MIG Welder Machine – Dual-Voltage Welder with Dyna-Pulseโ„ข MIG, Auto-Set & Program Mode – Aluminum, Mild & Stainless Steel Wire Feed Gas Welder
    • Dyna-Pulse MIG Welding: Now with Dyna-Pulse MIG, this welder supports mild steel, stainless steel, aluminum (with spool gun), and flux-cored wire; powered by continually upgradable USB-enabled software
    • BeadVision & Auto-Set: Built-in BeadVision delivers real-time bead monitoring for greater control; Auto-Set simplifies setup while Smooth-Start eliminates spatter for clean arc starts every time
    • Program Memory & Weld Longer: Save and recall your most-used weld parameters with new Program Memory; weld longer with a higher duty cycle โ€” ideal for a dependable, high-performance MIG welding machine
    • Dual Voltage with MVP Plug: Easily switch between 120V and 240V with no tools needed; plug-and-play flexibility makes this a top choice for a portable MIG welder for shop or job site use
    • Heavy-Duty Drive System & Spool Gun Ready: Angled cast-aluminum drive, Quick Select drive roll, .024โ€“.035 in. wire support; auto-detects spool gun for seamless aluminum welding โ€” 15-ft MIG gun included

    Last update on 2026-06-26 / Affiliate links / Images from Amazon Product Advertising API

    Budget Option: Consumables First

    If the machine is already in your shop, the budget upgrade is not another welder. Start with correct-size contact tips, a clean nozzle, anti-spatter, fresh wire, and a liner inspection. Unknown ASINs: Verify before adding AAWP boxes.

    Heavy-Duty Option: Spare Gun Consumables Kit

    For repeated shop use, keep a dedicated MDX-100-compatible consumables kit with contact tips, nozzles, diffuser-related parts, and a spare liner. Compatibility must be verified against the exact gun and Miller part numbers before purchase.

    Upgrade Path: Spool Gun for Aluminum

    If aluminum MIG is part of the plan, verify the supported Miller spool gun for the Millermatic 211 PRO package. Aluminum wire is soft and feed-sensitive, so a spool gun can reduce feed problems compared with pushing soft wire through a long MIG gun liner. Exact spool gun compatibility: Unknown (Verify).

    Related Accessory: Anti-Spatter and Nozzle Cleaning Tools

    Anti-spatter and a nozzle cleaning tool are low-cost prevention items. They help keep gas flow open around the contact tip and reduce the chance that spatter buildup gets misdiagnosed as a machine settings problem.

    Comparison Table: Machine vs. Consumables vs. Accessories

    CategoryBest UseBuyer IntentAAWP Status
    Millermatic 211 PROPrimary MIG / flux-cored welding platformBest overall machine upgradeVerified ASIN: B0FFWV5DJG
    Contact tipsBurnback, unstable arc, wire dragReplacement consumableUnknown ASIN (Verify)
    NozzlesPorosity and spatter controlReplacement consumableUnknown ASIN (Verify)
    Gun linerBirdnesting, surging feed, wire dragTroubleshooting replacementUnknown ASIN (Verify)
    Drive rollsWire slipping, shaving, flux-core setupCompatibility partUnknown ASIN (Verify)
    Anti-spatterNozzle maintenancePreventative itemUnknown ASIN (Verify)
    Welding gloves / helmetArc, heat, sparks, grinding prepPPE buying intentUnknown ASIN (Verify)

    Recommended Spare Quantity

    • Contact tips: keep 10 per wire size you use most often.
    • Nozzles: keep 2โ€“3 spares for the gun.
    • Liner: keep 1 spare liner matched to wire size and gun length.
    • Drive rolls: keep the correct roll set for solid wire and flux-cored wire if you run both.
    • Wire: keep one sealed backup spool of your most common diameter.
    • PPE: keep spare cover lenses, gloves, safety glasses, and ear protection near the welder.

    Recommended Shop Setup

    A practical Millermatic 211 PRO setup includes the welder, cart or stable surface, properly chained gas cylinder, clean work clamp area, dry wire storage, tip/nozzle organizer, anti-spatter, nozzle pliers, wire brush, flap discs, gloves, helmet, safety glasses, and ventilation appropriate for the material being welded.

    Related internal guide: Flap Disc Prep and Weld Cleaning

    Related internal guide: Welding Safety Equipment

    Common Misdiagnosis

    • โ€œThe welder is defectiveโ€ when the contact tip is actually worn or the liner is dragging.
    • โ€œI need more drive roll tensionโ€ when the wire path is blocked downstream.
    • โ€œThe gas is badโ€ when the nozzle is packed with spatter.
    • โ€œThe voltage is wrongโ€ when the work clamp is attached to dirty metal.
    • โ€œThe wire is junkโ€ when the wrong contact tip size is installed.

    If Ignored

    Ignoring consumable wear leads to wasted contact tips, wasted wire, poor starts, spatter cleanup, porosity repairs, and unnecessary troubleshooting time. In production or repair work, the hidden cost is often not the contact tip itself; it is the time spent stopping, clipping wire, clearing the gun, grinding defects, and restarting.

    Related Failures

    FAQ

    Is B0FFWV5DJG the Millermatic 211 PRO?

    Search results verified B0FFWV5DJG as an Amazon listing associated with the Miller Millermatic 211 PRO MIG welder. Always confirm the product title, seller, package contents, and warranty details on Amazon before publishing or purchasing.

    What contact tips fit the Millermatic 211 PRO?

    The Millermatic 211 PRO literature references MDX-100 MIG gun consumables, but exact tip part numbers and compatibility should be verified against the included gun, wire size, and current Miller documentation before ordering.

    Why does my MIG wire burn back into the tip?

    Burnback usually comes from poor wire feed, incorrect stickout, wrong contact tip size, too little wire speed for the voltage, a dirty nozzle, liner drag, or poor work lead contact. Replace the damaged tip first, then isolate feed resistance.

    Should I buy extra consumables with the welder?

    Yes. At minimum, keep contact tips for each wire size, spare nozzles, a liner, anti-spatter, and PPE consumables. A good welder without spare tips can still stop a job over a minor burnback event.

    Can the Millermatic 211 PRO weld aluminum?

    Miller and Amazon listing text reference aluminum capability with a spool gun. Verify the exact supported spool gun, package contents, calibration steps, and aluminum wire requirements before buying accessories.

    Is a larger MIG welder better than replacing consumables?

    Not when the symptom is burnback, birdnesting, porosity, or erratic arc caused by the gun setup. Replace worn consumables and verify wire feed first. Upgrade machine capacity only when the material thickness, duty cycle, or process needs exceed the welderโ€™s limits.

    Safety Notes

    • Disconnect or power down the welder before removing the contact tip, nozzle, liner, or drive roll components.
    • Wear welding helmet, gloves, flame-resistant clothing, and safety glasses during welding and grinding prep.
    • Secure shielding gas cylinders upright so they cannot fall.
    • Use ventilation suitable for the material, coating, filler wire, and work area.
    • Do not weld on unknown coated, galvanized, painted, or contaminated metal without proper hazard controls.
    • Follow the Miller ownerโ€™s manual and applicable AWS, OSHA, and ANSI safety guidance.

    Sources Checked

    • Miller Millermatic 211 PRO product page and specification data.
    • Miller Millermatic 211 PRO ownerโ€™s manual.
    • Miller Millermatic 211 PRO literature referencing MDX-100 MIG gun consumables.
    • Amazon search result for ASIN B0FFWV5DJG.
    • Weld Support Parts internal MIG troubleshooting, MIG consumables, flap disc, and welding safety pages.
    • OSHA welding, cutting, and brazing safety guidance.
    • ANSI Z49.1 welding safety guidance referenced for general safety context.
  • Miller 211 PRO MIG Wire Slipping in Drive Rolls: Feed Pressure, Groove, and MDX-100 Checks

    If a Miller 211 PRO slips wire in the drive rolls, do not immediately crank down the tension knob. Wire slipping usually means the drive system is fighting drag somewhere else: wrong drive-roll groove, weak pressure setting, worn roll, wrong contact tip, blocked MDX-100 liner, tight spool hub, tangled wire, or a kinked gun cable. The Millermatic 211 PRO uses a Quick Select drive roll and a 15 ft MDX-100 MIG gun, so the drive roll, liner, contact tip, and wire diameter must all match.

    Start with the simple checks: confirm the wire is sitting in the correct groove, begin around the manualโ€™s initial pressure setting, feed wire onto wood or another non-conductive surface, and tighten only enough to prevent slipping. Too much pressure can flatten wire, shave copper coating, overload the drive motor, and make liner drag worse.

    Common Symptoms

    • Drive roll turns but wire does not move: Pressure is too low, the wrong groove is selected, or the gun path is blocked.
    • Wire shavings near the feeder: Excess pressure, wrong groove, worn roll, or rough inlet guide.
    • Birdnesting after the drive roll: The wire is being pushed into a restriction downstream.
    • Burnback at the contact tip: Wire feed slows at the arc because the wire is slipping or dragging.
    • Feed improves when the gun cable is straight: Suspect liner drag, cable kink, or wire path restriction.
    • Slipping with flux-core wire: Wrong groove or smooth V-groove used where a V-knurled groove is needed.
    • Intermittent feed after changing wire size: Groove, tip, liner, or Auto-Set diameter selection may not match the wire.

    What the Drive Rolls Do

    The drive roll grips the welding wire and pushes it through the inlet guide, gun liner, diffuser, and contact tip. The pressure knob only supplies clamping force. It cannot fix a blocked tip, wrong liner, tight spool hub, or kinked gun cable. If the wire path is restricted, adding more pressure may hide the symptom briefly while damaging the wire.

    Compatibility Notes for the Miller 211 PRO

    The Millermatic 211 PRO includes a 15 ft MDX-100 MIG gun and a Quick Select drive roll. Miller lists the Quick Select drive roll 261157 for .024 in solid wire, .030/.035 in solid wire, and .030/.035 in flux-cored wire. Miller also lists V-knurled dual-groove drive roll 202926 for .030/.035 in or .045 in flux-cored wire. Do not use non-MDX front-end parts on the MDX-100 gun unless fitment is independently verified.

    For gun-side parts, use the Miller MDX-100 gun parts breakdown. For related support paths, see MIG wire feed issues, MIG consumables, liner replacement, and contact tip troubleshooting.

    Correct Drive Roll Groove Checks

    Wire TypeWire SizeCorrect Direction
    Solid steel / stainless.024 inUse .024 V-groove
    Solid steel / stainless.030/.035 inUse .030/.035 V-groove
    Flux-cored.030/.035 inUse .030/.035 V-knurled groove
    Flux-cored.045 inVerify 202926 V-knurled drive roll
    AluminumSpool gun setupDo not push aluminum through the MDX-100 path unless OEM setup says so

    Fast Checks Before Replacing Parts

    1. Open the side door and confirm the wire is actually in the drive-roll groove.
    2. Check that the groove label aligned with the retaining pin matches the wire type and diameter.
    3. Remove the contact tip and nozzle from the MDX-100 gun.
    4. Lay the gun cable straight and jog wire.
    5. If wire feeds with the tip removed, replace the contact tip or inspect the diffuser area.
    6. If wire still slips with the tip removed, check liner drag, spool hub tension, inlet guide, and drive-roll pressure.
    7. Feed wire onto a non-conductive surface and tighten only enough to stop slipping.

    Diagnosis Table

    SymptomLikely CauseFirst Check
    Roll turns, wire stallsToo little pressure or downstream blockageRemove tip and test feed
    Wire is flattenedPressure too highBack off pressure and check liner/tip
    Copper dust at feederWrong groove, too much pressure, rough guideInspect drive roll and inlet guide
    Flux-core slipsWrong smooth grooveUse V-knurled groove for flux-core
    Slips only with cable bentLiner drag or kinked gun cableStraight-cable feed test
    Birdnesting at feederBlocked tip, diffuser, liner, or gun cableInspect MDX-100 front end and liner

    What Wears Out First

    The contact tip often fails before the drive roll. A worn, undersized, overheated, or spatter-packed contact tip can stop wire and make the drive roll slip. The liner is the next major suspect if the problem changes when the gun cable is bent. Replace the drive roll only after verifying groove selection, pressure, tip condition, spool tension, and liner condition.

    Spool Hub Tension Check

    The wire spool should not overrun, but it also should not take heavy force to turn. Millerโ€™s manual describes spool hub tension as correct when only slight force is needed to turn the spool. If the hub is too tight, the drive roll slips. If it is too loose, the spool can overrun and tangle wire into the drive area.

    Common Wrong-Part and Wrong-Setup Mistakes

    • Running .030 wire in the .024 groove.
    • Running flux-cored wire in a smooth solid-wire V-groove.
    • Using a contact tip smaller than the wire diameter.
    • Leaving the MDX-100 gun cable coiled tightly during feed testing.
    • Overtightening drive pressure until wire is flattened.
    • Replacing the drive motor before checking the liner and contact tip.
    • Using non-MDX contact tips, diffusers, or liners on the MDX-100 gun.

    Test Procedure

    1. Turn off the welder and release drive pressure.
    2. Clip the wire end clean and hold the spool so it does not unravel.
    3. Verify the selected groove and wire size.
    4. Set the pressure indicator near the initial setting recommended in the manual.
    5. Remove the nozzle and contact tip.
    6. Turn the machine on and feed wire through the straight MDX-100 gun cable.
    7. Feed wire against wood or another non-conductive surface and increase pressure only until slipping stops.
    8. Reinstall the correct contact tip and nozzle, then test weld on scrap.

    Field Fix vs Proper Fix

    Field fix: Straighten the gun cable, verify the drive-roll groove, replace the contact tip, reduce excessive spool tension, and reset drive pressure just high enough to feed without slipping.

    Proper fix: Install the correct Miller drive roll for the wire type, replace worn drive components, install the correct MDX-100 tip and liner, clean the inlet guide, and confirm the spool hub, pressure setting, and wire path with a feed test before welding.

    Safety Notes

    • Keep hands away from drive rolls while feeding wire.
    • Wear safety glasses when clipping or feeding wire.
    • Do not point the gun at yourself or another person during feed tests.
    • Disconnect input power before internal service.
    • The wire, drive roll housing, and parts touching welding wire can be electrically live during operation.
  • MIG Contact Tip Burnback Troubleshooting: Wire Sticking, Fusing, or Melting Back Into the Tip

    MIG contact tip burnback happens when the welding wire melts faster than it is being delivered, then fuses inside the contact tip. The most common causes are wire feed speed too low, stickout too short, a worn or wrong-size contact tip, liner drag, tight gun cable bends, incorrect drive roll pressure, wrong drive roll groove, spool brake drag, or spatter buildup at the nozzle and diffuser. Replace the contact tip first, then check the feed path before changing major machine parts.

    Do not fix repeated burnback by only tightening the drive rolls. Excessive drive pressure can deform solid wire, shave soft wire, pack debris into the liner, and create more feed restriction. Burnback is usually a symptom of unstable wire delivery or incorrect arc length, not just a bad tip.

    Common Symptoms

    SymptomLikely CauseFirst Check
    Wire welded inside contact tipLow wire feed speed, short stickout, feed restrictionReplace tip and straighten gun lead
    Tip glows red or discolorsExcessive heat, loose tip, wrong tip, high duty cycleTighten or replace tip
    Wire feeds, then stops mid-weldLiner drag, spool drag, drive roll slipRemove tip and test feed
    Arc stutters before burnbackWorn tip bore, dirty liner, poor wire contactInstall correct new tip
    Birdnesting after burnbackWire blocked downstream of drive rollsInspect tip, diffuser, liner, and gun cable
    Burnback repeats with new tipsWrong consumable family or feed-path restrictionVerify gun model, liner, wire size, and drive rolls

    Quick Fix: Do This First

    1. Stop welding and turn off the machine before touching the gun front end.
    2. Clip the wire clean near the contact tip.
    3. Remove the nozzle and unscrew the burned contact tip.
    4. Install a new contact tip that matches both the wire diameter and the gun series.
    5. Straighten the gun cable. Avoid tight loops, kinks, and sharp bends.
    6. Jog wire with the tip removed. If feed improves, the old tip was blocked or wrong.
    7. If feed is still rough, check liner drag, drive roll pressure, drive roll groove, and spool brake tension.
    8. Restart with correct stickout and adjust wire feed speed only after the mechanical feed path is stable.

    What This Part Does

    The contact tip transfers welding current to the MIG wire and guides the wire at the exit point of the gun. The tip bore must be the correct size for the wire. Too small can restrict feeding and cause burnback. Too large can reduce electrical contact, allow arc wander, and cause unstable starts. The tip must also match the gunโ€™s thread, length, seating style, and diffuser/retaining head system.

    Root Causes of Contact Tip Burnback

    CauseWhy It Causes BurnbackProper Fix
    Wire feed speed too lowArc consumes wire faster than feeder delivers itIncrease wire feed speed within procedure range
    Stickout too shortArc heat is too close to the tipHold proper contact-tip-to-work distance
    Wrong contact tip sizeWire drags or loses stable electrical contactMatch tip to wire diameter and gun family
    Dirty or kinked linerWire slows, surges, or hesitatesClean or replace liner
    Gun cable bent too tightlyWire friction increases before the tipStraighten cable during test
    Drive roll pressure wrongWire slips or gets crushedReset pressure only tight enough to feed
    Spool brake too tightFeeder motor fights spool dragReduce hub tension until spool stops without overrunning
    Spatter-packed nozzle/diffuserHeat builds up and gas flow becomes unstableClean nozzle and inspect diffuser

    What Wears Out First

    • Contact tip: Replace when the bore is oval, pitted, spatter-packed, loose, overheated, or repeatedly fusing wire.
    • Liner: Replace when wire drags with the tip removed, when changing wire size outside the liner range, or when the gun cable has been kinked.
    • Drive rolls: Clean or replace when the groove is worn, packed with wire shavings, or wrong for solid, flux-cored, or aluminum wire.
    • Diffuser/retaining head: Inspect if tips loosen, overheat, seat poorly, or fail repeatedly.
    • Nozzle: Clean spatter before it traps heat or disrupts shielding gas.

    Compatibility Notes

    Contact tips are not universal. Before ordering, verify the MIG gun brand and series, contact tip thread, tip length, wire diameter, diffuser style, and liner system. A .035 tip for one gun family may not fit another .035 gun. Miller AccuLock MDX, Miller AccuLock S, Lincoln Magnum, Tweco-style, Bernard, Tregaskiss, and ESAB/Tweco systems use different part families depending on gun model.

    Confirmed support pages:

    What To Verify Before Ordering

    • MIG gun model and rear connector type.
    • Wire diameter and wire type.
    • Contact tip part family, thread, length, and bore size.
    • Diffuser or retaining head style.
    • Liner size range and gun cable length.
    • Drive roll groove size and type.
    • Shielding gas and polarity for the process.
    • Whether the gun is original or a replacement gun.

    Common Wrong-Part Mistakes

    • Buying by wire size only instead of gun series.
    • Installing a .030 tip on .035 wire.
    • Using a worn diffuser that no longer seats the tip tightly.
    • Replacing tips repeatedly without checking liner drag.
    • Using excessive drive roll pressure to overcome a blocked liner.
    • Mixing Miller, Lincoln, Tweco, Bernard, and Tregaskiss consumables without confirming thread and seating style.

    Field Fix vs Proper Fix

    ProblemField FixProper Fix
    Wire fused in tipClip wire and replace tipCorrect wire speed, stickout, tip size, and feed path
    Burnback with cable bentStraighten gun leadReplace kinked liner or damaged gun cable
    Tip overheatsLet gun cool and clean nozzleVerify duty cycle, tip seating, diffuser, and settings
    Drive rolls slipReset pressureFix liner drag, roll groove, or spool brake tension
    Repeated burnbackInstall new tipInspect full wire path from spool to tip

    Safety Notes

    Turn off input power before servicing the gun, feeder, liner, or drive rolls. Wear safety glasses when clipping wire or clearing a fused tip. Hot tips and nozzles can burn skin through light gloves. Do not bypass feeder covers, defeat trigger controls, or continue welding with repeated burnback until the restriction is found.

    Sources Checked

    • Weld Support Parts MIG burnback and wire feed troubleshooting pages.
    • Weld Support Parts Miller MDX-100, Lincoln Magnum 100L, and Tweco Fusion gun breakdowns.
    • Bernard/Tregaskiss troubleshooting references for contact tip burnback, worn tips, liner restriction, and wrong tip size.
    • American Torch Tip burnback reference for low wire-feed-speed burnback cause.
  • Millermatic 211 Wire Feed Troubleshooting: Slipping, Stuttering, Burnback, and Birdnesting

    If a Millermatic 211 feeds wire unevenly, slips at the drive rolls, stops feeding during welding, burns back into the contact tip, or birdnests at the feeder, start with the wire path before replacing boards or motors. The most common causes are a blocked contact tip, dirty or kinked liner, wrong drive roll groove, incorrect drive roll pressure, spool brake drag, wire contamination, or a gun/liner mismatch. The 211 family has multiple gun configurations, so verify the exact machine version and installed MIG gun before ordering consumables.

    Millerโ€™s troubleshooting path for wire feeding stops during welding includes straightening the gun cable, adjusting drive roll pressure, changing to the proper drive roll groove, resetting hub tension, confirming the wire is in the correct groove, replacing a blocked contact tip, cleaning or replacing the inlet guide or liner, and checking for drive assembly or liner restrictions. If the over-temperature light blinks three times, Miller identifies that as a motor error and directs the user to check for birdnesting, drive roll alignment, drive roll tension, and a closed pressure assembly before service diagnosis.

    Common Symptoms

    SymptomLikely CauseFirst Check
    Drive rolls turn but wire does not exit gunBlocked tip, kinked liner, tight cable bendRemove contact tip and jog wire
    Wire slips at drive rollsLow tension, wrong groove, liner drag, spool brake too tightReset tension and straighten gun cable
    Birdnesting at feederFeed restriction downstream of rollsCut nest, remove tip, hand-pull wire
    Burnback into contact tipWire speed too low, tip drag, poor electrical contactReplace tip and verify wire size
    Wire feed starts then stopsTrigger plug issue, motor protection, drive restrictionCheck gun plug, roll pressure, liner
    Arc surges or stuttersIntermittent wire delivery or worn contact tipInstall correct new tip first

    Quick Test Procedure

    1. Turn input power off before opening the feeder or touching drive components.
    2. Remove the nozzle and contact tip.
    3. Lay the gun cable as straight as possible.
    4. Release the pressure arm and confirm the wire is in the correct drive roll groove.
    5. Inspect for loose wire loops or birdnesting at the spool and drive assembly.
    6. Pull wire through the gun by hand. Heavy drag points to the liner, cable bend, wrong wire/liner match, or dirty wire.
    7. Reinstall a verified contact tip that matches the wire diameter and gun series.
    8. Set drive pressure only tight enough to feed without slipping. Do not crush the wire.
    9. Check hub/spool brake tension. The spool should stop without overrunning but should not drag hard against the motor.
    10. Weld test after the mechanical feed path is correct.

    What Wears Out First

    • Contact tip: Replace when the bore is oval, spatter-packed, overheated, or causing repeated burnback.
    • Liner: Replace when wire drags with the contact tip removed, when the cable has been kinked, or when changing outside the linerโ€™s wire range.
    • Drive rolls: Replace or clean when grooves are polished, contaminated with wire shavings, wrong for the wire type, or unable to grip without excessive pressure.
    • Inlet guide: Inspect for wear grooves, missing support, misalignment, or packed debris.
    • Nozzle and diffuser area: Remove spatter that overheats the front end and increases burnback risk.

    Millermatic 211 Compatibility Notes

    Do not order 211 feed-path parts by โ€œMillermatic 211โ€ alone. Weld Support Parts lists Millermatic 211 transformer, Millermatic 211 inverter with M100 gun, and Millermatic 211 inverter with MDX-100 gun support paths. The gun currently installed controls the contact tip, liner, diffuser, nozzle, trigger, neck, and power pin parts.

    Confirmed internal support links:

    What To Verify Before Ordering

    • Exact Millermatic 211 version: transformer, inverter with M100, inverter with MDX-100, or unknown.
    • Serial number and ownerโ€™s manual revision when available.
    • Installed gun series, not just welder model.
    • Wire diameter: .023, .030, .035, .045, or other.
    • Wire type: solid steel, stainless, aluminum, self-shielded flux-core, or gas-shielded flux-core.
    • Contact tip family, thread, length, and wire size.
    • Liner family, wire range, and gun cable length.
    • Drive roll groove type and size.
    • Polarity and shielding gas for the process.

    Common Wrong-Part Mistakes

    • Installing a contact tip that matches wire diameter but not the gun family.
    • Using a liner that is too small, too short, kinked, or not seated fully.
    • Running .035 wire through a .030 tip.
    • Using the wrong drive roll groove for the wire type.
    • Overtightening drive pressure to force wire through a blocked liner.
    • Assuming a used 211 still has its original gun.

    Field Fix vs Proper Fix

    ProblemField FixProper Fix
    BurnbackCut wire, replace tip, increase wire speed if neededCorrect tip, liner drag, drive tension, and settings
    BirdnestingCut nest and rethread wireRemove downstream restriction and verify liner seating
    Slipping rollsClean rolls and reset tensionInstall correct roll and fix liner or spool drag
    Erratic feedStraighten cable and replace tipReplace liner if hand-pull test shows drag
    No feed after trigger pullCheck trigger plug and pressure armElectrical diagnosis only after mechanical checks pass

    Related Failure Paths

    • Burnback into contact tip
    • Birdnesting at feeder
    • Arc stutter from inconsistent wire delivery
    • Porosity from unstable feed and nozzle spatter
    • Low output from poor work clamp or poor contact tip engagement
    • Premature liner wear from crushed or rusty wire

    Safety Notes

    Disconnect input power before servicing the feeder, drive rolls, liner, gun connection, or trigger wiring. Keep fingers clear of drive rolls during feed tests. Wear eye protection when cutting wire or clearing a birdnest. Do not bypass motor protection or continue welding if the machine indicates a motor error after the feed path has been corrected.

    Sources Checked

    • Miller Millermatic 211 ownerโ€™s manuals OM-239988 and OM-265809
    • Weld Support Parts Miller MIG support pages
    • Weld Support Parts MDX-100 gun parts page
    • Weld Support Parts MIG wire feed troubleshooting page
    • Uploaded welding catalog reference for general MIG burnback causes
  • MIG Birdnesting Causes and Fixes: Wire Feed Jam Diagnosis

    MIG birdnesting happens when the feeder pushes wire but the wire cannot move cleanly through the gun, liner, contact tip, or drive-roll path. The wire backs up at the feeder and tangles into a coil. Do not start by increasing drive-roll tension. That often crushes the wire, creates more drag, and makes the next jam worse. Start by clearing the jam, straightening the gun lead, checking the contact tip, then testing liner drag and drive-roll setup.

    The fastest field diagnosis is simple: remove the contact tip, keep the gun cable as straight as possible, and jog wire through the gun. If the wire feeds smoothly with the tip removed, the restriction is likely the contact tip, diffuser/nozzle area, or tip size. If it still hesitates, curls, shaves, or stops, look upstream at the liner, cable bend, drive rolls, spool brake, wire condition, or feeder guide tubes.

    Common Symptoms

    • Wire piles up beside or behind the drive rolls.
    • Drive rolls keep turning but wire stops at the gun.
    • Arc starts, pops, then stops feeding.
    • Wire burns back into the contact tip before the nest appears.
    • Wire has flat spots, copper dust, or shaving marks.
    • Problem gets worse when the gun lead is coiled or sharply bent.

    Most Likely Causes

    CauseWhat It DoesFast CheckProper Fix
    Drive-roll tension too tightFlattens or deforms wireLook for deep roll marks or copper dustBack off tension and reset to minimum grip
    Wrong drive-roll grooveSlips, shaves, or crushes wireVerify wire size and roll typeUse the correct roll for solid, flux-core, or aluminum wire
    Dirty or kinked linerAdds drag inside the cableFeed with the lead straight, then curvedBlow out or replace the liner
    Wrong or worn contact tipCreates a bottleneck at the arc endRemove tip and test feedInstall correct-size tip for the wire diameter
    Spool brake too tightFeeder fights the spoolCheck spool rotation by handLoosen brake until spool does not overrun
    Soft wire in long gun leadWire buckles before reaching the tipCommon with aluminumUse spool gun, push-pull gun, U-groove rolls, or correct soft-wire setup

    Step-by-Step Fix

    1. Stop feeding immediately. Do not keep pulling the trigger. Continued feeding can pack wire deeper into the feeder and liner.
    2. Cut out the tangled wire. Remove the birdnest at the feeder and discard kinked or flattened wire.
    3. Remove the contact tip. A spatter-packed, undersized, overheated, or worn tip is one of the fastest restrictions to test.
    4. Straighten the gun cable. Tight loops can create a false liner problem.
    5. Jog wire through the gun. If feed improves with the tip removed, replace the tip and inspect the diffuser/nozzle area.
    6. Check drive-roll groove and tension. Match the roll to wire diameter and wire type. Use minimum tension that feeds consistently without flattening the wire.
    7. Check the liner. Replace the liner if the wire drags with the tip removed, if the cable has a kink, or if metal dust comes out when blown clean.
    8. Check spool brake drag. The spool should not freewheel, but it should not require heavy pull to rotate.
    9. Test weld on scrap. Change one variable at a time before returning to production.

    Compatibility Notes

    Birdnesting is usually a setup and wear-path problem, not a failed welder. Before ordering parts, verify the machine model, MIG gun model, wire diameter, wire type, liner length, contact tip thread, drive-roll groove, and feeder guide style. Lincoln parts documentation shows that drive-roll kits, contact tips, liners, guide tubes, and gun assemblies vary by machine group and code number, so model-only matching can still be wrong.

    Solid steel wire normally uses a smooth V-groove style roll. Flux-core commonly uses a knurled roll where specified. Aluminum wire normally needs a soft-wire setup such as U-groove rolls, correct liner, reduced drag, and sometimes a spool gun or push-pull gun. Unknown fitment should be treated as Unknown (Verify).

    What To Verify Before Ordering

    • MIG gun brand and series, not just welder brand.
    • Wire diameter: .023/.025, .030, .035, .045, 1.0 mm, 1.2 mm, etc.
    • Wire type: solid steel, stainless, flux-core, aluminum, hardfacing.
    • Contact tip size, thread, length, and consumable family.
    • Liner size range and cable length.
    • Drive-roll groove type and groove size.
    • Incoming and outgoing wire guide condition.
    • Spool size and brake setup.

    Common Wrong-Part Mistakes

    • Buying contact tips by wire size only without checking thread or gun series.
    • Using a .030 contact tip with .035 wire.
    • Using smooth rolls on wire that requires knurled rolls.
    • Using knurled rolls too aggressively on solid wire and shaving copper coating.
    • Installing a liner that is too long, too short, or cut with a burred end.
    • Trying to push aluminum wire through a long standard MIG gun cable.

    Field Fix vs Proper Fix

    Field fix: clear the nest, cut back damaged wire, straighten the lead, replace the contact tip, loosen drive-roll tension, and test feed. This may get a job moving again.

    Proper fix: correct the feed restriction. Replace the worn tip, dirty liner, incorrect drive roll, damaged guide tube, or wrong soft-wire setup. Repeated birdnesting after a quick reset means the wire path is still restricted.

    Related Failure Paths

    Safety Notes

    Disconnect input power before removing covers, drive rolls, liners, or gun components. Wear gloves and eye protection when clipping tangled wire because stored wire tension can snap loose. Keep the gun pointed away from hands and bystanders while jogging wire. Maintain ventilation and follow the machine manual for feeder service procedures.

  • Why does my MIG wire feed keep slipping? (Fast Fix Guide)

    If your MIG wire feed keeps slippingโ€”especially mid-beadโ€”youโ€™ll see an unstable arc, hear the drive rolls โ€œchirp,โ€ and end up with inconsistent penetration. This guide walks you through a fast diagnosis and a clean, one-variable-at-a-time fix so you stop chasing settings.

    Where to Buy (Quick Fix Parts)

    Most โ€œwire slippingโ€ complaints come down to these components:

    • Drive rolls (wrong groove / worn groove):ย rolls spin but canโ€™t grip the wire consistently.
    • Spool hub tension (too tight):ย the feeder canโ€™t pull wire off the spool smoothly, so it surges/slips.
    • Gun liner (dirty, kinked, wrong length):ย too much drag; the rolls slip before the wire moves.

    Top Pick (Primary Fix)

    Unknown (Verify ASIN) โ€” liner choices are highly gun-specific (length + wire size + brand compatibility). To avoid recommending the wrong part, no AAWP box is included.

    Backup / Consumable Option

    Unknown (Verify ASIN) โ€” drive rolls are feeder/model-specific. No AAWP box included.


    Key Takeaways

    • Wire โ€œslippingโ€ is usuallyย dragย (liner/tip) orย mismatchย (drive roll groove/wire size), not voltage/WFS settings.
    • Fix it fastest by checkingย spool brake tensionย andย drive roll grooveย first.
    • If itโ€™s not fixed inย 2โ€“3 minutes, stop adjusting andย replace the liner or contact tipย (most common wear items).
    • Keep one rule:ย one change at a timeย so you donโ€™t create a second problem.

    Symptoms (Fast Diagnosis)

    • Drive rolls spin but wire speedย surgesย orย stalls
    • Arc sounds like itโ€™sย cutting in/out
    • Wire feed feelsย jerkyย when you pull the trigger
    • You hearย clicking/chirpingย from the feeder
    • You get randomย burnbackย or the wire โ€œsticksโ€ at the tip
    • You seeย wire shavingsย near the drive rolls (wire being crushed)

    Root Causes (Mapped to Symptoms)

    • Surging wire speedย โ†’ spool brake too tight, liner drag, or contact tip partially blocked
    • Clicking/chirping at feederย โ†’ drive roll tension wrong, wrong groove for wire size/type, worn rolls
    • Wire shavings/dustย โ†’ too much drive roll pressure, wrong knurl/V-groove selection, misaligned inlet guide
    • Feeds fine with tip removedย โ†’ contact tip worn/blocked, diffuser/nozzle contamination, or tip size mismatch
    • Feeds worse when gun is bentย โ†’ liner kinked, liner too short/too long, cable damage, tight bends in lead

    Quick Fix (Do This First)

    • Stop adjusting voltage/WFS.ย Slipping is mechanical 90% of the time.
    • Set the gun lead straightย (no tight loops) and test again.
    • Back off spool brake tensionย until the spoolย justย stops free-spinning when you release the trigger.
    • Confirm drive roll groove matches the wireย (size and type).
    • Remove the contact tipย and test feed for 2 seconds:
      • If it feeds smoothly now โ†’ tip/diffuser/nozzle area is the restriction.
      • If it still slips โ†’ liner/drive rolls/spool tension is the restriction.

    (AAWP omitted โ€” no verified ASIN.)


    Step-by-Step Fix

    1. Confirm wire size and type
      • Verify the spool label (example: .030 in / 0.8 mm solid ER70S-6, or flux-core).
      • Make sure your drive rolls are correct for that wire (V-groove for solid, knurled for flux-coreโ€”model dependent).
    2. Check drive roll groove selection
      • Many rolls are double-sided. Make sure youโ€™re on the correct groove for your wire diameter.
      • If the groove is polished/worn, it may slip even with correct tension.
    3. Reset drive roll tension (donโ€™t crush the wire)
      • Start low. Increase only until the wire feeds without slipping.
      • Too much tension creates wire shavings and makes liner drag worse.
    4. Set spool hub/brake tension
      • Too tight = feeder struggles to pull wire, causing surging/slip.
      • Too loose = overrun/birdnesting risk when you stop feeding.
    5. Isolate the gun end
      • Remove nozzle and contact tip. Feed wire briefly.
      • If itโ€™s smooth now, replace theย contact tipย first (cheap, fast).
    6. If still slipping: service/replace the liner
      • Blow out the liner (dry air only) and inspect for kinks or rust/dirt.
      • If the liner is worn, kinked, or contaminated, replacement is usually faster than trying to โ€œsave it.โ€
    7. Re-test with the lead in a normal working bend
      • If it only fails under bend, the liner/cable is the culprit.

    Parts That Actually Fix This

    Liner
    Replace when: feed gets worse with bends, you see dust/rust, or it wonโ€™t feed smoothly even with correct roll setup.
    Adjust when: liner is clean and straight, and the issue disappears with the tip removed.

    Contact tips
    Replace when: wire sticks, arc is unstable, tip is ovaled, or feeding improves when the tip is removed.
    Adjust when: tip size is correct and the problem is clearly upstream (rolls/spool/liner).

    Drive rolls
    Replace when: groove is worn/polished, wire slips even at correct tension, or wire is being deformed.
    Adjust when: wrong groove/side is selected or tension is mis-set.

    Diffuser / nozzle (if relevant)
    Replace/clean when: spatter buildup constricts the wire path or the tip seat is damaged.
    Adjust when: itโ€™s simply dirtyโ€”cleaning restores normal feed.


    Replace vs Adjust (Fast Decision Table)

    ProblemAdjust FirstReplace
    Wire slips only at higher WFSSpool brake tension + correct roll grooveDrive rolls (worn groove)
    Feeds smooth with tip removedTip size/condition checkContact tip
    Worse when gun lead is bentStraighten lead + check routingLiner
    Wire shavings at feederReduce roll tension + correct roll typeLiner (if packed with debris)

    Copy table

    Rule: If not fixed in 2โ€“3 minutes โ†’ replace the consumable causing drag (tip or liner).


    Prevention Tips

    • Keep the gun lead as straight as practical; avoid tight coils on the floor.
    • Store wire dry; rust/dirt increases liner drag fast.
    • Donโ€™t overtighten drive rollsโ€”set tension to feed reliably without crushing wire.
    • Replace contact tips proactively when arc stability drops (interval: Unknown; depends on amperage/time-on-arc).
    • Use proper ventilation and fume control; keep spatter under control so the nozzle/tip area doesnโ€™t clog.

    Safety note: Wear ANSI Z87.1-rated eye protection under your hood, welding gloves, and ensure adequate ventilation when welding and when blowing out liners (avoid breathing dust/particulate).


    FAQ

    Why does my MIG wire feed slip only when Iโ€™m welding (not when I free-feed)?
    Heat and load increase drag at the tip/nozzle area. A marginal contact tip or spatter buildup can show up only under arc conditions.

    Should I crank drive roll tension until it stops slipping?
    No. Too much tension deforms wire, creates shavings, and makes liner drag worse. Fix the restriction first.

    How do I know if itโ€™s the liner or the contact tip?
    Remove the contact tip and test feed. If it becomes smooth, the tip/nozzle area is the restriction. If it still slips, look upstream (liner/rolls/spool tension).

    Can the wrong drive roll groove cause slipping?
    Yes. A mismatch between groove and wire size/type is a common cause of inconsistent feed and wire deformation.

  • Why Does My MIG Wire Feed Keep Slipping? (Fast Fix in 10 Minutes)

    If your MIG wire feed โ€œslipsโ€ (you hear clicking, the rolls spin but wire stalls, or the arc keeps cutting out), youโ€™re not dealing with a settings problem firstโ€”youโ€™re dealing with a wire-path problem. This guide walks you through a fast diagnosis and a clean troubleshooting path that fixes most slipping feeds in minutes.

    Youโ€™ll start with the highest-failure consumables and only adjust tension/settings after youโ€™ve confirmed the wire can physically move through the gun.

    Where to Buy (Quick Fix Parts)

    Most โ€œslippingโ€ wire feed problems trace back to a restriction at the end of the gun or inside the liner, which makes the drive rolls lose traction. The three most likely failed components are:

    • Contact tipย (burnt, oversized, spattered, or wrong size for wire)
    • Gun linerย (dirty, kinked, wrong length, worn)
    • Drive rollsย (wrong groove/type for wire, worn, misaligned)

    Top Pick (Primary Fix)

    If you need the fastest, highest-probability replacement: start with a fresh contact tip in the correct wire size.

    Last update on 2026-06-26 / Affiliate links / Images from Amazon Product Advertising API

    Disclosure: As an Amazon Associate, I earn from qualifying purchases.

    Backup / Consumable Option

    If the problem returns quickly (or gets worse when you straighten the gun lead), the liner is usually the next failure point.

    Last update on 2026-06-10 / Affiliate links / Images from Amazon Product Advertising API

    Key Takeaways

    • Slipping wire feed is usuallyย friction or restriction, not voltage/WFS.
    • Replace theย contact tip firstย if thereโ€™s any burnback, spatter clogging, or wrong size.
    • If the gun lead position changes the symptom, suspect theย linerย (kink/contamination/wear).
    • Set drive-roll tension to theย minimum that feeds reliablyโ€”too tight causes deformation and adds drag.
    • If itโ€™s not fixed inย 2โ€“3 minutes, replace the consumable instead of over-adjusting.

    Symptoms (Fast Diagnosis)

    • Drive rolls spin but wireย stallsย orย surges
    • You hearย clicking/chatteringย at the feeder
    • Arcย cuts in/outย like the wire is โ€œskippingโ€
    • Wire shaves or getsย flat spotsย (drive-roll marks)
    • Wire feeds fine straight, but slips when the gun lead isย curved
    • Burnback events increase (wire melts to tip) after feed starts slipping

    Root Causes (Mapped to Symptoms)

    • Slips worse when the gun lead is bent/loopedย โ†’ liner kinked, dirty, wrong length, or wrong type
    • Clicking at feeder + wire shavingsย โ†’ drive-roll tension too high, wrong groove, worn rolls, or misalignment
    • Wire stalls at the tip / arc stuttersย โ†’ contact tip clogged, wrong size, or burnback damage
    • Feeds fine with tip removedย โ†’ restriction is at the tip/nozzle area (tip, diffuser, spatter, nozzle blockage)
    • Slips more at higher WFSย โ†’ spool brake too tight, liner friction, or drive-roll traction issue

    Quick Fix (Do This First)

    Do these in orderโ€”fast, high-probability, and low-risk:

    • Replace the contact tipย (correct size for your wire).
    • Clip wire cleanย and re-thread with the gun lead as straight as possible.
    • Back drive-roll tension off, then increase only until it feeds without slipping.

    Last update on 2026-06-26 / Affiliate links / Images from Amazon Product Advertising API

    Step-by-Step Fix

    1. Stop and make it safe
      • Turn the machine off before opening the feeder or handling the drive rolls.
      • Wear gloves and eye protection (ANSI Z87.1 safety glasses under your hood).
    2. Rule out tip/nozzle restriction (fastest test)
      • Remove the nozzle.
      • Remove the contact tip.
      • Try feeding wire with the gun lead straight.
      • If it feeds smoothly with the tip removed, your restriction is likely theย tip/nozzle/diffuser area.
    3. Replace the contact tip (donโ€™t โ€œclean it and hopeโ€)
      • If thereโ€™s burnback, ovaling, heavy spatter, or the wrong size tip: replace it.
      • Unknown (Verify): exact tip-to-wire fit guidance varies by manufacturerโ€”confirm with your gun manual.
    4. Check drive-roll type and groove
      • Solid wire typically wants aย V-groove.
      • Flux-core often wants aย knurledย roll (varies by wire typeโ€”verify wire manufacturer guidance).
      • Make sure the roll matches your wire diameter (e.g., 0.030 in / 0.035 in).
    5. Set drive-roll tension correctly (minimum effective tension)
      • Start low.
      • Increase tension only until wire feeds consistently without slipping.
      • Too much tension can deform wire, increase liner drag, and create a โ€œfeeds bad everywhereโ€ problem.
    6. Check spool brake / hub tension
      • If the spool is hard to pull and the wire โ€œsnapsโ€ tight when you stop feeding, the brake may be too tight.
      • Set it so the spool doesnโ€™t overrun, but also doesnโ€™t fight the drive system.
    7. Suspect the liner if the symptom changes with lead position
      • If it slips when the lead is curved but feeds when straight, the liner is likely dirty, kinked, worn, or cut wrong.

    Parts That Actually Fix This

    Liner

    Replace when:

    • Feed changes dramatically with gun lead position
    • You see wire shavings/dust inside the gun
    • Youโ€™ve had repeated birdnesting or burnback events

    Adjust/clean when:

    • The liner is new and you suspect contamination from wire dust (blow out per manufacturer guidance; avoid unsafe practices)

    Contact tips

    Replace when:

    • Any burnback, ovaling, heavy spatter clogging, or erratic arc starts
    • Wire feels โ€œstickyโ€ through the tip even with the gun straight

    Adjust when:

    • Tip is correct size and clean, and restriction is clearly elsewhere

    Drive rolls

    Replace when:

    • Groove is worn smooth, chipped, or misaligned
    • Correct groove/type still slips at reasonable tension

    Adjust when:

    • Wrong groove selected or tension is clearly excessive/insufficient

    Diffuser / nozzle (when relevant)

    Replace when:

    • Spatter buildup blocks gas flow and physically crowds the tip area
    • Threads are damaged or the tip wonโ€™t seat correctly

    Replace vs Adjust (Fast Decision Table)

    ProblemAdjust FirstReplace
    Wire slips only when gun lead is bentStraighten lead, reduce drive-roll tensionLiner
    Clicking at feeder + wire shavingsReduce tension, confirm correct roll groove/typeDrive rolls (if worn)
    Arc stutters and wire feels tight at the tipRemove nozzle/tip and test feedContact tip
    Slips worse at higher wire speedReduce spool brake tension, confirm roll tractionLiner (if friction-related)

    Copy table

    Rule: If not fixed in 2โ€“3 minutes โ†’ replace the consumable.

    Prevention Tips

    • Keep wire clean and covered; wire dust increases liner drag over time.
    • Donโ€™t crank drive-roll tension โ€œjust to make it feedโ€โ€”set the minimum that works.
    • Store consumables (tips/liners) dry and organized by wire size to avoid mix-ups.
    • Replace tips proactively if youโ€™re doing frequent starts/stops or running hot (burnback risk increases).
    • Avoid tight loops in the gun lead during welding; tight bends increase friction and accelerate liner wear.

    FAQ

    Why does my MIG wire feed slip but not birdnest?

    Birdnesting is usually the feeder pushing wire into a restriction until it tangles. Slipping can happen earlierโ€”when the rolls canโ€™t maintain traction due to friction, wrong rolls, or low tension.

    How do I know if itโ€™s the liner or the contact tip?

    Quick test: remove the contact tip and feed wire with the lead straight. If it feeds smoothly, suspect the tip/nozzle area. If it still strugglesโ€”especially when the lead is bentโ€”suspect the liner.

    Can drive-roll tension being too tight cause slipping?

    Yes. Too much tension can deform wire, increase drag through the liner, and create inconsistent feeding that looks like slipping or surging.

    Should I change voltage or wire speed to fix slipping?

    Not first. Fix the mechanical feed path (tip, liner, rolls, spool brake) before touching settings. Settings changes can mask the real issue and waste time.

    Internal Linking (Add These)

  • Why Does My MIG Wire Feed Stutter? (Fast Fix in 10 Minutes)

    If your MIG wire feed feels jittery, surging, or โ€œstutteringโ€ mid-bead, treat it as a feed-path problem first, not a voltage/WFS tuning problem. In most cases, the arc is only โ€œacting upโ€ because the wire is not moving smoothly through the gun.

    This guide gives you a symptom-first diagnosis and a one-variable-at-a-time fix you can run in under 10 minutes.


    Where to Buy (Quick Fix Parts)

    Most โ€œstuttering wire feedโ€ problems come from wire drag (liner/tip) or inconsistent push (drive rolls/spool tension). These are the first parts to inspect and replace.

    Most likely failed components

    • MIG gun linerย (kinked, dirty, rust dust, worn): creates drag โ†’ wire surges and the arc pops
    • Contact tipย (wrong size, worn, spatter-restricted): wire sticks/slips โ†’ inconsistent arc
    • Drive rolls / tension setupย (wrong groove, too tight/loose): wire slips or deforms โ†’ feed pulses

    Top Pick (Primary Fix)

    Mig Welding Liner 42-3035-15 Tweco #1/#2 & Lincoln 250L 030-035″ 15′ Replaceme (1 pc)
    • Premium quality Lincoln Tweco style MIG wire liner 42-3035-15 (0.030″-0.035″) 15-ft long for Lincoln Tweco MIG welding guns
    • Lincoln 42 series liner is used in Lincoln Magnum 200A or Tweco #2 series MIG welding guns
    • You get One (1) 42-3035-15 (0.030″-0.035″) 15-ft liner at this price. FREE SHIPPING WITHIN THE U.S.
    • Please refer to part breakdown chart for other available consumable torch parts. Quality MIG wires are also avaiable. We do combined shipping.

    Last update on 2026-06-26 / Affiliate links / Images from Amazon Product Advertising API

    Disclosure: As an Amazon Associate, I earn from qualifying purchases.

    Backup / Consumable Option

    Mig Welding gun accessory 0.035″ kit for Lincoln Magnum 100L or Tweco Mini/#1 Mig gun: 20pcs Contact Tips 11-35 0.035″ + 2pcs gas nozzles 21-50 1/2″ + 2pcs gas diffusers 35-50
    • Mig Welding gun accessory 0.035″ kit with contact tip,gas nozzle,gas diffuser for Lincoln Magnum 100L & Tweco Mini/#1.
    • Including:20pcs mig welding Contact Tips 11-35 0.035″ + 2pcs gas nozzles 21-50 1/2″ + 2pcs gas diffusers 35-50
    • Fits for Tweco Mini/#1 and Lincoln Magnum 100L K530 series Mig welding guns

    Last update on 2026-06-26 / Affiliate links / Images from Amazon Product Advertising API


    Key Takeaways

    • Stuttering wire feed is usually friction: liner, tip, or a tight/kinked gun lead.
    • Do not chase settings first. Fix the wire path before touching voltage/WFS.
    • If itโ€™s not fixed in 2โ€“3 minutes, replace the consumable (tip/liner) and move on.
    • Wrong drive-roll groove or tensionย can mimic electrical problems.
    • Keep the gun leadย as straight as possibleย while troubleshooting.

    H2: Symptoms (Fast Diagnosis)

    • Wire feed feelsย pulsingย instead of smooth
    • Arcย pops / sputtersย even with โ€œnormalโ€ settings
    • Wire speed changes when youย move the gun lead
    • Drive rollsย slipย (you hear it or see dust/shavings)
    • Wireย burns backย or the tip gets hot fast
    • You get intermittentย birdnestingย at the feeder

    H2: Root Causes (Mapped to Symptoms)

    • Stutter gets worse when the lead is bentย โ†’ liner drag, kinked lead, liner packed with debris
    • Popping + inconsistent arc lengthย โ†’ contact tip restriction, wrong tip size, worn tip bore
    • Drive rolls chatter/slipย โ†’ tension wrong, wrong groove, dirty/worn rolls
    • Wire shavings at feederย โ†’ tension too high, wrong groove, soft wire getting crushed
    • Random surging at start of weldย โ†’ spool brake too tight/loose, wire not paying off smoothly

    Quick Fix (Do This First)

    Before you touch settings, do this sequence:

    1. Kill powerย and remove the nozzle.
    2. Clip the wireย at the contact tip, pull the wire back a few inches, then re-feed.
    3. Straighten the gun leadย (no tight loops).
    4. Swap the contact tipย (fastest โ€œknown-goodโ€ test).
    5. If it still stutters:ย replace the liner.

    Include ONLY if you have a VERIFIED ASIN:

    Mig Welding Liner 42-3035-15 Tweco #1/#2 & Lincoln 250L 030-035″ 15′ Replaceme (1 pc)
    • Premium quality Lincoln Tweco style MIG wire liner 42-3035-15 (0.030″-0.035″) 15-ft long for Lincoln Tweco MIG welding guns
    • Lincoln 42 series liner is used in Lincoln Magnum 200A or Tweco #2 series MIG welding guns
    • You get One (1) 42-3035-15 (0.030″-0.035″) 15-ft liner at this price. FREE SHIPPING WITHIN THE U.S.
    • Please refer to part breakdown chart for other available consumable torch parts. Quality MIG wires are also avaiable. We do combined shipping.

    Last update on 2026-06-26 / Affiliate links / Images from Amazon Product Advertising API


    H2: Step-by-Step Fix

    1. Confirm the wire/tip match
      • Tip size must match wire diameter (example:ย .030 wire = .030 tip).
      • If youโ€™re unsure:ย Unknown (Verify)ย โ€” check your wire spool label and your tip packaging.
    2. Check the gun lead routing
      • Lay the lead outย as straight as possible.
      • If the stutter disappears when straight, youโ€™ve confirmedย dragย (liner/tip), not settings.
    3. Set drive-roll tension correctly (quick test)
      • Start low, increase until the wire feeds without slipping.
      • If you can pinch the wire at the gun and the rolls keep pushing hard enough to birdnest instantly, tension is likelyย too high.
    4. Verify the correct drive-roll groove
      • Many rolls are dual-groove. Wrong groove = slip or wire deformation.
      • Flux-core vs solid can also require different roll style (varies by machine;ย Unknown (Verify)).
    5. Replace the contact tip
      • If the wire is sticking, arcing inside the tip, or the bore is worn, youโ€™ll get surging.
    6. Replace the liner
      • If the liner is dirty, kinked, rusted, or worn, it will create intermittent drag that feels exactly like โ€œbad settings.โ€
    7. Only now: fine-tune WFS/voltage
      • Once feed is smooth, adjust for arc sound and bead profile.

    H2: Parts That Actually Fix This

    Liner

    Replace if:

    • Feed changes when you move the lead
    • You see rust dust, wire shavings, or the liner feels โ€œgrittyโ€
    • The lead has been kinked or crushed

    Adjust/clean if:

    • You recently changed wire and suspect contamination
    • The liner is new and the issue started after a setup change

    Contact tips

    Replace if:

    • Wire sticks intermittently
    • Tip is spatter-packed or the bore is visibly worn
    • You changed wire diameter and didnโ€™t change the tip

    Drive rolls

    Replace/repair if:

    • Rolls are worn smooth, chipped, or packed with debris
    • You see consistent slipping even with correct tension

    Diffuser / nozzle (if relevant)

    Replace/clean if:

    • Spatter blocks gas flow and overheats the tip area
    • Nozzle is distorted and wonโ€™t seat correctly

    Replace vs Adjust (Fast Decision Table)

    ProblemAdjust FirstReplace
    Stutter changes when you bend/straighten the leadStraighten lead, reduce sharp bendsLiner
    Drive rolls slip or chatterReduce/increase tension, confirm correct grooveDrive rolls (if worn)
    Wire sticks/pops at the arcConfirm tip size matches wireContact tip

    Copy table

    Rule: If not fixed in 2โ€“3 minutes โ†’ replace the consumable.


    H2: Prevention Tips

    • Keep wire spoolsย clean and coveredย (dust + rust = liner drag).
    • Avoid tight loops in the gun lead during welding and storage.
    • Replace contact tips proactively when arc stability drops (interval =ย Unknown; depends on duty cycle, wire type, and technique).
    • If you run dirty environments, consider a routine: inspect tip + blow out/clean liner on a schedule (interval =ย Unknown (Verify)).

    Safety note: When troubleshooting, wear proper PPE: welding helmet rated to ANSI Z87.1, welding gloves, and ensure adequate ventilationโ€”especially when removing spatter and running test beads.


    H2: FAQ

    Why does my MIG wire feed stutter only at the start of the weld?

    Common causes are wire payoff/spool brake issues, a slightly restricted tip, or the wire not seated smoothly through the inlet/liner. Straighten the lead and do the quick tip swap first.

    Can a bad contact tip cause wire feed surging?

    Yes. If the wire drags or sticks in the tip (wrong size, spatter restriction, worn bore), the feeder pushes, slips, then pushes againโ€”felt as surging.

    Should I increase drive-roll tension to stop stuttering?

    Not as a first move. Too much tension can crush soft wire, create shavings, and make the problem worse. Fix drag first (tip/liner/lead routing), then set tension to the minimum that feeds reliably.

    Is stuttering wire feed an electrical problem?

    Sometimes, but most of the time itโ€™s mechanical friction in the feed path. Prove the wire path is smooth before chasing electrical faults.


    Internal Linking (Related WSP Guides)

  • Why Does My MIG Wire Feed Slip or Surge? (Fast Fix in 10 Minutes)

    If your MIG wire feed feels inconsistentโ€”slipping at the drive rolls, surging at the arc, or randomly stoppingโ€”youโ€™re usually dealing with a restriction in the wire path, not a โ€œbad welder.โ€ The goal is to restore smooth, low-friction wire travel from spool to contact tip. This guide walks you through a fast diagnosis and a one-variable-at-a-time fix.

    Where to Buy (Quick Fix Parts)

    Most likely failed components for slipping/surging feed:

    • Gun liner (clogged with debris, wrong size, kinked, or cut too long/short)
    • Contact tip (worn/oversized, spatter-packed, or wrong size for wire)
    • Drive roll setup (wrong groove, worn groove, or tension crushing the wire)

    Top Pick (Primary Fix)

    1-pk 42-3035-15 .030″-.035″ 15ft Liner Compatible with Tweco MIG Gun
    • ๐Ÿ”ง COMPATIBILITY NOTICE: This is a replacement part compatible with specific vehicle/machine models. Please carefully check the part number, vehicle model, and size before purchasing.
    • โš™๏ธ RELIABLE PERFORMANCE: Manufactured to meet or exceed standard replacement specifications, providing stable performance and reliable operation under normal working conditions.
    • ๐Ÿ›ก๏ธ DURABLE MATERIALS: Made from high-quality materials, resistant to wear, corrosion, and heat, ensuring a long lifespan and stable use.
    • ๐Ÿงฐ EASY INSTALLATION: Designed for direct replacement installation. No modifications required. Professional installation is recommended if you are unfamiliar with replacing parts.
    • ๐Ÿš— WIDE APPLICATION: Suitable for use with a wide range of vehicles and equipment such as cars, motorcycles, lawnmowers, snowmobiles, and other compatible machinery.

    Last update on 2026-06-26 / Affiliate links / Images from Amazon Product Advertising API

    Disclosure: As an Amazon Associate, I earn from qualifying purchases.

    Backup / Consumable Option

    Last update on 2026-06-26 / Affiliate links / Images from Amazon Product Advertising API

    Key Takeaways

    • If the drive rolls are slipping, donโ€™t crank tension firstโ€”check for a liner restriction and crushed wire.
    • If the arc surges, the wire is often sticking in the tip or dragging in the liner.
    • Set drive roll tension using the โ€œjust enough to feedโ€ method; too tight creates debris that clogs liners.
    • If itโ€™s not fixed in 2โ€“3 minutes, replace the consumable (tip/liner) before changing machine settings.

    Symptoms (Fast Diagnosis)

    • Drive rolls spin but wire doesnโ€™t move (or moves in bursts)
    • Wire feed feels jerky when you pull the trigger
    • Arc stutters/surges even with stable voltage/WFS settings
    • You see copper dust/shavings near the feeder (crushed wire)
    • Wire is flattened or has shaved edges after the drive rolls
    • Feed improves when you straighten the gun lead, then gets worse again

    Root Causes (Mapped to Symptoms)

    • Rollers spin but wire doesnโ€™t feed โ†’ liner restriction, wrong drive roll groove, tension too low or wire crushed from too much tension
    • Jerky feed / surging arc โ†’ contact tip worn/dirty, liner packed with debris, tight bends in lead, spool drag too high
    • Copper dust at feeder โ†’ drive roll tension too high crushing wire (debris migrates into liner)
    • Feed changes with lead position โ†’ kinked liner, damaged lead, liner not seated, too many tight bends

    Quick Fix (Do This First)

    Replace the most common failure components first:

    1. Contact tip (fastest swap)
    2. Liner (most common hidden restriction)
    3. Then re-set drive roll tension (donโ€™t over-tighten)

    Avoid over-adjusting voltage/WFS until the wire path is confirmed smooth.

    1-pk 42-3035-15 .030″-.035″ 15ft Liner Compatible with Tweco MIG Gun
    • ๐Ÿ”ง COMPATIBILITY NOTICE: This is a replacement part compatible with specific vehicle/machine models. Please carefully check the part number, vehicle model, and size before purchasing.
    • โš™๏ธ RELIABLE PERFORMANCE: Manufactured to meet or exceed standard replacement specifications, providing stable performance and reliable operation under normal working conditions.
    • ๐Ÿ›ก๏ธ DURABLE MATERIALS: Made from high-quality materials, resistant to wear, corrosion, and heat, ensuring a long lifespan and stable use.
    • ๐Ÿงฐ EASY INSTALLATION: Designed for direct replacement installation. No modifications required. Professional installation is recommended if you are unfamiliar with replacing parts.
    • ๐Ÿš— WIDE APPLICATION: Suitable for use with a wide range of vehicles and equipment such as cars, motorcycles, lawnmowers, snowmobiles, and other compatible machinery.

    Last update on 2026-06-26 / Affiliate links / Images from Amazon Product Advertising API

    Step-by-Step Fix

    1. Stop and inspect the wire after the drive rolls
      Cut 6โ€“12 in (150โ€“300 mm) off and look for flattening or shaving.
      • Flattened wire = too much tension or wrong groove.
    2. Check spool drag (donโ€™t let it freewheel, donโ€™t choke it)
      You want the spool to stop without coasting into a birdnest when you release the trigger. If drag is excessive, the feeder will slip.
    3. Confirm drive roll groove matches wire type and size
      • Solid wire typically uses V-groove.
      • Flux-core often prefers knurled (verify your feeder manual).
        Unknown (Verify): your specific feederโ€™s recommended roll type.
    4. Set drive roll tension correctly (the โ€œjust enoughโ€ method)
      Start low. Feed wire into a block of wood (or pinch lightly with gloved fingers at the gun end). Increase tension only until it feeds without slipping.
      If you crank tension to โ€œfixโ€ slipping, you often create crushed-wire debris that plugs the liner.
    5. Straighten the gun lead and test feed
      If feed improves when straight, you likely have liner drag, a kink, or a lead issue.
    6. Pull the nozzle and contact tip; test wire feed without the tip
      • If it feeds smooth with the tip removed, the tip is the restriction (wrong size, worn, spatter-packed).
    7. Replace/clean the liner if drag is suspected
      If youโ€™ve had a birdnest, crushed wire, or lots of dust, assume liner contamination. Replace is usually faster than trying to โ€œsaveโ€ it.
    8. Re-test with one change at a time
      Make one change, run a 10โ€“15 second feed test, then move to the next variable.

    Parts That Actually Fix This

    Gun liner
    Replace when:

    • Wire feels rough when feeding
    • You see debris/copper dust and feed is inconsistent
    • The lead position changes feed quality
      Adjust/clean when:
    • Minor contamination and you can blow it out safely (manufacturer guidance varies; replacement is often the most reliable)

    Contact tips
    Replace when:

    • Wire binds at the tip
    • Tip bore is worn (arc becomes inconsistent)
    • Tip is spatter-packed
      Adjust when:
    • You simply had spatter buildup you can remove and the bore isnโ€™t damaged

    Drive rolls
    Replace when:

    • Groove is visibly worn/polished and slips even at correct tension Adjust when:
    • Wrong groove selection or tension was incorrect

    Diffuser / nozzle (if applicable)
    Replace when:

    • Threads are damaged, tip wonโ€™t seat correctly, or gas coverage is inconsistent due to damage
      Adjust/clean when:
    • Itโ€™s just spatter buildup affecting seating

    Replace vs Adjust (Fast Decision Table)

    ProblemAdjust FirstReplace
    Drive rolls slippingReduce spool drag; confirm correct groove; set โ€œjust enoughโ€ tensionLiner (if debris); drive rolls (if worn)
    Surging/stuttering arc with stable settingsTest feed with tip removedContact tip (most common)
    Feed changes when lead is bentStraighten lead; check routingLiner or damaged lead
    Copper dust near feederBack off tension; confirm grooveLiner (likely contaminated)

    Rule: If not fixed in 2โ€“3 minutes โ†’ replace the consumable.

    Prevention Tips

    • Keep the gun lead as straight as practical; avoid tight loops on the floor.
    • Donโ€™t over-tighten drive rolls. Crushing wire creates debris that clogs liners.
    • Store wire dry and covered; rust/contamination increases liner drag.
    • Replace contact tips proactively if you notice arc instability or frequent spatter packing.
    • Routine interval: Unknown (Verify). It varies by duty cycle, wire type, environment, and technique.

    Safety Notes

    • Wear an ANSI Z87.1-rated helmet and safety glasses under the hood.
    • Use welding gloves when handling hot consumables and sharp wire.
    • Ensure proper ventilation; fume exposure increases during troubleshooting because you tend to do repeated short test welds.

    FAQ

    Why does my wire feed fine until I start welding, then it surges?
    Often the wire is binding at the contact tip under heat/spatter, or the liner drag shows up under load. Test feed with the tip removed to isolate it.

    Should I just tighten the drive rolls until it stops slipping?
    No. Over-tension crushes the wire, creates debris, and makes the liner clog worse. Set tension to โ€œjust enough to feed.โ€

    Can a bad ground clamp cause wire feed surging?
    A poor work clamp can cause arc instability that feels like surging, but it wonโ€™t usually cause true mechanical slipping at the feeder. Fix the wire path first, then confirm your clamp and connections.

    How do I know if my liner is the wrong size?
    If the wire drags even when everything is clean and straight, or youโ€™re using a different wire diameter/material than the gun was set up for, liner size mismatch is a common cause. Verify against your gun manual.

  • Why Your MIG Wire Burns Back Into the Contact Tip (Fast Fix)

    If your MIG wire keeps burning back and welding itself into the contact tip, youโ€™re not dealing with a โ€œmystery setting.โ€ Youโ€™ve got wire feed interruption (mechanical) or a wire speed/voltage mismatch (setup) thatโ€™s letting the arc eat the wire faster than itโ€™s being delivered. This guide walks you through a fast diagnosis and a clean, one-variable-at-a-time fix.

    Where to Buy (Quick Fix Parts)

    Most burnback events trace back to one of these failed/dirty components:

    • Contact tip (wrong size, worn, or spatter-packed) โ†’ wire drags, overheats, and fuses
    • Nozzle/diffuser area clogged with spatter โ†’ tip overheats, arc gets unstable
    • Liner friction (kinked/dirty/wrong size) โ†’ wire feed stutters and stalls

    Top Pick (Primary Fix)

    No verified ASIN available (omit AAWP box).

    Backup / Consumable Option

    No verified ASIN available (omit AAWP box).


    Key Takeaways

    • Burnback is usually wire feed stopping or wire speed too low for the voltage.
    • Replace the contact tip first if the wire is stickingโ€”donโ€™t waste time tuning around a bad tip.
    • Clean spatter from the nozzle/diffuser before changing settings.
    • If itโ€™s not fixed in 2โ€“3 minutes, replace the consumable and move on.
    • Donโ€™t ignore safety: eye protection, gloves, and ventilation matter even during โ€œquick fixes.โ€

    Symptoms (Fast Diagnosis)

    • Wire fuses to the contact tip at the end of a weld or during starts
    • Arc gets โ€œangry,โ€ then the wire suddenly stops feeding
    • You hear the drive rolls slip or the feeder motor strain
    • Tip is discolored/blue, nozzle is packed with spatter
    • Wire feels โ€œstickyโ€ when you pull it by hand through the gun (power off)

    Root Causes (Mapped to Symptoms)

    • Wire sticks in tip repeatedly โ†’ worn tip, wrong tip size, tip overheated, spatter packed in tip/nozzle
    • Burnback happens at the end of the weld โ†’ burnback setting (if equipped) too high, poor stop technique, wire speed too low
    • Burnback happens mid-weld โ†’ wire feed interruption: liner friction, kinked lead, drive roll tension wrong, spool drag too high
    • Starts are violent then burn back โ†’ stickout too short, starting on cold/dirty metal, wire speed too low for voltage

    Quick Fix (Do This First)

    Do these in order. Donโ€™t touch your machine settings until the mechanical stuff is clean.

    1. Kill power to the welder.
    2. Clip the wire at the contact tip, remove the nozzle, and inspect the tip.
    3. If the wire is fused: replace the contact tip (correct diameter for your wire).
    4. Clean spatter from the nozzle and diffuser area (spatter can trap heat and destabilize the arc).
    5. Straighten the gun lead and remove tight loops. A tight coil can create enough drag to stall the wire.

    No verified ASIN available (omit AAWP box).


    Step-by-Step Fix

    1. Confirm the basics (30 seconds)
      1. Wire diameter matches the contact tip size (example: .030 in wire needs a .030 in tip).
      2. Polarity is correct for your wire/process (unknownโ€”verify per wire manufacturer).
      3. Work clamp is clean and tight.
    2. Fix wire feed drag (most common โ€œhiddenโ€ cause)
      1. Lay the gun lead out as straight as possible.
      2. Check drive roll tension: tighten only enough to feed consistently. If itโ€™s crushing the wire, it can create shavings and drag.
      3. Check spool tension/brake: too tight increases drag; too loose can overrun (different problem, but still feed instability).
    3. Replace/clean the hot-end consumables
      1. Replace the contact tip if itโ€™s worn, ovaled, or packed with spatter.
      2. Clean/replace nozzle if itโ€™s heavily spattered.
      3. Inspect the diffuser for spatter buildup or damaged threads.
    4. Only then adjust settings (one variable at a time)
      1. If burnback is happening: increase wire speed slightly or reduce voltage slightly (small moves).
      2. If your machine has a burnback timer/setting: reduce it (unknownโ€”verify per machine manual).
      3. Re-test on clean scrap of the same thickness.
    5. Technique check (quick)
      1. Keep a consistent stickout (too short increases heat at the tip).
      2. Donโ€™t โ€œjamโ€ the wire into the puddleโ€”maintain a stable arc length.

    Parts That Actually Fix This

    Contact tip

    • Replace when: wire sticks, arc becomes unstable, tip bore is worn/ovaled, heavy spatter inside.
    • Adjust instead when: tip is clean and correct size, but settings are clearly off.

    Liner

    • Replace when: wire feed stutters with the lead straight, you feel drag pulling wire by hand (power off), visible shavings/dirt.
    • Adjust instead when: drag is caused by a tight lead coil or excessive drive roll/spool tension.

    Drive rolls

    • Replace when: grooves are worn, wrong groove type for wire, wire is slipping even with correct tension.
    • Adjust instead when: tension is simply too tight/too loose.

    Diffuser / nozzle

    • Replace when: threads are damaged, diffuser is packed with spatter, gas flow is disrupted (symptoms may include porosity too).
    • Adjust instead when: light spatter can be cleaned and gas coverage is stable.

    Replace vs Adjust (Fast Decision Table)

    ProblemAdjust FirstReplace
    Wire fuses to contact tipSlight wire speed increase (small step)Contact tip (correct size)
    Burnback happens mid-weldStraighten lead; reduce drive roll/spool dragLiner (if drag persists)
    Burnback at end of weldBurnback setting (if equipped) / stop techniqueContact tip if sticking continues
    Arc unstable + spatter-packed front endClean nozzle/diffuserNozzle/diffuser if damaged

    Rule: If not fixed in 2โ€“3 minutes โ†’ replace the consumable.


    Prevention Tips

    • Keep the gun lead straight during long welds; tight loops add liner drag.
    • Replace tips on a schedule if you run production (interval: unknownโ€”depends on amperage, wire type, and duty cycle).
    • Store wire dry and clean; contamination increases feeding issues and spatter.
    • Donโ€™t overtighten drive rollsโ€”crushed wire creates shavings that load the liner.
    • Safety: wear ANSI Z87.1 eye protection when chipping/cleaning, gloves for hot consumables, and ensure adequate ventilation for welding fumes.

    FAQ

    Why does burnback happen right when I stop welding?
    Often the wire stops feeding before the arc fully extinguishes (burnback timing/stop technique), or wire speed is too low for the voltage. If your machine has a burnback control, check the manual and reduce it (unknownโ€”verify).

    Can a wrong contact tip size cause burnback?
    Yes. Too tight increases drag and heat at the tip; too loose can cause poor current transfer and instability. Match tip size to wire diameter.

    Is burnback a gas problem?
    Usually no. Gas issues show up more as porosity/oxidation. Burnback is primarily wire feed + heat balance at the tip.

    Do I need to replace the liner every time?
    No. Straighten the lead and correct tension first. Replace the liner when drag persists and feeding is inconsistent with everything else correct.


    Internal Linking


Try Amazon Prime Free