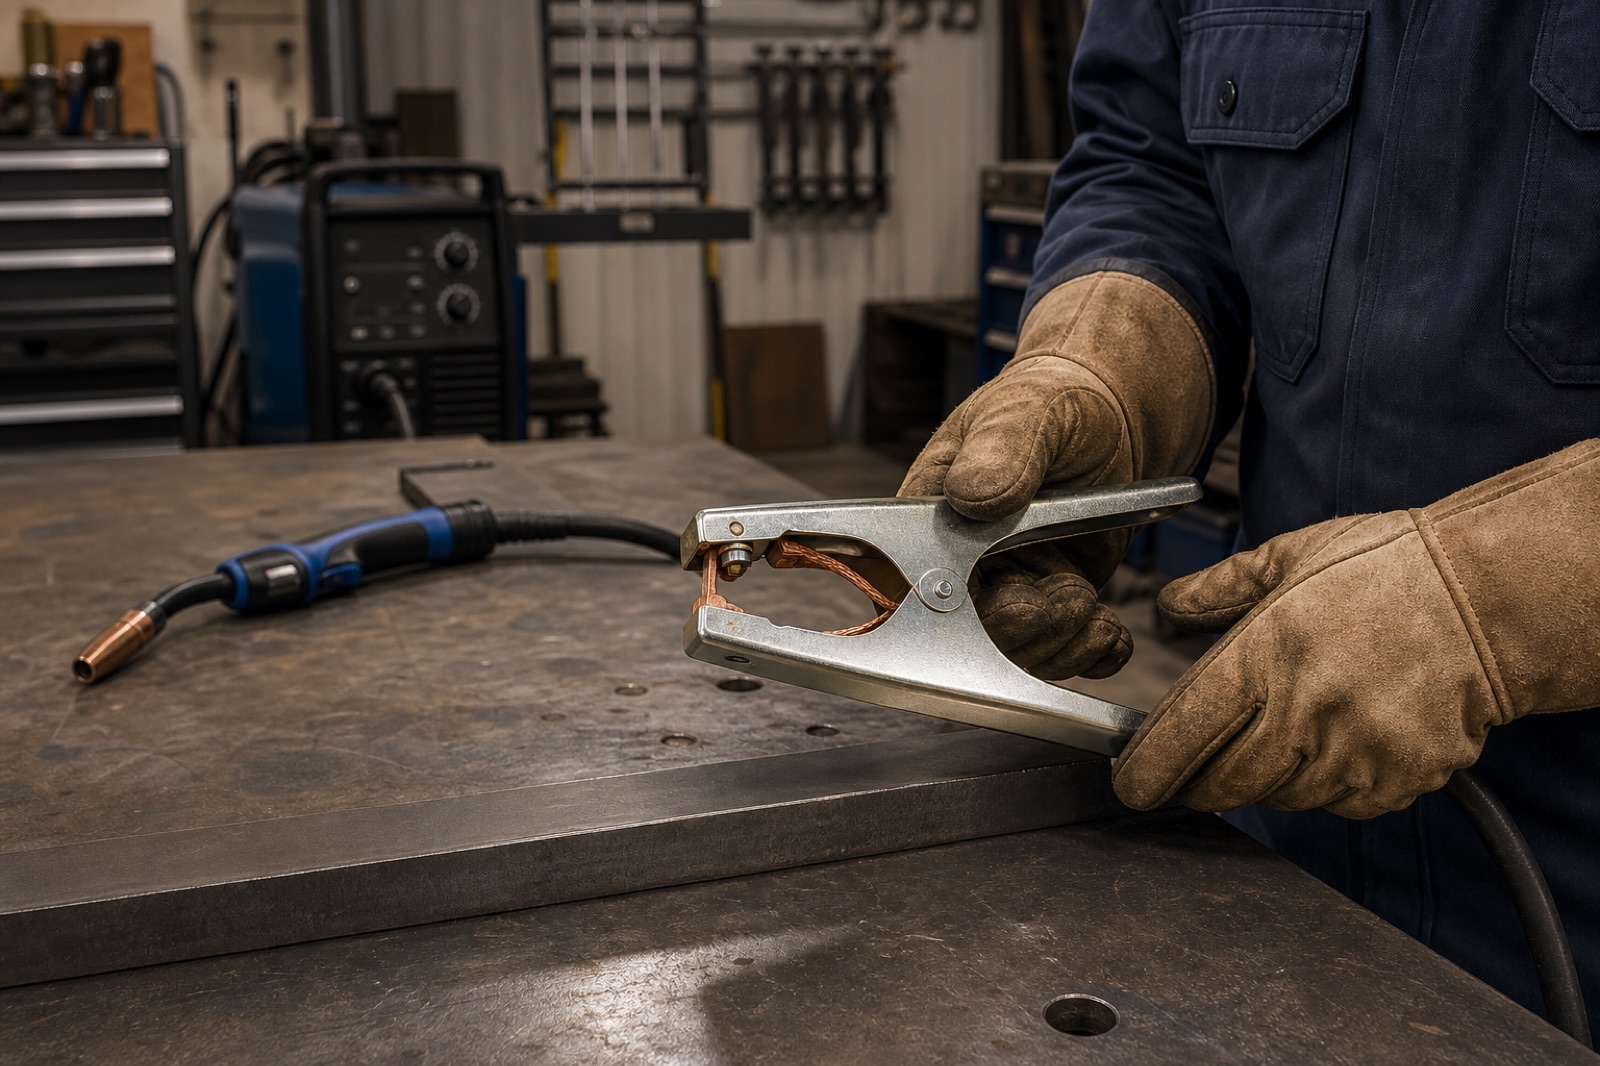
Your wire is feeding, the fan is running, and the gun trigger sounds normal—but the arc will not start, or it starts only after you drag the wire across the joint. Before replacing the gun, control board, or drive motor, inspect the welding current return path. A loose, dirty, undersized, or damaged work-clamp connection can interrupt the circuit even when the wire-feed system is working perfectly.
This checklist focuses on the work clamp, cable, and connection points. It applies broadly to MIG and flux-cored machines, but the owner’s manual for your exact welder remains the final authority for cable size, polarity, connector type, and service procedures.
Quick answer: what should you check first?
- Turn the welder off and disconnect input power before inspecting cables or hardware.
- Move the work clamp onto clean, bare steel close to the weld.
- Remove paint, rust, mill scale, oil, and weld spatter from the contact area.
- Inspect both clamp jaws and the cable-to-clamp connection for looseness, heat damage, oxidation, or broken strands.
- Confirm the work cable and gun polarity match the wire and shielding setup in the machine manual.
- Reconnect power and test on clean scrap steel using the manufacturer’s recommended settings.
Why the clamp matters when the wire still feeds
The wire-feed motor and the welding output circuit are related, but they are not the same path. The trigger can energize the feeder while a bad work connection prevents useful welding current from returning to the power source. That is why “wire feeds but no arc” can point to the clamp even though the machine appears alive.
OSHA requires work leads to be firmly attached and says welding connections should be mechanically strong and electrically adequate. It also specifically calls for removing adhering metal particles from magnetic clamp contact surfaces. Miller’s Millermatic 142 manual warns that loose work-clamp hardware can cause poor weld performance and excessive heating.
A five-minute work-clamp inspection
1. Make the inspection safe
Switch the welder off and disconnect its input power before opening a case, tightening internal terminals, or handling damaged insulation. Let recently used cables and connectors cool. Stop using the machine if insulation is cut through, copper is exposed, a connector is badly burned, or the clamp becomes hot enough to discolor or soften nearby insulation.
2. Improve the contact point
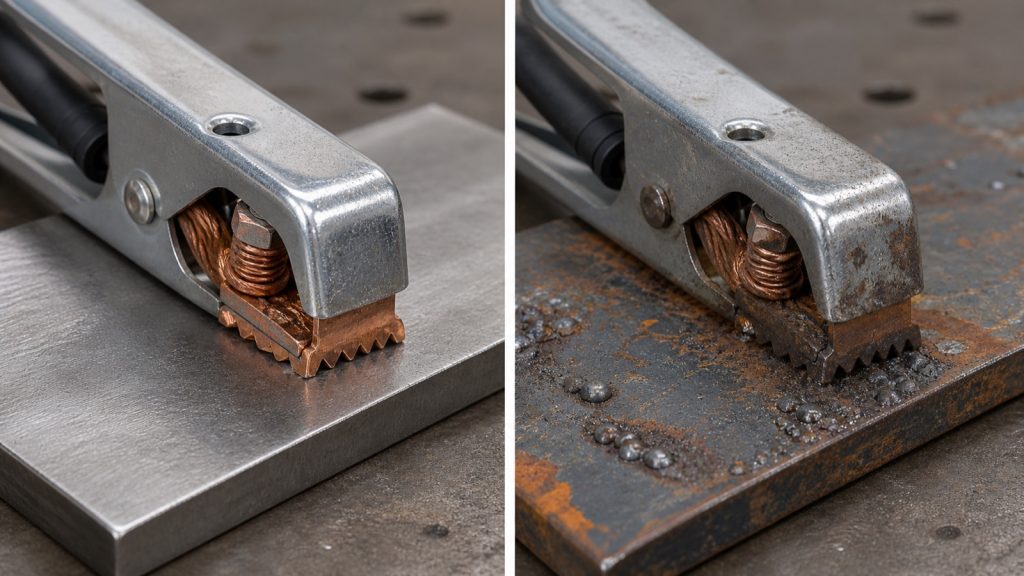
Attach the clamp directly to the workpiece or to a properly bonded fixture. Choose a flat area of clean bare metal, as close to the weld as practical. Paint, powder coat, rust, heavy mill scale, adhesive, oil, and spatter can reduce the area that actually carries current. A clamp hanging on an edge by one tooth may feel secure while making poor electrical contact.
3. Inspect the jaws and spring pressure
Open the clamp and inspect both contact faces. Clean away spatter and oxidation with an appropriate hand tool while the machine is de-energized. Look for pitted copper contacts, twisted jaws, a weak or broken spring, and a hinge that prevents the jaws from closing squarely. Replace the clamp if it cannot maintain firm, broad contact.
4. Check the cable-to-clamp hardware
Follow the work cable into the clamp handle. The lug, braid, fastener, washers, and nut should be intact and tight according to the manufacturer’s design. Darkened copper, melted insulation, green corrosion, loosened hardware, or broken cable strands indicate resistance and heat. Do not improvise undersized fasteners or bypass strain relief.
5. Inspect the rest of the return path
Run your hand along the disconnected cable and look for hard spots, crushed sections, cuts, repaired areas, or a loose machine connector. Confirm plug-style connectors are fully seated and locked. If you are using a table or fixture as part of the return path, verify that joints between the clamp and workpiece are electrically bonded; paint and loosely bolted sections can break the path.
Symptoms and likely clamp-side checks
| Symptom | Likely return-path issue | First check |
|---|---|---|
| Wire feeds but no arc | Open or very poor work connection | Move the clamp to clean bare steel and reseat the machine connector |
| Arc starts only when wire scratches the work | Marginal contact or contaminated surface | Clean the contact area and inspect jaw pressure |
| Arc is erratic or sounds harsh | Loose connection, damaged cable, or wrong polarity | Tighten approved connections and verify polarity in the manual |
| Clamp or cable lug gets hot | High resistance at the jaw, lug, or broken strands | Stop, cool, inspect, and replace damaged parts |
Work clamp versus equipment ground
Welders often say “ground clamp,” but the clamp on the welding lead is normally the work clamp: it completes the welding current circuit back to the power source. The safety grounding conductor for the machine frame serves a different protective purpose. Do not treat building conduit, chains, wire rope, hoists, or random grounded structures as substitutes for the correct work lead. OSHA prohibits several of those paths from carrying welding current.
When cleaning is not enough
Replace or have qualified personnel repair the work lead assembly when the clamp cannot hold firmly, contact faces are badly eroded, the cable is undersized for the machine, strands are broken, insulation is damaged, or connectors show repeated overheating. Match the replacement cable, clamp, lug, and connector to the welder’s rated output and duty cycle. If a clean, tight return path does not restore the arc, continue with the gun connection, contact tip, polarity block, output terminals, and machine-specific diagnostics.
For related checks, see our guides to poor MIG arc stability and MIG contact-tip overheating.
Frequently asked questions
Can a bad work clamp let the wire feed normally?
Yes. The feeder can operate even when the welding-current return path is open or highly resistive. That makes the clamp and work cable an early check for a machine that feeds wire but will not establish an arc.
Should the clamp be close to the weld?
Usually, yes. Place it on clean metal as close to the weld as practical while following the equipment manual and job-specific requirements. This reduces unnecessary current paths through hinges, bearings, electronics, or poorly bonded joints.
Is a hot work clamp normal?
Noticeable heating can indicate excessive resistance, loose hardware, inadequate contact area, damaged conductors, an undersized assembly, or use beyond the component’s rating. Stop and correct the cause rather than continuing until the clamp or insulation fails.

Leave a Reply