Tag: TIG torch

  • TIG Torch Gas Leak Troubleshooting: Argon Loss, Black Tungsten, Porosity, and Torch Seal Checks

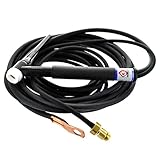
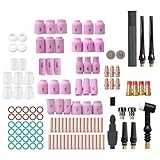
    If a TIG torch has a gas leak, the weld may show black tungsten, gray weld color, porosity, sugaring on stainless, unstable starts, or a loud uneven gas hiss even when the regulator shows normal flow. Start at the cylinder and work forward to the cup. A TIG gas leak can be at the regulator, machine inlet, solenoid, torch hose, power cable/gas hose, torch head, collet body, gas lens, cup seal, back cap O-ring, or torch valve.

    The fast check is to verify 100% argon, confirm flow at the torch with a flow tester, inspect the cup/gas lens/collet body/back cap, then leak-test fittings with approved leak-check solution. Do not raise flow to hide a leak. Too much flow can pull air into the shielding envelope and make the weld dirtier. For related TIG shielding symptoms, see TIG shielding gas coverage troubleshooting, why TIG tungsten turns black, and TIG welds looking sooty.

    Common Symptoms

    • Tungsten turns black, blue, gray, or chalky after welding.
    • Weld bead has porosity, soot, oxidation, or gray color.
    • Stainless shows sugaring, crusting, or dark heat tint near the root.
    • Arc starts unstable even with clean tungsten.
    • Gas hiss sounds loud, weak, pulsed, or uneven at the cup.
    • Regulator flow reads normal, but flow at the cup is low.
    • Shielding improves when the torch hose is moved or held straight.
    • Back cap area hisses during post-flow.
    • Gas flow stops too early and tungsten discolors after arc-off.

    Likely Causes

    CauseWhat It DoesQuick Check
    Loose regulator or hose fittingLeaks argon before it reaches the machine or torchLeak-check fittings with solution
    Cracked TIG gas hosePulls air or loses shielding gas before the cupFlex hose during post-flow and check for bubbles
    Loose collet body or gas lensLeaks inside the torch head or disrupts flowRemove cup and verify body is seated tight
    Damaged back cap O-ringLeaks around the rear of the torch headInspect O-ring for cuts, flattening, heat damage, or missing seal
    Cracked cup or wrong insulatorBreaks the gas seal and creates turbulenceReplace cup and confirm correct gasket/insulator stack
    Plugged gas lens screenRestricts or distorts argon flowHold lens to light and inspect screen
    Bad torch valveLeaks or fails to shut off on valve-style torchesClose valve and check if gas continues
    Short post-flowLets hot tungsten oxidize after weldingIncrease post-flow and hold torch over weld

    Fast Diagnosis Sequence

    1. Confirm the cylinder is 100% argon for normal TIG work unless the procedure calls for another approved shielding gas.
    2. Check the regulator, flowmeter, and cylinder connection.
    3. Confirm gas flow at the torch cup, not only at the regulator.
    4. Inspect the cup for cracks, chips, heat damage, wrong size, or poor seating.
    5. Remove and inspect the collet body or gas lens. It must seat fully in the torch head.
    6. Inspect the back cap O-ring and back cap threads.
    7. Check torch hose, power cable/gas hose, machine inlet, and torch valve for leaks.
    8. Use leak-check solution on fittings. Do not use flame.
    9. Reduce excessive flow if the gas sounds like a hard blast instead of a smooth shield.
    10. Retest with clean tungsten, normal stickout, and no drafts.

    Inspection Steps

    • Regulator and flowmeter: Confirm proper connection, stable flow reading, no damaged CGA fitting, and no cracked hose barb.
    • Machine gas inlet/outlet: Inspect loose fittings, cracked internal hose, and gas solenoid area only with power disconnected.
    • Torch hose: Look for cuts, burned sections, kinks, loose crimps, or leaks that appear only when the hose is flexed.
    • Torch head: Inspect threads, heat damage, loose head-to-body connection, and valve packing on valve torches.
    • Collet body/gas lens: Verify it is the correct type for the torch series and cup system. A loose or mismatched body can leak or disturb gas flow.
    • Back cap: Check O-ring, cap length, threads, and whether the tungsten is clamped without bottoming the cap incorrectly.
    • Cup and insulator: Confirm the cup is not cracked and the correct gasket/insulator is installed for standard or gas-lens setup.
    • Post-flow: Gas must continue long enough to shield the hot tungsten and cooling weld area.

    Test Procedures

    • Cup flow test: Use a TIG flow tester at the cup. A regulator reading alone does not prove flow at the torch.
    • Bubble leak test: Apply approved leak-check solution to fittings during flow or post-flow. Bubbles identify leakage.
    • Hose flex test: Run post-flow and gently flex the hose. If flow or bubbles change, replace damaged hose or cable assembly.
    • Back cap test: Listen and check around the back cap during post-flow. Replace damaged O-rings and verify correct cap.
    • Front-end swap test: Install a known-good cup, collet body/gas lens, collet, back cap, and insulator. If shielding improves, the leak or turbulence was in the torch front end.
    • Post-flow test: Hold the torch still after arc-off. If the tungsten stays bright after increasing post-flow, the issue was hot tungsten oxidation.

    Root Cause Analysis

    TIG shielding must protect the tungsten, arc, filler rod end, and weld puddle from oxygen and nitrogen. A leak before the torch wastes argon and can lower flow at the cup. A leak or bad seal inside the torch head can mix air into the shielding zone. A damaged gas lens or cracked cup can create turbulence even when flow volume looks correct.

    Gas leaks are often mistaken for bad tungsten or dirty filler. The tungsten turns black, the weld gets sooty, and the operator increases gas flow. If the actual problem is a cracked cup, missing O-ring, loose gas lens, or leaking hose, more gas may make turbulence worse. Correct the seal and gas path first, then tune cup size, flow, torch angle, and stickout.

    Compatibility Notes

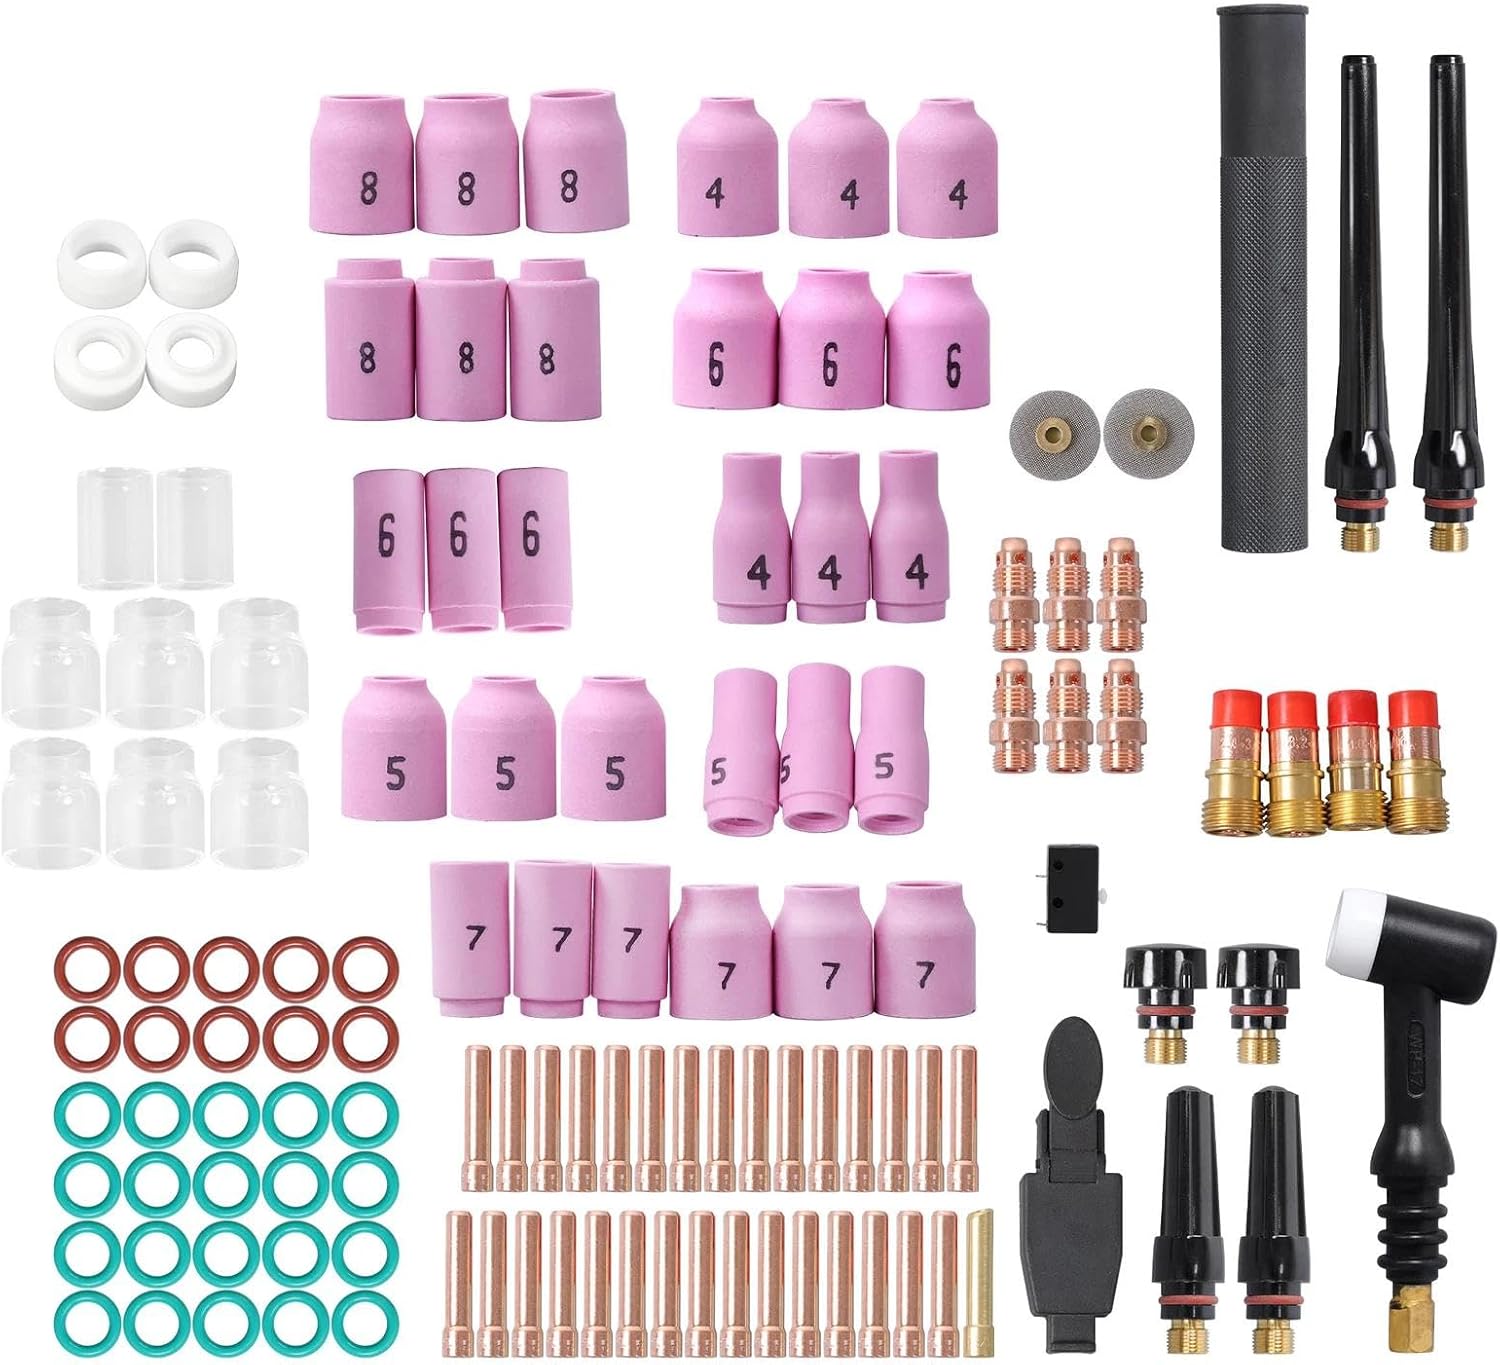
    Do not order TIG torch gas parts by cup size alone. Verify torch series, cooling type, torch head style, collet size, collet body style, gas lens style, cup thread or push-on style, back cap length, O-ring, gasket/insulator, power connector, gas connector, and machine connection. Common 9/20 and 17/18/26-style parts are not automatically interchangeable.

    Gas-lens conversions also require the correct insulator, cup, collet body, collet, and sealing ring where used. Mixing standard collet bodies with gas-lens cups, or using the wrong insulator stack, can create leaks at the torch head. If the torch model or consumable system is not confirmed, mark the part as Unknown (Verify).

    What To Verify Before Ordering

    • TIG torch series: 9, 17, 18, 20, 26, or manufacturer-specific equivalent.
    • Air-cooled or water-cooled torch.
    • Valve torch or machine-solenoid torch.
    • One-piece or two-piece cable/hose arrangement.
    • Back cap length and O-ring style.
    • Collet size matching tungsten diameter.
    • Standard collet body or gas lens collet body.
    • Cup style, cup size, insulator/gasket, and sealing ring.
    • Machine gas connector, quick connector, or separate gas hose fitting.
    • Argon regulator/flowmeter outlet fitting and hose size.

    Common Wrong-Part Mistakes

    • Installing a gas-lens cup without the correct gas-lens body and insulator.
    • Using a 17/18/26 front-end kit on a 9/20 torch.
    • Replacing tungsten repeatedly while leaving a cracked cup in service.
    • Using a back cap with a missing, cut, or flattened O-ring.
    • Over-tightening ceramic cups until they crack.
    • Using a MIG flowmeter or wrong-pressure flow device on a TIG torch setup.
    • Raising argon flow too high and creating turbulence instead of fixing the leak.

    Field Fix vs Proper Fix

    ProblemField FixProper Fix
    Back cap leakReseat cap and reduce movementReplace O-ring or correct back cap
    Cracked cupInstall spare cupVerify correct cup, insulator, and torch angle/stickout
    Loose gas lensSnug gas lens bodyReplace damaged gas lens, filter, seal, or torch threads
    Leaking hoseStop using the torchReplace hose, cable assembly, or torch
    Black tungsten after arc-offAdd post-flowCorrect post-flow, leaks, drafts, and cup coverage

    Related Failure Paths

    • Black tungsten: Hot tungsten is exposed to oxygen from poor shielding, leaks, or short post-flow.
    • Porosity: Air enters the weld puddle through a leak, draft, bad cup seal, or contaminated gas path.
    • Arc instability: Gas turbulence and tungsten oxidation make starts and arc focus inconsistent.
    • Sugaring on stainless: Shielding loss at the puddle or root side allows heavy oxidation.
    • Short consumable life: Leaks and overheating damage cups, collets, gas lenses, and O-rings.

    Safety Notes

    • Close the cylinder valve and bleed pressure before removing gas fittings.
    • Disconnect input power before opening machine covers or checking internal gas hoses.
    • Use approved leak-check solution. Never use flame to find gas leaks.
    • Argon can displace oxygen in confined spaces. Maintain ventilation.
    • Do not weld with cracked torch hoses, burned cables, or leaking torch heads.
    • Hot cups and torch heads can burn skin and gloves; allow cooling before disassembly.
    • Use correct PPE and follow the torch and machine manual for service limits.

    Sources Checked

    Sources checked include TIG torch parts catalog data, TIG shielding gas flow references, torch manual troubleshooting notes, and related Weld Support Parts TIG shielding articles. Final replacement must be verified by torch series, cable/hose style, back cap/O-ring, cup system, collet body or gas lens type, tungsten diameter, machine connection, and shielding gas setup.

  • TIG Post-Flow Setting Troubleshooting: Black Tungsten, Porosity, Gas Waste, and Torch Cooling

    TIG post-flow is the shielding gas that keeps flowing after the arc stops. If it is too short, the hot tungsten and cooling weld crater are exposed to air, causing black, blue, gray, or crusty tungsten, rough restarts, porosity, and contaminated weld starts. If post-flow is too long, weld quality may be fine, but argon usage goes up fast during tack welding or short beads.

    Start by watching the tungsten after arc stop. If the tungsten is still glowing when argon shuts off, increase post-flow. If the tungsten stays clean but gas keeps flowing long after the torch cools, reduce post-flow in small steps. Do not fix black tungsten by only increasing flow rate; a cracked cup, leaking back cap O-ring, clogged gas lens, or loose torch fitting can still expose the electrode to oxygen.

    Related TIG checks include why TIG tungsten turns black, TIG porosity troubleshooting, sooty TIG weld gas coverage fixes, and TIG cup size and gas lens selection.

    Common Symptoms

    SymptomLikely Post-Flow IssueFirst Check
    Tungsten turns black after weldPost-flow too short or gas leakIncrease post-flow and inspect gas path
    Tungsten turns blue or grayHot tungsten exposed during coolingWatch whether gas stops before glow is gone
    Rough arc restartOxidized tungsten from previous stopRegrind tungsten and extend post-flow
    Porosity at crater or restartWeld pool loses shielding while coolingHold torch over crater during post-flow
    Argon bottle empties quicklyPost-flow too long for short weldsReduce time gradually after tungsten stays clean

    What Post-Flow Does

    Post-flow protects three hot areas after the arc shuts off: the tungsten, the weld crater, and the end of the filler rod if it remains inside the gas envelope. Tungsten can oxidize after the bead looks finished because the electrode remains hot longer than many operators expect. The goal is enough shielding to let the tungsten cool without discoloration, not maximum gas flow for every weld.

    Starting Point for Post-Flow

    A common field rule is about 1 second of post-flow per 10 amps of welding current. Some Miller GTAW guidance also lists 10โ€“15 seconds as a corrective range when inadequate post-flow is causing tungsten or arc problems. Use those as starting points, then tune by tungsten color, material, torch heat, tungsten size, and weld length.

    Welding CurrentCommon Starting RangeWhat To Watch
    50 amps5 secondsTungsten should not color after gas stops
    80 amps8 secondsGood range for many light TIG jobs
    120 amps12 secondsCheck torch heat and tungsten color
    150 amps15 secondsOften needs longer protection on hot torch setups
    200 amps20 secondsVerify torch rating and cooling; gas use increases quickly

    Inspection Steps

    1. Confirm the gas. Most TIG work uses 100% argon. Do not use MIG gas with CO2 or oxygen for TIG.
    2. Watch tungsten color. Black, gray, blue, or crusted tungsten after arc stop points to oxygen exposure, contamination, or too little post-flow.
    3. Hold the torch still. Keep the cup over the crater until post-flow ends. Moving away early defeats the setting.
    4. Check flow at the cup. A regulator reading does not prove gas is reaching the tungsten.
    5. Inspect the cup. Replace cracked, chipped, loose, or overheated cups.
    6. Inspect the gas lens or collet body. Blocked screens or damaged gas passages can cause poor coverage even with long post-flow.
    7. Check the back cap O-ring. A damaged O-ring can pull air into the torch and oxidize tungsten.
    8. Check hoses and fittings. Use approved leak-check methods and repair leaks before welding.
    9. Adjust gradually. Add or subtract a few seconds at a time, then retest on clean material.

    Post-Flow Too Short vs Too Long

    ConditionResultCorrective Action
    Too shortBlack tungsten, rough restarts, crater oxidationIncrease time and hold torch over weld
    Too longHigh argon consumption with no quality gainReduce time after tungsten remains clean
    Correct time but black tungstenLeak, cracked cup, bad O-ring, dirty gas lensInspect torch and gas path
    Correct time but porosityDraft, contamination, wrong cup, no purgeCheck shielding coverage and base-metal prep

    Field Fix vs Proper Fix

    ProblemField FixProper Fix
    Tungsten blackens after stopAdd post-flow timeSet time by amps and repair leaks or worn torch parts
    Gas wastes during tacksLower post-flow slightlyUse a repeatable tack schedule that still protects tungsten
    Crater porosityHold torch over crater longerCorrect post-flow, torch angle, cup size, and cleanliness
    Blue tungsten on aluminumAdd post-flowCheck AC heat, torch cooling, gas lens, and cup size
    Soot remains after increasing post-flowClean cup and tungstenFix gas coverage, contaminated material, or wrong gas

    Common Wrong-Part Mistakes

    • Replacing tungsten repeatedly while ignoring a leaking back cap O-ring.
    • Using a cracked cup and trying to compensate with longer post-flow.
    • Installing gas lens parts that do not match the torch series or cup setup.
    • Using a collet that does not match tungsten diameter, causing poor alignment and overheating.
    • Turning gas flow too high and creating turbulence instead of fixing post-flow time.

    Compatibility Notes

    Post-flow is a machine setting, but the correct result depends on torch family, cup size, gas lens or standard collet body, tungsten diameter, amperage, material, and torch cooling. Consumables for WP-9/20-style torches and WP-17/18/26-style torches are not automatically interchangeable. Verify torch series and tungsten diameter before replacing cups, collets, gas lenses, or back caps.

    Related Failure Paths

    • Black tungsten from oxygen exposure after arc stop.
    • Rough arc starts from oxidized tungsten.
    • TIG porosity at crater or restart.
    • Sooty TIG welds caused by poor gas coverage.
    • Cracked cups or clogged gas lenses mistaken for bad post-flow.
    • High argon use from excessive post-flow during tack welding.

    Safety Notes

    • Let tungsten, cups, and torch parts cool before handling.
    • Secure argon cylinders upright and protect regulators from impact.
    • Argon can displace oxygen in confined areas; use ventilation and confined-space controls where required.
    • Use eye protection when grinding tungsten.
    • Do not weld through suspected gas leaks or damaged hoses.

    Sources Checked

    • Weld Support Parts TIG tungsten discoloration support page.
    • Weld Support Parts TIG porosity and soot troubleshooting pages.
    • Weld Support Parts TIG cup size and gas lens support page.
    • CK Worldwide TIG troubleshooting and gas shielding guidance.
    • Miller GTAW troubleshooting guidance.
  • Square Wave 205 TIG Gas Lens vs Standard Collet Body: When to Use Each Setup

    On a Lincoln Square Wave 205, a gas lens is not an automatic upgrade for every TIG weld. Use a gas lens when you need smoother argon coverage, longer tungsten stickout, better visibility around corners, cleaner stainless work, or better shielding on aluminum outside a tight cup position. Use a standard collet body when the joint is easy to reach, stickout is short, space is tight, amperage is moderate, or you want a simple low-cost torch setup.

    If tungsten is turning black, the arc is wandering, or the weld is sugaring/oxidizing, a gas lens may help only after the basics are correct: 100% argon, leak-free torch, clean cup, good collet grip, proper tungsten prep, enough post-flow, clean work metal, and a solid work clamp. A gas lens cannot fix dirty base metal, wrong polarity, poor tungsten grind, or a leaking back cap.

    What Each Part Does

    A standard collet body holds the tungsten collet and routes shielding gas through the torch cup. It is compact, inexpensive, and works well for many normal DC steel, stainless, and basic AC aluminum TIG jobs.

    A gas lens replaces the standard collet body with a screen/diffuser assembly that smooths the gas stream before it exits the cup. The cleaner gas column can improve shielding coverage and allow more tungsten stickout when access or visibility requires it.

    Compatibility Notes for the Square Wave 205

    The Lincoln Square Wave 205 is an AC/DC TIG and Stick machine with AC frequency, AC balance, pulse, and post-flow controls. Those controls affect arc focus, aluminum cleaning/penetration balance, heat input, and tungsten shielding time, but torch consumable fitment depends on the installed torch series, not the machine name alone.

    Do not order a gas lens by โ€œSquare Wave 205โ€ only. Verify torch series first. Common air-cooled TIG torches may be 9/20-style or 17/18/26-style depending on the package or replacement torch. Gas lens collet bodies, collets, cups, insulators, and back caps are torch-family specific. If the torch series is unknown, fitment is Unknown (Verify).

    For related Square Wave support, see the Lincoln Electric Square Wave 205 overview, unstable TIG arc from poor tungsten prep, why TIG tungsten turns black, gas lens support, and TIG collet support.

    Gas Lens vs Standard Collet Body

    FeatureGas LensStandard Collet Body
    Gas coverageSmoother, wider shielding envelopeGood for normal short-stickout work
    Tungsten stickoutAllows more stickout when neededBest with shorter stickout
    VisibilityBetter for corners, cups pulled back, and tight anglesGood when the joint is open
    CostHigherLower
    Durability in dirty workScreen can clog from spatter/debrisSimpler and easier to clean
    Best useStainless, aluminum, corners, longer stickoutGeneral TIG, practice, easy-access joints

    When a Gas Lens Helps

    • Longer tungsten stickout: Better access into corners, tubes, fillets, and tight joints.
    • Cleaner stainless welds: Better shielding can reduce oxidation when gas coverage was the weak point.
    • Aluminum edge work: A smoother gas envelope can help when cup angle is hard to maintain.
    • Arc wandering from gas turbulence: Helps only if tungsten prep and work return are already correct.
    • Better puddle visibility: Lets the operator pull the cup back slightly without immediately losing shielding.

    When a Standard Collet Body Is Better

    • Short welds on clean steel where shielding is already stable.
    • Practice work where low-cost consumables matter.
    • Dirty repair work where a gas lens screen may clog quickly.
    • Very tight spaces where the gas lens cup/insulator stack is too bulky.
    • High-spatter or awkward tack work where cups get damaged often.

    Common Symptoms That Lead Welders to Try a Gas Lens

    SymptomGas Lens May Help?Check First
    Black tungstenSometimesPost-flow, leaks, cup cracks, argon flow
    Arc wanderingSometimesTungsten grind, contamination, work clamp
    Stainless turns grayYes, if shielding is weakGas flow, travel speed, cup size
    Aluminum puddle is dirtySometimesOxide removal, AC balance, clean filler
    Tungsten slipsNoCollet and collet body wear
    No gas at torchNoCylinder, solenoid, hose, torch leak

    What To Verify Before Ordering

    • Torch series: 9/20, 17/18/26, or other.
    • Tungsten diameter: 1/16, 3/32, 1/8 in, or metric equivalent.
    • Gas lens collet body size that matches tungsten diameter.
    • Correct collet for the gas lens setup.
    • Correct cup type and cup gasket/insulator for gas lens use.
    • Back cap and O-ring condition.
    • Whether a stubby gas lens kit or standard-length gas lens is being used.

    Common Wrong-Part Mistakes

    • Buying 17/18/26 gas lens parts for a 9/20 torch.
    • Buying a gas lens body but reusing the wrong cup or insulator.
    • Using a 3/32 collet body with 1/16 tungsten.
    • Installing a gas lens but keeping excessive argon flow that creates turbulence.
    • Expecting a gas lens to fix a cracked cup, leaking torch, or dirty tungsten.
    • Using long stickout without increasing cup size or confirming shielding coverage.

    Test Procedure

    1. Start with a clean standard collet body, correct collet, and short tungsten stickout.
    2. Run a bead on clean scrap and note tungsten color, arc stability, and weld appearance.
    3. Install the verified gas lens setup with the same tungsten size and clean cup.
    4. Set argon flow conservatively; do not assume more CFH is better.
    5. Run the same bead with the same amperage and travel angle.
    6. If the gas lens improves color and arc stability, shielding coverage was likely part of the problem.
    7. If nothing improves, inspect gas leaks, tungsten prep, work clamp, base-metal cleaning, and Square Wave 205 AC settings.

    Field Fix vs Proper Fix

    Field fix: Use a clean cup, fresh tungsten, short stickout, stable argon flow, and a standard collet body if the joint is easy to reach.

    Proper fix: Match the gas lens kit to the exact TIG torch series and tungsten diameter, replace worn collets or leaking O-rings, verify post-flow, and document cup size, argon flow, tungsten size, AC balance, AC frequency, and material type.

    Safety Notes

    • Disconnect power before changing torch consumables.
    • Let the torch cool before removing cups or collet bodies.
    • Use eye and respiratory protection when grinding tungsten.
    • Do not weld with damaged cups, leaking gas fittings, or loose torch parts.
    • Use ventilation and keep your head out of fumes.
  • Square Wave 205 TIG Arc Wandering Causes: Tungsten, Gas, Ground, and AC Setup Checks

    If a Lincoln Square Wave 205 TIG arc wanders, splits, flutters, or refuses to stay centered on the joint, start with tungsten condition and torch setup before blaming the machine. Arc wandering is usually caused by contaminated tungsten, poor tungsten grind direction, too much tungsten stickout, weak argon shielding, a loose work clamp, damaged torch consumables, or AC settings that do not match the aluminum joint.

    The Square Wave 205 is an AC/DC TIG and Stick machine with AC frequency, AC balance, pulse, and post-flow control. Those controls help fine-tune bead shape and cleaning action, but they will not stabilize a dirty tungsten, leaking torch, cracked cup, loose collet, poor work return, or contaminated base metal.

    Common Symptoms

    • Arc moves side to side: Tungsten point, work lead, or gas coverage is unstable.
    • Arc splits into two paths: Tungsten is contaminated, balled unevenly, or ground poorly.
    • Arc starts clean then wanders: Tungsten is overheating, dipping, or losing shielding after the puddle forms.
    • Arc wanders on aluminum only: AC balance, oxide cleaning, tungsten shape, or base-metal cleaning is suspect.
    • Arc wanders on steel/stainless: Dirty tungsten, poor work clamp, long arc length, or contaminated filler is likely.
    • Black tungsten after welding: Shielding gas or post-flow is not protecting the electrode.
    • Puddle chases away from the joint: Work angle, arc length, magnetic arc blow, or uneven heat path may be involved.

    What Arc Wandering Means

    In TIG welding, the tungsten electrode carries the arc while inert shielding gas protects the tungsten and puddle. A stable arc needs a clean tungsten point, a consistent electrical path, and controlled shielding. If the electrode surface is contaminated or the current path is unstable, the arc can leave the tip center and hunt for another path to the workpiece.

    Square Wave 205 Compatibility Notes

    Lincoln lists the Square Wave 205 as an AC/DC TIG and Stick welder with AC frequency control, AC balance control, pulse, and post-flow features. Use those machine controls only after verifying torch condition, tungsten prep, argon shielding, and work clamp connection.

    For machine-family context, see the Lincoln Electric Square Wave 205 overview. For related support, see unstable TIG arc from poor tungsten prep, why TIG tungsten turns black, TIG torch support, and tungsten prep support.

    Fast Checks Before Changing Machine Settings

    1. Cut off any dipped or contaminated tungsten end.
    2. Regrind lengthwise on a clean wheel dedicated to tungsten.
    3. Confirm the tungsten diameter matches amperage.
    4. Reduce tungsten stickout unless the cup/gas lens setup supports it.
    5. Inspect the cup, collet, collet body, gas lens, back cap, and O-ring.
    6. Confirm 100% argon and stable gas flow.
    7. Move the work clamp to clean metal near the weld zone.
    8. Clean the base metal and filler rod before testing again.

    Arc Wandering Diagnosis Table

    SymptomLikely CauseFirst Check
    Arc wanders immediatelyPoor tungsten grind or dirty tipCut back and regrind lengthwise
    Arc splitsContaminated or uneven tungstenInspect tip under light
    Arc wanders after a few secondsTungsten overheating or losing shieldingCheck amperage, stickout, cup, and post-flow
    Arc favors one side of jointPoor ground path or joint geometryMove work clamp and shorten arc
    Arc wanders on aluminumOxide, AC balance, dirty tungsten, poor cleaningClean aluminum and reset AC setup
    Arc wanders with black tungstenGas leak or post-flow problemCheck argon path and torch seals

    Tungsten Prep Causes

    Poor tungsten prep is the first place to look. Grinding marks should run lengthwise with the electrode. Circular grind marks, a flat broken point, a dipped tip, or a point contaminated by a dirty grinding wheel can make the arc leave the center of the tungsten. If the tungsten touched the puddle or filler rod, cut the contaminated section off instead of lightly touching up the surface.

    Gas Coverage Causes

    • Wrong gas or contaminated argon supply.
    • Flow too low for cup size and stickout.
    • Flow too high, causing turbulence.
    • Cracked cup or damaged gas lens screen.
    • Loose back cap or damaged O-ring.
    • Leaking torch hose, fitting, or torch head.
    • Post-flow too short to protect hot tungsten.

    AC Aluminum Causes

    On aluminum, a wandering arc can come from oxide, inadequate cleaning, poor AC balance, or an overheated tungsten. The Square Wave 205 gives the operator AC balance control for cleaning versus penetration and AC frequency control for bead width and arc focus. If the tungsten and gas path are correct but the arc still washes around on aluminum, clean the oxide layer again, tighten arc length, and adjust AC balance/frequency in small steps.

    DC Steel and Stainless Causes

    On DC TIG, wandering is often caused by long arc length, dirty tungsten, filler touching the electrode, poor work clamp placement, contaminated base metal, or magnetic arc blow. Move the work clamp closer, clean the work area, shorten the arc, and keep filler wire entering the front edge of the puddle instead of crossing the tungsten.

    Common Wrong-Setup Mistakes

    • Turning AC balance or frequency before fixing a dipped tungsten.
    • Grinding tungsten sideways instead of lengthwise.
    • Using a dirty bench grinder wheel for tungsten prep.
    • Running excessive tungsten stickout with a small cup.
    • Ignoring a loose work clamp or painted ground path.
    • Welding aluminum without removing oxide and oil.
    • Continuing after the tungsten touches filler metal.
    • Using post-flow that shuts off while the tungsten is still hot.

    Test Procedure

    1. Cut back and regrind the tungsten lengthwise.
    2. Install the tungsten with normal stickout and a clean cup.
    3. Clamp directly to clean metal near the test weld.
    4. Set argon flow and post-flow for the cup size and amperage.
    5. Run a short bead on clean scrap without filler.
    6. If the arc is stable without filler, add clean filler rod.
    7. If the arc wanders only after filler is added, check filler technique and contamination.
    8. If the arc wanders without filler, isolate torch, tungsten, gas, ground, and machine settings.

    Field Fix vs Proper Fix

    Field fix: Regrind tungsten, shorten arc length, move the work clamp, reduce stickout, and test with clean argon coverage.

    Proper fix: Replace worn collets, damaged cups, bad O-rings, contaminated tungsten, leaking torch parts, or poor work leads. Then document tungsten size, cup size, gas flow, amperage, AC balance, AC frequency, and post-flow for the material being welded.

    Safety Notes

    • Disconnect power before torch service.
    • Use eye and respiratory protection when grinding tungsten.
    • Do not grind thoriated tungsten without proper dust control and shop approval.
    • Keep solvents, oil, and unknown coatings away from welding heat.
    • Use ventilation and keep your head out of fumes.
  • Lincoln Square Wave 205 TIG Tungsten Contamination Troubleshooting

    If the tungsten on a Lincoln Square Wave 205 turns black, balls unevenly, grows a dirty tip, spits into the puddle, or makes the TIG arc wander, stop and correct contamination before continuing. Tungsten contamination usually comes from dipping the electrode, touching filler metal, poor argon shielding, too little post-flow, a cracked cup, a leaking torch connection, dirty base metal, or the wrong tungsten size/prep for the amperage.

    The Square Wave 205 is an AC/DC TIG and Stick machine with pulse, AC frequency, AC balance, and post-flow control. Those controls help, but they do not fix a contaminated electrode. If the tungsten is dirty, cut or grind back to clean material, correct the shielding or torch issue, then restart the weld.

    Common Symptoms

    • Black tungsten: Hot tungsten is being exposed to oxygen, contamination, or poor post-flow.
    • Green/gray dusty tip: Oxidation, gas coverage loss, or contaminated argon path.
    • Arc wandering: Dipped tungsten, poor grind direction, oversized tungsten, or bad work return.
    • Arc splits or flutters: Dirty tungsten, wrong diameter for amperage, or damaged cup/collet setup.
    • Metal sticks to tungsten: Electrode touched the puddle or filler wire.
    • Aluminum puddle gets dirty fast: Oxide, wrong AC balance, poor cleaning, or weak gas shielding.
    • Tungsten keeps overheating: Amperage too high for tungsten size, too little stickout control, or inadequate torch cooling.

    What Tungsten Contamination Means

    TIG welding uses a non-consumable tungsten electrode to carry the arc while argon shielding protects the tungsten and weld puddle. When the tungsten touches molten metal, filler wire, oil, oxide, or air while hot, it becomes contaminated. Once contaminated, the arc becomes unstable and can transfer contamination into the weld.

    Square Wave 205 Compatibility Notes

    The Lincoln Square Wave 205 is sold as an AC/DC TIG and Stick welder with adjustable AC frequency, AC balance, pulse, and post-flow features. Lincoln literature describes AC frequency control for bead width and AC balance for cleaning/penetration control on aluminum. Use those settings after the torch, tungsten, gas, and work preparation are correct.

    For machine-family context, see the Lincoln Electric Square Wave 205 overview. For related TIG support, see why TIG tungsten turns black, unstable TIG arc from poor tungsten prep, TIG torch support, and TIG collet support.

    Fast Checks Before Regrinding Again

    1. Confirm 100% argon for TIG welding.
    2. Check that the cylinder is not empty and the flowmeter is stable.
    3. Inspect the cup for cracks, chips, or spatter.
    4. Inspect the collet and collet body for poor grip, heat damage, or gas leakage.
    5. Check the back cap O-ring and torch head connection.
    6. Clean the base metal and filler rod before welding.
    7. Set enough post-flow to keep the tungsten shielded until it cools.
    8. Cut off dipped tungsten instead of grinding only the surface stain.

    Diagnosis Table

    SymptomLikely CauseFirst Check
    Tungsten turns black after stoppingPost-flow too short or torch leakIncrease post-flow and inspect back cap/cup
    Tungsten balls unevenly on ACWrong prep, too much heat, contaminationRegrind/cut back and verify tungsten size
    Arc wandersDipped tungsten or poor grind directionGrind lengthwise on a dedicated wheel
    Tip melts backToo much amperage for tungsten sizeIncrease tungsten diameter or reduce current
    Puddle gets gray/dirtyGas coverage loss or dirty materialCheck cup, flow, stickout, and cleaning
    Contamination repeats immediatelyLeaking torch or contaminated gas pathCheck torch seals, hose, regulator, and fittings

    What Wears Out First

    The tungsten is the visible failure, but the cause is often the torch front end. A worn collet may not grip the electrode. A damaged collet body or gas lens can disrupt shielding. A cracked alumina cup can pull air into the gas envelope. A dried or missing back-cap O-ring can leak shielding gas before it reaches the cup.

    AC Aluminum Contamination Checks

    On aluminum, clean the oxide layer and remove oil before welding. If the Square Wave 205 AC balance is set for too much penetration and not enough cleaning, the puddle may look dirty even with good tungsten prep. If AC balance is set for excessive cleaning, the tungsten may run hotter. Start from a conservative setup, verify clean argon coverage, and adjust balance only after contamination sources are controlled.

    DC Steel and Stainless Contamination Checks

    For DC TIG on steel or stainless, tungsten contamination is commonly caused by dipping the puddle, touching filler wire to the electrode, grinding tungsten on a dirty wheel, using too long of an arc, or welding over oil, mill scale, paint, or solvent residue. Keep filler wire out of the arc cone until it enters the leading edge of the puddle.

    Common Wrong-Setup Mistakes

    • Regrinding the tungsten without fixing gas coverage.
    • Using a cracked cup or worn collet body.
    • Letting post-flow stop while the tungsten is still hot.
    • Grinding tungsten across the electrode instead of lengthwise.
    • Using the same grinding wheel for tungsten and dirty steel.
    • Running too much stickout without a gas lens or larger cup.
    • Trying to weld aluminum without removing oxide and oil first.
    • Assuming AC balance will fix dirty base metal or a gas leak.

    Test Procedure

    1. Remove the tungsten and cut off any dipped or balled contaminated end.
    2. Grind a fresh point lengthwise on a clean, dedicated wheel.
    3. Install the tungsten in a matching collet and verify it does not slip.
    4. Install a clean cup or gas lens setup that matches the torch series.
    5. Set argon flow and post-flow for the cup size and amperage.
    6. Run a bead on clean scrap without filler. Watch whether the tungsten stays clean.
    7. Add clean filler rod and repeat the test.
    8. If contamination returns without dipping, isolate gas leaks and torch consumables.

    Field Fix vs Proper Fix

    Field fix: Cut back the contaminated tungsten, regrind lengthwise, clean the cup, increase post-flow slightly, and test on clean scrap.

    Proper fix: Replace worn collets, damaged collet bodies, cracked cups, bad O-rings, leaking hoses, or contaminated tungsten. Then document the tungsten size, cup size, argon flow, AC balance, AC frequency, amperage, and post-flow that keep the tungsten clean.

    Safety Notes

    • Disconnect power before torch service.
    • Use eye and respiratory protection when grinding tungsten.
    • Do not grind radioactive thoriated tungsten without proper dust control and shop policy approval.
    • Keep solvent, oil, and unknown coatings away from TIG welding heat.
    • Use ventilation and keep your head out of fumes.
  • Best TIG Torch for Aluminum Welding: Top 4 Picks for 150Aโ€“350A

    Aluminum demands precisionโ€”wrong torch choice means poor penetration, porosity, and wasted material. We tested and verified four proven TIG torches that handle aluminum from hobby to production welding.

    Where to Buy

    All products below are available on Amazon with verified ASINs and ArcWeld.store. Links include affiliate commissions at no extra cost to you.

    Key Takeaways

    • CK17 (150A air-cooled): Best for hobby and light aluminum work; lightweight, affordable, easy maintenance.
    • WP-26FV (200A air-cooled): Best budget upgrade; handles thicker aluminum and stainless; proven compatibility with Miller/Everlast.
    • WP-20 (250A water-cooled): Best for sustained aluminum production; larger cooling capacity, longer duty cycle.
    • CK18 (350A water-cooled): Best for heavy-duty aluminum fabrication; largest cooling jacket, premium build quality.

    Comparison Table

    ModelTypeAmperageCoolingCable LengthBest For
    CK17Air150AAir12.5 ftHobby, thin aluminum
    WP-26FVAir200AAir12.5 ftBudget upgrade, stainless
    WP-20Water250AWater25 ftProduction aluminum
    CK18Water350AWater12.5 ftHeavy fabrication

    Product Breakdowns

    1. CK17 Air-Cooled TIG Torch (150A) โ€“ Best for Hobby & Light Aluminum

    Verified Specs:

    • Amperage: 150A ACHF or DCSP @ 100%
    • Cooling: Air-cooled
    • Head Style: Flex head (super-flex cable option)
    • Cable Length: 12.5 ft (standard); 25 ft available
    • Torch Length: 8-1/8″ (20.6 cm)
    • Weight: 5 oz (141 g)
    • Tungsten Size: .020″โ€“1/8″
    • Collet Body: 3 Series (standard accessories compatible)

    Why It Works for Aluminum:The CK17 is the industry standard for entry-level and hobby aluminum TIG welding. Its lightweight design (5 oz) reduces fatigue on long jobs, and the air-cooled system keeps it simpleโ€”no water circulation to maintain. Perfect for aluminum sheet metal up to 1/8″ thickness.

    Best For:

    • Hobby welders upgrading from stick
    • Aluminum repairs and fabrication shops
    • Educational settings
    • Portable/field welding

    Safety Notes:Always use proper PPE: welding helmet (ANSI Z87.1, shade 10โ€“14 for aluminum), heat-resistant gloves, and long sleeves. Ensure adequate ventilation; aluminum fumes require respiratory protection in confined spaces.

    CK17 Air Cooled TIG Torch Kit, Flex, 150A, 12.5′, 2-Pc, Super-Flex, CK17-12-2SF FX
    • Flex head a maximum of 40 degrees from centerline. See below for more details and recommendations.
    • 150 amp ACHF or DCSP @ 100%
    • 8-1/8″ (20.6cm) 5 oz (141gm)
    • Super-Flex cables are made of durable silicone hose with nylong over-braid. This lightweight innovative design stays flexible no matter the conditions.
    • 3 Series Head Accessories

    Last update on 2026-06-17 / Affiliate links / Images from Amazon Product Advertising API


    2. WP-26FV Air-Cooled TIG Torch (200A) โ€“ Best Budget Upgrade

    Verified Specs:

    • Amperage: 200A ACHF or DCSP @ 100%
    • Cooling: Air-cooled
    • Head Style: Flex head with gas valve
    • Cable Length: 12.5 ft (standard)
    • Torch Length: 6โ€“8″ (varies by configuration)
    • Tungsten Size: .020″โ€“3/32″
    • Collet Body: Standard (Miller/Everlast compatible)

    Why It Works for Aluminum:The WP-26FV bridges the gap between hobby and professional. At 200A, it handles thicker aluminum (up to 3/16″) and stainless steel without overheating. Air-cooled design means lower cost and simpler maintenance than water-cooled torches.

    Best For:

    • Upgrading from 110V hobby systems
    • Small fabrication shops
    • Aluminum and stainless work
    • Portable TIG setups

    Safety Notes:Ensure your welder supports 200A output. Use shade 12โ€“14 helmet for aluminum. Check collet compatibility with your machine before ordering.

    No products found.


    3. WP-20 Water-Cooled TIG Torch (250A) โ€“ Best for Production Aluminum

    Verified Specs:

    • Amperage: 250A ACHF or DCSP @ 100%
    • Cooling: Water-cooled (requires chiller or cooler)
    • Head Style: Standard or flex (model-dependent)
    • Cable Length: 25 ft (standard)
    • Torch Length: 6โ€“7″ (varies by configuration)
    • Tungsten Size: .020″โ€“1/8″
    • Collet Body: Standard (Miller/Everlast compatible)

    Why It Works for Aluminum:Water-cooled torches handle sustained high-amperage work without thermal fatigue. The WP-20 is rated for 250A, making it ideal for production aluminum welding (1/4″+ thickness) and long duty cycles. The 25 ft cable gives you more workspace flexibility.

    Best For:

    • Production fabrication shops
    • Thick aluminum structures
    • Long welding sessions (high duty cycle)
    • Aerospace and automotive aluminum work

    Safety Notes:Water-cooled torches require a dedicated cooler/chiller (not included). Monitor water flow and temperature; improper cooling can damage the torch. Use shade 12โ€“14 helmet. Ensure your welder supports 250A output.

    No products found.


    4. CK18 Water-Cooled TIG Torch (350A) โ€“ Best for Heavy-Duty Aluminum Fabrication

    Verified Specs:

    • Amperage: 350A ACHF or DCSP @ 100%
    • Cooling: Water-cooled (largest jacket available)
    • Head Style: Flex head (super-flex cable option)
    • Cable Length: 12.5 ft (standard); 25 ft available
    • Torch Length: 8โ€“9″ (varies by configuration)
    • Tungsten Size: .020″โ€“3/16″
    • Collet Body: 3 Series (premium build)
    • Water Jacket: 300% larger cooling capacity than standard torches

    Why It Works for Aluminum:The CK18 is the premium choice for heavy aluminum fabrication. Its oversized water jacket provides superior cooling, allowing sustained operation at 350A without thermal stress. The flex head and super-flex cable offer unmatched maneuverability in tight spaces.

    Best For:

    • Heavy-duty aluminum fabrication
    • Aerospace and marine welding
    • Multi-pass aluminum structures
    • Professional shops with high-volume work

    Safety Notes:Requires a robust water cooler and 350A-capable welder. Use shade 12โ€“14 helmet. Inspect water hoses regularly for leaks. Ensure proper grounding and cable management for high-amperage work.

    CK TL18 Water Cooled Trim-Line TIG Torch Kit, Flex, 350A, 12.5′, 3-Pc, Super-Flex, TL18-12SF FX
    • Trim-Line torches significantly reduce the size and weight of your torch while maintaining similar amperage capacity.
    • Larger coolant passage in head
    • Flex head a maximum of 40 degrees from centerline. See below for more details and recommendations.
    • 8″ (20.3cm) 5 oz (141gm)
    • 3 Series Head Accessories

    Last update on 2026-06-17 / Affiliate links / Images from Amazon Product Advertising API


    Top Pick: CK17 for Most Aluminum Welders

    If you’re upgrading from stick or MIG to TIG aluminum, the CK17 is the proven choice. It’s lightweight, affordable, easy to maintain, and handles aluminum up to 1/8″ with precision. Thousands of welders trust it for hobby and professional work.


    How to Choose the Right TIG Torch for Aluminum

    1. Match Amperage to Material Thickness

    • Up to 1/8″ aluminum: 150A (CK17) is sufficient
    • 1/8″โ€“3/16″ aluminum: 200A (WP-26FV) recommended
    • 3/16″โ€“1/4″ aluminum: 250A (WP-20) ideal
    • 1/4″+ aluminum: 350A (CK18) for sustained work

    2. Air-Cooled vs. Water-Cooled

    Air-Cooled (CK17, WP-26FV):

    • Lower cost
    • Simpler setup
    • Best for intermittent work
    • Limited duty cycle at high amperage

    Water-Cooled (WP-20, CK18):

    • Higher upfront cost (requires cooler)
    • Better for sustained production
    • Handles high amperage longer
    • Requires maintenance (water flow, temperature)

    3. Cable Length & Maneuverability

    • 12.5 ft: Standard for shop work; good for fixed benches
    • 25 ft: Better for field work and tight spaces; reduces cable drag

    4. Compatibility Check

    Verify your welder supports the torch amperage and connector type (Dinse 35, 50, or quick-connect). CK and Weldcraft torches are compatible with Miller, Lincoln, Everlast, and most TIG welders.


    FAQ

    Q: Can I use an air-cooled torch for thick aluminum?A: Yes, but with limits. Air-cooled torches are rated for 100% duty cycle at their amperage. For aluminum thicker than 3/16″, a water-cooled torch (WP-20 or CK18) is recommended to avoid thermal fatigue and maintain weld quality.

    Q: Do I need a water cooler for water-cooled torches?A: Yes. Water-cooled torches require a dedicated cooler or chiller unit. Some welders have built-in coolers; check your manual. Standalone coolers cost $200โ€“$400.

    Q: What’s the difference between CK17 and WP-26FV?A: CK17 is 150A air-cooled; WP-26FV is 200A air-cooled. The WP-26FV handles thicker material and longer duty cycles. CK17 is lighter and more affordable for hobby work.

    Q: Are these torches compatible with my welder?A: Most are. CK and Weldcraft torches work with Miller, Lincoln, Everlast, and other major brands. Verify your welder’s connector type (Dinse 35, 50, or quick-connect) before ordering.

    Q: How often should I replace consumables (collets, cups, nozzles)?A: Tungsten: every 20โ€“50 hours (depends on material). Collets and cups: every 100โ€“200 hours. Nozzles: as needed if cracked or eroded. Keep spares on hand.


    Safety Notes: Aluminum TIG Welding

    Arc Flash & UV Protection:

    • Use ANSI Z87.1 certified helmet with shade 12โ€“14 for aluminum
    • Wear heat-resistant gloves (leather or aluminized)
    • Cover exposed skin with long sleeves and apron

    Fume & Respiratory Safety:

    • Aluminum fumes can cause metal fume fever; ensure ventilation
    • In confined spaces, use a respirator (P100 or equivalent)
    • Position fume extractor 6โ€“12″ from work

    Electrical Safety:

    • Ensure proper grounding (ground clamp to workpiece)
    • Check cable insulation for damage before use
    • Use a properly grounded work table

    Water-Cooled Torch Safety:

    • Monitor water flow; low flow can damage the torch
    • Check hoses for leaks weekly
    • Drain cooler if storing in freezing conditions
  • TIG Torch Consumables Wearing Out Fast? Stock Up With This 123-Piece Kit

    TIG Torch Consumables Wearing Out Fast? Stock Up With This 123-Piece Kit

    Intro: TIG torch consumables wear out fastโ€”especially with aluminum or stainless jobs. This 123-piece kit gives WP-17/18/26 users a complete, ready-to-go stock of nozzles, collets, and gas lenses for pro-level results without the downtime of waiting for parts.

    Key Takeaways

    • 123 pieces: nozzles, collets, gas lenses, and ceramic cups for WP-17/18/26 torches
    • Precision-manufactured for reliable fit and consistent gas coverage
    • Heatproof glass cups and alumina nozzles resist cracking under high temps
    • Supports both AC and DC TIG work; ideal for aluminum, stainless, and mild steel
    • One-time stock eliminates repeated small orders and shop delays

    PHUOC LOC THO for TIG Welding Torch Kit 123 Pcs Stubby Lens, Alumina Nozzle, Collets
    • For TIG Welding Torch Kit 123 Pcs Stubby Lens, Alumina Nozzle, Collets
    • Includes 123 pieces for TIG welding torch kit, featuring stubby lens, alumina nozzle, and collets for welding applications.
    • components like alumina nozzle and collets reliable performance and precise welding results with TIG torch kit 123 Pcs.
    • Upgrade Your Gear, Upgrade Your Performance โ€“ Choose Our Reliable Replacement Parts.
    • To ensure a perfect fit and make an informed decision, we encourage you to carefully review both the product’s dimensions and visually inspect it in the provided photos.

    Last update on 2026-06-17 / Affiliate links / Images from Amazon Product Advertising API

    Performance & Use

    All parts are precision-manufactured for reliable fit and gas coverage. Designed for both AC and DC TIG work (verify for your machine). Suits most US-shop WP-17/18/26 torches.

    What to compare before you buy

    • Torch compatibility: Verify your torch model (WP-17, WP-18, or WP-26) before ordering
    • Collet sizes: Kit includes 0.040″, 1/16″, 3/32″, and 1/8″ colletsโ€”confirm your electrode diameter
    • Glass vs. ceramic: Kit includes both heatproof glass cups and alumina nozzles; choose based on your material and duty cycle
    • Gas lens setup: Verify whether you run stubby or regular gas lens configuration
    • Storage: Check if included storage case or organizer meets your shop layout needs

    Comparable Amazon picks (optional)

    Durability & Build

    Heatproof glass cups and alumina nozzles resist cracking under high temps. All collets and lenses are built for repeated useโ€”ideal for daily welding or instructional settings. Precision tolerances ensure tight, consistent seals that minimize gas leakage and porosity.

    Who It’s For

    • TIG welders running WP-17/18/26 torches on aluminum, stainless, or mild steel
    • Fabrication shops that need backup consumables in stock to avoid downtime
    • Instructors teaching TIG welding who need a complete parts kit for multiple torch setups
    • Hobbyists and pros upgrading from single-part orders to bulk stock

    Quick FAQ

    Q: Will this fit my torch?
    A: Compatible with WP-17, WP-18, WP-26 (verify torch model before ordering).

    Q: Are all parts included for aluminum and stainless?
    A: Yes, supports both (verify machine settings and gas type).

    Q: Are the cups glass or ceramic?
    A: Both heatproof glass and alumina nozzles included.

    Q: Can I use this for AC and DC TIG?
    A: Yes (verify for your machine).

    Q: Does it include a storage case?
    A: Unknown (Verify on listing).

    Safety Notes

    • Always allow torch to cool before handling consumables
    • Inspect collets and gas lenses for cracks or damage before use; replace if compromised
    • Verify gas flow and coverage before starting production welds
    • Follow ANSI Z49.1 safety standards for TIG welding
  • 123 Pcs TIG Welding Torch Kit for WP-17/18/26

    123 Pcs TIG Welding Torch Kit for WP-17/18/26

    Intro:
    TIG torch consumables wear out fastโ€”especially with aluminum or stainless jobs. This 123-piece kit gives WP-17/18/26 users a complete, ready-to-go stock of nozzles, collets, and gas lenses for pro-level results.

    Key Takeaways

    • Full kit: 123 pieces for WP-17/18/26 torches.
    • Includes alumina nozzles, stubby gas lens, collets, glass cups.
    • Supports steel, stainless, and aluminum TIG jobs.
    • Compatible with most standard torch bodies (verify model).
    • Saves time and downtimeโ€”no emergency parts runs.

    Performance & Use

    All parts are precision-manufactured for reliable fit and gas coverage. Designed for both AC and DC TIG work (verify for your machine). Suits most US-shop WP-17/18/26 torches.

    Durability & Build

    Heatproof glass cups and alumina nozzles resist cracking under high temps. All collets and lenses are built for repeated useโ€”ideal for daily welding or instructional settings.

    Power / Specs

    • Kit size: 123 pieces
    • Torch fit: WP-17, WP-18, WP-26
    • Materials: Alumina, glass, copper
    • Process: TIG (AC/DC), steel, stainless, aluminum
    • Standards: Unknown (Verify)
    • Included: Nozzles, collets, gas lenses, glass cups, accessories

    Who Itโ€™s For

    • TIG welders (pro, hobby, instructional) using WP-17/18/26.
    • Shops needing full consumable stock.
    • Not for: Non-compatible torch models (verify fit).

    Quick FAQ

    Q: Will this fit my torch?
    A: Compatible with WP-17, WP-18, WP-26 (verify torch model).

    Q: Are all parts included for aluminum and stainless?
    A: Yes, supports both (verify machine settings).

    Q: Are the cups glass or ceramic?
    A: Both glass and alumina nozzles included.

    Q: Can I use this for AC and DC TIG?
    A: Yes (verify for your machine).

    Q: Does it include a storage case?
    A: Unknown (Verify on listing).

    Safety Notes

    • Inspect all consumables before use.
    • Replace cracked or worn parts promptly.
    • Use proper PPE (gloves, eyewear) during installation.
    • Always follow the machine manual, SDS, and applicable code requirements. If unsure, verify with the manufacturer.

    Where to Buy

    • Amazon pick: 123 Pcs TIG Welding Torch Kit for WP-17/18/26 โ€” ASIN: B0FWJVW4NT
    • Amazon listing
    • PHUOC LOC THO for TIG Welding Torch Kit 123 Pcs Stubby Lens, Alumina Nozzle, Collets
      • For TIG Welding Torch Kit 123 Pcs Stubby Lens, Alumina Nozzle, Collets
      • Includes 123 pieces for TIG welding torch kit, featuring stubby lens, alumina nozzle, and collets for welding applications.
      • components like alumina nozzle and collets reliable performance and precise welding results with TIG torch kit 123 Pcs.
      • Upgrade Your Gear, Upgrade Your Performance โ€“ Choose Our Reliable Replacement Parts.
      • To ensure a perfect fit and make an informed decision, we encourage you to carefully review both the product’s dimensions and visually inspect it in the provided photos.

      Last update on 2026-06-17 / Affiliate links / Images from Amazon Product Advertising API

Stream with Amazon Music