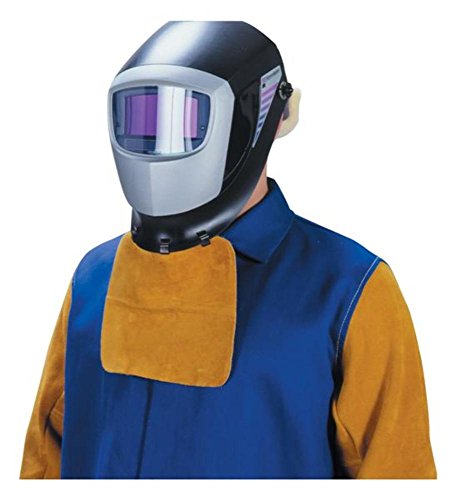
Category: Welding Helmet Support
Weld Helmet, consumables, parts breakdowns, and accessories
-

Helmet Lens Keeps Fogging
“>
If your welding helmet lens keeps fogging, the cause is usually one or more of these: warm moist breath getting trapped, poor helmet seal, low airflow, sudden temperature change, or a dirty/damaged lens surface. Start with fit and airflow before replacing parts.
Key Takeaways
- Fogging is usually a moisture and airflow problem, not an auto-darkening problem.
- A poor seal around the nose and cheeks can trap exhaled moisture inside the helmet.
- Cold lenses fog faster when warm breath hits them.
- Dirty inner lenses, scratches, or worn covers can make fogging look worse.
- If you use a respirator under the helmet, fit and airflow can change significantly.
Troubleshooting Steps
1) Check helmet fit first
A helmet that sits too low, too tight, or too loose can trap moisture or let warm air rise into the viewing area. Adjust the headgear so the helmet sits square on your head and seals consistently without pressing uncomfortably on the face.
- Verify crown and rear strap position.
- Make sure the helmet is not tipping forward.
- Check whether breathing upward into the helmet worsens fogging.
2) Inspect airflow under the helmet
Fogging often happens when exhaled air has no path out of the helmet. If you wear a respirator, bandana, or other face covering, it may redirect moisture toward the lens.
- Look for blocked vents or tight clothing around the neck and face.
- Confirm that the helmet has enough internal clearance for your face and nose bridge.
- If you work in still air, even small changes in head position can affect fogging.
3) Check temperature difference
Going from a cold tool room or truck into a hot weld area can cause the inner lens to fog immediately. Cold inner covers and cold shell surfaces are common triggers.
- Let the helmet acclimate before welding when possible.
- Store the helmet in a moderate-temperature area.
- Avoid leaving the lens on a cold bench between welds if condensation is an issue.
4) Clean the inside lens and cover plates
Smoke film, dust, oil, and residue can hold moisture and make fogging worse. Clean the inner lens with a method approved by the helmet manufacturer. If the cover plate is scratched or clouded, replace it.
- Inspect for pitting, scratches, and spatter damage.
- Replace worn inner and outer cover lenses as needed.
- Do not use cleaners that can damage plastics or coatings.
5) Check for worn headgear or gaps
Worn headgear can let the helmet shift during welding. A moving helmet changes the airflow pattern and can create repeated fogging.
- Inspect pivot points, tension settings, and padding.
- Replace cracked or stretched headgear parts.
- Confirm the helmet stays in the same position when you lean, strike an arc, and reposition.
6) Review lens condition
Fogging is often blamed on the lens, but lens wear can contribute. A scratched inner lens, damaged cover plate, or contaminated surface can hold condensation and reduce visibility.
- Inspect the auto-darkening lens window and protective covers.
- Replace damaged lens covers before assuming the electronics are failing.
- If the lens appears hazy even when dry, the cover plate may be the problem.
7) Consider respirator or face protection stack-up
If you wear a respirator under the helmet, the combined gear stack can trap exhaled moisture. Fit can also change when you add filters, cartridges, or a face seal. Unknown (Verify) for your exact respirator and helmet combination.
- Test the helmet with and without the respirator.
- Check whether fogging changes with breathing rate and work position.
- Make sure nothing is blocking the natural exhaust path from the face area.
When to Replace Parts
Replace parts when fogging continues after fit and cleaning checks.
- Inner cover lens: replace if scratched, cloudy, or contaminated.
- Outer cover lens: replace if pitted, spattered, or heat-damaged.
- Headgear: replace if the helmet will not hold position.
- Helmet shell or lens housing: replace if cracked, warped, or not sealing correctly.
Product / Parts Check
If the helmet itself is part of the problem, use a model with stable fit and clear optics. One available option is:
Lincoln Electric K3034-4 VIKING 3350 Auto Darkening Welding Helmet with 4C Lens, Matte Black
Lincoln Electric’s VIKING™ 3350 (K3034-4) is their top-of-the-line auto-darkening helmet series, built to balance optics, comfort, and jobsite versatility for daily welding work. It features Lincoln’s exclusive 4C® Lens Technology with 1/1/1/1 optical clarity and a 12.5 sq. in. auto-darkening viewing area for a clearer view of the puddle and surrounding joint. For comfort, the X6 Headgear™ is designed to distribut…
View at Arc Weld StoreThis helmet is listed in the ArcWeld catalog. For exact cover lens, headgear, and replacement part fitment, verify the model-specific part numbers before ordering.
Safety Notes
- Do not weld with a fogged lens if visibility is compromised.
- Do not modify vents, shell openings, or lens assemblies unless the manufacturer allows it.
- Use only manufacturer-approved replacement lenses and parts where required.
- If fogging is paired with smoke, heat damage, or lens failure, remove the helmet from service until inspected.
FAQ
Why does my welding helmet lens fog only at the start of the shift?
Cold storage, temperature change, and moisture on the inner lens are common causes. Let the helmet warm up and check for condensation before welding.
Can anti-fog spray solve welding helmet lens fogging?
Sometimes, but only if it is safe for the lens materials and approved by the helmet manufacturer. Unknown (Verify) for your exact helmet and cleaner compatibility.
Does a respirator make helmet fogging worse?
It can. A respirator changes airflow and can push moisture toward the lens, especially if the fit is tight under the helmet.
Should I replace the auto-darkening lens if it fogs?
Not first. Start with fit, airflow, cleaning, and cover lens inspection. Replace the auto-darkening lens only if it is damaged or the viewing window remains cloudy when dry.
Sources Checked
- 3M Speedglas G5-02 Welding Helmet Support Guide: Fitment, Lens Protection, and Ordering Checks
- Auto-Darkening Welding Helmet Buying Guide 2025 | Lens Speed, Shade Range & Standards
- Best Welding Respirator for Under a Welding Helmet (Low-Profile Picks)
- ArcWeld product listing for Lincoln Electric K3034-4 VIKING 3350 Auto Darkening Welding Helmet with 4C Lens, Matte Black
Bottom line: welding helmet lens fogging is usually a fit, moisture, or temperature issue. Check those first, then replace worn lenses or headgear as needed.
Related Weld Support Guides
- 3M Speedglas G5-02 Welding Helmet Support Guide: Fitment, Lens Protection, and Ordering Checks
- Aluminum ER 5554 3/64″ X 5lb. MIG Welding Wire Spool By Washington Alloy – Weld Support Parts Blog
- Auto-Darkening Welding Helmet Buying Guide 2025 | Lens Speed, Shade Range & Standards
- Best Welding Respirator for Under a Welding Helmet (Low-Profile Picks)
Welding Helmet Grind Mode Troubleshooting: Lens Stays Light, Won’t Darken, or Grind Button Fails
If a welding helmet is left in grind mode, the auto-darkening filter may stay in its light state and will not darken correctly when an arc starts. That is the first thing to check when a helmet suddenly “stops darkening” after grinding, wire brushing, fit-up, or cleanup. Grind mode is useful because it keeps the lens light for grinding visibility, but it must be switched back to weld mode before striking an arc.
The fast repair is to stop welding, turn the helmet away from the arc, verify the mode indicator, switch out of grind mode, test the auto-darkening filter, clean the sensors, check the battery, and confirm shade/sensitivity/delay settings. Do not weld through a helmet that is stuck in grind mode or one that only works intermittently. For related helmet checks, see auto-darkening welding helmet not working, auto-darkening helmet flicker on aluminum TIG, and auto-darkening helmet shade range and standards.
Common Symptoms
- Helmet stays light when the arc starts.
- Helmet darkens during testing, then fails after grinding.
- Grind light, LED, icon, or display remains active.
- External grind button does not toggle consistently.
- Internal mode button is dirty, stuck, or hard to read.
- Lens darkens while grinding instead of staying light.
- Helmet flickers between light and dark during grinding sparks.
- ADF works for MIG or stick but behaves poorly during low-amp TIG.
- Helmet will not wake up after sitting in storage.
- Lens works only after the battery is moved, tapped, or replaced.
Likely Causes
| Cause | What It Does | Quick Check |
|---|---|---|
| Helmet left in grind mode | Disables normal welding darkening response | Check mode display, LED, or grind icon |
| Weak battery | Causes no-darken, slow response, flicker, or mode reset | Replace with correct battery type |
| Blocked sensors | ADF cannot detect the arc reliably | Clean front lens and sensor windows |
| Dirty cover lens | Reduces arc signal and visibility | Replace scratched or spatter-covered lens |
| Faulty grind switch | Helmet stays stuck in grind or weld mode | Toggle switch repeatedly and inspect button feel |
| Wrong sensitivity | Lens may not trigger or may trigger from shop light | Reset sensitivity for process and environment |
| Wrong delay | Lens clears too fast or too slowly after arc stop | Adjust delay and retest |
| ADF cartridge failure | Helmet becomes unreliable even after settings and battery checks | Remove from service and replace cartridge or helmet |
Fast Diagnosis Sequence
- Stop welding immediately if the helmet stays light, flickers, or does not darken reliably.
- Check whether grind mode is active. Look for the grind icon, LED, external button position, or display setting.
- Switch to weld mode and confirm the shade range is appropriate for the process and amperage.
- Test the auto-darkening filter with the helmet manufacturer’s test button or a safe arc-test procedure.
- Clean the front cover lens and sensor windows with a soft cloth.
- Replace the outside cover lens if scratched, spatter-covered, smoky, cracked, or warped.
- Replace the battery if the helmet uses replaceable cells or shows weak response.
- Reset sensitivity and delay to normal welding settings.
- Inspect the grind button, wiring area, cartridge seat, and battery contacts.
- If the helmet still fails, remove it from welding service and replace the ADF cartridge or helmet.
When the Helmet Stays Light
A helmet that stays light after grinding is usually still in grind mode, has a weak battery, has blocked sensors, or has a failed ADF cartridge. Grind mode may be controlled by an external button, internal control, digital menu, flip-up filter, or mode selector. Some helmets use a light-state shade such as DIN 3, DIN 3.5, or DIN 4 during grind mode, which is not a welding shade.
- Switch out of grind mode before welding.
- Check the indicator every time the helmet is used for grinding between welds.
- Do not rely on memory; verify the mode before striking the next arc.
- Do not weld if the ADF only darkens after tapping the shell or moving the battery.
- Use a compliant passive helmet as backup if the ADF cannot be trusted.
When the Helmet Darkens While Grinding
If the lens darkens while grinding, the helmet may not actually be in grind mode, the grind switch may not be engaging, or the sensors may be reacting to bright sparks, sunlight, LED lights, or nearby welding arcs. Confirm the mode indicator first. Then check whether the helmet has separate cut, grind, X-mode, weld, or low-current settings.
- Confirm the grind icon or grind LED is active.
- Check the external grind button for dirt, damage, or poor tactile response.
- Move away from nearby welding arcs during testing.
- Shield the sensors from direct sunlight or bright reflected light if allowed by the manual.
- If the lens still darkens in verified grind mode, remove the helmet from service until the ADF is checked.
Inspection Steps
- Mode control: Verify weld, cut, grind, and any X-mode or low-current settings. A mode mistake can look like lens failure.
- External grind button: Check for broken plastic, worn rubber, stuck travel, spatter damage, or intermittent response.
- Internal controls: Open the helmet and inspect buttons, dials, display markings, and loose cartridge seating.
- Arc sensors: Clean the sensor windows and make sure cover plates, stickers, cheater lenses, tape, or spatter are not blocking them.
- Cover lenses: Replace outside and inside cover lenses that are scratched, cloudy, cracked, heat-warped, smoky, or coated with grinding dust.
- Battery compartment: Inspect battery type, polarity, contacts, corrosion, loose door, and age of the cell.
- ADF cartridge: Check for cracks, delamination, water damage, heat damage, missing safety markings, or wrong cartridge size.
- Helmet shell: Inspect for cracks, damaged front cover frame, missing lens gasket, and gaps that allow sparks or light leaks.
Test Procedures
- Mode reset test: Switch from grind to weld, then power the helmet off and back on if the design allows. Confirm the helmet did not return to grind mode unexpectedly.
- Test-button check: Use the built-in test button where provided. No response means battery, contacts, cartridge, or control failure.
- Known-arc check: With proper PPE and safe positioning, test on a known welding setup. The lens must darken before normal welding begins.
- Sensor-clean test: Clean sensors and replace the front cover lens. If response improves, the issue was blocked arc detection.
- Battery test: Replace with the exact required battery type. Do not mix old and new cells where multiple batteries are used.
- Process test: Check MIG, stick, TIG, and plasma/cutting modes separately. Low-amp TIG often needs higher sensitivity than MIG or stick.
Root Cause Analysis
Grind mode is designed to prevent the auto-darkening filter from darkening during grinding. That improves visibility during grinding, chipping, wire brushing, and fit-up, but it also creates a hazard if the welder forgets to return to weld mode. Many “helmet not darkening” complaints are actually mode problems, especially when the helmet worked before grinding and fails at the next arc strike.
Other grind-mode failures are electrical or optical. Weak batteries can make the controls unreliable. Dirty cover plates and blocked sensors reduce the arc signal. A damaged external grind button can leave the lens stuck in the wrong mode. A failed cartridge may pass once and fail later. A helmet that cannot be verified every time should not be used for welding.
Compatibility Notes
Do not order welding helmet replacement parts by shell shape alone. Verify helmet brand, series, ADF cartridge size, grind-button type, external-control cover, inside and outside cover lens dimensions, battery type, cheater lens compatibility, safety standard markings, and whether the helmet uses weld/cut/grind/X-mode controls. Some helmets use external grind buttons; others use internal buttons or a flip-up clear grinding shield.
Lincoln examples show the spread of designs. Some helmets list external grinding mode, others internal grinding mode, flip-up grinding shields, or external grind buttons. Some ADFs use solar assist plus replaceable lithium or alkaline batteries. Speedglas 9100XXi-style kits use external controls for grinding and memory modes and must match compatible Speedglas shell families. Treat ADF cartridges, grind buttons, batteries, and cover lenses as helmet-family-specific until verified.
What To Verify Before Ordering
- Helmet manufacturer, series, and exact model.
- ADF cartridge part number and viewing-area size.
- External grind button, internal grind control, flip-up grind shield, or digital menu design.
- Outside cover lens size and inside cover lens size.
- Battery type, quantity, polarity, and battery-door condition.
- Shade range and whether the helmet supports weld, cut, grind, and low-current TIG modes.
- Sensor count and sensor location.
- Cheater lens holder and magnifier compatibility.
- Helmet shell condition, front lens frame, gasket, and retaining clips.
- Applicable safety markings and shop PPE requirements.
Common Wrong-Part Mistakes
- Replacing cover lenses while the helmet is still left in grind mode.
- Ordering an ADF cartridge that fits the opening but does not match the control layout.
- Using the wrong battery type or installing the battery with reversed polarity.
- Buying a helmet with grind mode but no clear mode indicator for production work.
- Assuming safety glasses make it acceptable to weld while the ADF is in grind mode.
- Ignoring scratched cover plates and blaming the cartridge for poor visibility.
- Using low-amp TIG with sensitivity set for MIG or stick.
- Using a helmet with damaged or missing safety-standard markings.
Field Fix vs Proper Fix
| Problem | Field Fix | Proper Fix |
|---|---|---|
| Helmet left in grind mode | Switch to weld mode before striking arc | Build a pre-arc mode check into shop procedure |
| Lens will not darken | Stop welding and test helmet | Replace battery, clean sensors, verify settings, replace ADF if unreliable |
| Grind button intermittent | Use backup helmet | Replace verified button assembly, front cover, cartridge, or helmet as designed |
| Lens darkens while grinding | Confirm grind mode is active | Check mode switch, sensor response, cartridge condition, and nearby arc/light interference |
| Low-amp TIG flicker | Increase sensitivity and delay | Use a helmet with documented low-amp TIG capability and clean sensor exposure |
Related Failure Paths
- Arc flash exposure: Welding in grind mode can leave the lens too light for the arc.
- Helmet not darkening: Mode setting, battery, sensors, cover lens, or cartridge failure can cause no-darken symptoms.
- ADF flicker: Low sensitivity, low-amp TIG, blocked sensors, or bright shop conditions can make the lens unstable.
- Poor visibility: Scratched or dirty cover plates can make a good ADF look bad.
- False grind activation: Damaged external buttons or mode controls can leave the helmet in the wrong state.
- Wrong replacement cartridge: Incorrect ADF size, control layout, shade range, or shell compatibility can create unsafe operation.
Safety Notes
- Never weld with a helmet that is in grind mode.
- Test the auto-darkening function before each use.
- Wear ANSI-rated safety glasses under the hood, especially for grinding, chipping, and wire brushing.
- Use the correct welding shade for process and amperage.
- Do not use cracked cover lenses, damaged ADF cartridges, missing gaskets, or helmets with light leaks.
- Do not bypass helmet controls or tape buttons into position.
- Remove unreliable helmets from service until repaired or replaced.
- Use ventilation or respiratory PPE as required; a standard welding helmet is not respiratory protection.
Sources Checked
Sources checked include welding helmet troubleshooting references, auto-darkening helmet buying and safety guidance, Lincoln helmet catalog data, Speedglas ADF catalog data, and related Weld Support Parts helmet support articles. Final replacement must be verified by helmet model, ADF cartridge, grind-control design, battery type, cover lens size, sensor layout, safety markings, shade range, and process requirement.
PAPR Welding Helmet Airflow Troubleshooting: Low-Flow Alarm, Filter Loading, Hose Leaks, Battery, and Blower Checks
If a PAPR welding helmet has weak airflow, a low-flow alarm, fogging, heat buildup, or reduced breathing comfort, stop welding and troubleshoot before continuing. A PAPR depends on a battery-powered blower, correct filter, sealed hose, clean airflow path, and compatible helmet/headtop. Common causes are loaded filters, blocked spark arrestors or prefilters, weak batteries, loose hose connections, damaged breathing tubes, clogged inlet screens, poor face seal or shroud fit, and blower faults.
Do not silence or ignore a low-airflow alarm. Install a fully charged battery, replace the prefilter and main filter if loaded, inspect the hose and seals, verify the headtop connection, and perform the manufacturer’s airflow check with the correct flow indicator. If the unit still fails the airflow test, remove it from service and replace the failed component or send it for qualified service.
Related helmet and respiratory checks include welding helmet replacement parts, auto-darkening welding helmet buying guide, PAPR welding safety support, and respirator-under-helmet fit checks.
Common Symptoms
| Symptom | Likely Cause | First Check |
|---|---|---|
| Low-flow alarm sounds | Loaded filter, blocked prefilter, weak battery, hose restriction | Replace prefilter/filter and run airflow test |
| Weak airflow in helmet | Battery low, blower inlet blocked, hose kinked | Fully charge battery and inspect hose route |
| Lens fogs inside headtop | Low airflow, poor shroud fit, blocked outlet | Check airflow and head seal/shroud position |
| Airflow starts strong then drops | Battery capacity issue or filter loading under load | Test with fresh battery and clean filters |
| Blower runs louder than normal | Filter restriction or blower working against blockage | Inspect filter stack and inlet screen |
| No blower operation | Dead battery, bad contacts, switch/blower failure | Check battery seating and contacts |
What the PAPR Airflow System Does
A powered air-purifying respirator uses a fan/blower to pull air through approved filters and deliver filtered air into the helmet or headtop. The filter protects against the approved hazard class only when the correct filter is installed, the blower delivers required airflow, the breathing tube is sealed, and the headtop is worn as designed. A PAPR is not a substitute for ventilation, fume extraction, confined-space controls, or correct filter selection.
Inspection Steps
- Leave the weld area if airflow drops. Do not keep welding through a low-flow alarm.
- Check battery charge and seating. Confirm the battery is fully charged, latched, and making clean contact.
- Inspect the filter stack. Replace loaded, wet, damaged, expired, or wrong filters. Check prefilter and spark arrestor if equipped.
- Inspect blower inlet and outlet. Remove dust, grinding debris, tape, bags, or blocked screens.
- Inspect the breathing tube. Look for kinks, crushed sections, pinholes, cracks, loose swivels, and damaged O-rings.
- Check headtop connection. The hose must lock into the helmet or hood without leaks.
- Check face seal, shroud, or hood skirt. Tears, poor fit, or worn elastic can reduce protection and comfort.
- Perform the airflow check. Use the manufacturer’s required flow indicator and procedure before welding.
- Confirm the alarm works. Follow the manual’s alarm-check procedure; do not block hoses or sensors except as instructed.
Filter Loading and Airflow Loss
Welding fume, grinding dust, metal dust, and shop debris load filters faster than clean-air use. A clogged prefilter or spark arrestor can trigger alarms even when the main filter still looks usable. If airflow improves after replacing the prefilter but drops again quickly, check the work process, fume extraction, filter type, and whether grinding dust is overloading the system.
Field Fix vs Proper Fix
| Problem | Field Fix | Proper Fix |
|---|---|---|
| Low-flow alarm | Stop welding and move to clean air | Replace loaded filters and pass airflow test |
| Weak battery | Install charged spare battery | Test charger, contacts, and battery runtime |
| Kinked hose | Reroute hose | Replace crushed or cracked breathing tube |
| Fogging in helmet | Check head seal and fan speed | Fix airflow restriction and worn shroud/seal |
| Alarm remains after new filters | Remove from service | Inspect blower, sensors, hose seals, and service parts |
Common Wrong-Part Mistakes
- Installing a filter from the wrong PAPR system because it appears to fit.
- Using a particulate-only filter where gas/vapor cartridge protection is required.
- Replacing the main filter but leaving a packed spark arrestor or prefilter in place.
- Using a non-compatible breathing tube or helmet adapter.
- Assuming a charged battery is good without checking runtime under blower load.
- Using damaged head seals, shrouds, or hose O-rings and blaming the blower.
Compatibility Notes
PAPR parts must match the complete system approval: blower, battery, charger, filter/cartridge, prefilter, spark arrestor, breathing tube, belt, helmet/headtop, face seal or shroud, and airflow indicator. Do not mix 3M, Miller, Lincoln, ESAB, ArcOne, Jackson, or other PAPR components unless the manufacturer specifically approves the configuration. For verified WSP category references, see welding helmet and PAPR support by brand and ESAB welding helmet support.
What To Verify Before Ordering
- PAPR brand, model, and approval label.
- Blower unit part number and serial/date information.
- Filter type required for welding fume and any coating, metal, or gas/vapor hazard.
- Battery and charger model.
- Breathing tube connection style and length.
- Helmet/headtop model and face seal or shroud style.
- Required airflow indicator or test kit.
- Whether the system is still within service life and approved configuration.
Related Failure Paths
- Low-flow alarm caused by filter loading.
- Helmet fogging caused by weak airflow or seal damage.
- Battery runtime collapse during long weld shifts.
- Fume exposure caused by wrong filter type.
- Blower overwork from blocked inlet screens or packed prefilters.
- Loss of protection from torn shrouds, loose hoses, or mixed-brand parts.
Safety Notes
- Do not use a PAPR that fails airflow, alarm, battery, or fit checks.
- Do not bypass low-flow alarms, sensors, filters, or manufacturer interlocks.
- Use only filters approved for the hazard; welding fume, stainless, galvanized, coatings, and solvents may require different controls.
- PAPRs do not supply oxygen and are not for oxygen-deficient or immediately dangerous atmospheres unless specifically designed and approved for that use.
- Maintain ventilation and fume extraction; a respirator is the last line of protection, not the only control.
Sources Checked
- NIOSH PAPR overview.
- 3M PAPR system overview.
- Weld Support Parts PAPR welding safety and helmet replacement support pages.
- Weld Support Parts ESAB and welding helmet/PAPR support pages.
- Welding helmet PAPR blog references for airflow, filter, and battery status.
Welding Helmet Flickering Shade Troubleshooting: Auto-Darkening Lens, Sensors, Batteries, Sensitivity, and Delay
A welding helmet that flickers between light and dark during welding should be removed from service until it passes a safe function check. Flickering shade is usually caused by weak batteries, blocked sensors, dirty cover lenses, low sensitivity, short delay, wrong mode, obstructed arc view, low-amperage TIG detection problems, or a failing auto-darkening filter cartridge. Do not keep welding through repeated flashes.
Start with the simple checks: confirm the helmet is in weld mode, clean or replace the outside cover lens, clean sensor windows, replace serviceable batteries, increase sensitivity, increase delay, and test the helmet at the actual welding process and amperage. If the shade still flickers after these checks, replace the auto-darkening filter or helmet according to the manufacturer’s instructions.
Related helmet support checks include auto-darkening helmets flickering on aluminum TIG, auto-darkening welding helmet not working, welding helmet replacement parts, and auto-darkening welding helmet buying guide.
Common Symptoms
| Symptom | Likely Cause | First Check |
|---|---|---|
| Lens flashes light during welding | Blocked sensors, weak battery, low sensitivity | Stop welding and inspect sensors/battery |
| Works on MIG but flickers on TIG | Low TIG arc signal or obstructed sensor view | Increase sensitivity and verify TIG rating |
| Lens darkens then drops out | Delay too short or arc intensity changes | Increase delay one step |
| Helmet stays light | Dead battery, grind mode, failed ADF | Check mode, batteries, and function test |
| Helmet stays dark | Stuck control, wrong mode, sensor issue | Cycle controls and inspect ADF |
| View looks dim or hazy | Scratched/dirty cover lens | Replace cover lenses |
What the Auto-Darkening Lens Does
The auto-darkening filter detects the welding arc through front sensors and switches the lens to the selected shade. The helmet shell, cover lenses, sensor windows, ADF cartridge, battery contacts, and settings all affect performance. A helmet can have a good shell and bad filter cartridge, or a good filter cartridge that flickers because the sensors are blocked by smoke film, spatter haze, tape, a hand position, or a tight joint.
Inspection Steps
- Stop welding immediately. Repeated flicker can expose eyes to arc flash.
- Confirm weld mode. Make sure the helmet is not in grind mode, cut mode, test mode, or light-state lock.
- Clean or replace the outside cover lens. Smoke film, scratches, spatter, and dust reduce sensor visibility and operator visibility.
- Inspect the inside cover lens and ADF window. Replace damaged lenses before judging the cartridge.
- Clean sensor windows. Use the helmet manufacturer’s cleaning method. Do not scrape sensors with metal tools.
- Replace batteries if serviceable. Confirm battery type, polarity, and battery contact condition from the helmet manual.
- Increase sensitivity. Low-amp TIG, pulsed TIG, inverter TIG, and partially hidden arcs often need higher sensitivity.
- Increase delay. Short delay can make the lens return to light during pulsing, crater fill, or brief arc changes.
- Check shade setting. Confirm the selected shade matches process and amperage.
- Test at the actual process. A helmet that works on MIG may still fail on low-amperage TIG.
Why TIG Often Causes Helmet Flicker
TIG can be harder for some helmets to detect than MIG or stick because the arc may be lower amperage, cleaner, quieter, partly hidden by the cup or filler hand, or aimed into a corner. Aluminum AC TIG and pulsed TIG can change arc intensity enough that a marginal setting drops out. If the helmet only flickers on TIG, treat sensitivity, delay, sensor view, cover lens condition, and TIG amperage rating as the first checks.
Field Fix vs Proper Fix
| Problem | Field Fix | Proper Fix |
|---|---|---|
| Dirty cover lens | Clean lens | Replace scratched or smoke-damaged cover lenses |
| Blocked sensors | Clean sensor area | Change work angle or helmet position so sensors see the arc |
| Weak batteries | Install fresh batteries | Clean contacts and verify battery type from manual |
| Low-amp TIG flicker | Raise sensitivity/delay | Use a helmet rated for the TIG amperage used |
| Flicker continues after checks | Stop using helmet | Replace ADF cartridge or helmet |
Common Wrong-Part Mistakes
- Buying a cover lens that is the wrong size for the helmet frame.
- Replacing the shell when only the ADF cartridge or cover lens is bad.
- Installing the wrong battery type or reversing polarity.
- Assuming “solar powered” means no battery or no charge issue.
- Using a helmet not rated for low-amperage TIG.
- Ignoring cracked lens retainers that leave light gaps around the cartridge.
Compatibility Notes
Helmet replacement parts must match the helmet model, ADF cartridge size, cover lens size, retaining frame, battery type, shade range, and safety rating. Do not order cover lenses, batteries, headgear, or ADF cartridges by appearance alone. If markings are missing or the cartridge does not pass a pre-use function test, remove the helmet from service.
Related Failure Paths
- Arc flash exposure from intermittent darkening.
- TIG flicker caused by low sensitivity or blocked sensors.
- ADF dropout caused by short delay during pulsed welding.
- False helmet failure caused by dirty cover lenses.
- Battery contact corrosion causing random shade switching.
- Wrong shade range causing eye strain or poor puddle visibility.
Safety Notes
- Never weld with a helmet that flickers, flashes, or fails a pre-use darkening check.
- Follow ANSI Z87.1 and ANSI Z49.1 eye and face protection requirements.
- Inspect the shell, headgear, lens frame, ADF holder, and cover lenses before welding.
- Replace damaged or uncertain protection instead of trying to weld through the issue.
- Use the correct shade for the welding process and amperage.
Sources Checked
- Weld Support Parts auto-darkening helmet flicker and not-working guides.
- Weld Support Parts welding helmet replacement parts guide.
- Weld Support Parts welding helmet buying guide.
- Welding helmet manufacturer/support troubleshooting resources.
Do Welding Helmet Cover Lenses Block UV, or Is the ADF Doing That?
A clear welding helmet cover lens is mainly a sacrificial protection plate. It protects the auto-darkening filter, fixed shade plate, and viewing area from spatter, grinding dust, scratches, smoke film, and impact wear. The welding filter or auto-darkening filter is the part that must provide the required welding shade and UV/IR protection for arc exposure.
This matters because a clean cover lens can make the helmet look safer than it really is. A clear cover plate is not a welding shade. Do not weld with only a clear cover lens, and do not assume a scratched or missing cover lens is harmless. If the auto-darkening cartridge is damaged, missing, incorrectly installed, or not marked for welding protection, the helmet should be removed from service.
For broader helmet selection and shade checks, see the auto-darkening welding helmet buying guide and the welding safety glasses shade and ANSI Z87.1 guide.
Key Takeaways
- The ADF or passive welding filter is the primary part responsible for welding shade and UV/IR protection.
- The clear outside cover lens mainly protects the filter from spatter, dust, scratches, and impact wear.
- Some clear cover lenses may meet ANSI Z87.1 impact requirements, but that does not make them welding shade filters.
- Do not weld with a missing, cracked, heat-warped, or heavily scratched cover lens because it can expose the ADF to damage.
- Do not weld with only a clear cover lens. Use the correct filter shade for the process and amperage.
Problem / Context
The common question is whether the clear lens on the outside of a welding helmet blocks UV, or whether the auto-darkening filter does that job. The practical answer is that the welding filter must be treated as the critical UV/IR and shade-control component. The clear cover lens is a replaceable barrier that helps preserve the filter, but it is not a substitute for the filter.
Most helmet designs use several layers: the helmet shell, the outside clear cover lens, the ADF or fixed shade filter, and often an inside cover lens. Each part has a different job. Confusing these layers can lead to unsafe shortcuts, especially when a cover lens is cracked or the ADF looks expensive to replace.
Root Causes of Confusion
Clear lenses may still have safety markings: A clear replacement cover lens may be sold as ANSI Z87.1 compliant for impact protection. That does not mean it has the correct optical density for welding arc radiation.
ADF lenses protect in light and dark states: Manufacturer manuals commonly state that the auto-darkening cartridge provides UV/IR protection in both light and dark states. The darkening function controls visible brightness and shade comfort, but the UV/IR filter function should not depend only on the lens switching dark.
The cover lens sits closest to the arc: Because the clear plate faces sparks and spatter first, welders may assume it is the main safety lens. Its real job is to protect the more expensive filter behind it.
Damaged cover lenses can hide filter problems: A cloudy, pitted, or heat-warped cover lens reduces visibility and can make welders raise their hood, lean into bad positions, or miss a damaged ADF. See the ArcOne S240-10 auto-darkening filter support guide for fit and visibility checks.
Some helmets cannot be used without cover lenses: Several helmet manuals warn against using the helmet without the inside and outside cover lenses properly installed. Missing cover lenses can allow spatter, heat, and debris to damage the filter cartridge.
Solution
- Confirm the helmet has a proper ADF or passive welding filter installed. A clear cover lens alone is not enough.
- Check the helmet and filter markings for ANSI Z87.1 and manufacturer identification.
- Confirm the shade range or fixed shade number matches the welding process and amperage.
- Inspect the outside cover lens for cracks, spatter pits, smoke film, deep scratches, or heat warping.
- Inspect the inside cover lens if the helmet uses one. Replace it if it is cracked, dirty, pitted, or loose.
- Use only replacement cover lenses specified by the helmet manufacturer when possible.
- Replace the cover lens before visibility drops enough to affect puddle control or sensor performance.
- Remove the helmet from service if the ADF cartridge is cracked, loose, delaminated, water-damaged, or not darkening correctly.
- Wear safety glasses or goggles under the helmet where grinding, chipping, or flying particle hazards exist.
Specs / Verification Notes
| Helmet Layer | Main Job | Can It Replace the ADF? | Verification Note |
|---|---|---|---|
| Outside clear cover lens | Protects the welding filter from spatter, dust, scratches, and impact wear | No | Size, material, and helmet fit: Unknown (Verify) |
| Auto-darkening filter | Provides welding shade and UV/IR protection according to the helmet design | Required for ADF helmets | Confirm shade range and ANSI marking |
| Passive filter plate | Provides fixed welding shade and radiation filtering | Required for passive helmets | Confirm shade number for process and amperage |
| Inside cover lens | Protects the inside face of the filter from dust, handling damage, and debris | No | Helmet-specific fit: Unknown (Verify) |
| Safety glasses under hood | Protects against flying particles when required | No | Confirm ANSI Z87.1 marking |
Product Section
Replacement cover lenses are maintenance parts, not shade filters. The example below is a 2 in x 4-1/4 in clear cover lens. Confirm helmet fit, lens size, manufacturer approval, and ANSI marking before use. Compatibility with any specific helmet is Unknown (Verify).
- package dimensions :13.208 cm L x 5.588 cm W x 0.254 cm H
- Product type :TOOLS
- country of origin:China
- This are highly durable
Last update on 2026-07-14 / Affiliate links / Images from Amazon Product Advertising API
Comparison Table
| Question | Correct Answer | Shop Mistake to Avoid |
|---|---|---|
| Does the clear cover lens provide welding shade? | No. It is not the welding filter. | Do not weld through only a clear cover lens. |
| Does the ADF provide UV/IR protection? | Manufacturer manuals commonly state UV/IR protection is present in light and dark states. | Do not keep using a cracked or unverified ADF. |
| Can a cracked cover lens be ignored? | No. Replace it before welding. | Do not let spatter or debris reach the filter cartridge. |
| Can any clear lens fit any helmet? | No. Size and helmet model matter. | Do not force a loose, undersized, or warped cover plate into service. |
| Are safety glasses still needed? | They may be required for flying particle hazards. | Do not rely on the helmet alone during grinding or chipping. |
Related Failure Paths
ADF does not darken: If the lens stays light, flashes, or responds inconsistently, use the auto-darkening welding helmet not working checklist.
ADF flickers on TIG: A dirty cover lens or blocked sensor can contribute to flicker on low-current TIG. See why auto-darkening helmets flicker on aluminum TIG.
Passive versus auto-darkening confusion: Passive helmets and ADF helmets both require proper filter protection, but they work differently. Compare the practical differences in auto-darkening vs passive welding helmets.
Shade number mismatch: A clear cover lens does not determine whether shade 9, 10, 11, 12, or 13 is correct. Use the process, amperage, and manufacturer chart to select shade. The helmet lens speed, shade range, and standards guide gives broader selection context.
Safety Notes
Arc welding emits visible light, ultraviolet radiation, and infrared radiation. Use a welding helmet with the correct filter lens shade for the process and current. OSHA guidance also notes that workers using welding helmets may need safety glasses with side shields or goggles where flying particle hazards exist.
Do not treat a clear cover plate as UV/IR proof for welding exposure unless the complete helmet, filter, and replacement part are being used exactly as specified by the manufacturer. Even if a clear cover lens has some UV-blocking material property, it is not a substitute for a welding filter shade.
Stop using the helmet if the filter cartridge is cracked, loose, heat damaged, water damaged, or visibly compromised. Manufacturer warnings commonly state that UV/IR protection may be compromised when the product is damaged.
FAQ
Does the clear outside cover lens block UV?
Do not rely on it as the welding UV/IR protection layer. The cover lens is mainly a protective plate. The ADF or passive welding filter is the critical radiation-filtering component.
Does an auto-darkening helmet protect from UV before it darkens?
Manufacturer manuals for auto-darkening helmets commonly state that the ADF protects against UV/IR in both light and dark states. The darkening function controls visible light shade, but the helmet still must be undamaged, properly assembled, and correctly rated.
Can welding flash happen if the ADF fails to darken?
Yes. Even when UV/IR filtering is present, a lens that fails to darken can expose the user to excessive visible light and unsafe viewing conditions. Stop welding and troubleshoot the helmet.
Can a clear cover lens be used for grinding?
Only if the complete helmet setup is rated and configured for grinding or impact hazards. Grinding mode does not make the helmet a welding shade, and welding mode does not replace safety glasses where flying particles are present.
How often should cover lenses be replaced?
Replace them when cracked, soiled, pitted, deeply scratched, heat-warped, loose, or visibility is reduced. Replacement interval depends on welding process, spatter level, grinding exposure, and shop conditions.
Can aftermarket cover lenses be used?
Only after verifying size, fit, material, safety marking, and helmet manufacturer guidance. OEM lenses are preferred when the helmet manual specifies exact replacement parts.
Next Step
Inspect the helmet in layers: outside cover lens, ADF or passive filter, inside cover lens, shell, headgear, and safety glasses. Replace damaged cover lenses, verify the correct filter shade, and remove the hood from service if the ADF or passive filter is cracked, loose, unmarked, or not working correctly.
Sources Checked
- OSHA Eye Protection against Radiant Energy during Welding and Cutting fact sheet: filter lens shade guidance and safety glasses or goggles for flying particle hazards.
- Lincoln Electric auto-darkening helmet manuals: UV/IR protection in dark and light states, warnings about damaged products, and use of specified cover lenses.
- 3M Speedglas welding PPE product guide: permanent UV/IR protection references for Speedglas ADF products.
- Forney 56800 cover lens manufacturer listing: 2 in x 4-1/4 in clear plastic cover lens, impact and spatter protection, ANSI Z87.1 reference, and fit notes.
- Weld Support Parts: Auto-Darkening Welding Helmet Buying Guide 2025.
- Weld Support Parts: Welding Safety Glasses Guide 2025.
- Weld Support Parts: Auto-Darkening Welding Helmet Not Working: Causes and Fixes.
- Weld Support Parts: ArcOne S240-10 Auto-Darkening Welding Filter Support Guide.
- Weld Support Parts: Auto-Darkening vs Passive Welding Helmets.
Welding Helmet Sensor Troubleshooting: Auto-Darkening Lens Flicker, Flashing, and No-Darken Checks
If an auto-darkening welding helmet flashes, flickers, darkens late, stays light, or drops out while welding, stop welding and inspect the helmet before continuing. The most common sensor-related causes are blocked arc sensors, dirty cover lenses, low batteries, grind mode left on, sensitivity set too low, delay set wrong, low-amperage TIG not being detected, or the workpiece/torch blocking the sensor view of the arc.
Do not keep welding through repeated flicker. Even if the filter cartridge still provides passive UV/IR protection when functioning as designed, a helmet that does not darken reliably can expose the operator to bright arc flash, eye strain, missed starts, and unsafe reaction movements. Verify helmet mode, sensor visibility, battery condition, shade range, sensitivity, delay, and cover lens condition before returning it to service.
Common Symptoms
- Helmet does not darken: Grind mode, dead battery, blocked sensors, failed ADF cartridge, or sensor not seeing the arc.
- Helmet darkens late: Low battery, low sensitivity, dirty sensor windows, or weak arc detection.
- Helmet flickers while welding: Sensors are being blocked, sensitivity is too low, or the arc signal is inconsistent.
- Helmet flashes during TIG: Low-amperage TIG, torch hand blockage, cup position, or poor sensor angle.
- Helmet stays dark after welding: Delay set too long, sensor seeing bright light, or control issue.
- Helmet works on MIG but not TIG: TIG arc may be too low or partially blocked for the sensor setup.
- Helmet darkens in sunlight or under shop lights: Sensitivity too high or sensor responding to external light sources.
What the Sensors Do
Auto-darkening helmets use arc sensors to detect welding light and trigger the auto-darkening filter. Most problems are not caused by the viewing lens itself at first. They begin when the sensors cannot clearly see the arc or the electronics do not have enough power to switch consistently. A scratched outside cover lens, spatter over a sensor window, a gloved hand blocking one side of the helmet, or a joint corner hiding the arc can all cause intermittent darkening.
Fast Checks Before Replacing the Helmet
- Confirm the helmet is in weld mode, not grind mode or cut mode.
- Clean or replace the outside cover lens.
- Clean the sensor windows with the method allowed by the helmet manual.
- Replace batteries if the helmet uses replaceable batteries.
- Set sensitivity higher for low-amperage TIG or obstructed joints.
- Set delay appropriate for the process and amperage.
- Check that the selected shade range matches MIG, TIG, Stick, or plasma work.
- Test the helmet before welding again. If it still fails, remove it from service.
Sensor Troubleshooting Table
| Problem | Likely Cause | First Check |
|---|---|---|
| Lens stays light | Grind mode, dead battery, blocked sensors, failed ADF | Mode, batteries, sensor windows |
| Lens flickers during weld | Sensor view blocked or sensitivity too low | Increase sensitivity and reposition helmet |
| Works on MIG but not TIG | Low TIG amperage or arc hidden by torch hand | Higher sensitivity, better sensor angle |
| Darkens late | Low battery, dirty sensors, wrong setting | Replace batteries and clean cover lens |
| Stays dark too long | Delay too long or bright light hitting sensors | Adjust delay and remove bright light source |
| Random darkening | Sensitivity too high or sunlight/shop light trigger | Lower sensitivity and test indoors |
Blocked Sensor Checks
Look at the front of the helmet and locate the arc sensor windows. They are usually small dark windows around or near the auto-darkening filter. Spatter, dust, stickers, tape, scratched cover lenses, smoke film, and damaged front lens retainers can block the sensor view. A helmet may work on a flat bench test but fail in a tight joint because the torch hand, cup, fixture, or workpiece blocks one or more sensors.
Battery and Solar-Assist Checks
Many helmets use replaceable batteries, solar-assist cells, or sealed batteries depending on model. Replace the battery if the helmet has a low-battery indicator, slow switching, dim controls, intermittent darkening, or unexplained flicker. Do not assume a solar-assist panel means the helmet never needs battery service. Battery type and replacement method are model-specific: Unknown (Verify from helmet manual).
Sensitivity and Delay Setup
Sensitivity controls how easily the sensors trigger the ADF. Low-amperage TIG, hidden arcs, out-of-position work, and tack welding often need more sensitivity. Bright shop lighting, sunlight, nearby welders, and reflective work can require less sensitivity. Delay controls how long the lens stays dark after the arc stops. Too short a delay can feel like flicker. Too long a delay can make the helmet feel stuck dark between tack welds.
TIG-Specific Sensor Problems
TIG can expose weak helmet sensor setups because the arc may be small, low-amperage, partially hidden by the torch cup, or blocked by the welder’s hand. If the helmet works reliably on MIG or Stick but flickers on TIG, test at a higher sensitivity setting, keep the sensors facing the arc, reduce obstruction from the torch hand, and confirm the helmet is rated for the TIG amperage being used.
Cover Lens and Sensor Window Wear
A scratched or smoke-coated outside cover lens can reduce arc detection and make the puddle hard to see. Replace cover lenses before condemning the ADF cartridge. If the sensor window itself is cracked, melted, clouded, or contaminated behind the front cover, the helmet may need a replacement ADF cartridge or manufacturer service.
Common Wrong-Diagnosis Mistakes
- Welding with grind mode still enabled.
- Replacing the helmet before cleaning the sensor windows.
- Testing only under shop lights instead of testing with a safe arc check.
- Assuming low-amperage TIG will trigger every budget helmet reliably.
- Leaving scratched cover lenses in service too long.
- Ignoring blocked sensors when welding pipe, corners, fixtures, or tight fillets.
- Assuming solar-assist helmets never need battery replacement.
Field Fix vs Proper Fix
Field fix: Stop welding, clean the sensor windows, replace the outside cover lens, verify weld mode, increase sensitivity, and replace batteries if applicable.
Proper fix: Confirm the helmet’s shade range, TIG amperage rating, sensor count, battery condition, cover lens condition, and ADF cartridge function. Replace damaged cover lenses, failed batteries, broken retainers, cracked shells, or a failing ADF cartridge. Remove the helmet from service if it cannot darken reliably.
Related Failure Paths
- Auto-darkening welding helmet not working
- Auto-darkening helmet flicker on TIG aluminum
- Helmet troubleshooting
- Auto-darkening helmet support
- Welding safety support
Safety Notes
- Never weld with a helmet that repeatedly flickers or fails to darken.
- Verify helmet operation before welding.
- Use the shade range required for the process and amperage.
- Replace damaged cover lenses and cracked helmet shells.
- Follow ANSI Z87.1 and ANSI Z49.1 guidance for welding eye and face protection.
Why Auto-Darkening Helmets Flicker on Aluminum TIG but Not MIG or Stick
An auto-darkening helmet that behaves normally on MIG or stick but flickers on aluminum TIG is usually not failing in the same way as a helmet that will not darken at all. Aluminum TIG exposes weak points in sensor detection, sensitivity settings, low-current arc recognition, torch angle, reflected light, and delay settings. The arc can be stable at the weld, but the helmet may not be seeing enough consistent arc signal to stay dark.
This is a narrower support article for welders who already have a working auto-darkening hood but only see flicker during AC aluminum TIG. For broader helmet selection, see the Best Auto-Darkening Welding Helmet for TIG guide and the auto-darkening welding helmet buying guide.
Key Takeaways
- Aluminum TIG flicker is commonly caused by low TIG arc signal, blocked sensors, low sensitivity, short delay, or reflective arc angles.
- MIG and stick usually create brighter, broader, easier-to-detect arcs, so the same helmet may seem fine on those processes.
- AC TIG, tight torch angles, cup position, filler hand position, and workpiece geometry can partly shield the arc from the helmet sensors.
- Increase sensitivity, increase delay, clean the cover lens, replace weak batteries, and confirm that the helmet is rated for the TIG amperage used.
- Do not keep welding with a helmet that flickers, flashes, or fails a pre-use darkening check.
Problem / Context
The symptom is specific: the helmet darkens normally for MIG or stick welding, but during aluminum TIG it rapidly switches between dark and light, pulses, or drops shade during starts, crater fill, or low-amperage sections. This is different from a dead helmet. For total failure, use the broader checklist in Auto-Darkening Welding Helmet Not Working: Causes and Fixes.
Aluminum TIG is a harder detection case because the welder may run low current, use a tight cup angle, weld around corners, or move the torch in a way that hides part of the arc from the helmet sensors. MIG and stick normally throw more visible arc energy and spatter glow into the front of the hood, so a marginal sensor setup may still work there.
Root Causes
Low sensitivity setting: Many helmets have sensitivity ranges intended for different welding conditions. Some manufacturer instructions list higher sensitivity positions for stable TIG arcs, low-current TIG, inverter TIG, or cases where part of the arc is obscured. If the helmet is still on a lower general-purpose setting, it may detect MIG and stick but drop out on aluminum TIG.
Short delay setting: If the delay is set too short, the lens may return to light state during brief arc intensity changes, pulsing, repositioning, or crater fill. This can feel like flicker even when the helmet is detecting the arc correctly at the start.
Blocked arc sensors: The torch cup, filler rod hand, bench edge, pipe joint, corner joint, or the welder’s head angle can block the arc from one or more front sensors. This matters more in TIG because the arc is smaller and more concentrated than a typical MIG or stick arc.
Dirty or damaged cover lens: Smoke film, grinding dust, aluminum oxide dust, fingerprints, and spatter haze can reduce what the sensors see. A hazy lens can also make the puddle look washed out. If visibility is the main issue, see auto-darkening filter lens fit and visibility checks before assuming the whole helmet is bad.
Weak battery or solar-assist limitation: Some helmets use replaceable batteries, some use solar assist, and some use sealed cells. Weak power can make response inconsistent, especially when welding starts and stops repeatedly.
Helmet not suited for low-amp TIG: Some low-cost or older auto-darkening filters work acceptably on MIG and stick but are less reliable at low TIG amperage. Minimum TIG amp rating is often unclear on retailer listings. Treat missing low-amp TIG data as Unknown (Verify).
Grinding mode or light-state lock: A helmet left in grind mode or light-state lock may not darken. A helmet partly stuck between modes can also behave inconsistently. Always confirm weld mode before striking an arc.
Solution
- Stop welding and inspect the helmet before continuing. Do not keep welding through repeated flicker.
- Confirm the helmet is in weld mode, not grind mode, cut mode, or light-state lock.
- Clean or replace the outer cover lens. Clean the sensor windows according to the helmet manual.
- Replace the batteries if the helmet uses replaceable cells. Battery type: Unknown (Verify from helmet manual).
- Increase sensitivity one step at a time until the helmet stays dark during aluminum TIG starts and steady welding.
- Increase delay if the lens drops out during pulsing, crater fill, or brief arc-length changes.
- Reposition the hood and torch so the front sensors have a direct view of the arc.
- Test at the actual TIG amperage used, not only on MIG or stick.
- If flicker remains, compare the helmet’s TIG amp rating and sensor count against manufacturer documentation. Missing rating: Unknown (Verify).
- Use a passive shade lens or a TIG-capable replacement helmet until the auto-darkening issue is resolved.
Specs / Verification Notes
| Check Point | Why It Matters on Aluminum TIG | Status |
|---|---|---|
| Minimum TIG amperage rating | Confirms whether the ADF is designed to detect low-current TIG arcs | Unknown (Verify) |
| Number of arc sensors | More sensor coverage can reduce dropout when one sensor is blocked | Unknown (Verify) |
| Sensitivity control | Needed for low-current TIG and partially obscured arcs | Verify helmet has adjustable sensitivity |
| Delay control | Helps prevent light-state return during arc pulsing or crater fill | Verify helmet has adjustable delay |
| Battery type | Weak batteries can cause inconsistent darkening | Unknown (Verify) |
| ANSI Z87.1 marking | Confirms eye and face protection compliance marking | Verify on helmet and manual |
Product Section
If the helmet uses replaceable CR2032 cells, fresh batteries are a low-cost maintenance step before replacing the full hood. Battery fit varies by helmet model, so confirm the required battery type in the manufacturer manual before ordering. Battery compatibility: Unknown (Verify).
- Rome Tech CR2032 battery for Welding Helmet compatible with Welding Helmet Viking / G5 9000 9100 FX x xx xxi 100 Series 3m SL100 9000 9002 9100. Please, check your Welding Helmet needs battery CR2032 before purchasing!
- RTB CR2032 batteries are designed to last long. Enjoy long CR2032 lithium 3V coin battery life without worry. Use this time with pleasure.
- CR2032 lithium 3V coin battery is reliable and provides consistent power to your Welding Helmet. This means you can trust CR 2032 battery for Welding Helmet to work when you need it most, ensuring you always have working Welding Helmet.
- CR2032 lithium battery is designed to withstand extreme temperatures, whether hot or cold. Battery CR2032 3V lithium cell robust construction makes it resistant to vibration and impact, ensuring it can withstand the rigours of daily use.
- Rome Tech multifunctional CR 2032 3V battery for Welding Helmet can be used for various electronic devices such as watches, fitness trackers, calculators, digital cameras, remote controls, and many more.
Last update on 2026-07-14 / Affiliate links / Images from Amazon Product Advertising API
Comparison Table
| Process | Helmet Behavior | Likely Reason | Best First Fix |
|---|---|---|---|
| Aluminum TIG | Flickers or drops shade | Low-current arc, blocked sensor, AC arc behavior, short delay | Raise sensitivity and delay; clean sensors |
| MIG | Usually stable | Brighter, broader arc signal with easier sensor detection | Use as comparison test only |
| Stick | Usually stable | Strong arc light and electrode angle often expose sensors clearly | Use as comparison test only |
| Grinding mode | May stay light | Darkening function disabled | Return to weld mode before welding |
Related Failure Paths
Helmet does not darken at all: This is usually a battery, mode, sensor, or cartridge failure issue. Use the auto-darkening helmet not working checklist.
Wrong helmet type for the work: Some shops keep a passive hood as a backup for awkward TIG joints or outdoor stick welding. The auto-darkening vs passive welding helmet comparison explains where each type fits.
Fixed-shade filter mismatch: A shade 10 filter may be useful in some compact hood setups, but it is not automatically correct for every TIG amperage or aluminum job. Check the ArcOne S240-10 auto-darkening filter support guide for fit and shade cautions.
Low-amp TIG helmet selection: If the current helmet lacks a published TIG amp rating or has poor sensor coverage, compare it against helmets documented for TIG work in the TIG auto-darkening helmet buyer guide.
Safety Notes
Arc radiation can injure eyes and skin. A welding helmet must use the correct filter shade for the welding process and current. OSHA guidance states that protective eye and face devices must comply with ANSI Z87.1, and side protection or safety glasses may also be required where flying particles are present.
Do not use a flickering auto-darkening helmet as a normal condition. If sensitivity and delay adjustments do not produce reliable darkening, remove the helmet from service until the battery, cartridge, cover lens, sensors, and safety markings are verified.
Auto-darkening helmets do not provide respiratory protection by themselves. Aluminum TIG can still involve cleaning chemicals, ozone, shielding gas displacement, and fume exposure depending on the shop setup. Use ventilation and respiratory protection according to the job hazard assessment.
FAQ
Why does my helmet flicker only on aluminum TIG?
Aluminum TIG can produce a smaller or more directional arc signal at the helmet sensors, especially at low amperage or with the cup blocking the arc. MIG and stick are usually easier for the sensors to detect.
Should sensitivity be higher for TIG?
Often yes. Many helmets require higher sensitivity for low-current TIG, inverter TIG, or arcs that are partly blocked from sensor view. Increase sensitivity gradually and confirm that the helmet still lightens correctly after welding.
Can AC balance or pulse settings cause helmet flicker?
They can contribute to the symptom if arc intensity changes enough for the helmet to drop below its detection threshold. The practical fix is usually helmet sensitivity, delay, sensor exposure, and confirming the helmet’s TIG capability.
Does flicker mean the helmet is unsafe?
Repeated flicker means the helmet is not performing reliably for that task. Stop and troubleshoot before continuing. If it cannot be corrected, use a properly shaded passive helmet or a TIG-capable auto-darkening helmet.
Will replacing the cover lens help?
Yes, if the cover lens is dirty, scratched, smoky, or spatter-damaged. A poor cover lens can reduce both visibility and sensor performance.
Can the same helmet be used for TIG, MIG, and stick?
Yes, but only if the helmet has the correct shade range, reliable sensor performance, and manufacturer support for the TIG amperage used. Multi-process claims should be verified against the manual, not only retailer copy.
Next Step
Before replacing the helmet, test it in this order: weld mode, clean lens, fresh battery, higher sensitivity, longer delay, direct sensor view, and actual aluminum TIG amperage. If the hood still flickers while MIG and stick remain stable, the helmet may not be suitable for that TIG application. Use the helmet lens speed, shade range, and standards guide to compare replacement requirements.
Sources Checked
- 3M Speedglas 9100 Series user instructions: sensitivity positions for stable TIG, low-current TIG, inverter TIG, obscured TIG arcs, light-state lock, dark-state lock, and delay behavior.
- OSHA Eye Protection against Radiant Energy during Welding and Cutting in Shipyard Employment fact sheet: ANSI Z87.1 compliance, side protection, filter lens shade guidance, and ANSI/AWS shade references.
- Weld Support Parts: Auto-Darkening Welding Helmet Buying Guide 2025.
- Weld Support Parts: Best Auto-Darkening Welding Helmet for TIG.
- Weld Support Parts: Auto-Darkening vs Passive Welding Helmets.
- Weld Support Parts: Auto-Darkening Welding Helmet Not Working: Causes and Fixes.
- Weld Support Parts: ArcOne S240-10 Auto-Darkening Welding Filter Support Guide.
- Amazon search result checked for ASIN B0D7J214QR. Battery compatibility remains Unknown (Verify).
Welding Helmet Replacement Parts: Lens, Headgear, Shell, Battery, and ADF Fitment Guide
If a welding helmet is hard to see through, will not stay up, flickers, fails to darken, or feels loose on the head, the repair usually starts with replacement parts—not a new helmet. The most common welding helmet replacement parts are outside cover lenses, inside cover lenses, sweatbands, headgear assemblies, batteries, ADF cartridges, lens seals, shell parts, magnifying lenses, hard hat adapters, and PAPR filters. The part must match the exact helmet series, lens size, cartridge style, and shell design before ordering.
Do not order by appearance alone. Two helmets can look similar and use different inside lenses, ADF cartridges, gasket profiles, or headgear hardware. Verify the brand, helmet series, model number, lens dimensions, ADF part number, battery type, and whether the hood is passive, auto-darkening, flip-front, grind-shield, hard-hat compatible, or PAPR-equipped.
Common Symptoms
| Symptom | Likely Part | What To Check First |
|---|---|---|
| Cloudy view or haze | Outside cover lens / inside cover lens | Scratches, smoke film, spatter pits, heat warping |
| Helmet will not stay up | Headgear assembly | Stripped knobs, cracked pivots, worn ratchet band |
| ADF flickers or goes light | Battery, sensors, ADF cartridge | Battery condition, sensor blockage, mode setting |
| Light leaks around lens | Lens seal / gasket / ADF holder | Missing seal, warped holder, wrong cover lens thickness |
| Sweatband torn or soaked | Sweatband | Contamination, odor, slipping headgear |
| Helmet shell cracked | Replacement shell | Impact damage, heat damage, broken lens frame |
| Need closer puddle view | Cheater / magnifying lens | Correct diopter and compatible lens slot |
| PAPR airflow warning | Filter, pre-filter, battery, breathing tube | Loaded filters, low battery, blocked hose, poor seal |
What This Part Does
The outside cover lens protects the ADF or passive filter from spatter, sparks, grinding dust, and scratches. It is the part most shops replace first because it directly affects puddle visibility. The inside cover lens protects the rear side of the filter from dust, fingerprints, and fumes trapped inside the hood.
The ADF cartridge is the auto-darkening filter. If the helmet powers on but does not darken reliably after batteries and sensors are checked, the cartridge may be the failed component. The headgear assembly controls fit, balance, lift tension, and working position. A worn headgear can make a good helmet feel unsafe or unusable.
Sweatbands are low-cost wear items. They do not just improve comfort; they help keep the helmet stable on the head. Lens seals, gaskets, holders, and front frames keep the filter seated correctly and help prevent light leaks around the cartridge.
What Wears Out First
- Outside cover lens: usually the first part to replace on MIG, flux-core, stick, and grinding-heavy work.
- Sweatband: absorbs sweat and shop contamination; replace when it slips, smells, or loses shape.
- Headgear: fails at ratchets, pivots, tension knobs, and adjustment slots.
- Batteries: weak batteries cause delayed darkening, flicker, or failure to power the ADF.
- Lens seals and holders: wear after repeated lens changes or heat exposure.
- PAPR filters and pre-filters: load with fume and dust; replacement interval depends on exposure and manufacturer guidance.
Compatibility Notes
Helmet replacement parts are not universal unless the manufacturer states that they are. Lincoln VIKING 2450 and VIKING 3350 helmets both use KP2898-1 outside cover lenses and KP2930-1 sweatbands in the Lincoln parts data, but their inside cover lenses and ADF cartridges differ. The VIKING 2450 listing uses KP2931-1 inside cover lenses and KP2932-4 ADF cartridge, while the VIKING 3350 listing uses KP3044-1 inside cover lenses and KP3045-4 ADF cartridge.
The VIKING 3250D FGS uses larger front protection parts than standard VIKING shells, including KP3700-1 outside cover lenses, KP3701-1 inside cover lenses, KP3702-1 grind shield clear lens, KP3703-3 ADF cartridge, KP3704-1 replacement shell, and KP3706-1 headgear assembly.
Miller Performance and Classic helmet families use their own shell, lens cover, gasket, lens assembly, headgear, and battery tray part numbers. 3M Speedglas helmets also have series-specific outside plates, inside plates, filters, batteries, headbands, and hard-hat adapters. Dynaflux lists replacement cover lenses and auto-darkening replacement lenses by helmet family, including Miller, Jackson, and Speedglas-compatible listings. Treat every brand and series as its own parts system.
What To Verify Before Ordering
- Helmet brand and exact series
- Helmet model number or product number
- ADF cartridge part number
- Inside and outside cover lens dimensions
- Battery type, if replaceable
- Headgear style and pivot hardware
- Shell version or graphic series, if shell replacement is needed
- Hard hat adapter requirement
- PAPR model, blower, filter, pre-filter, hose, and face seal style
- Whether the helmet is passive, auto-darkening, flip-front, grind-shield, or PAPR
Common Wrong-Part Mistakes
- Ordering a standard VIKING lens for an FGS grind-shield helmet.
- Ordering an outside cover lens when the damaged part is the inside cover lens.
- Replacing the ADF cartridge before checking batteries, sensors, and cover lens condition.
- Assuming all 4-1/2 x 5-1/4 lenses fit every shell.
- Buying a headgear assembly without confirming the pivot hardware.
- Using a non-rated clear plastic sheet instead of a manufacturer lens cover.
- Mixing PAPR parts from different blower or helmet systems.
Visual Wear Indicators
Replace the outside lens when scratches, spatter pits, fogging, distortion, or heat waves make it harder to see the puddle. Replace the inside lens when it is cloudy, cracked, coated with fume residue, or no longer locks flat in the filter frame. Replace headgear if the helmet drops unexpectedly, feels unbalanced, or cannot hold adjustment.
Inspect the shell for cracks around the lens frame, pivot mounts, and top edge. A cracked shell can allow light entry or fail to support the filter. On PAPR helmets, inspect the face seal, breathing tube, filter cover, pre-filter, and battery connection before assuming the blower is bad.
Inspection Steps
- Clean the outside lens with a soft cloth and mild cleaner.
- Remove the outside cover lens and inspect it under shop light.
- Inspect the inside cover lens and ADF window.
- Check ADF sensors for smoke film, tape, stickers, or spatter.
- Replace batteries if the helmet uses serviceable batteries.
- Cycle weld, grind, shade, delay, and sensitivity settings.
- Inspect the headgear pivots, knobs, ratchet band, and sweatband.
- Look for light gaps around the ADF holder and lens seal.
- For PAPR systems, check airflow alarms, filter loading, hose connection, and face seal.
Test Procedures
After replacing helmet parts, perform a safe function check before welding. Confirm the ADF powers up, shade and delay controls respond, grind mode turns off before welding, and the helmet darkens consistently from multiple arc angles. Do not weld with a cracked lens, missing cover plate, missing gasket, damaged shell, or uncertain ADF response.
For PAPR helmets, follow the manufacturer airflow check procedure. If the low-flow alarm triggers after replacing the pre-filter or particle filter, inspect the breathing tube, battery charge, filter seating, and face seal. Do not treat a loaded filter as a comfort issue; it is a respiratory protection issue.
Field Fix vs Proper Fix
| Problem | Field Fix | Proper Fix |
|---|---|---|
| Scratched outside lens | Clean lens to finish a non-critical task | Replace with correct outside cover lens |
| Loose helmet | Tighten knobs | Replace worn headgear assembly |
| Dirty sweatband | Wipe down | Replace sweatband |
| Weak ADF battery | Stop and replace battery | Use specified battery and confirm operation |
| Light leak | Do not weld | Replace seal, holder, lens, or shell as needed |
| PAPR low flow | Leave weld area | Replace filters or repair system per manufacturer procedure |
Related Failure Paths
- Poor puddle visibility → scratched cover lens → wrong shade setting → bad bead placement.
- Helmet slipping → worn headgear → neck strain → inconsistent arc position.
- ADF flicker → weak battery or blocked sensors → arc flash risk.
- Missing lens seal → light leak → eye fatigue and unsafe viewing.
- Loaded PAPR filter → low airflow alarm → reduced respiratory protection.
Replacement Notes
For Lincoln VIKING 2450 and 3350 families, start by confirming whether the part needed is KP2898-1 outside cover lens, KP2930-1 sweatband, the correct inside lens, or the correct ADF cartridge for that series. For Miller helmets, use the correct Miller series breakdown before ordering shells, lens covers, gaskets, headgear, or ClearLight lens assemblies. For Speedglas, confirm the exact helmet family because 9002, 9100, G5, and PAPR systems do not share every part.
Unknown (Verify): cross-brand ADF cartridge swaps, non-OEM lens thickness, imported clone shell fitment, and hard-hat adapter fitment unless confirmed by the manufacturer or a verified parts breakdown.
Safety Notes
- Do not weld with a cracked, missing, or improvised lens cover.
- Do not bypass an ADF problem by increasing shade only; confirm the cartridge darkens correctly.
- Turn grind mode off before welding.
- Use only helmet parts rated for welding protection.
- For PAPR equipment, follow employer respiratory protection rules and manufacturer service intervals.
- If eye irritation, flash symptoms, or repeated ADF failure occurs, stop welding and inspect the helmet before reuse.
Sources Checked
- Lincoln Electric 2024 Expendable Parts Guide
- Lincoln Electric Accessories 2024 Product Catalogue
- Miller Accessories and Consumables Catalog data
- 3M Speedglas welding helmet parts references
- Dynaflux replacement lenses, faceshields, and headgear catalogue
- Weld Support Parts helmet breakdown pages
- Weld Support Parts Blog helmet visibility and helmet selection support pages

Why a PAPR Welding Helmet Low Airflow Alarm Keeps Going Off
A PAPR welding helmet’s low airflow alarm usually means the blower cannot deliver the required air volume through the hood, breathing tube, filter stack, or battery-powered blower system. The most common causes are clogged filters, blocked prefilters, a weak battery, a kinked breathing tube, a damaged face seal or hood seal, or a system that has not passed its required airflow check before use.
This PAPR Helmet Support guide is a troubleshooting follow-up to Lincoln K3930-1 PAPR welding helmet setup and ArcOne AirPlus PAPR kit selection. It focuses on low-airflow alarms, maintenance checks, and respiratory-protection failure paths instead of general PAPR buying advice.
Key Takeaways
- A low airflow alarm should be treated as a stop-work warning, not a nuisance sound.
- Clogged prefilters, spark guards, and main filters are the first items to inspect.
- A charged battery does not prove the blower is delivering enough air.
- Loose-fitting PAPR welding helmets still require correct assembly, airflow checks, and a respiratory protection program when used for required protection.
- Do not mix non-approved filters, hoses, batteries, helmets, or blower parts across systems.
- PAPR systems do not supply oxygen and must not be used in oxygen-deficient, unknown, or IDLH atmospheres.
Problem / Context
PAPR welding helmets are used to reduce exposure to welding fumes and particulates while improving comfort during long weld, grind, and fabrication work. A powered air-purifying respirator uses a battery-powered blower to pull contaminated air through approved filters or cartridges and deliver filtered air to the wearer’s breathing zone.
When the low airflow alarm sounds, the system may not be moving enough air through the breathing zone. That can happen during high-fume MIG, flux-core, stainless, galvanized, hardfacing, gouging, or grinding work. If the shop is also struggling with source capture, review welding fume extractor airflow troubleshooting because a PAPR should not be used as the only control when ventilation and fume extraction are required.
Root Causes
1. The Prefilter or Spark Guard Is Loaded
Grinding dust, spatter, smoke residue, and shop debris can load the outer protection layers before the main filter is fully used. A dirty prefilter or spark guard can restrict airflow enough to trigger the alarm even when the main filter looks usable.
2. The Main Filter Is Clogged or Wrong for the System
Main PAPR filters have specific fitment, approval, and service requirements. A clogged filter increases resistance and makes the blower work harder. A non-approved substitute may fit physically but fail the system approval or airflow requirement. Only use filters listed for the exact blower and helmet assembly.
3. The Battery Is Weak Under Load
A battery can show charge but still fail under blower load, especially if it is old, cold, damaged, or not fully seated. Low airflow alarms that appear late in a shift often trace back to battery capacity, dirty contacts, or a charger problem.
4. The Breathing Tube Is Kinked, Crushed, or Leaking
The breathing tube must move air from the blower to the helmet without restriction. Kinks behind the shoulder, crushed sections under a harness, loose bayonet fittings, torn cuffs, or heat damage can reduce airflow or leak filtered air before it reaches the helmet.
5. The Hood, Head Seal, or Face Seal Is Damaged
Loose-fitting PAPR helmets depend on the complete hood or head seal assembly. A torn seal, missing cape, worn head seal, or poorly seated helmet can disrupt the intended airflow pattern around the breathing zone. If the issue is mostly helmet fit and visibility, compare it with auto-darkening helmet fit and lens standards before assuming the blower is the only problem.
6. The Blower Inlet Is Blocked by Clothing or Position
A jacket, tool belt, harness, welding curtain, or body position can partially cover the blower intake. This can happen when welding out of position, crawling inside equipment, or leaning against a workpiece. The alarm may stop when the welder stands up because the intake is no longer blocked.
7. The System Was Not Flow-Tested Before Use
Many PAPR systems require a pre-use airflow check with a manufacturer-specified airflow indicator or procedure. Skipping this step can hide clogged filters, weak batteries, damaged tubes, or incorrect assembly until the alarm sounds during welding.
Solution
Step 1: Stop Welding and Move to Clean Air
Do not keep welding through a low airflow alarm. Stop the arc, leave the fume area when safe, and inspect the PAPR in clean air. A low airflow alarm means the respirator may not be performing as intended.
Step 2: Check the Filter Stack in the Correct Order
Inspect the spark guard, prefilter, main filter, filter cover, gasket, and latch. Replace loaded or damaged consumables according to the manufacturer’s instructions. Do not blow filters clean with compressed air unless the manufacturer specifically allows it. Compressed air can damage filter media or drive contamination deeper into the filter.
Step 3: Confirm Battery Seating, Charge, and Contacts
Remove and reseat the battery. Inspect contacts for dirt, corrosion, heat damage, or looseness. Confirm the charger is the correct charger for the battery. If the low-airflow alarm appears on one battery but not the other, tag the questionable battery out of service.
Step 4: Inspect the Breathing Tube
Run a hand along the full breathing tube. Look for flattened sections, cracks, melted spots, loose swivel fittings, missing O-rings, or damaged cuffs. Re-route the tube so it does not pinch when the welder bends, kneels, or turns the head.
Step 5: Inspect the Helmet Seal and Headgear
Check the hood seal, cape, head seal, sweatband, headgear, and helmet shell. Replace torn or contaminated soft goods. Do not tape over damaged seals as a permanent repair. If the helmet is uncomfortable enough that workers loosen or misposition it, the respiratory protection may not be used consistently. For half-mask alternatives under a hood, compare P100 welding respirator options and low-profile respirator fit under welding helmets.
Step 6: Run the Required Airflow Check
Use the manufacturer’s airflow indicator, test tube, or built-in test procedure. Pass/fail values are system-specific. Do not estimate airflow by feel. A helmet can feel breezy and still fail the required test, especially if the flow path is leaking or assembled incorrectly.
Step 7: Remove the System From Service if It Fails
If the PAPR fails the airflow check after filters, battery, tube, and seals are inspected, remove it from service. Tag the blower, battery, hose, or helmet assembly and follow the employer’s repair procedure. Do not return a failed respirator to production because replacement parts are inconvenient.
Specs / Verification Notes
| Item to Verify | Why It Matters | Field Note |
|---|---|---|
| NIOSH approval | PAPR protection depends on approved complete assemblies. | Verify exact blower, helmet, filter, battery, and tube combination. |
| Airflow test method | Low airflow checks are system-specific. | Unknown (Verify in manual). |
| Filter part number | Wrong filters can void approval or restrict airflow. | Use manufacturer-listed filters only. |
| Prefilter and spark guard | Loaded outer layers can cause alarms before the main filter is fully spent. | Inspect before each shift. |
| Battery runtime | Runtime varies by battery age, filter load, airflow setting, and temperature. | Unknown (Verify). |
| Breathing tube condition | Kinks, leaks, and heat damage reduce delivered airflow. | Inspect full length. |
| Helmet seal or hood seal | Damaged soft goods can disrupt airflow pattern. | Replace damaged seals. |
| Hazard type | Particulate filters may not control gases or vapors. | Verify exposure and cartridge/filter selection. |
Product Section
If the existing PAPR welding helmet repeatedly fails airflow checks or replacement parts are no longer available, a complete manufacturer-matched PAPR welding helmet system may be a better path than mixing parts. The listing below is for a Lincoln Electric VIKING 3350 XG PAPR welding helmet system. Confirm part number, battery type, included filters, replacement consumables, approval status, and workplace requirements before ordering.
Last update on 2026-07-14 / Affiliate links / Images from Amazon Product Advertising API
Comparison Table
| Symptom | Likely Cause | Check First | Do Not Do |
|---|---|---|---|
| Alarm starts as soon as blower turns on | Blocked filter stack, wrong assembly, failed airflow test | Filter cover, prefilter, main filter, airflow indicator | Do not weld until it passes the test. |
| Alarm starts late in the shift | Battery sag or filter loading | Battery charge, charger, filter condition | Do not assume the battery is good by indicator lights only. |
| Alarm changes when bending or kneeling | Kinked tube or blocked blower intake | Tube routing, belt position, clothing interference | Do not route the tube under straps that crush it. |
| Helmet feels drafty but fails flow check | Leak, missing seal, wrong setup, or incorrect test method | Hood seal, breathing tube, manual procedure | Do not judge airflow by feel. |
| Alarm appears during grinding | Heavy dust loading or intake blockage | Spark guard, prefilter, intake screen | Do not use damaged or clogged filters. |
Related Failure Paths
- Fume extractor not pulling smoke when source capture is weak and the welder is relying too heavily on PPE.
- P100 respirator selection when a PAPR is not required but particulate protection still needs verified fit and filters.
- Low-profile half-mask interference when a respirator hits the welding helmet or breaks the face seal.
- Galvanized welding fume control when zinc-coated work creates high fume exposure and requires stronger controls.
- Welding helmet fit and lens issues when poor visibility or headgear fit is being confused with PAPR blower failure.
Safety Notes
OSHA 29 CFR 1910.134 requires an appropriate respiratory protection program when respirators are necessary to protect employee health. That program includes selection, medical evaluation, fit testing where required, use procedures, maintenance, training, and program evaluation. Loose-fitting PAPR hoods and helmets may not require fit testing, but they still require correct selection, training, inspection, cleaning, storage, and maintenance.
NIOSH describes PAPRs as reusable respirators that use a battery-powered blower to pull air through filters, cartridges, or canisters before delivering it to the breathing zone. PAPRs can protect against gases, vapors, or particles only when equipped with the correct approved filter, cartridge, or canister. A particulate PAPR filter should not be assumed to protect against gases, vapors, oxygen deficiency, or unknown atmospheres.
PAPR welding helmets do not supply oxygen. Do not use a PAPR in oxygen-deficient spaces, immediately dangerous to life or health atmospheres, confined spaces without proper evaluation, or areas with unknown contaminants. Welding stainless, galvanized, painted, coated, or plated materials may require exposure assessment, ventilation, source capture, and specific respiratory protection beyond a basic particulate setup.
FAQ
Can a PAPR welding helmet be used after the low airflow alarm sounds?
No. Stop welding and move to clean air when safe. Inspect the PAPR and run the required airflow check before returning it to service.
Does a full battery mean the PAPR airflow is safe?
No. Battery charge is only one part of the system. Filters, prefilters, tubes, seals, blower condition, and assembly all affect delivered airflow.
Can PAPR filters be cleaned with compressed air?
Do not clean filters with compressed air unless the manufacturer specifically allows it. Many filters are replaceable consumables, and compressed air can damage the media or spread contamination.
Do loose-fitting PAPR welding helmets require fit testing?
Loose-fitting PAPR hoods and helmets generally do not require fit testing, while tight-fitting PAPR facepieces do. OSHA respiratory protection requirements still apply when the respirator is required for workplace protection.
Can a PAPR replace fume extraction?
No. A PAPR is respiratory PPE, not source capture. Use ventilation, local exhaust, process controls, and exposure assessment as required by the job and employer program.
Can filters, batteries, or hoses be mixed between PAPR brands?
No. Use only parts approved for the exact PAPR assembly. Mixing parts can affect airflow, approval status, and respiratory protection.
Next Step
If the low airflow alarm keeps going off, start with the filter stack, battery, breathing tube, intake blockage, helmet seal, and required airflow test. If the system fails after approved replacement consumables are installed, remove it from service. For broader shop exposure control, pair this check with fume extractor troubleshooting and verify whether the job requires a PAPR, half-mask respirator, ventilation change, or process control.
Sources Checked
- Weld Support Parts Blog: Lincoln K3930-1 PAPR Powered Air Purifying Respirator with Black Viking 3350 Welding Helmet.
- Weld Support Parts Blog: ArcOne AP1K-V-BFFVX AirPlus w/Vison BFFVX Kit.
- Weld Support Parts Blog: Welding Fume Extractor Not Pulling Smoke: Causes and Fixes.
- Weld Support Parts Blog: Best Welding Respirator for Fumes (P100) – Top 3 3M Picks.
- Weld Support Parts Blog: Miller LPR-100 Gen II Half Mask Respirator.
- Weld Support Parts Blog: Welding Galvanized: Safe Fume Control Tactics.
- Weld Support Parts Blog: Auto-Darkening Welding Helmet Buying Guide 2025.
- OSHA 29 CFR 1910.134 Respiratory Protection.
- NIOSH Powered Air-Purifying Respirators page.
- 3M Powered Air Purifying Respirator overview.
- Lincoln Electric VIKING 3350 PAPR / VIKING 3350 XG PAPR product and operator manual references.
- Amazon listing checked for ASIN B0FC2PRFV8: Lincoln Electric VIKING 3350 XG PAPR with Standard Battery.
3M Speedglas G5-02 Welding Helmet Support Guide: Fitment, Lens Protection, and Ordering Checks
“>3M Speedglas G5-02 Auto Darkening Welding Helmet is a professional welding helmet built around the Speedglas G5-02 platform. This support article is intended to help buyers confirm the correct helmet, understand the verified specs, and avoid ordering the wrong lens protection or replacement accessory.Key Takeaways
- Primary product: 3M Speedglas G5-02 Auto Darkening Welding Helmet, Pack of 1.
- Arc Weld SKU: 08-0100-50IC.
- Verified shade range from the Arc Weld product page: variable dark shade 8 to 12.
- 3M identifies the G5-02 as a welding helmet using Curved Glass Technology for a viewing filter that follows the curved shape of the head.
- For replacement protection plates, confirm G5-02 compatibility before ordering.
Product Overview
The 3M Speedglas G5-02 is an auto-darkening welding helmet listed by Arc Weld Store under SKU 08-0100-50IC. The product page identifies the brand as 3M and describes the helmet with Natural Color Technology, adjustable arc detection sensitivity, a delay function, and Bluetooth connectivity through the 3M Connected Equipment App.
For commercial buyers, the important ordering point is simple: this is a complete G5-02 helmet listing, not a cover plate, not a replacement ADF, and not a generic welding hood. Confirm that your shop needs the helmet assembly before purchasing.
Best For
- Professional welding operations that need a premium auto-darkening welding helmet.
- Welders who want a G5-02 helmet platform with curved filter design.
- Shops standardizing on 3M Speedglas welding helmet equipment.
- Buyers replacing a complete welding helmet rather than only a cover plate or lens accessory.
Key Specs
| Product | 3M Speedglas G5-02 Auto Darkening Welding Helmet, Pack of 1 |
| Brand | 3M |
| Arc Weld SKU | 08-0100-50IC |
| Helmet Series | Speedglas G5-02 |
| Auto-Darkening | Yes |
| Dark Shade Range | 8 to 12 |
| Natural Color Technology | Listed by Arc Weld Store |
| Adjustable Arc Detection Sensitivity | Listed by Arc Weld Store |
| Delay Function | Listed by Arc Weld Store |
| Bluetooth Connectivity | Listed by Arc Weld Store |
| Included Items | Unknown (Verify) |
| Certifications | Unknown (Verify) |
| Viewing Area | Unknown (Verify) |
| Battery Type | Unknown (Verify) |
| Weight | Unknown (Verify) |
Compatibility / Fitment Notes
The product page identifies this helmet as the 3M Speedglas G5-02. For replacement parts, do not assume that other Speedglas series accessories will fit. G5-01, G5-03, 9100, and 9002NC components may use different filter, cover lens, or shell designs. Confirm the helmet series and part number before ordering replacement plates, ADF components, headgear, or accessories.
3M lists a G5-02 curved auto-darkening filter under alternative ID 08-0000-50iC, but the Arc Weld product URL supplied for this article is the helmet listing with SKU 08-0100-50IC. If you need only the filter, verify the exact replacement filter part number before purchasing.
Before You Order
- Confirm you need the complete 3M Speedglas G5-02 helmet, not only a replacement lens or cover plate.
- Verify the helmet series: G5-02.
- Confirm the Arc Weld SKU: 08-0100-50IC.
- Confirm whether shade range 8 to 12 supports your welding process and amperage range.
- Check whether your shop requires documented ANSI, OSHA, or site-specific PPE compliance before ordering. Certifications on this Arc Weld listing: Unknown (Verify).
- Confirm whether any additional outside protection plates are needed for daily production use.
- Confirm whether your application requires respiratory protection. This listing is for a welding helmet; respirator compatibility: Unknown (Verify).
- Confirm whether your crew needs spare batteries, cover plates, sweatbands, headgear, or storage protection. Included spare parts: Unknown (Verify).
- Confirm whether Bluetooth/app features are allowed under your jobsite device policies.
- For replacement components, match the OEM part number before ordering.
Accessories / Compatible Products
Technically relevant accessories should be selected by confirmed helmet series and part number. The most direct Arc Weld accessory found for this product family is the G5-02 outside protection plate.
| Related Item | Use Case | Compatibility Note |
|---|---|---|
3M Speedglas G5-02 Outside Protection Plate 08-0200-52, Scratch Resistant, 5 ea/Case$40.49 Sold Out View Product | Replacement outside protection plates for the G5-02 helmet family. | Listed by Arc Weld as designed specifically for the 3M Speedglas G5-02 welding helmet. |
3M Speedglas G5-03 Pro Welding Helmet 10-0100-30TW with G5TW ADF with Grind Mode, TAP, Natural Color, Tack Weld Mode$516.61 In Stock View Product | Compare another Speedglas helmet option. | Not a replacement part for the G5-02. Compatibility: Unknown (Verify). |
| Inside and Outside Cover Lens Collection | Find cover lenses and protection plates. | Filter by exact helmet model and part number before ordering. |
| Welding Helmet Collection | Compare welding helmet options. | Compare by process, shade range, viewing area, and safety requirements. |
Common Applications
- Precision welding where optical clarity and puddle visibility are important.
- Professional fabrication and maintenance welding.
- Shop environments where helmet standardization reduces setup confusion.
- Applications where replacement cover plates should be stocked to protect the auto-darkening filter.
Shipping / Returns Notes
Arc Weld Store lists this product as typically shipping within 1–2 business days, shipping from Corydon, Indiana, with free ground shipping to the lower 48 on qualifying orders. Returns are listed as accepted on unused items in original packaging. Always check the live product page before ordering because shipping, pricing, and availability can change.
FAQ
Is this a complete welding helmet or a replacement lens?
The Arc Weld listing is for the 3M Speedglas G5-02 Auto Darkening Welding Helmet, Pack of 1. Replacement lens and cover plate requirements should be verified separately by part number.
What is the Arc Weld SKU?
The Arc Weld SKU shown on the product page is 08-0100-50IC.
What shade range is listed?
The Arc Weld product page lists a variable dark shade range of 8 to 12.
Which outside protection plate was found for the G5-02?
Arc Weld lists the 3M Speedglas G5-02 Outside Protection Plate 08-0200-52, Scratch Resistant, 5 ea/Case as designed specifically for the 3M Speedglas G5-02 welding helmet.
Can G5-03 parts be used on the G5-02?
Compatibility: Unknown (Verify). Do not substitute G5-03 parts for G5-02 parts unless the manufacturer or Arc Weld confirms the fitment.
Safety Notes
Welding helmets and filter lenses must be selected for the welding process, amperage, radiant energy exposure, impact hazards, and workplace safety requirements. OSHA welding guidance references filter lens requirements and appropriate eye and face protection. Confirm jobsite PPE requirements before use, and wear approved safety glasses or goggles under the helmet when required by your safety program.
Sources Checked
- Arc Weld Store product page for 3M Speedglas G5-02 Auto Darkening Welding Helmet, SKU 08-0100-50IC.
- Arc Weld Store product page for 3M Speedglas G5-02 Outside Protection Plate 08-0200-52.
- Arc Weld Store welding helmet and cover lens collections.
- 3M Speedglas product information for G5-02 and G5-02 curved auto-darkening filter references.
- OSHA welding eye and face protection guidance.
- CDC/NIOSH PPE-Info reference for ANSI/ISEA Z87.1-2020 scope.