Category: Abrasive and Grinding Support

  • Choosing Abrasives for Weld Cleanup

    Choosing Abrasives for Weld Cleanup

    Bernard Clean Air E Fume Extraction Guns

    Choosing the right weld cleanup abrasives affects surface finish, base metal loss, and how much time the crew spends correcting the same joint twice. For welders, fabricators, and maintenance buyers, the goal is not to find one disc that does everything. The goal is to match the abrasive to the work: spatter removal, bead blending, beveling, edge prep, or final cleanup before coating.

    The wrong abrasive can load up fast, cut too aggressively, glaze over, or leave deep scratch patterns that create extra finishing steps. The right one removes material at the needed rate and leaves a surface that is ready for the next process.

    Key Takeaways

    • Match the abrasive to the job: spatter removal, weld blending, beveling, or surface prep.
    • Use aggressive products only where stock removal is required; avoid unnecessary base metal loss.
    • Check wheel condition, RPM rating, backing support, and fit before use.
    • Verify the finish requirement before choosing grit, bond, or disc style.
    • Do not assume a single product handles carbon steel, stainless, and aluminum equally well.

    Start With the Cleanup Task

    Before selecting a product, define the work. Weld cleanup usually falls into one of four categories:

    • Spatter removal: Breaking loose surface spatter without digging into the parent metal.
    • Bead blending: Reducing weld crown or smoothing a transition.
    • Beveling and edge prep: Creating a consistent edge profile for fit-up or repair.
    • Surface prep: Cleaning oxidation, scale, or coating residue before welding or finishing.

    Each task needs a different balance of cut rate, control, and finish. A coarse grinding wheel may be appropriate for beveling, but it is usually too aggressive for light spatter removal. A surface conditioning disc may clean a weld area well, but it may not remove heavy slag or scale efficiently.

    Common Abrasive Types and Where They Fit

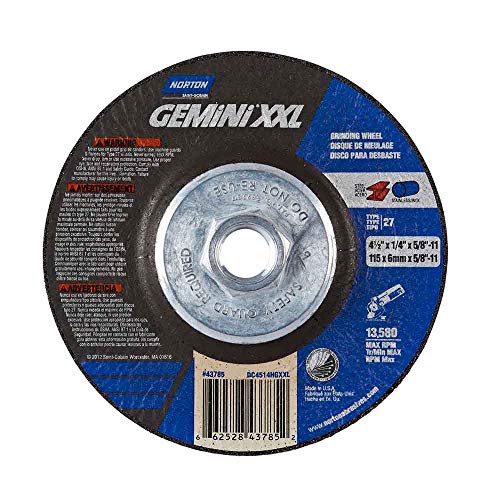
    Grinding wheels are used when stock removal matters. They are suitable for beveling, weld reduction, and heavy cleanup. Check the wheel grade, diameter, thickness, and RPM rating before use. If any of these details are unknown, stop and verify them on the wheel label or product sheet.

    Fiber discs are common for general weld cleanup on flat or accessible surfaces. They can offer a controlled cut for blending and smoothing. The backing pad matters. A worn or incorrect backing pad can change the cut pattern and increase vibration.

    Flap discs combine cutting and finishing in one product. They are useful when the cleanup work needs a smoother transition than a hard grinding wheel leaves. They are often preferred for blending weld toes, but the exact grit and abrasive grain type should be selected based on the required finish. Unknown (Verify) if the finish standard is not specified.

    Surface conditioning pads and nonwoven discs are better when the goal is cleaning, not shaping. They can help remove light oxidation, discoloration, and fine weld residue. They are not the right choice for heavy weld buildup or beveling.

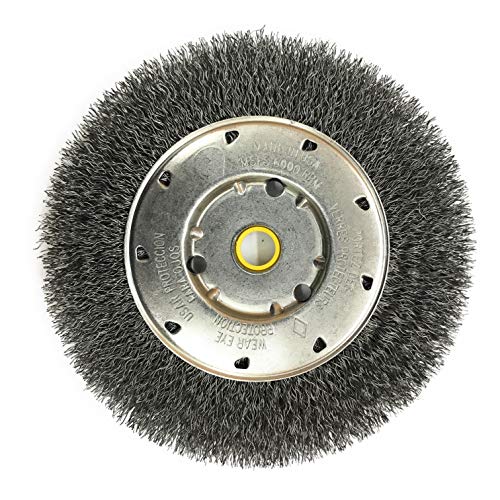
    Wire wheels and brushes are useful for light spatter, rust, and loose scale. They can be effective on irregular surfaces and around corners. Verify wire type, wheel construction, and maximum operating speed before use. If the base metal is soft or the part has a critical finish, test a small area first.

    How to Choose for Spatter, Bevels, and Prep

    For spatter cleanup: Start with the least aggressive option that clears the surface. Wire brushes, light grinding products, or conditioning discs may be enough. Avoid over-grinding the parent metal just to remove isolated spatter.

    For bevels: Choose a product that holds its shape and removes material consistently. Grinding wheels and some abrasive discs are better suited to this task than soft finishing products. Check the required angle and depth before starting. If the joint design is unclear, verify the drawing or repair procedure first.

    For weld prep: Clean oxide, scale, coating, and oil before striking an arc. A contaminated surface can cause porosity, lack of fusion, and repeated rework. If the base material condition is unknown, inspect the joint, clean a test area, and verify weldability before production work.

    Check, Inspect, Verify Before You Grind

    Check the task, the material, and the finish target. Confirm whether the job is heavy removal or light cleanup. Verify whether the workpiece is carbon steel, stainless, aluminum, or coated material. Do not assume the same abrasive is correct for all of them.

    Inspect the abrasive before mounting it. Look for cracks, chips, glazing, loose flaps, broken filaments, or damaged backing. Inspect the tool guard, flange surfaces, spindle, and backing pad. If the product is not clearly marked, do not use it until the rating is verified.

    Verify the operating limits. Match the wheel or disc RPM rating to the tool speed. Confirm mounting direction if the product has a directional face. Verify that the arbor, thread, or attachment system fits correctly. If the fit is uncertain, stop and confirm before startup.

    Troubleshooting Common Problems

    Problem: The abrasive loads up quickly.
    Check whether the material is soft, coated, or contaminated. Inspect the surface for paint, oil, or adhesive. Verify whether the grit is too fine for the job. A finer product can clog faster on heavy weld cleanup.

    Problem: The wheel cuts too aggressively.
    Inspect the product type and grade. Verify whether the tool speed is correct. If the abrasive is removing too much base metal, step down to a less aggressive product or use a more controlled technique.

    Problem: The finish is uneven.
    Check the operator angle, pressure, and pass pattern. Inspect the backing pad or support surface. Verify that the workpiece is stable and that the tool is not bouncing across the joint.

    Problem: The abrasive wears out too fast.
    Inspect the material hardness and the amount of slag or scale. Verify whether the product is intended for this application. A finishing product used on heavy bevel work will wear out early.

    WSP Lookup Section

    The current provided WSP lookup page is for Bernard Clean Air E Fume Extraction Guns. It is not an abrasive product page, so it should be treated as a source-backed support reference only. Use it when you need to confirm how WSP structures source-backed model rows, compatibility paths, and gated Amazon links. Do not use it to infer abrasive compatibility or abrasive specifications.

    If a job requires accessory support or related system verification, review the page details and then confirm the exact part or consumable through the source-backed listing. Since no abrasive product page was provided here, any abrasive-specific compatibility remains Unknown (Verify).

    Safety Notes

    • Wear eye, face, hand, and hearing protection appropriate to the task.
    • Use the wheel guard and side handle where required.
    • Keep sparks away from flammables, cables, gas hoses, and solvent containers.
    • Do not exceed the tool or abrasive speed rating.
    • Replace damaged abrasives immediately.
    • Control dust and metal debris according to site procedure.

    FAQ

    What is the best abrasive for weld spatter?
    There is no single best choice. Light spatter often comes off with a wire brush or conditioning disc, while heavier buildup may need a more aggressive abrasive. Verify the base material and avoid excessive stock removal.

    Can I use the same abrasive on carbon steel and stainless steel?
    Not automatically. Cross-contamination and finish requirements matter. Verify the abrasive type, previous use, and any site rules before moving between alloys.

    Should I use a flap disc or a grinding wheel for beveling?
    A grinding wheel is usually better for heavier beveling and stock removal. A flap disc may be better when you need more control or a smoother transition. Check the required bevel depth before choosing.

    How do I know when to replace an abrasive?
    Replace it when it is cracked, worn below safe limits, glazed, damaged, or no longer cutting as intended. Always inspect before mounting and verify the tool rating against the product label.

    Sources Checked

    For weld cleanup abrasives, the practical rule is simple: define the cleanup task, inspect the abrasive, verify the setup, and use the least aggressive product that meets the job requirement. That approach reduces rework, protects the base metal, and keeps cleanup consistent across shifts.

  • Grinding Disc Glazing Instead of Cutting

    CGW 35517 Metal Cut Off Wheel 6" X .045" X 7/8", Pack of 25 for High-Precision Cutting
    “>CGW 35517 Metal Cut Off Wheel 6" X .045" X 7/8", Pack of 25 for High-Precision Cutting

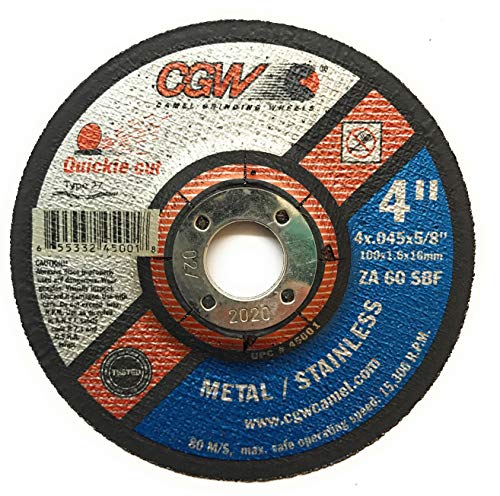
    When a grinding disc glazes, it stops cutting freely and starts skidding, smearing, or heating the work. The problem is usually not the wheel alone. Check pressure, speed, contact angle, and whether the abrasive matches the material.

    Key Takeaways

    • Glazing means the abrasive face has dulled or loaded and is no longer exposing fresh grit.
    • Too much pressure can burnish the wheel instead of opening it.
    • Wrong wheel grade or bond for the material can cause early glazing.
    • Incorrect RPM, shallow contact, or use on the wrong alloy can shorten wheel life.
    • Dress or replace the wheel if cutting action does not return after correction.

    What Grinding Disc Glazing Looks Like

    • The disc stops biting and starts rubbing.
    • Heat builds quickly at the contact point.
    • Sparks reduce or change pattern without improved removal.
    • The wheel face looks shiny, smooth, or packed with material.
    • You need more force to get the same cut.

    Common Causes

    1. Excessive pressure

    Heavy feed pressure can compress the abrasive surface and close the cutting face. The wheel runs hot and loses its ability to shed worn grit. Use steady, controlled pressure instead of forcing the cut.

    2. Wrong wheel for the material

    A wheel that is too hard or too fine for the application may glaze before it cuts efficiently. Material mismatch is common when one wheel is used across mild steel, stainless, and nonferrous metals without review. If the wheel is not intended for the material, performance will suffer. Unknown (Verify) for specific application ratings.

    3. Improper speed or tool setup

    If the grinder speed does not match the wheel rating, cutting action can degrade. Running below the effective working speed can also make the wheel rub instead of cut. Verify the grinder RPM against the wheel label before use.

    4. Shallow or inconsistent contact

    Light skimming across the surface can polish the abrasive instead of keeping it open. Hold a stable angle and maintain full, even contact.

    5. Loaded wheel face

    Soft metals, coatings, scale, and contaminants can pack the wheel face. This loading is often mistaken for glazing. Clean or dress the wheel if it is safe to do so, or replace it if the face is damaged.

    Troubleshooting Steps

    1. Stop and inspect the wheel face for shine, loading, cracks, or uneven wear.
    2. Check grinder RPM and confirm the wheel rating matches the tool.
    3. Reduce pressure and make a few controlled passes.
    4. Increase contact consistency and keep the correct working angle.
    5. Verify the wheel type is suitable for the base material and the job.
    6. If the face stays glazed, dress the wheel if the product type allows it, or replace it.

    When to Replace the Wheel

    Replace the wheel if it shows cracking, edge damage, heavy loading, or repeated glazing after the setup is corrected. Do not continue using a wheel that has lost cutting action and cannot be restored safely.

    Product / Parts

    For cutoff work where a thin, precision wheel is needed, the allowed ArcWeld product is:

    CGW 35517 Metal Cut Off Wheel 6" X .045" X 7/8", Pack of 25 for High-Precision Cutting

    CGW 35517 Metal Cut Off Wheel 6" X .045" X 7/8", Pack of 25 for High-Precision Cutting

    Experience premium precision and performance with the CGW 35517 Metal Cut Off Wheel, expertly designed to meet all your metal cutting needs. Crafted specifically for durability and efficiency, this 6" x 0.045" x 7/8" metal cut off wheel is ideal for a wide range of applications, making it a vital tool for both professionals and hobbyists. Each pack contains 25 high-quality wheels, ensuring you have enough supply f…

    View at Arc Weld Store

    CGW 35517 Metal Cut Off Wheel 6" x .045" x 7/8", Pack of 25 for High-Precision Cutting

    Use only if the wheel type, size, arbor, and application match the job. Compatibility beyond the provided product description is Unknown (Verify).

    Safety Notes

    • Wear eye protection, face protection, gloves, and hearing protection.
    • Use the correct wheel guard and verify it is installed before running the grinder.
    • Do not exceed the wheel’s rated speed.
    • Replace damaged wheels immediately.
    • Keep hands clear of the wheel plane and clamp the work when possible.
    • Do not use a wheel that has been dropped unless it has been inspected per shop procedure.

    FAQ

    Is glazing the same as loading?

    No. Glazing usually means the abrasive face has become smooth and dull. Loading means material is packed into the wheel face. Both reduce cutting performance.

    Can I fix a glazed disc?

    Sometimes. If the wheel type allows dressing and the wheel is otherwise sound, dressing may restore cut. If not, replace it.

    Why does a new disc glaze fast?

    Common causes are excess pressure, wrong wheel selection, incorrect RPM, or use on a material that loads the abrasive face.

    Does glazing mean the wheel is unsafe?

    Not always, but a glazed wheel that cuts poorly should be inspected before reuse. If there is any damage, replace it.

    Sources Checked

    • ArcWeld product record:
      CGW 35517 Metal Cut Off Wheel 6" X .045" X 7/8", Pack of 25 for High-Precision Cutting

      CGW 35517 Metal Cut Off Wheel 6" X .045" X 7/8", Pack of 25 for High-Precision Cutting

      Experience premium precision and performance with the CGW 35517 Metal Cut Off Wheel, expertly designed to meet all your metal cutting needs. Crafted specifically for durability and efficiency, this 6" x 0.045" x 7/8" metal cut off wheel is ideal for a wide range of applications, making it a vital tool for both professionals and hobbyists. Each pack contains 25 high-quality wheels, ensuring you have enough supply f…

      View at Arc Weld Store
    • Flap Disc Loading and Glazing Causes: Grinding Troubleshooting for Steel, Stainless, and Aluminum

    Category: Abrasive and Grinding Support

    Related Weld Support Guides

  • Why Flap Discs Explode: RPM Ratings, Grinder Mismatch, and Storage Problems

    Why Flap Discs Explode: RPM Ratings, Grinder Mismatch, and Storage Problems

    A flap disc that explodes during grinding is usually the result of overspeed operation, damaged backing material, improper storage, side-loading stress, or using the wrong disc for the grinder. Abrasive failures are often blamed on defective discs, but many disc separations happen because the grinder exceeds the disc RPM rating, the disc has absorbed moisture, the backing plate has been cracked, or the operator twists the wheel during grinding.

    Unlike normal wear, explosive flap disc failure can eject abrasive material and backing fragments at extremely high speed. Even a small 4-1/2 inch grinder spinning above rated RPM can create severe injury risk if the disc delaminates or separates under load.

    How Flap Discs Fail

    Flap discs are layered abrasive products bonded to a backing plate made from fiberglass, plastic, or composite materials. Heat, impact, overspeed, contamination, and improper loading can weaken the bond between the abrasive flaps and the backing structure.

    • Backing plate cracks
    • Flap separation
    • Center hub failure
    • Edge tearing
    • Delamination at high speed
    • Heat distortion

    Once the backing structure weakens, centrifugal force can cause the disc to separate rapidly during operation.

    Maximum RPM Ratings Explained

    Every flap disc has a maximum safe operating speed marked on the label. That RPM rating must always meet or exceed the grinder’s no-load speed.

    If a grinder spins faster than the disc rating, the abrasive experiences excessive centrifugal force even before contacting the material.

    • A 13,300 RPM grinder should never use a disc rated below 13,300 RPM
    • Worn or modified grinders may exceed labeled speed
    • Removing guards increases risk exposure
    • Cheap import grinders sometimes have inconsistent speed control

    Overspeed failures often occur instantly at startup, not only during grinding.

    Why Cordless Grinders Create Hidden Overspeed Problems

    High-output cordless grinders can create dangerous conditions when operators assume all 4-1/2 inch accessories share the same RPM capability.

    • Battery grinders reach full RPM very quickly
    • Light pressure allows the grinder to remain near no-load speed
    • Mixing cut-off wheels and flap discs increases wrong-wheel usage
    • Damaged battery grinders may lose speed regulation

    Always verify the disc RPM rating before installing a new abrasive.

    Humidity and Moisture Damage

    Abrasives stored in damp environments can absorb moisture over time. High humidity affects bonding materials, backing integrity, and abrasive stability.

    • Unheated containers
    • Service trucks
    • Outdoor gang boxes
    • Wet fabrication areas
    • Compressed-air moisture exposure

    Discs exposed to repeated moisture cycling can weaken even if they appear visually normal.

    Improper Storage Temperature Problems

    Extreme heat and freezing temperatures both affect abrasive life.

    • High heat can soften bonding materials
    • Freezing conditions can increase brittleness
    • Rapid temperature swings increase condensation risk
    • Stacking heavy materials on flap discs damages backing plates

    Abrasives should be stored flat, dry, and protected from impact damage.

    Side Pressure and Twisting Failures

    Flap discs are designed primarily for grinding pressure applied in the intended working angle range. Excessive twisting, edge jamming, or side-loading can crack the backing structure.

    • Twisting while the wheel is loaded
    • Grinding inside corners aggressively
    • Using the disc as a pry tool
    • Catching flap edges on weld seams
    • Applying pressure outside the recommended angle

    Many disc failures start as small cracks near the center hub that grow during repeated grinder startup cycles.

    Using Damaged Backing Plates

    If the fiberglass or composite backing plate shows cracks, chips, warping, or impact damage, discard the disc immediately.

    Do not continue using a partially damaged flap disc to “finish the job.” Small cracks can rapidly expand at operating speed.

    Cheap Flap Discs vs Industrial-Grade Abrasives

    Industrial-grade flap discs generally use more consistent abrasive bonding, stronger backing materials, tighter RPM testing standards, and more stable manufacturing tolerances.

    Low-cost abrasives may still perform adequately for light work, but inconsistent bonding quality, weak fiberglass backing, and poor balance can increase vibration and failure risk during demanding grinding.

    Signs a Flap Disc Should Be Discarded

    • Visible backing plate cracks
    • Missing abrasive flaps
    • Warped or bent profile
    • Excessive vibration during operation
    • Heat discoloration
    • Water saturation or contamination
    • Loose center hub fit
    • Delamination around the edges

    If the grinder suddenly develops vibration after changing abrasives, stop immediately and inspect the disc before continuing.

    PPE Requirements for Abrasive Grinding

    A face shield alone is not enough for abrasive grinding. High-speed abrasive failures can bypass inadequate protection.

    • ANSI-rated safety glasses
    • Full face shield
    • Hearing protection
    • Cut-resistant gloves
    • Flame-resistant clothing
    • Respiratory protection when grinding coated materials

    Grinding dust from stainless steel, galvanized steel, coatings, and composites may require additional respiratory protection.

    OSHA and ANSI Considerations

    Grinding safety standards exist because abrasive wheel failures can cause severe injury. Operators should verify that grinders, guards, wheel ratings, and PPE meet current OSHA and ANSI requirements for abrasive use.

    Removing wheel guards, defeating grinder safety switches, or operating damaged grinders dramatically increases injury risk during abrasive failure.

    What Happens When a Disc Delaminates at Speed?

    When a flap disc separates at full grinder RPM, abrasive sections and backing fragments can be ejected at extremely high velocity. Injuries commonly involve the face, neck, hands, chest, and eyes.

    Even near-miss failures should be treated seriously. Inspect the grinder spindle, guard, mounting flange, and replacement abrasive before restarting work.

    Field Fix vs Proper Fix

    A field fix may involve replacing the abrasive, cleaning the spindle flange, and slowing down aggressive grinding pressure. The proper fix is identifying the root cause: overspeed operation, wrong accessory selection, moisture damage, improper storage, grinder defects, or unsafe grinding technique.

    Related Abrasive and Safety Articles

    Sources Checked

    Norton abrasive guidance, Weiler abrasive references, grinding safety guidance, PPE references, and industrial abrasive handling practices were reviewed for this article.

  • Flap Disc Edge Wear Troubleshooting

    Flap Disc Edge Wear Troubleshooting

    Flap disc edge wear usually happens when the grinder angle is too steep, pressure is excessive, the wrong disc type is being used, or the operator is grinding primarily on the disc edge instead of the face. Premature edge wear reduces abrasive life, creates uneven grinding performance, increases heat buildup, and can damage both the workpiece and grinder.

    Common Symptoms

    • Outer edge of the flap disc wears much faster than the center.
    • Grinding becomes uneven or difficult to control.
    • Disc cuts aggressively at first but loses performance quickly.
    • Visible flap tearing or uneven flap separation.
    • Increased vibration during grinding.
    • Excessive heat discoloration on the workpiece.

    Likely Causes

    • Grinding angle too steep: Excessive angle concentrates force on the outer edge of the disc.
    • Too much pressure: Heavy force overheats and overloads the abrasive flaps.
    • Incorrect flap disc style: Type 27 and Type 29 discs perform differently depending on grinding angle and application.
    • Wrong grit selection: Coarse grits used for finishing work can wear unevenly.
    • Improper grinder RPM: Overspeeding increases edge stress and heat generation.
    • Using the edge like a grinding wheel: Flap discs are designed primarily for face contact, not aggressive edge digging.

    Inspection Steps

    1. Inspect flap wear pattern across the full disc face.
    2. Verify grinder RPM matches the flap disc rating.
    3. Check grinding angle during operation.
    4. Inspect for excessive heat discoloration or flap glazing.
    5. Verify correct flap disc style and grit for the application.
    6. Inspect grinder spindle and backing flange condition.

    Visual Wear Indicators

    • Outer edge worn down faster than the center.
    • Missing or torn abrasive flaps.
    • Glazed abrasive surface from overheating.
    • Uneven flap height around the disc.
    • Discoloration from excessive grinding heat.

    Common Wrong-Part Mistakes

    • Using Type 27 discs where Type 29 geometry is more appropriate.
    • Running flap discs above rated RPM.
    • Using coarse grinding discs for fine finishing applications.
    • Using worn backing flanges that create disc instability.

    Field Fix vs Proper Fix

    Field fix: Reduce grinding pressure, flatten the grinder angle slightly, and rotate the disc contact area more evenly. Proper fix: Select the correct flap disc geometry, grit, RPM range, and grinder setup for the application while correcting operator technique issues.

    Ignored Failure Consequences

    Ignoring uneven edge wear reduces abrasive life, increases grinding cost, creates inconsistent surface finish quality, overheats the workpiece, and increases vibration-related grinder wear.

    Safety Notes

    Always follow abrasive RPM ratings and grinder compatibility requirements. Use face shields, gloves, hearing protection, and safety glasses when grinding. Never use damaged or delaminating flap discs.

    Sources Checked

    • Norton abrasive solutions catalog
    • Weiler abrasive catalog
    • Lincoln welding accessories catalog
  • Grinding Wheel Wobble Causes and Troubleshooting

    Grinding Wheel Wobble Causes and Troubleshooting

    A grinding wheel that wobbles during operation is usually caused by damaged flanges, incorrect wheel mounting, bent spindles, worn bearings, improper wheel storage, or using the wrong wheel for the grinder. Even minor wheel runout can reduce grinding accuracy, overload bearings, increase vibration, and create a dangerous wheel failure risk at operating RPM.

    Common Symptoms

    • Visible side-to-side wheel movement during rotation.
    • Vibration through the grinder body or handle.
    • Uneven grinding marks or gouging.
    • Premature edge wear on flap discs or grinding wheels.
    • Difficulty maintaining straight cuts.
    • Excessive operator fatigue from vibration.

    Likely Causes

    • Improper wheel mounting: Dirt, burrs, or metal debris trapped behind the wheel prevent proper seating.
    • Damaged mounting flanges: Bent or worn flanges create uneven clamping pressure.
    • Bent spindle shaft: Impact damage from dropped grinders commonly bends spindle assemblies.
    • Worn grinder bearings: Bearing play allows oscillation under load.
    • Wheel damage: Cracked, warped, moisture-damaged, or expired wheels may not rotate true.
    • Incorrect wheel selection: Oversized or incompatible wheels create instability and imbalance.

    Inspection Steps

    1. Disconnect grinder power before inspection.
    2. Remove the wheel and clean both flange surfaces completely.
    3. Inspect the abrasive wheel for cracks, chips, or uneven wear.
    4. Check spindle runout manually while rotating the shaft slowly.
    5. Verify wheel RPM rating exceeds grinder RPM.
    6. Inspect arbor fitment and mounting hardware compatibility.

    Common Wrong-Part Mistakes

    • Installing wheels with incorrect arbor sizes.
    • Running cut-off wheels sideways as grinding wheels.
    • Using missing or incorrect flange washers.
    • Using moisture-damaged abrasive wheels from poor storage.

    Field Fix vs Proper Fix

    Field fix: Remove and remount the wheel correctly, clean flange surfaces, and replace visibly damaged abrasives. Proper fix: Replace bent spindles, worn bearings, damaged flanges, or incorrect wheel assemblies. Persistent wobble should never be ignored on high-speed grinders.

    Ignored Failure Consequences

    Operating with a wobbling grinding wheel increases the chance of wheel breakage, grinder damage, poor surface finish, operator fatigue, and severe injury from abrasive wheel fragmentation.

    Safety Notes

    Always follow abrasive RPM ratings and mounting instructions. Never use cracked wheels. Use face shields, gloves, hearing protection, and safety glasses when troubleshooting grinders and abrasive equipment.

    Sources Checked

    • Norton welding abrasive solutions catalog
    • Weiler abrasive and surface conditioning catalog
    • Lincoln Electric welding accessories catalog
  • Stream with Amazon Music