Tag: plasma cutting

  • Plasma Cut Has Beveled Edge

    Hypertherm 220674 Plasma Cutting Shield - T45v Hand Cutting Shield, 1 Pack
    “>Hypertherm 220674 Plasma Cutting Shield - T45v Hand Cutting Shield, 1 Pack

    A beveled edge on a plasma cut usually means the arc is not centered through the kerf. The most common causes are torch angle, travel speed, worn consumables, incorrect standoff, and poor air quality. Start with the cut setup, then inspect parts, then check the air system.

    Key Takeaways

    • A plasma cut beveled edge is often caused by torch tilt or uneven travel speed.
    • Worn nozzle, electrode, or shield parts can push the arc off-center.
    • Too fast or too slow travel speed changes edge angle and dross.
    • Dirty, wet, or low-pressure air can distort the plasma stream.
    • Check the shield and consumables before changing settings.

    Diagnose the Cut

    1) Check torch angle

    Hold the torch square to the plate. Even a small tilt can create a bevel on one side of the cut. If the torch is hand-held, watch for side lean during the full cut path, especially on long cuts and corners.

    2) Check travel speed

    Travel speed affects kerf shape. If you move too fast, the arc trails and the cut leans. If you move too slow, the arc can wash out the lower edge and increase dross. Make one change at a time and test on scrap.

    3) Inspect consumables

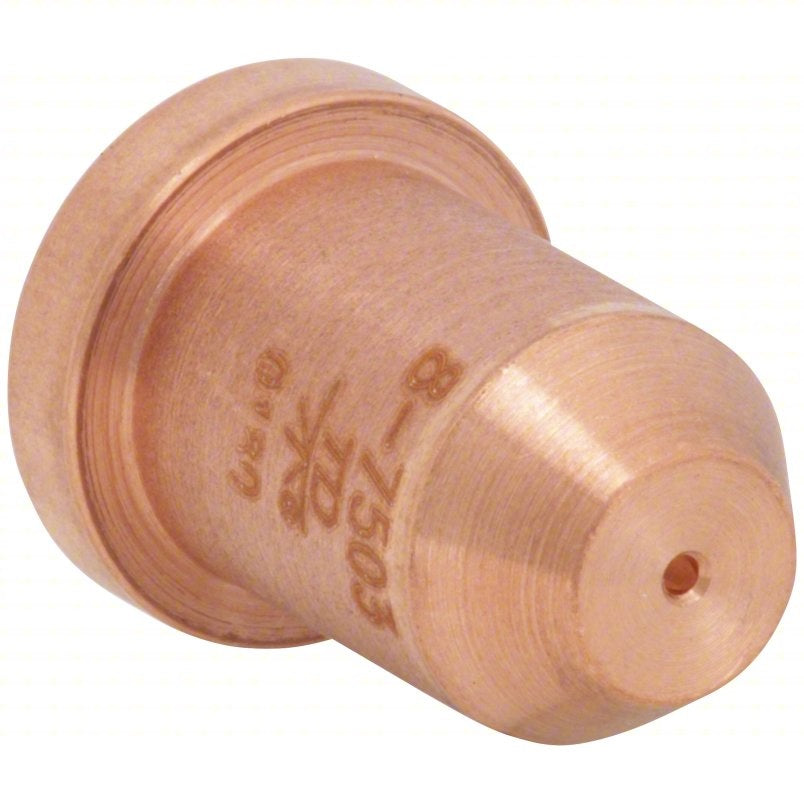
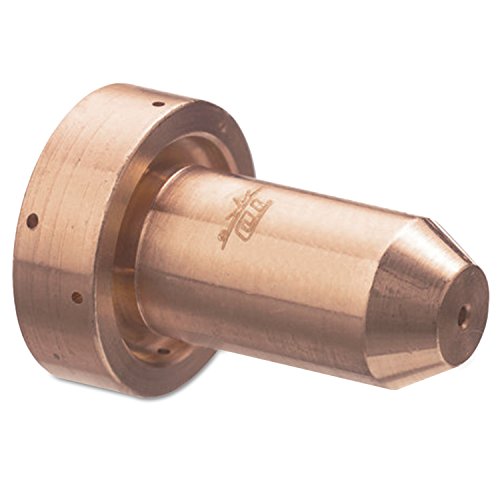
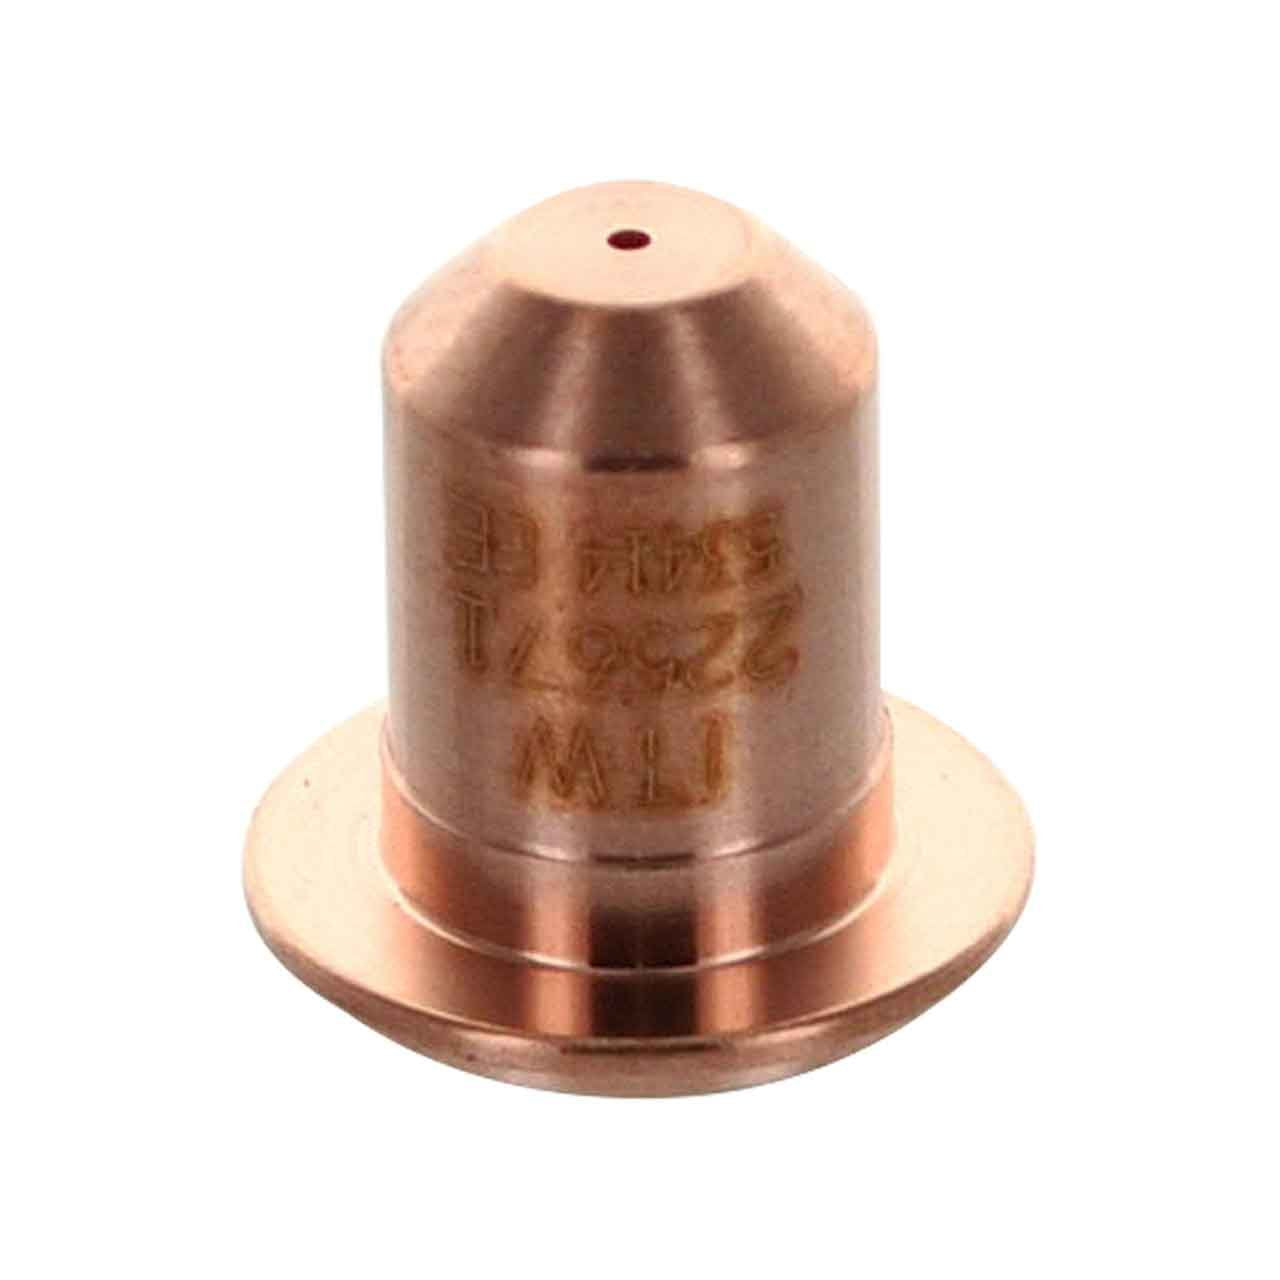
    Worn or damaged consumables can make the arc unstable. Check the electrode, nozzle, and shield for erosion, pitting, heat damage, or clogging. If the shield is damaged or worn, replace it before continuing. The Hypertherm 220674 Plasma Cutting Shield is one available part for compatible T45v hand cutting setups; exact compatibility beyond the listed product title is Unknown (Verify).

    4) Verify standoff and contact

    If standoff is too high, the arc can spread and lose cut squareness. If the torch is dragging when it should not, the shield or tip condition may be affecting arc control. Follow the machine or torch manual for the correct stand-off method.

    5) Check air quality

    Moisture, oil, and debris in the air line can cause rough cuts and edge angle changes. Drain the compressor tank, inspect filters, and confirm the air supply is clean and dry. Air pressure and flow requirements are torch-specific and Unknown (Verify) without the machine manual.

    Troubleshooting Support Sections

    If the bevel is consistent on one side

    • Recheck torch angle and hand path.
    • Inspect for worn shield or nozzle.
    • Check for a damaged torch head or loose retaining parts.

    If the bevel changes during the cut

    • Look for inconsistent hand speed.
    • Check for air pressure drop while cutting.
    • Inspect the work lead, power cable, and air hose for restriction.

    If edge quality is poor with fresh consumables

    • Verify the air source is clean and dry.
    • Confirm the machine settings match the material being cut.
    • Check for incorrect torch height or dragging on the plate.

    Product / Parts

    Hypertherm 220674 Plasma Cutting Shield – T45v Hand Cutting Shield, 1 Pack

    This shield may be used when the existing shield is worn or damaged. Use only if it matches the torch setup and manual requirements. Compatibility details beyond the product title are Unknown (Verify).

    Hypertherm 220674 Plasma Cutting Shield - T45v Hand Cutting Shield, 1 Pack

    Hypertherm 220674 Plasma Cutting Shield – T45v Hand Cutting Shield, 1 Pack

    Introducing the Hypertherm 220674 Hand Cutting Shield, your essential companion for plasma cutting tasks. This high-quality plasma cutting shield is designed to protect both your workspace and yourself. Made by Hypertherm, a trusted name in plasma cutting technology, this product ensures superior performance and durability. The Hypertherm Hand Cutting Shield is perfect for both professionals and DIY enthusiasts. I…

    View at Arc Weld Store

    Safety Notes

    • Wear proper eye, face, hand, and body protection for plasma cutting.
    • Keep hands clear of the arc and hot cut edges.
    • Do not service consumables until the unit is powered down and safe to handle.
    • Use adequate ventilation and follow hot-work controls.
    • Do not assume compatibility; verify the torch model and parts list before installation.

    FAQ

    Why does plasma cut beveled edge happen?

    It usually happens when the arc is not centered through the cut path. Torch angle, travel speed, consumable wear, and air quality are the main checks.

    Can bad air cause a bevel?

    Yes. Wet or contaminated air can make the arc unstable and change edge angle.

    Should I replace the shield first?

    If the shield is worn, damaged, or heat-affected, replace it. If the shield looks normal, check nozzle, electrode, torch angle, and air supply before replacing more parts.

    What setting should I change first?

    Start with torch angle and travel speed, then inspect consumables. Exact cut settings are torch and material dependent and Unknown (Verify) without the manual.

    Sources Checked

    • Provided product title and description for Hypertherm 220674 Plasma Cutting Shield
    • Topic brief: diagnose torch angle, consumables, speed, and air quality
    • Internal link inventory: none provided
  • Plasma Consumables Wearing Out Too Fast

    Hypertherm Plasma Swirl Ring 220670 - Replacement for Powermax45 Plasma Cutting System
    “>Hypertherm Plasma Swirl Ring 220670 - Replacement for Powermax45 Plasma Cutting System

    If plasma consumables are wearing out too fast, the cause is usually not one part alone. Short life often comes from air quality, incorrect cut settings, poor torch handling, or a worn component elsewhere in the torch stack. Start with the basics and check each item in order.

    Key Takeaways

    • Fast consumable wear usually points to air, setup, or technique issues.
    • Check electrode, nozzle, shield, swirl ring, and retaining cap together, not one at a time.
    • Excessive start/stop cycles shorten life.
    • Cutting at the wrong standoff or amperage can damage parts quickly.
    • Internal torch damage or dirty air can make new consumables fail early.

    Troubleshooting Support

    1) Check air quality first

    Contaminated air is one of the most common causes of plasma consumables wearing fast. Moisture, oil, and dirt can damage the electrode and nozzle quickly. Verify the air supply, filtration, and dryer setup used on the machine. If the system depends on shop air, inspect the entire air path for contamination and pressure drop.

    If air quality is uncertain, treat it as a likely root cause until verified. Unknown (Verify) for actual air cleanliness at the torch inlet.

    2) Verify cut settings

    Incorrect amperage, cut speed, or duty cycle can overheat consumables. Running too hot will erode the nozzle and electrode. Running too slow can put more heat into the part and torch than intended. Check the machine settings against the material and process being used. If those settings are not documented, mark them as Unknown (Verify).

    3) Inspect torch standoff and cut height

    Holding the torch too close can cause double arcing, nozzle damage, and rapid wear. Holding it too far away can also destabilize the arc and increase wear. Maintain the standoff recommended for the torch and process. If the actual cut height is not measured, it is Unknown (Verify).

    4) Look for drag cutting misuse

    Not every consumable set is meant for drag contact. If the torch is being dragged across plate with parts that are not intended for that use, the shield and nozzle may wear early. Confirm whether the process is drag cutting, stand-off cutting, or gouging. Unknown (Verify) if the torch is being used outside its intended cutting method.

    5) Check for arc starts that are too frequent

    Consumables wear faster when the torch is restarted repeatedly. Frequent piercing, short cuts, and testing can burn through nozzles and electrodes faster than normal. Reduce unnecessary starts where possible and use the correct pierce delay and cut sequence.

    6) Inspect the full consumable stack

    Do not replace only one part if the wear pattern suggests a system problem. Check the electrode, nozzle, shield, swirl ring, and retaining cap for pits, cracks, distortion, or heat damage. A worn swirl ring can disrupt gas flow and shorten life across the set.

    7) Confirm the torch and lead condition

    Loose connections, damaged leads, or internal torch wear can cause unstable arc behavior. That instability can look like consumable wear, but the root cause may be elsewhere. Check for heat damage, loose fitment, and damaged sealing surfaces. Unknown (Verify) if the torch body or lead set has been inspected recently.

    8) Check for improper consumable installation

    If parts are not seated correctly, gas flow and arc alignment can be affected. Cross-threaded retaining parts, missing seals, or incorrect part order can shorten life immediately. Recheck installation against the machine service procedure.

    When to Replace More Than One Part

    If the nozzle is pitted and the electrode is deeply worn, replace the related parts as a set. If the swirl ring is damaged or heat affected, inspect the whole consumable stack before returning the torch to service. A single failed part can be a symptom, not the whole problem.

    Product / Parts

    For torch service, the swirl ring is one of the parts that can affect gas flow and consumable life.

    • Hypertherm Plasma Swirl Ring 220670 โ€” Replacement for Powermax45 plasma cutting system.

    [ArcBox: plasma-swirl-ring-hypertherm-220670]

    Use only the correct part for the torch and power source. Compatibility beyond the listed application is Unknown (Verify).

    Safety Notes

    • Shut down and de-energize equipment before servicing the torch.
    • Do not inspect hot consumables by hand.
    • Use proper eye protection when checking worn parts.
    • Verify air and electrical isolation before maintenance.
    • Follow the manufacturer service procedure for the specific plasma system.

    FAQ

    Why do plasma consumables wear out so fast?

    Common causes include dirty air, wrong amperage, incorrect standoff, poor torch handling, frequent starts, and worn or misinstalled parts.

    Can a bad swirl ring cause fast wear?

    Yes. A damaged swirl ring can disrupt gas flow and contribute to unstable cutting and short consumable life.

    Should I replace the electrode only?

    Not if the nozzle, shield, or swirl ring also show damage. Replace the full set when wear is uneven or the cause is not confirmed.

    What should I check first?

    Start with air quality, then inspect cut settings, standoff, and the full consumable stack.

    Sources Checked

    • Plasma Consumable Wear Indicators: Electrode, Nozzle, Shield, Swirl Ring, and Retaining Cap Checks
    • Plasma Electrode Pitting Causes: Air Quality, Gas Pressure, Amperage, Standoff, and Consumable Wear

    Related Arc Weld Part

    Hypertherm Plasma Swirl Ring 220670 - Replacement for Powermax45 Plasma Cutting System

    Hypertherm Plasma Swirl Ring 220670 – Replacement for Powermax45 Plasma Cutting System

    Introducing the Hypertherm 220670 Swirl Ring, a vital component designed specifically for the Powermax45 plasma cutting system. This high-quality plasma swirl ring features a tough and durable construction, ensuring it withstands the rigors of plasma cutting with precision and efficiency. The plasma swirl ring plays a crucial role in the cutting process by creating a swirling motion in the plasma arc. This results…

    View at Arc Weld Store

    Related Weld Support Guides

  • Plasma Cutter Not Piercing Cleanly

    Hypertherm 220674 Plasma Cutting Shield - T45v Hand Cutting Shield, 1 Pack
    “>Hypertherm 220674 Plasma Cutting Shield - T45v Hand Cutting Shield, 1 Pack

    If a plasma cutter is not piercing cleanly, the usual cause is a setup problem rather than a major machine fault. Start with air quality, consumable condition, ground connection, torch angle, and pierce technique. Small errors in any of these areas can leave a ragged start, excessive dross, or a failed pierce.

    Key Takeaways

    Troubleshooting Steps

    1. Check air pressure and air quality

    Plasma cutting depends on clean, dry, correctly regulated air. Low pressure can produce a weak, unstable arc. Water, oil, or heavy contamination can cause sputtering and poor pierce quality.

    2. Inspect consumables

    Worn or damaged consumables are a common reason a plasma cutter is not piercing cleanly. The electrode and nozzle must be in good condition for a focused arc.

    3. Verify ground clamp placement

    Poor work return can make the arc start erratically and cause a messy pierce. The clamp must make solid metal-to-metal contact on clean material.

    4. Check pierce height and torch angle

    If the torch is too close, molten metal can blow back into the shield and nozzle. If it is too high, the arc can spread and fail to pierce cleanly.

    5. Reduce pierce demand on thicker or coated material

    Thick plate, rusty plate, painted plate, and galvanized material can make piercing harder. Start with a clean spot if possible. If the plate is thick, give the arc enough time to fully transfer before moving.

    6. Check torch and machine condition

    If air, consumables, and grounding are correct but the pierce still fails, inspect the torch body, leads, and machine output for damage. Intermittent cable faults, heat damage, or loose connectors can reduce performance.

    Product / Parts Support

    When consumables or shielding parts are worn, replace them with the correct torch parts. For hand cutting shield support, see:

    Hypertherm 220674 Plasma Cutting Shield - T45v Hand Cutting Shield, 1 Pack

    Hypertherm 220674 Plasma Cutting Shield – T45v Hand Cutting Shield, 1 Pack

    Introducing the Hypertherm 220674 Hand Cutting Shield, your essential companion for plasma cutting tasks. This high-quality plasma cutting shield is designed to protect both your workspace and yourself. Made by Hypertherm, a trusted name in plasma cutting technology, this product ensures superior performance and durability. The Hypertherm Hand Cutting Shield is perfect for both professionals and DIY enthusiasts. I…

    View at Arc Weld Store

    Hypertherm 220674 Plasma Cutting Shield – T45v Hand Cutting Shield, 1 Pack

    Use only if it matches the torch model and application. Compatibility for your machine is Unknown (Verify) unless confirmed by the torch manual or parts list.

    Safety Notes

    FAQ

    Why does my plasma cutter start but not pierce cleanly?

    Most often it is low air pressure, contaminated air, worn consumables, or poor ground contact.

    Can a bad shield cause poor piercing?

    Yes. A damaged or incorrect shield can affect arc focus and increase spatter. Verify the correct shield for the torch model.

    Should I drag the torch during the pierce?

    Only if the torch and process are designed for drag operation. Otherwise, maintain the correct standoff distance and start upright. Unknown (Verify).

    What is the fastest test for a bad pierce issue?

    Check air pressure, replace visibly worn consumables, and clean the ground point. Those three checks solve many start-up problems.

    Sources Checked

    Related Weld Support Guides

  • Why Metal Cutting Results Are Rough

    CGW 35517 Metal Cut Off Wheel 6" X .045" X 7/8", Pack of 25 for High-Precision Cutting
    “>CGW 35517 Metal Cut Off Wheel 6" X .045" X 7/8", Pack of 25 for High-Precision Cutting

    Rough cut edges usually come from the cutting process, the consumable, or the setup. Start with the basics: material condition, tool condition, feed rate, travel speed, angle, and heat control. In many cases, the cut is not failing because the machine is weak. It is failing because the process is out of balance.

    Key Takeaways

    Troubleshooting Rough Metal Cutting

    1. Check the consumable first

    Worn or damaged wheels, nozzles, tips, or electrodes can leave a rough edge before other settings are the real problem. Look for glazing, uneven wear, chipping, or buildup. Replace consumables that no longer cut cleanly. If the cut surface gets worse as the job continues, consumable wear is a likely cause.

    2. Verify travel speed

    Travel that is too slow can overheat the edge and create heavy dross or wide kerf damage. Travel that is too fast can leave a narrow, ragged cut with incomplete separation. Hold a steady pace and watch the cut trail. If sparks or molten metal are dragging behind the cut instead of exiting cleanly, adjust speed.

    3. Confirm angle and alignment

    A crooked torch, tilted grinder, or off-angle cutoff wheel can create bevel and uneven edges. Keep the tool aligned with the cut line. For hand cutting, small angle errors can show up as one rough side and one cleaner side. For guided setups, check rails, fences, and workholding.

    4. Inspect material condition

    Heavy rust, paint, oil, mill scale, and debris can interfere with the cut path. Clean the cut line when possible. Dirty surfaces do not always prevent cutting, but they can increase roughness and make it harder to maintain a stable cut.

    5. Watch for heat buildup

    Excess heat can warp thin stock, harden the cut edge, or leave slag that bonds to the part. If the workpiece is heating too fast, reduce dwell time, improve cutting sequence, or allow cooling between passes. Thin material is especially sensitive to heat input.

    6. Check power and gas delivery where applicable

    For plasma and oxy-fuel work, poor gas flow, incorrect pressure, or restricted delivery can reduce cut quality. Weak arc stability or poor flame shape can leave a rough, inconsistent edge. Verify the machine settings and delivery path against the equipment manual. Unknown (Verify) if the setup has recent maintenance issues or modified consumables.

    7. Review the base process

    Different cutting methods leave different edge conditions. Abrasive cutoff work may leave a burr or heat tint. Plasma can leave dross if settings are wrong. Oxy-fuel can leave slag if speed, preheat, or oxygen balance is off. Match the troubleshooting step to the process in use.

    Support Section: What to Check by Symptom

    Parts and Consumables

    For abrasive cutting jobs, a clean-cut wheel in good condition helps reduce edge damage. The CGW 35517 Metal Cut Off Wheel 6″ x .045″ x 7/8″, Pack of 25 is listed for high-precision cutting.

    CGW 35517 Metal Cut Off Wheel 6" X .045" X 7/8", Pack of 25 for High-Precision Cutting

    CGW 35517 Metal Cut Off Wheel 6" X .045" X 7/8", Pack of 25 for High-Precision Cutting

    Experience premium precision and performance with the CGW 35517 Metal Cut Off Wheel, expertly designed to meet all your metal cutting needs. Crafted specifically for durability and efficiency, this 6" x 0.045" x 7/8" metal cut off wheel is ideal for a wide range of applications, making it a vital tool for both professionals and hobbyists. Each pack contains 25 high-quality wheels, ensuring you have enough supply f…

    View at Arc Weld Store

    Use the correct wheel size and arbor fit for the tool. Verify the wheel rating, machine speed, and application before use.

    Safety Notes

    FAQ

    Why is my cut rough on one side?

    One-sided roughness usually points to angle error, uneven travel, or misalignment in the cut path.

    Does faster cutting always improve edge quality?

    No. Too much speed can make the cut ragged or incomplete. Too little speed can cause heat buildup and slag.

    Can dirty metal cause rough cuts?

    Yes. Rust, paint, oil, and scale can all reduce cut consistency and increase edge cleanup.

    When should I replace the consumable?

    Replace it when wear, chipping, or unstable cut quality appears. Do not wait for a complete failure.

    Sources Checked

  • Plasma Cutter Not Cutting Through: Causes and Fixes

    A plasma cutter that fails to cut through material typically indicates issues with air supply, consumables, or machine setup. This problem reduces cut quality, increases dross, and can damage the torch if ignored. Diagnosing the root cause quickly restores performance and prevents unnecessary wear.

    Key Takeaways

    • Insufficient air pressure is a leading cause of poor cutting performance
    • Worn consumables reduce arc energy and cut penetration
    • Incorrect amperage settings limit cutting capability
    • Slow or inconsistent travel speed affects cut-through
    • Moisture in air supply degrades plasma arc quality

    Problem / Context

    Plasma cutting relies on a high-temperature ionized gas stream to melt and eject metal. When any part of the systemโ€”air supply, power, or consumablesโ€”is compromised, the arc loses effectiveness. This results in incomplete cuts, excessive slag, or arc instability.

    Root Causes

    • Low air pressure: insufficient airflow reduces arc force
    • Moisture contamination: water in air disrupts plasma stability
    • Worn consumables: degraded electrodes and nozzles reduce performance
    • Incorrect amperage: not matched to material thickness
    • Slow travel speed: excessive heat buildup without full penetration
    • Poor ground connection: unstable arc behavior

    Solution / Explanation

    • Verify air pressure meets machine specifications
    • Install air dryers or filters to remove moisture
    • Replace consumables regularly based on wear
    • Adjust amperage according to material thickness
    • Maintain consistent travel speed during cutting
    • Ensure clean and secure ground clamp connection

    Specs / Verification Notes

    • Air Pressure: Unknown (Verify per machine manual)
    • Amperage Range: Machine dependent
    • Consumable Life: Usage dependent
    • Cut Thickness Capacity: Unknown (Verify)
    • Air Quality Requirement: Dry, oil-free air

    Comparison Table

    CauseSymptomImpactFix
    Low Air PressureWeak arcNo full cut-throughIncrease pressure
    Worn ConsumablesWide arcPoor cut qualityReplace parts
    Moisture in AirArc sputteringInconsistent cutsDry air supply
    Low AmperageSlow cuttingIncomplete penetrationIncrease output

    Safety Notes

    Follow ANSI Z49.1 safety standards for plasma cutting. Ensure proper grounding and use appropriate PPE including eye protection and gloves. Never operate a plasma cutter with damaged consumables or unstable air supply.

    FAQ

    Why is my plasma cutter not cutting all the way through?

    This is usually caused by low air pressure, worn consumables, or incorrect amperage settings.

    Can bad air quality affect plasma cutting?

    Yes. Moisture or oil in the air supply disrupts the plasma arc and reduces cutting efficiency.

    How often should consumables be replaced?

    Replacement depends on usage and material, but worn consumables should be changed as soon as cut quality declines.

    Next Step

    Check air supply quality and consumable condition before the next cut. Adjust settings based on material thickness and confirm stable operation on scrap material.

    Sources Checked

    • ANSI Z49.1 Safety in Welding and Cutting
    • Plasma cutter manufacturer’s operation manuals
    • AWS cutting process references (general guidance)
  • Plasma Cutter Wonโ€™t Pierce Metal: Causes and Fixes

    A plasma cutter that fails to pierce metal will produce arc instability, excessive spatter, or no full penetration. This issue is typically related to air supply, consumable wear, or incorrect setup parameters. Identifying the restriction point in the system is critical for restoring proper cut initiation.

    Key Takeaways

    • Insufficient air pressure is a leading cause of failed pierce
    • Worn consumables disrupt arc focus and energy transfer
    • Incorrect amperage or travel setup prevents full penetration
    • Material thickness must match machine capability

    Problem / Context

    Plasma cutting relies on a high-velocity ionized gas stream to melt and eject metal. When the system cannot pierce, the arc may start but fail to transfer enough energy into the material. This results in surface gouging instead of a full cut-through.

    Root Causes

    • Low air pressure or flow: weak arc and poor metal ejection
    • Moisture in air supply: destabilizes plasma arc
    • Worn electrode or nozzle: reduces arc concentration
    • Incorrect amperage setting: insufficient heat input
    • Excessive stand-off distance: arc loses intensity before contact
    • Material too thick: exceeds machine rating

    Solution / Explanation

    • Verify air compressor output meets cutter requirements (pressure and CFM)
    • Install a moisture separator or dryer to remove water contamination
    • Inspect and replace consumables if wear is visible
    • Set amperage appropriate to material thickness
    • Maintain correct torch height during pierce and cut
    • Confirm material thickness is within rated capacity

    Specs / Verification Notes

    • Air Pressure Requirement: Unknown (Verify)
    • Air Flow (CFM): Unknown (Verify)
    • Amperage Range: Machine dependent
    • Maximum Pierce Thickness: Unknown (Verify)
    • Consumable Type: Model-specific

    Comparison Table

    IssueSymptomCorrection
    Low Air PressureWeak arc, no penetrationIncrease PSI/CFM
    Worn ConsumablesWide arc, spatterReplace electrode/nozzle
    Moisture in AirArc instabilityAdd dryer/filter
    Incorrect SettingsIncomplete pierceAdjust amperage

    Safety Notes

    Follow ANSI Z49.1 for safe cutting practices. Ensure proper ventilation and use appropriate eye and face protection rated for plasma cutting. Disconnect power before servicing consumables or air systems.

    FAQ

    Why wonโ€™t my plasma cutter pierce thick steel?

    The material may exceed the machineโ€™s rated pierce capacity or settings may be too low.

    Does air pressure affect piercing?

    Yes. Low pressure reduces arc force and prevents molten metal from being expelled.

    How often should consumables be replaced?

    Replace when wear is visible or cut quality declines. Frequency depends on usage and material.

    Next Step

    Check air supply and inspect consumables before the next cut. Correct setup and maintenance resolve most piercing failures without equipment changes.

    Sources Checked

    • ANSI Z49.1 Safety in Welding and Cutting
    • Plasma cutter manufacturer manuals (general reference)
    • Air compressor and filtration guidelines
  • Plasma Cut Leaving Heavy Dross? Fix It Fast

    Plasma cuts that leave a thick โ€œslagโ€ ridge on the bottom edge are usually telling you the arc isnโ€™t transferring cleanly. If youโ€™re cutting plate and spending more time grinding than cutting, this is the fast checklist to get clean edges again. Hereโ€™s why it happens and how to fix it.

    Symptoms (what youโ€™ll see):

    • Thick dross stuck to theย bottomย of the cut that wonโ€™t chip off easily
    • Rough, jagged cut edge with lots of spatter
    • Noticeable bevel (edge leans) even on straight cuts
    • Arc sounds โ€œlazyโ€ or unstable instead of crisp
    • Consumables discolor quickly or the tip looks out-of-round

    Root Cause (whatโ€™s actually happening):
    Heavy bottom dross is typically caused by a mismatch between travel speed, torch standoff/drag technique, and air quality/pressure. When you move too slowly (or hold the torch too high/too low for the consumables youโ€™re using), the arc lingers and the molten metal doesnโ€™t blow out of the kerf cleanlyโ€”so it re-freezes as dross on the bottom edge.

    Once youโ€™ve run a set of consumables past their useful life, the nozzle orifice can erode and the electrode can pit. That degrades arc shape and airflow, which makes dross and bevel worse even if your technique is decent.

    The Fix (step-by-step):

    1. Confirm your technique: drag vs standoff
      If youโ€™re drag cutting, use aย true drag shield/tip setupย designed for it. If not, maintain a consistent standoff (donโ€™t โ€œfloatโ€ the height).
    2. Increase travel speed slightly (then test)
      Heavy bottom dross commonly means youโ€™re moving too slow. Do a short test cut and speed up until the bottom dross reduces.
    3. Set air pressure/flow to the cutterโ€™s spec (and drain water)
      Wet air and low/unstable pressure destroy cut quality and consumables. Drain the compressor tank and any filter bowl before cutting.
    4. Square up torch angle and keep it steady
      A slight tilt increases bevel and can push molten metal into the kerf.
    5. Inspect consumables and replace if worn
      If the nozzle hole is egged out, the electrode is pitted, or the shield is packed with spatter, replace the set. Consumables are cheaper than grinding time.

    Real-World Tip:
    Experienced plasma users donโ€™t โ€œfightโ€ dross with more ampsโ€”they do quick test cuts and tune speed first, then height, then air. If the cut suddenly gets worse after it was fine yesterday, they assume air moisture or consumables before anything else.

    Soft CTA (MANDATORY):
    If this keeps happening, your plasma consumables (nozzle/tip + electrode + shield) are likely worn or damaged. See the best replacement options โ†’ [BUYER PAGE LINK PLACEHOLDER]

    Safety Note:
    Wear eye/face protection and glovesโ€”plasma cutting throws hot sparks and slag. Use ANSI Z87.1-rated eye protection and keep flammables clear of the work area.

  • Plasma Cutter Buying Guide 2025 | Duty Cycle, Cut Capacity & Air Requirements

    Plasma Cutter Buying Guide 2025 | Duty Cycle, Cut Capacity & Air Requirements

    Plasma cutters use ionized gas to cut conductive metals. Choosing the right cutter depends on material thickness, duty cycle, air supply, and cut quality requirementsโ€”not just amperage rating.

    Key Specifications Explained

    Amperage Rating & Cut Capacity

    AmperageRecommended CutMaximum CutTypical Material
    20-30A1/8โ€-3/16โ€1/4โ€Sheet metal, auto body, HVAC
    40-50A1/4โ€-3/8โ€1/2โ€Light fabrication, farm repair
    60-80A3/8โ€-1/2โ€3/4โ€General fabrication, structural steel
    85-100A1/2โ€-3/4โ€1โ€Heavy fabrication, thick plate

    Recommended cut = Clean cut with minimal dross (slag on bottom edge)
    Maximum cut = Severance cut (rough edge, heavy cleanup required)

    Rule of thumb: Buy 20-30% more amperage than your typical material thickness for clean cuts and longer consumable life.

    Duty Cycle

    Definition: Percentage of 10-minute period the machine can run at rated amperage before requiring cooldown.

    Duty CycleRuntime @ Max AmpsCooldownUse Case
    20%2 min8 minHobbyist, occasional use
    35%3.5 min6.5 minLight fabrication, DIY
    60%6 min4 minProduction shop, frequent use
    100%10 min0 minIndustrial, continuous operation

    Example: 50A cutter with 35% duty cycle can run 3.5 minutes at 50A, then must cool 6.5 minutes.
    At lower amperage: Duty cycle increases (50A cutter at 30A may have 60-80% duty cycle).

    Air Supply Requirements

    Compressed Air Specs:Pressure: 60-90 PSI (4-6 bar) – Flow rate: 4-8 CFM @ 90 PSI (varies by amperage) – Quality: Clean, dry, oil-free

    Compressor Sizing:

    Plasma AmperageMinimum CFM @ 90 PSIRecommended Tank Size
    20-30A4 CFM20 gallon
    40-50A5 CFM30 gallon
    60-80A6 CFM60 gallon
    85-100A8 CFM80 gallon

    Air quality issues: – Moisture = premature consumable failure and poor cut quality – Oil contamination = torch tip clogging – Solution: Install inline air dryer/filter between compressor and plasma cutter

    Input Power Requirements

    120V Plasma Cutters:Amperage range: 12-40A – Cut capacity: Up to 3/8โ€ recommended, 1/2โ€ maximum – Advantage: Portable, runs on standard outlets – Limitation: Lower duty cycle, reduced cut speed

    240V Plasma Cutters:Amperage range: 40-100A+ – Cut capacity: 1/2โ€-1โ€+ recommended – Advantage: Higher duty cycle, faster cutting, thicker material – Requirement: Dedicated 240V circuit (30-50A breaker)

    Dual Voltage (120V/240V): – Runs on both voltages with reduced performance on 120V – Example: 50A on 240V, 30A on 120V – Best for: Portable use + shop capability

    Cut Quality Factors

    Pilot Arc vs. Contact Start

    Pilot Arc (High-Frequency Start): – Arc initiates without touching workpiece – Pros: Cuts expanded metal, grating, rusty/painted steel – Cons: Higher cost, can interfere with electronics – Best for: Versatile cutting, field work

    Contact Start (Scratch Start): – Requires torch tip contact with workpiece to start arc – Pros: Lower cost, no electronic interference – Cons: Cannot cut expanded metal or start on edge – Best for: Budget cutters, clean flat plate

    Inverter vs. Transformer Technology

    Inverter-Based:Weight: 10-40 lbs (portable) – Efficiency: High (lower power consumption) – Duty cycle: Typically higher (35-60%) – Cost: Moderate to high – Best for: Modern shops, portability required

    Transformer-Based:Weight: 80-200 lbs (stationary) – Efficiency: Lower (higher power draw) – Duty cycle: Often 100% (industrial use) – Cost: Higher upfront, lower long-term maintenance – Best for: Heavy industrial, continuous operation

    Consumable Costs & Life

    Consumable Components

    PartFunctionTypical LifeCost per Set
    ElectrodeConducts current to arc1-3 hours cutting time$3-$8
    Nozzle (tip)Focuses plasma stream1-3 hours cutting time$2-$5
    Swirl ringStabilizes gas flow5-10 hours$1-$3
    Shield cupProtects nozzle10-20 hours$2-$5

    Consumable life factors: – Amperage setting (higher amps = shorter life) – Air quality (moisture/oil reduces life 50%+) – Arc-on time (duty cycle) – Proper technique (perpendicular torch angle, correct standoff)

    Annual consumable cost estimate: – Hobbyist (20 hours/year): $50-$100 – Light fabrication (100 hours/year): $250-$500 – Production shop (500+ hours/year): $1,500-$3,000

    Material Compatibility

    MaterialPlasma CutNotes
    Mild steelโœ“Best cut quality, minimal dross
    Stainless steelโœ“Clean cuts, some dross on thick sections
    Aluminumโœ“Requires higher amperage than steel (30% thicker capacity)
    Copperโœ“High thermal conductivity = slower cut speed
    Brassโœ“Similar to copper, produces toxic fumes (ventilation required)
    Cast ironโœ“Brittle, may crack from rapid heating
    Galvanized steelโœ“Toxic zinc fumes (ventilation mandatory)

    Cannot cut: Non-conductive materials (wood, plastic, concrete, glass)

    Torch Styles & Ergonomics

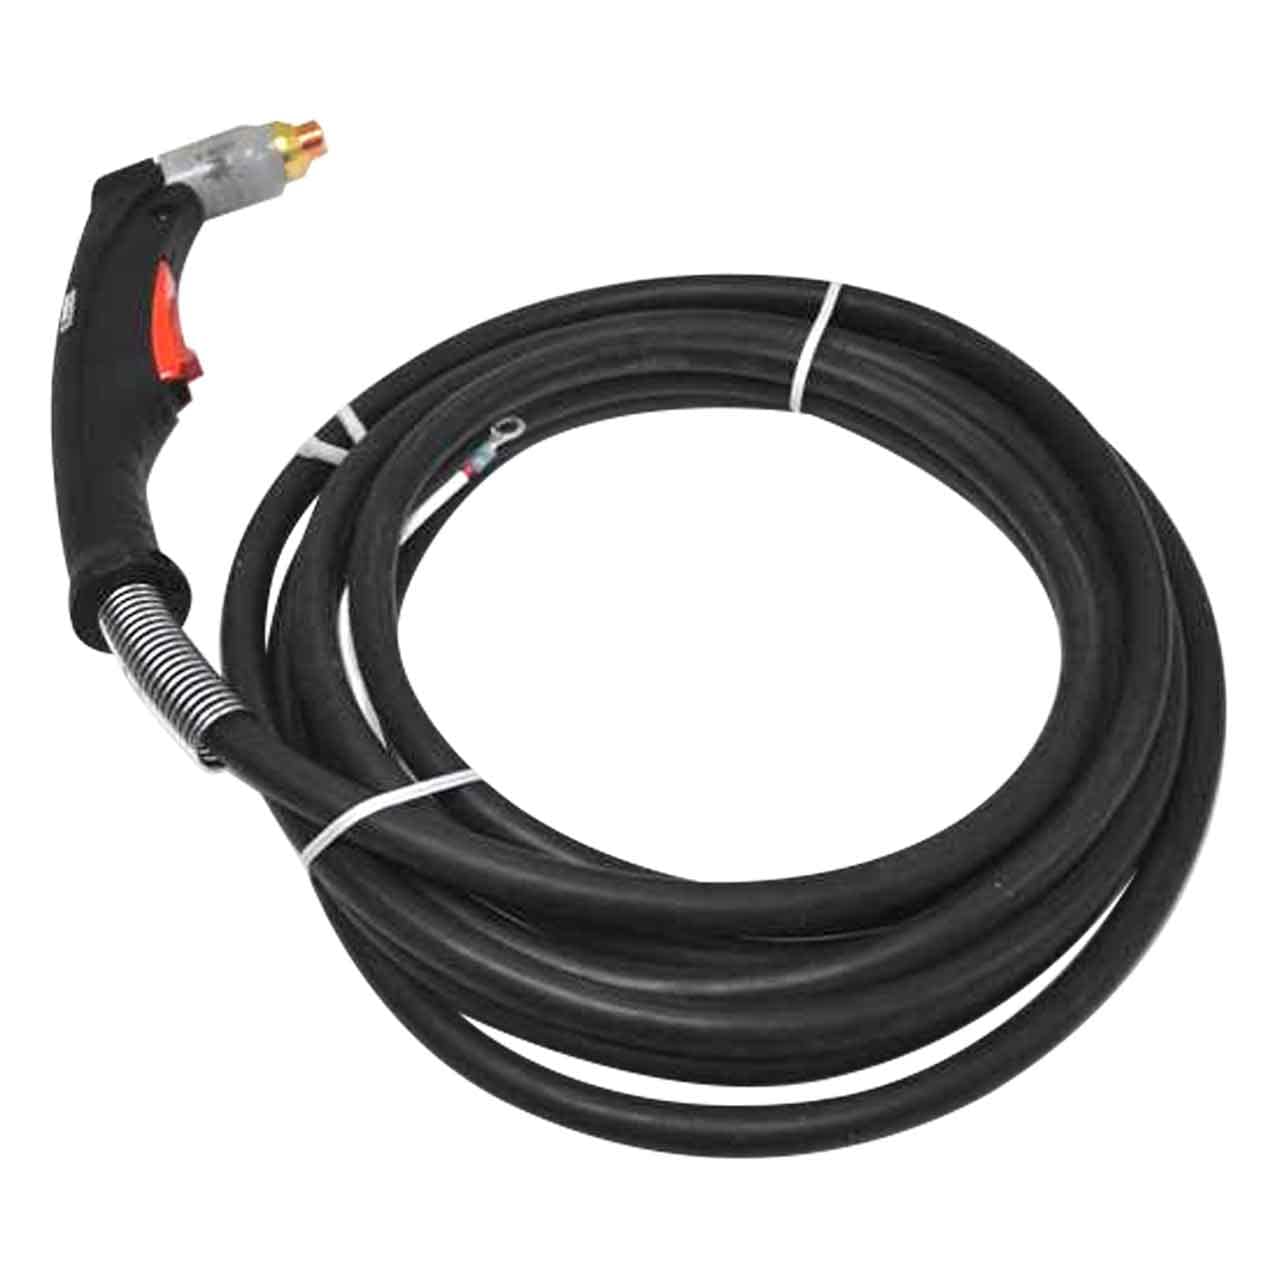
    Hand Torch (Standard)

    • Cable length: 10-25 feet
    • Weight: 1-3 lbs
    • Best for: Freehand cutting, portability
    • Limitation: Less precise than machine torch

    Machine Torch (CNC-Compatible)

    • Mounting: Designed for CNC table or track system
    • Standoff: Adjustable height control for consistent cut quality
    • Best for: Automated cutting, production runs
    • Cost: $200-$800 (in addition to hand torch)

    Ergonomic Features

    • Trigger lock: Reduces hand fatigue during long cuts
    • Swivel head: Prevents cable twist, improves maneuverability
    • Insulated grip: Protects from heat during extended use

    Common Mistakes

    Undersizing amperage for material thickness
    40A cutter on 1/2โ€ steel = slow, rough cuts and rapid consumable wear. Size cutter 20-30% above typical thickness for clean cuts.

    Using contaminated air supply
    Moisture and oil in compressed air destroy consumables in 10-20% of normal life. Always use inline air dryer/filter.

    Running at maximum amperage continuously
    Exceeds duty cycle, triggers thermal shutdown. Run at 70-80% of rated amperage for longer duty cycle and consumable life.

    Buying Checklist

    • โœ“ Amperage rating 20-30% above typical material thickness
    • โœ“ Duty cycle matches usage frequency (35%+ for regular use)
    • โœ“ Input voltage compatible with available power (120V or 240V)
    • โœ“ Pilot arc start for versatile cutting (expanded metal, rusty steel)
    • โœ“ Inverter technology for portability and efficiency
    • โœ“ Compressor meets CFM and PSI requirements
    • โœ“ Air dryer/filter included or purchased separately
    • โœ“ Consumable availability and cost verified

  • Carbon Arc Gouging vs. Hypertherm Plasma Gouging: Whatโ€™s the Better Choice?

    Carbon Arc Gouging vs. Hypertherm Plasma Gouging: Whatโ€™s the Better Choice?

    Carbon arc gouging and plasma gouging both remove metal fastโ€”but they serve different jobs, budgets, and shop environments. This guide breaks down how each process works, when to use one over the other, and what to expect for performance, cost, and safety.


    Key Takeaways

    • Carbon arc gouging is cheaper to operate and works anywhere you have adequate air and amperage.
    • Plasma gouging (Hypertherm) delivers cleaner, more precise results with less post-grinding.
    • Plasma gouging has higher equipment cost but faster learning curve and less mess.
    • Carbon arc is loud, dirty, and requires high current; plasma is cleaner but more expensive to maintain.
    • For production shops and precision repair work, plasma wins. For heavy removal at lowest cost, carbon arc is still king.

    Where to Buy

    Arc Weld Store โ€“ Recommended:
    Carbon arc torches, gouging carbons, and air systems:
    https://www.arcweld.store/collections/esab-carbon-arc-slice-torch


    How Each Process Works

    Carbon Arc Gouging (CAC-A)

    Carbon arc gouging uses a graphite/carbon electrode to melt the base metal with high amperage while compressed air blows the molten metal away.

    Typical Specs (Manufacturer Ranges, AWS C5.3):

    • Current: 300โ€“1200 A depending on electrode size
    • Voltage: 35โ€“55 V
    • Air Pressure: ~80โ€“100 psi
    • Air Flow: ~20 cfm minimum
    • Electrode Types: DC+, copper-coated carbons
    • Noise: 110โ€“125 dB (hearing protection required)

    Strengths

    • Lowest equipment cost
    • Removes large volumes of metal quickly
    • Works indoors/outdoors, even in dirty field conditions
    • Repair shops & fab shops already wired for high amps

    Weak Points

    • Extremely loud
    • Heavy spatter and carbon dust
    • Large heat-affected zone
    • More grinding required after gouging

    Hypertherm Plasma Gouging

    Plasma gouging uses a constricted plasma arc to heat and remove metal with very controlled airflow. Hypertherm systems (Powermax series) are the industry standard.

    Typical Specs (Hypertherm Powermax):

    • Output: 45โ€“125 A depending on system
    • Gouge Depth: Light to medium removal
    • Air Pressure: ~90โ€“120 psi (per model spec sheet)
    • Duty Cycle: Model-dependent; most 60โ€“100% at rated output
    • Noise: Lower than carbon arc; still requires hearing protection

    Strengths

    • Very controlled and predictable gouge
    • Reduced post-grinding
    • Less carbon contamination
    • Quieter and cleaner than CAC-A
    • Works extremely well on stainless and aluminum

    Weak Points

    • Higher equipment cost
    • Consumables are more expensive
    • Not ideal for deep, aggressive removal
    • Requires dry, clean air supply

    Which One Should You Use?

    If you need maximum metal removal at lowest cost โ†’ Choose Carbon Arc Gouging

    Great for:

    • Heavy plate bevels
    • Removing welds on thick structural steel
    • Field repair
    • Shops already running 600โ€“1000 A power sources

    If you need cleaner, controlled gouges with minimal cleanup โ†’ Choose Hypertherm Plasma Gouging

    Great for:

    • Stainless & aluminum work
    • Pressure vessel repairs
    • Precision removal (cracks, isolated welds)
    • Indoor fabrication environments
    • Operators needing fast training curve

    Comparison Table

    Model/ProcessKey SpecsBest For
    CAC-A Carbon Arc Torch (Generic Industrial)300โ€“1200 A, 80โ€“100 psiHeavy gouging, lowest cost
    Hypertherm Powermax 65/85 Gouging65โ€“85 A plasma gouging, precise removalClean, controlled gouging

    Practical Considerations & Setup

    Air System Requirements

    Both processes require dry, steady airflow. Plasma is more sensitiveโ€”wet air destroys consumables.

    • Install a dryer or desiccant if plasma gouging.
    • Carbon arc tolerates โ€œshop airโ€ but still benefits from dryness.

    Power Requirements

    • Carbon arc requires sizable 3-phase machines or engine drives.
    • Plasma gouging can run on standard Hypertherm Powermax units (45โ€“125 A).

    Skill Level

    • Carbon arc demands better hand control to avoid digging.
    • Plasma gouging is easier to learn; the arc is more stable and directional.

    Safety Notes

    • Use ANSI Z87.1-rated eye protection (shade per AWS F2.2 recommendationsโ€”typically shade 10โ€“12 for CAC-A, 8โ€“10 for plasma).
    • Wear full PPE, flame-resistant clothing, and hearing protection (both processes exceed 100 dB).
    • Ensure adequate ventilation; carbon arc creates carbon dust and fumes.
    • Follow manufacturer guidelines for electrode size, air pressure, and duty cycle (Hypertherm, AWS C5.3 for CAC-A).

    FAQ

    Is plasma gouging as fast as carbon arc gouging?
    No. Plasma is cleaner and more controlled, but CAC-A removes metal significantly faster.

    Is carbon arc gouging bad for stainless?
    It can leave carbon contamination. Plasma is preferred for stainless/aluminum.

    Can you gouge outdoors with plasma?
    Yes, but wind can disrupt arc stability more than CAC-A.

    Does Hypertherm sell dedicated gouging consumables?
    Yesโ€”consult the Hypertherm Powermax series gouging nozzle and shield charts.


    Sources Checked

    • Hypertherm Powermax 45/65/85/105 Spec Sheets
    • AWS C5.3: Recommended Practices for Air Carbon Arc Cutting and Gouging
    • Manufacturer data for carbon electrodes and torches

    Where to Buy
    Arc Weld Store:

    https://www.arcweld.store/collections/esab-carbon-arc-slice-torch

  • Listen with Audible