Tag: plasma consumables

  • ESAB Model 33368 30 Amp Nozzle for Plasmarc PT-27 Plasma Torch, Pack of (5): Product Breakdown

    ESAB Model 33368 30 Amp Nozzle for Plasmarc PT-27 Plasma Torch, Pack of (5): Product Breakdown

    Product not found.
    “>ESAB Model 33368 30 Amp Nozzle for Plasmarc PT-27 Plasma Torch, Pack of (5)

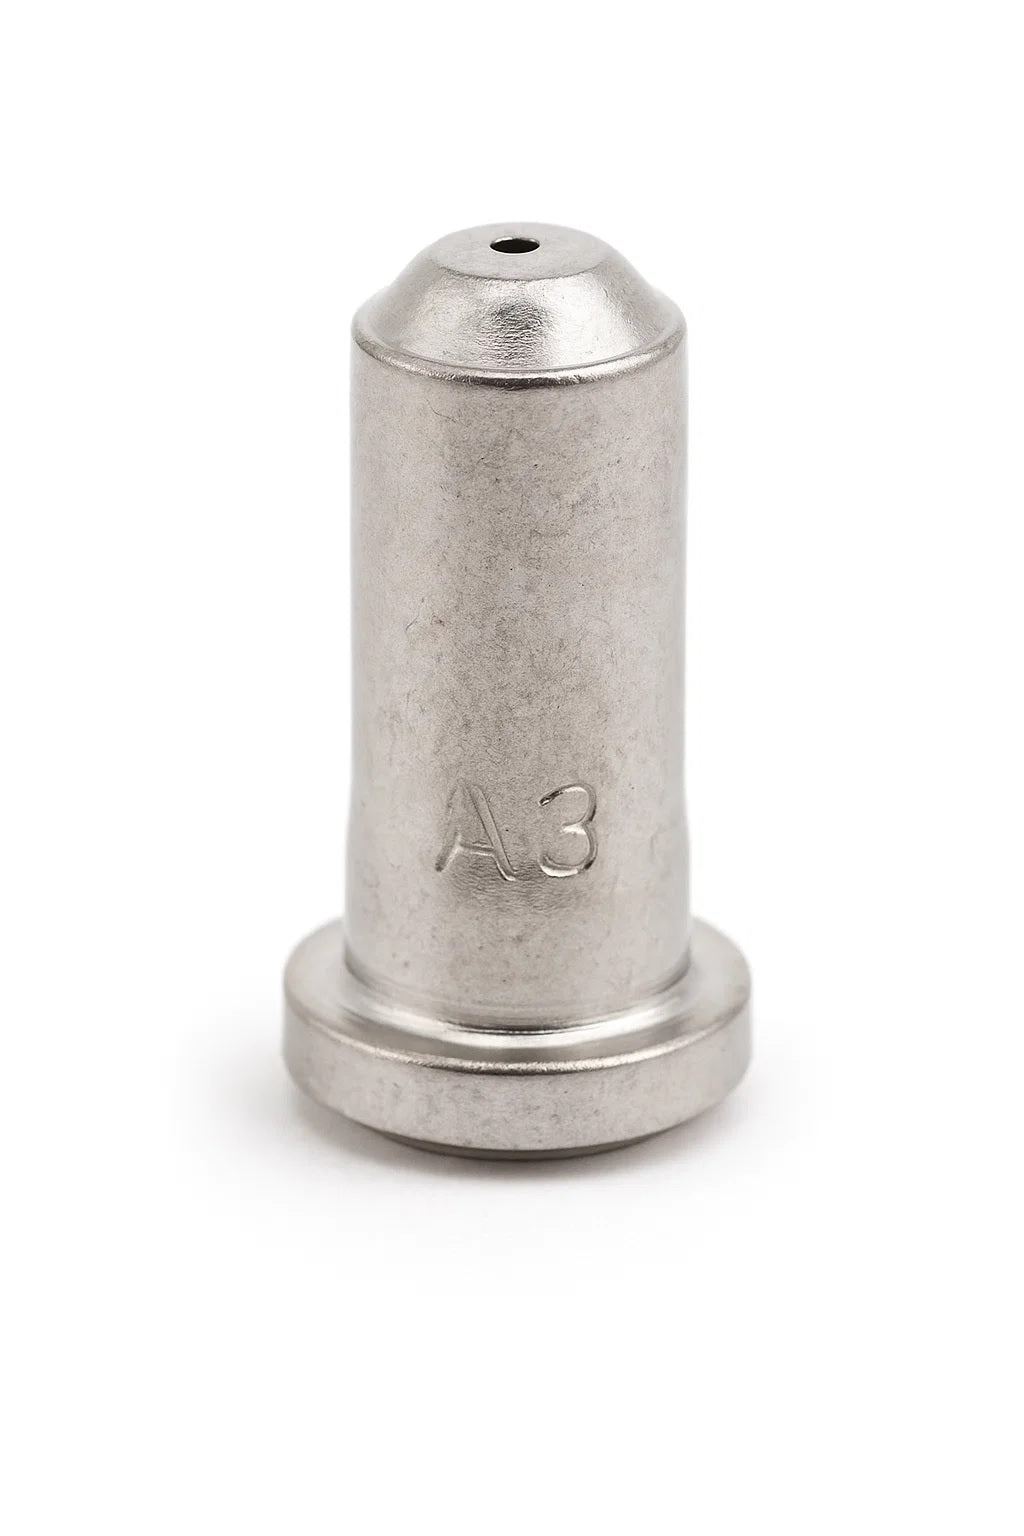
    The ESAB Model 33368 30 Amp Nozzle for Plasmarc PT-27 Plasma Torch, Pack of (5) is a consumable part used in plasma cutting. For buyers, maintenance teams, and welding support staff, the main question is not whether it is a replacement part, but whether it matches the torch family, amperage range, and cut duty you actually run on the shop floor. This draft stays focused on that practical check.

    The product page indicates this is a 30 amp nozzle intended for PT-23 and PT-27 Plasmarc plasma torches. Beyond that, the important technical details that affect fit and performance should be verified against the machine manual and the torch consumable chart before purchase or installation. If a detail is not confirmed in the source material, treat it as Unknown (Verify).

    Key Takeaways

    • This is a plasma nozzle consumable, not a universal part.
    • The listed amperage is 30 amp, but the correct operating range still needs verification against your torch and power source.
    • The source product information states PT-23 and PT-27 Plasmarc torch use.
    • As with any nozzle, cut quality depends on air quality, arc start condition, standoff, and wear state.
    • Pack quantity is five nozzles according to the source product listing.

    What This Part Does

    A plasma nozzle constricts and directs the plasma arc. In practical terms, it affects kerf shape, arc concentration, and edge quality. A worn nozzle can show up as wider kerf, rougher edge, harder starts, arc instability, or accelerated wear in related consumables. If your cut quality has changed, do not assume the nozzle is the only cause. Air contamination, electrode wear, damaged swirl components, incorrect stand-off, and double arcing can produce similar symptoms.

    For broader root-cause checks, see the support article on plasma torch nozzle damage causes. For torch-family and consumable matching logic, the plasma drag shield compatibility guide is a useful reference point, even though this part is a nozzle and not a drag shield.

    Buyer Checklist Before Ordering

    Use this as a field check before you place the order or pull stock for a job:

    • Check torch family: Confirm the torch is PT-23 or PT-27 as listed in the source product information.
    • Check amperage: Confirm your application uses a 30 amp nozzle. If the machine is set up differently, the correct match is Unknown (Verify) until confirmed.
    • Inspect the current nozzle: Look for orifice distortion, spatter buildup, ovality, or heat damage.
    • Inspect related parts: Check electrode, retaining cap, swirl ring or equivalent torch components, and air passages as applicable to your torch design.
    • Verify cut problem symptoms: If the issue is intermittent arc transfer, poor start consistency, or excessive dross, confirm whether consumable wear is actually the cause.
    • Verify machine settings: Confirm air pressure, cutting speed, stand-off, and polarity per the equipment manual. Unknown (Verify) if manual data is not on hand.

    Support and Troubleshooting Notes

    When a nozzle is replaced too early, the real problem usually stays in the system. Use a simple inspect sequence:

    1) Inspect the nozzle. Remove it and examine the orifice under good light. Check for wash-out, eccentric wear, cracks, or heavy spatter. If the opening no longer looks uniform, replacement is justified.

    2) Inspect the electrode. A damaged electrode can create arc instability that looks like nozzle failure. Replace related consumables as a set when wear is obvious or when the torch manual recommends it.

    3) Inspect air quality. Moisture, oil, and dirt in the air supply shorten consumable life. Verify dryer function, filter condition, and regulator behavior. If air quality has not been measured recently, it is Unknown (Verify).

    4) Verify torch assembly condition. Check for damaged threads, loose fit, worn retaining parts, and signs of double arcing. If the consumable stack does not seat correctly, the nozzle will not run as expected.

    5) Verify cut setup. Wrong travel speed or stand-off can destroy a new nozzle quickly. If the cut profile is poor immediately after installation, the issue may be setup rather than part quality.

    Product / Parts Section

    The source product information identifies the part as ESAB Model 33368 30 Amp Nozzle for Plasmarc PT-27 Plasma Torch, Pack of (5). The product summary also states use with PT-23 and PT-27 Plasmarc torches. No additional verified specs were provided in the source material, so any further material, dimensions, or certifications are Unknown (Verify).

    For sourcing support, the product can be reviewed through the provided ArcWeld listing: Product not found.

    “>ESAB Model 33368 30 Amp Nozzle for Plasmarc PT-27 Plasma Torch, Pack of (5). Use the listing as the product reference, then verify torch compatibility and amperage in the machine documentation before deployment.

    How to Verify Fit in the Shop

    Before issuing the part, run these checks:

    • Match the torch model: PT-23 or PT-27 per the source listing.
    • Match the consumable shape: Compare the old nozzle to the new one visually and by seating style.
    • Confirm the installation stack: Nozzle, electrode, and adjacent consumables should assemble without force.
    • Test on scrap: Make a short cut on comparable material before releasing the torch back to production.

    Safety Notes

    • De-energize the system before changing consumables.
    • Do not inspect the plasma arc directly.
    • Wear eye and hand protection during part removal and test cuts.
    • Verify compressed air condition before use. Contaminated air can shorten consumable life and affect operator safety.
    • If the torch shows repeated double arcing or abnormal noise, stop and inspect the full torch stack before continuing.

    FAQ

    Is this nozzle only for the PT-27?
    The source product information also states PT-23 compatibility. Verify the actual torch model and consumable chart before ordering.

    Can I use this nozzle at amperage other than 30 amp?
    The listing identifies it as a 30 amp nozzle. Other amperage use is Unknown (Verify) unless confirmed by the torch and power source documentation.

    What causes a new nozzle to fail quickly?
    Common causes include poor air quality, incorrect stand-off, damaged electrode parts, double arcing, and cutting too fast or too slow. Check the full system, not just the nozzle.

    Should I replace only the nozzle?
    Not always. If the electrode or other consumables are also worn, replace the worn set as a group according to the torch manual.

    Sources Checked

    • ArcWeld product listing: ESAB Model 33368 30 Amp Nozzle for Plasmarc PT-27 Plasma Torch, Pack of (5)
    • Internal support article: Plasma Torch Nozzle Damage Causes: Orifice Wear, Double Arcing, Piercing, and Air Problems
    • Internal support article: Plasma Drag Shield Compatibility Guide: Torch Family, Amperage, Nozzle, Retaining Cap, and Cut Mode Checks

    Final note: treat this part as a consumable matched to a specific torch system. Verify torch model, amperage, and assembly details before purchase and before installation. If any technical detail is not confirmed by source material or machine documentation, mark it Unknown (Verify).

    Related Arc Weld Part

    ESAB Model 33368 30 Amp Nozzle for Plasmarc PT-27 Plasma Torch, Pack of (5)

    ESAB Model 33368 30 Amp Nozzle for Plasmarc PT-27 Plasma Torch, Pack of (5)

    ESAB 33368 – 30 Amp Plasma Nozzle for Plasmarc PT-27 Torch (5-Pack) The ESAB 33368 is a 30 amp nozzle designed for use with PT-23 and PT-27 Plasmarc plasma torches. Engineered for clean, efficient cuts in light to medium-gauge metal, this nozzle delivers consistent arc stability and cut quality. Each pack contains five OEM-grade nozzles, ensuring reliable performance and compatibility with ESAB plasma systems. Spe…

    View at Arc Weld Store

    Related Weld Support Guides

  • Hypertherm Air T30 Torch Parts Breakdown: Parts Lookup and Buying Checks

    Hypertherm Air T30 Torch Parts Breakdown: Parts Lookup and Buying Checks

    Hypertherm Air T30 Torch Parts Breakdown

    The Hypertherm Air T30 torch support path is a parts-lookup problem before it is a buying problem. For maintenance buyers and weld shop support teams, the main risk is ordering a consumable or service part by name instead of confirming the torch family, cut mode, and part interface. The result is wasted time, mismatched hardware, or a torch that will not assemble correctly.

    This guide is a practical breakdown for the Hypertherm Air T30 Torch Parts Breakdown process. It focuses on what to inspect, what to verify before ordering, and how to use the Weld Support Parts lookup page as a starting point for parts identification.

    Key Takeaways

    • Start with torch family identification, not the cut tip alone.
    • Verify retaining hardware, shield style, nozzle style, and electrode condition before ordering.
    • Do not assume compatibility from a similar Hypertherm torch name.
    • Use the WSP lookup page as the source page for parts identification, then confirm against the torch in hand.
    • When a detail is uncertain, mark it as Unknown (Verify) and confirm from the machine, torch label, or service documentation.

    What the Air T30 Parts Breakdown Should Cover

    For a torch service check, the useful breakdown is the set of wear parts and torch-side service items that affect arc start, cut quality, and torch assembly. That usually includes the electrode, nozzle, shield or drag shield style if used, retaining cap or retaining hardware, swirl ring or gas distribution component if used, and any torch body or lead-side service items that are specific to the torch family.

    For this support path, the source page is the place to begin the lookup:

    Hypertherm Air T30 hand torch support on Weld Support Parts

    Use that page to identify the support path, then verify the exact torch and consumable set before placing an order.

    Check the Torch Before You Buy

    Do not order from memory. A fast visual inspection often prevents the wrong part from being purchased.

    • Check the torch label. Confirm the torch family and any visible model marking. If unreadable, note it as Unknown (Verify).
    • Inspect the retaining hardware. Verify whether the cap, shield, or front-end hardware matches the torch you have in service.
    • Inspect the nozzle and electrode wear. Look for pit wear, heat discoloration, erosion, and arc damage.
    • Verify the front-end stack-up. Count the parts in the assembly as removed, and compare that stack to the lookup page or service parts breakdown.
    • Check for cut-quality symptoms. Heavy dross, arc wandering, or repeated pilot-arc issues may indicate worn consumables rather than a power supply fault.

    Troubleshooting Support: Where Parts Checks Matter

    Many torch problems look electrical at first but are actually consumable-related. Before replacing components upstream, inspect the torch front end.

    1) No-start or weak start

    • Inspect the electrode and nozzle for obvious wear or burn damage.
    • Verify the torch stack is assembled correctly and tightened to the correct feel for the design, not over-torqued.
    • Check for contamination, moisture, or debris in the torch front end.

    2) Pilot arc dropout

    • Inspect the retaining hardware and front-end fit.
    • Verify the consumables are the correct family for the Air T30 support path.
    • Check lead condition, damage at the torch neck, and any visible burn-through.

    3) Poor cut quality

    • Inspect nozzle orifice wear and edge damage.
    • Verify the shield or drag shield style against the torch setup in use.
    • Check the work clamp, air quality, and cut technique before replacing parts again.

    For a deeper fault tree, the internal support article on pilot arc issues is a useful follow-up:

    Plasma Cutter Pilot Arc Failure Troubleshooting

    Buying Checks for Service Parts

    When you move from inspection to purchasing, treat every line item as a verification step.

    • Check part family first. The torch family must match the support path.
    • Inspect the old part. Compare shape, thread style, contact surfaces, and overall length. If the old part is damaged beyond comparison, mark the detail Unknown (Verify).
    • Verify the assembly count. Some torch fronts use multiple small parts that are easy to miss.
    • Confirm the use case. Drag cutting, standoff cutting, or shielded use may require different front-end hardware. If not confirmed, the requirement is Unknown (Verify).
    • Do not substitute by brand alone. Similar plasma parts are not interchangeable without verification.

    If you need a methodical way to compare drag-shield and front-end configurations, use this internal reference:

    Plasma Drag Shield Compatibility Guide

    WSP Lookup Section

    Use the Weld Support Parts lookup page as the starting point for the Air T30 support path:

    View the Hypertherm Air T30 hand torch support page

    Practical workflow:

    1. Open the lookup page.
    2. Match the torch family to the machine and torch in service.
    3. Remove and inspect the worn parts.
    4. Compare the old parts to the page listing and any internal support notes.
    5. Only then place the order.

    Any item that cannot be confirmed from the torch, the page, or service paperwork should remain Unknown (Verify) until checked.

    Safety Notes

    • De-energize the plasma system before removing torch parts.
    • Allow the torch to cool before handling front-end consumables.
    • Do not inspect burned parts by touch immediately after use.
    • Use eye protection when cleaning the torch front end.
    • Do not mix unknown parts into a live torch assembly.

    FAQ

    How do I know if the Air T30 part I need is a consumable or a service part?

    Check the wear pattern and location. Front-end items such as electrodes, nozzles, shields, and retaining hardware are consumable-facing. Torch-body, lead-side, or connector items are service parts. If the category is unclear, label it Unknown (Verify) and compare against the lookup page.

    Can I order by torch name only?

    No. Torch name alone is not enough. Verify the exact torch family, front-end stack, and cut mode before ordering.

    What should I do if the old part is too damaged to identify?

    Use the torch label, machine model, and the support page as reference points. If a detail still cannot be confirmed, keep it as Unknown (Verify) until checked against service documentation or a known-good assembly.

    Why does a torch sometimes fail even when the power supply is fine?

    Worn or mismatched consumables can cause no-start, weak arc, dropout, and poor cut quality. Start with the torch front end before replacing larger components.

    Sources Checked

    Disclosure: As an Amazon Associate, Weld Support Parts may earn from qualifying purchases.

    Related Weld Support Guides

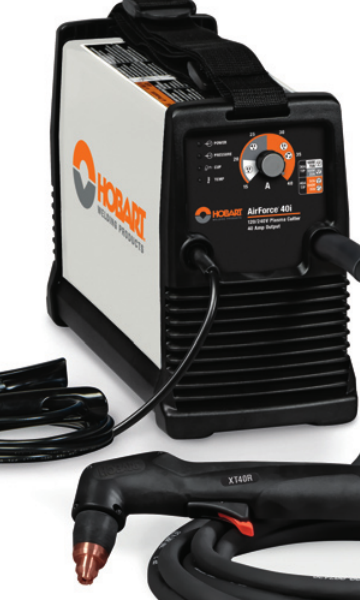
  • Hobart AirForce 40i Plasma Cutter Support: Parts Lookup and Buying Checks

    Hobart AirForce 40i Plasma Cutter Support: Parts Lookup and Buying Checks

    Hobart AirForce 40i Plasma Cutter Support

    The Hobart AirForce 40i is a compact plasma cutter support topic that usually comes down to four checks: input power, torch condition, consumable wear, and air quality. If the machine is cutting poorly or not starting, the fastest path is to verify the torch setup and the air supply before replacing parts. This guide is built for parts lookup and buying checks, not a repair manual. Use it to confirm what to inspect, what to match, and what to verify before ordering.

    Key Takeaways

    • Confirm the machine identification and stock reference before ordering any support part.
    • The listed support page for this unit references a replacement XT40R torch, consumables, MVP adapters, an air filter kit, and cutting guide support.
    • Do not assume a torch, adapter, or consumable is correct from appearance alone. Verify by model reference and connector style.
    • For cutting problems, check air pressure/flow, torch consumables, lead condition, and work lead attachment before replacing the power source.
    • Use the WSP lookup page as the primary reference for the support page and linked parts path.

    What to verify first on a Hobart AirForce 40i

    Start with the machine nameplate and the support reference. The provided WSP lookup page identifies the Hobart AirForce 40i support page with stock 500576 and 120/240 V specifications. Verify the exact unit label on your machine, because buying decisions depend on the input version and the torch package, not just the model name. If the machine has been moved between shops, it may be wired differently than expected. Unknown (Verify) whether your specific installation is set up for 120 V or 240 V service until you check the nameplate and receptacle.

    Check: machine name, serial or stock reference, input voltage, torch type, and connector style.

    Inspect: power cord, plug, torch lead, trigger cable, and air line for damage or heat discoloration.

    Verify: the torch package against the support page before ordering consumables or adapters.

    Troubleshooting and support checks

    1) No start or weak arc

    If the torch does not initiate, or the arc starts weakly and drops out, isolate the basics first.

    • Check that the machine is powered correctly and the breaker is not marginal under load.
    • Inspect the torch tip, electrode, and swirl ring for wear, erosion, or contamination.
    • Verify the air supply is dry and clean. Moisture or oil can shorten consumable life and cause arc instability.
    • Check the work clamp connection and the cut table contact path.

    If the torch parts are visibly worn, replace the full consumable set rather than mixing old and new parts. Mixed wear states can make troubleshooting harder.

    2) Poor cut quality

    When the machine starts but cut quality is inconsistent, focus on air and consumables before assuming a power source fault.

    • Inspect the nozzle for oval wear or spatter damage.
    • Check whether the torch stand-off or hand motion is too fast or too slow for the material being cut.
    • Verify the air filter kit condition if water or debris is present in the line.
    • Inspect the torch lead for cuts, tight bends, or repeated abrasion at the work area.

    Do not buy replacement parts until you confirm which failure mode is present. A bad nozzle, dirty air, and low input power can produce similar symptoms.

    3) Torch and adapter fit checks

    The support page references an XT40R replacement torch and MVP adapters. Those items should be treated as model-specific support parts. Before ordering, match the torch family, connector interface, and any adapter callout shown on the support page. Unknown (Verify) whether any adapter is required for your existing setup until you confirm the current torch package and machine configuration.

    • Check the printed torch model reference.
    • Inspect the connector ends for wear, bent pins, or damaged locking features.
    • Verify the replacement torch is the exact support path listed for this machine.

    WSP lookup page: use it as the starting point

    The provided WSP lookup page is the main source for this support topic:

    Hobart AirForce 40i Plasma Cutter Support

    Use that page to confirm the machine support path, the stock 500576 reference, and the listed support categories. The page references consumables, XT40R replacement torch support, MVP adapters, an air filter kit, cutting guides, and related plasma support links. That makes it a parts lookup starting point, not a blanket approval for every accessory you may see elsewhere.

    Buying check: match the item to the machine and torch package before adding it to a quote or cart.

    Verify: whether the part is a direct replacement, a service accessory, or a support accessory that only applies to a specific configuration.

    Practical part selection checks

    • Consumables: replace as a set when wear is visible or cut quality changes.
    • Torch assembly: confirm the torch model before ordering. Do not assume a different torch in the same family will fit without verification.
    • Air filter kit: choose this when the air line shows moisture, particulate, or oil contamination.
    • MVP adapters: verify the machine-side and torch-side connection points before buying.
    • Cutting guides: confirm the guide style works with your hand technique and work envelope.

    Safety notes

    Plasma cutters involve high voltage, hot metal, compressed air, and intense arc radiation. Disconnect input power before opening access panels or handling internal connections. Bleed stored air pressure before servicing the air system. Replace damaged torch leads or worn consumables before operation. Use approved eye, face, hand, and body protection for plasma cutting. Keep the work area dry and free of flammables.

    FAQ

    What is the first part I should inspect on an AirForce 40i with arc issues?

    Inspect the consumables first, then verify air quality and work lead connection. Those are the most common support checks before replacing the torch or power source.

    Can I order a replacement torch from appearance alone?

    No. Verify the torch model reference and connector style first. The support page references an XT40R replacement torch, but you should confirm the exact machine and torch package before buying.

    Do the listed accessories mean every item is required?

    No. The support page is a parts lookup starting point. Some items, such as an air filter kit or MVP adapter, may only be needed if your current setup has a matching need. Verify against your machine configuration.

    How do I know if the input power is correct?

    Check the machine nameplate and the site wiring. The provided support page references 120/240 V specifications, but your installed service must still be verified at the machine and receptacle.

    Sources Checked

    Use the support page as the primary reference, then verify the machine condition and part match before ordering. That reduces avoidable returns and prevents mismatched torch or consumable purchases.

    Disclosure: As an Amazon Associate, Weld Support Parts may earn from qualifying purchases.

    Related Weld Support Guides

  • When to Replace Plasma Electrodes and Nozzles

    ESAB Plasma Cutting Nozzle 90A for PT-32/PC-1500 Torch, Pack of 5 Nozzles
    “>ESAB Plasma Cutting Nozzle 90A for PT-32/PC-1500 Torch, Pack of 5 Nozzles

    Plasma consumables wear out by design. The question is not whether they will need replacement, but when wear starts affecting arc stability, cut quality, or torch protection.

    For maintenance buyers and weld support teams, the practical approach is to replace the electrode and nozzle based on condition, not calendar time alone. Inspect the parts after a problem cut, after a tip-up or arc fault, and during scheduled consumable checks.

    Key Takeaways

    When to Replace a Plasma Electrode

    The electrode carries the cutting current and takes heat load during every cut. Replace it when you see the following:

    If the electrode face is no longer uniform, do not keep cutting with it. Continued use can damage the nozzle and reduce torch life.

    When to Replace a Plasma Nozzle

    The nozzle shapes the arc. Wear here changes cut geometry fast. Replace the nozzle when you find:

    A worn nozzle often shows up as a poor cut before the torch fails completely. If cut quality drops suddenly, inspect the nozzle first.

    Troubleshooting Support

    Poor Cut Quality

    If cuts are rough, angled, or heavily drossed, check the consumables first. Then verify:

    If the electrode and nozzle are worn, replace them before adjusting process settings further.

    Frequent Starts or Arc Failures

    Arc-start issues can come from wear, contamination, or torch setup. Inspect the electrode and nozzle for heat damage and verify that the air system is clean and dry. Unknown (Verify) if other torch components are contributing.

    Unexpected Tip Damage

    Rapid nozzle damage often points to one of three problems: wrong consumable set, poor air quality, or torch contact with the work. Check all three before returning the torch to service.

    Replacement Practice

    For reliable cut quality, many shops replace the electrode and nozzle as a set when one part is clearly worn or damaged. This reduces mixed-wear conditions that can make troubleshooting harder.

    Record the torch model, amperage, and failure mode before replacement. That helps maintenance teams spot repeat issues and stock the right consumables.

    Product / Parts

    For PT-32 and PC-1500 torch applications, one available consumable is the ESAB Plasma Cutting Nozzle 90A for PT-32/PC-1500 Torch, Pack of 5 Nozzles. Use only if the torch model matches. Unknown (Verify) if your torch or power source requires a different nozzle set.

    Internal reference: MIG Nozzle Gel: When It Helps, When It Does Not, and How to Use It Safely

    Safety Notes

    FAQ

    Can I replace only the nozzle?

    Sometimes, yes. But if the electrode shows wear or heat damage, replace both parts together for cleaner troubleshooting.

    How do I know if the consumables are the problem?

    Look for visible wear, unstable arc starts, wider-than-normal cut width, and dross that appears after the consumables have been in service for a while.

    Should I replace consumables on a schedule?

    Use inspection-based replacement first. Scheduled replacement can help in high-use shops, but actual wear should guide the final decision.

    Sources Checked

    Related Arc Weld Part

    ESAB Plasma Cutting Nozzle 90A for PT-32/PC-1500 Torch, Pack of 5 Nozzles

    ESAB Plasma Cutting Nozzle 90A for PT-32/PC-1500 Torch, Pack of 5 Nozzles

    Add precision to your welding projects with the ESAB 0558002837 Plasma Cutting Nozzle 90A. This high-quality plasma cutting nozzle is specifically designed for the PT-32 and PC-1500 torch models, ensuring optimal performance and superior cutting results. The plasma cutting nozzle 90A is a crucial component for achieving clean and efficient cuts in various metals. Whether you are a professional welder or an enthusi…

    View at Arc Weld Store

    Related Weld Support Guides

  • Lincoln Electric FlexCut 45 Plasma Cutter Troubleshooting, Consumables, and Air Supply Setup

    If your Lincoln Electric FlexCut 45 plasma cutter is producing excessive dross, struggling to maintain arc stability, refusing to transfer the pilot arc, or rapidly consuming tips and electrodes, the problem is often related to air quality, consumable wear, grounding issues, or incorrect setup. Operators commonly mistake these symptoms for a failed torch or power supply when the root cause is frequently restricted airflow, incorrect consumable installation, poor work clamp connection, or moisture contamination in the air system.

    The FlexCut 45 is designed for handheld plasma cutting applications where consistent air delivery, proper consumable fitment, and clean electrical connections are critical. Before replacing expensive components, verify the torch consumables, inspect swirl rings and retaining caps, confirm compressor output, and check for contamination inside the torch head. Many intermittent arc faults and poor cut quality complaints are resolved during basic inspection and setup verification.

    Common FlexCut 45 Symptoms

    • Pilot arc starts but will not transfer to the workpiece
    • Heavy bottom-edge dross during mild steel cutting
    • Uneven kerf width or wandering cut path
    • Torch consumables burning up quickly
    • Intermittent torch shutdowns during extended cutting
    • Arc sputtering or unstable plasma stream
    • Difficulty piercing thicker material
    • Poor cut edge quality on clean steel
    • Excessive moisture inside torch consumables
    • Torch overheating during continuous operation

    Most Likely Causes

    • Low inlet air pressure or restricted airflow
    • Moisture contamination from the compressor system
    • Incorrect tip and electrode installation
    • Worn electrode hafnium insert
    • Damaged retaining cap or swirl ring
    • Poor work clamp grounding
    • Torch lead damage or excessive bending
    • Incorrect amperage selection for material thickness
    • Improper torch stand-off distance
    • Using damaged or mixed consumable sets

    Quick Diagnostic Checks

    Inspection AreaWhat To CheckTypical Problem
    Air SupplyDry, stable compressed airMoisture causing unstable arc
    ElectrodeInspect hafnium pit depthHard starts and weak arc
    Tip OrificeRound, undamaged openingWandering or angled cuts
    Ground ClampClean metal contactPilot arc will not transfer
    Torch CableKinks, cuts, heat damageIntermittent cutting
    Cooling AirflowVentilation openings clearThermal shutdown

    Consumable Wear Indicators

    One of the most common FlexCut 45 service mistakes is replacing only the electrode or only the tip after severe wear. Plasma consumables function as a matched system. If the electrode is deeply worn, the tip orifice may already be distorted from unstable arc behavior. Running mixed-wear consumables often creates poor cut quality and shortens the life of new parts.

    • Electrode pit becoming excessively deep
    • Tip opening becoming oval-shaped
    • Visible torch spatter buildup inside retaining cap
    • Burn marks on swirl ring surfaces
    • Difficulty maintaining consistent stand-off
    • Double arcing inside the torch

    Air System Problems and Moisture Contamination

    Compressed air quality directly affects plasma cutter performance. Oil contamination, excessive moisture, and fluctuating compressor output will dramatically reduce consumable life. Operators frequently assume the plasma cutter itself has failed when the actual issue originates upstream in the air system.

    Install a properly sized filter and dryer system whenever possible. Drain compressor tanks regularly and inspect inline separators for saturation. If the torch begins cutting inconsistently after long run times, moisture buildup may be accumulating in the airline.

    Cut Quality Problems

    Excessive dross and bevel angle are usually setup-related rather than machine failure. Travel speed, torch height, consumable condition, and amperage selection all affect cut quality. Dragging the torch incorrectly or holding excessive stand-off distance can quickly produce rough edges and slag accumulation.

    • Slow travel speed often creates heavy bottom dross
    • Excessive stand-off can widen the kerf and reduce penetration
    • Worn tips produce angled or uneven cuts
    • Poor grounding causes unstable transfer arc behavior
    • Dirty steel surfaces may reduce arc consistency

    Field Fix vs Proper Repair

    Some operators temporarily restore cutting performance by cleaning consumables or increasing air pressure, but these fixes usually provide limited improvement if the consumables are already damaged. Severely worn electrodes and distorted tips should be replaced rather than reused.

    Likewise, wrapping leaking air fittings with thread tape may reduce leakage temporarily, but recurring pressure instability should be corrected with proper regulator, hose, or fitting replacement.

    Related Failure Paths

    • Dirty air systems accelerate torch wear
    • Damaged consumables increase nozzle overheating
    • Poor grounding stresses pilot arc components
    • Overheating from blocked ventilation may shorten internal component life
    • Incorrect extension cord sizing can create voltage instability

    Compatibility and Setup Notes

    • Machine Model: Lincoln Electric FlexCut 45
    • Process Type: Air plasma cutting
    • Input Requirements: Verify OEM specifications before installation
    • Compressed Air Requirement: Clean and dry compressed air required
    • Torch Compatibility: OEM consumables recommended
    • Extension Cord Compatibility: Verify conductor size and amperage rating
    • Generator Compatibility: Unknown (Verify)

    Safety Notes

    Plasma cutting systems generate intense ultraviolet radiation, molten metal spray, noise, and electrically energized components. Operators should use approved welding PPE including shaded eye protection, gloves, flame-resistant clothing, and respiratory protection where required. Keep combustible materials away from cutting areas and ensure adequate ventilation for fumes and airborne particulates.

    Never service torch consumables with power connected to the machine. Allow components to cool before inspection and replacement.

    Frequently Asked Questions

    Why does the pilot arc start but not transfer?

    The most common causes are poor grounding, contaminated material surfaces, worn consumables, or insufficient air pressure.

    Why are my consumables wearing out so fast?

    Moisture contamination, incorrect torch distance, excessive pierce height, or damaged airflow components are common causes of premature wear.

    Can dirty compressed air damage the torch?

    Yes. Moisture and oil contamination can destabilize the plasma stream and rapidly damage electrodes and tips.

    Sources Checked

    • Lincoln Electric FlexCut 45 OEM product information
    • Lincoln Electric equipment catalogues
    • Lincoln Electric expendable parts guide
    • General welding safety guidance and PPE documentation
  • Plasma Cutter Air Pressure Too High Symptoms

    Plasma Cutter Air Pressure Too High Symptoms

    Excessive air pressure on a plasma cutter can create unstable arc behavior, poor cut quality, accelerated consumable wear, double arcing, bevel problems, and torch overheating. Many operators assume more air pressure improves cutting performance, but plasma systems are designed to operate within a specific pressure and flow range. When pressure exceeds the torch or power source specification, airflow can disrupt the plasma arc instead of stabilizing it.

    Common Symptoms

    • Arc becomes unstable or difficult to maintain.
    • Excessive bevel angle on cuts.
    • Consumables wear out unusually fast.
    • Double arcing inside the torch.
    • Arc sputters or blows out intermittently.
    • Poor edge quality or excessive dross.
    • Torch overheats during longer cuts.

    Likely Causes

    • Regulator set above specification: Excess airflow disturbs plasma arc shape and transfer stability.
    • Incorrect compressor setup: High-output compressors without proper regulation can spike line pressure.
    • Faulty regulator: Damaged regulators may creep upward during operation.
    • Improper consumable matching: Nozzle and electrode combinations may not tolerate incorrect airflow characteristics.
    • Moisture separator restrictions: Blocked air treatment systems can create unstable pressure behavior.

    Inspection Steps

    1. Verify recommended air pressure from the plasma cutter manual.
    2. Check regulator output pressure while actively cutting, not only at idle.
    3. Inspect moisture separators and filters for blockage.
    4. Inspect consumables for double-arcing damage or abnormal erosion.
    5. Check compressor regulator operation and pressure stability.
    6. Verify torch lead condition and airflow connections.

    Visual Wear Indicators

    • Electrode pits forming rapidly.
    • Nozzle orifice distortion.
    • Uneven nozzle wear.
    • Heat discoloration around torch consumables.
    • Excessive dross despite proper travel speed.

    Common Wrong-Part Mistakes

    • Installing incorrect nozzle amperage ratings.
    • Using aftermarket consumables with mismatched airflow requirements.
    • Oversizing air compressors without proper regulation.
    • Ignoring damaged regulators or moisture separators.

    Field Fix vs Proper Fix

    Field fix: Reduce regulator pressure gradually to the manufacturer specification and inspect consumables for damage. Proper fix: Repair faulty regulators, service air treatment systems, replace damaged consumables, and verify compressor output stability under load.

    Ignored Failure Consequences

    Running excessive air pressure can shorten consumable life dramatically, increase torch overheating, reduce cut quality, damage swirl rings, and create repeated double-arcing conditions that may damage the torch body itself.

    Safety Notes

    Disconnect input power and bleed air pressure before servicing plasma torch components. Plasma cutting produces hot metal spray, UV exposure, compressed air hazards, and electrically live torch components.

    Sources Checked

    • Lincoln Electric equipment catalog
    • Lincoln air treatment and welding environment catalog
    • Uploaded welding accessories and safety catalogs
  • Plasma Consumable Mismatch Symptoms: Wrong Nozzle, Electrode, Swirl Ring, Shield, or Retaining Cap

    If plasma consumables are mismatched, the torch may start poorly, show cap faults, cut with heavy bevel, make a wide kerf, burn through nozzles, pit electrodes off-center, double arc, lose transfer, or stop cutting cleanly even with normal air pressure. A plasma torch consumable stack is not a loose set of similar-looking parts. The electrode, swirl ring, nozzle, retaining cap, shield, drag shield, spacer, and O-rings must match the torch family, amperage, cutting mode, and machine setup.

    The fast check is to stop cutting, remove the full stack, lay the parts out in order, compare every part number to the torch manual, then reinstall a complete known-good set for the exact torch and amperage. Do not diagnose only the nozzle. A wrong swirl ring, shielded-contact cap, gouging cap, drag shield, or amperage nozzle can make a new nozzle fail immediately. For related checks, see plasma torch nozzle damage causes, plasma torch retaining cap damage causes, and plasma arc starting then stopping troubleshooting.

    Common Symptoms

    • Arc starts, flashes, or pilots but will not transfer reliably.
    • Torch displays a cap fault, parts-in-place fault, or will not fire after a consumable change.
    • Cut edge suddenly has heavy bevel on one side.
    • Kerf is wider than expected for the amperage and material.
    • Nozzle orifice becomes oval, keyholed, or melted quickly.
    • Electrode pit is off-center, rough, or deeper than expected after short use.
    • Arc wanders, sounds harsh, or changes color.
    • Heavy dross appears after installing new consumables.
    • Drag cutting burns parts that were meant for standoff cutting.
    • Gouging parts cut poorly or cutting parts gouge poorly.
    • Shield, retaining cap, or swirl ring shows heat damage after a short cut.

    Likely Causes

    MismatchWhat It DoesQuick Check
    Wrong amperage nozzleArc is too wide, too restricted, or unstable for the selected currentMatch nozzle amp rating to machine setting
    Wrong electrodePoor pilot arc, off-center wear, or rapid nozzle failureVerify electrode part number by torch model
    Wrong swirl ringGas swirl and arc centering are incorrectInspect holes, O-rings, torch family, and orientation
    Wrong retaining capStack height or cap-sensing circuit may be wrongCompare cap to standard, contact, shielded, or gouging setup
    Wrong shield or drag shieldIncorrect standoff and poor protection from spatterVerify drag, standoff, gouging, or mechanized shield
    Mixed hand and machine torch partsMisalignment or incorrect stack seatingConfirm hand torch vs machine torch consumable list
    Gouging/cutting mix-upArc shape is wrong for the jobSeparate cutting and gouging kits
    Aftermarket stack-height mismatchParts look close but seat incorrectlyTest with known OEM-matched stack

    Fast Diagnosis Sequence

    1. Stop cutting when new consumables fail quickly or the cut changes immediately after a parts change.
    2. Turn off the plasma cutter and disconnect input power before torch service.
    3. Let the torch cool before removing the retaining cap, shield, nozzle, or electrode.
    4. Lay out the full stack in order: shield, retaining cap, nozzle, swirl ring, electrode, spacer, and O-rings where used.
    5. Confirm the torch model, not only the plasma cutter model.
    6. Compare every part number to the manual for the exact torch, amperage, and cutting mode.
    7. Replace the electrode and nozzle as a set if either shows abnormal wear.
    8. Inspect the swirl ring and retaining cap for cracks, blocked holes, burns, and incorrect seating.
    9. Install a complete known-good matched stack and hand-tighten the cap only.
    10. Test on clean scrap at correct air pressure, amperage, standoff, and travel speed.

    Inspection Steps

    • Nozzle: Check amp rating, orifice size, contact versus standoff style, gouging style, and torch family. A wrong nozzle can produce wide kerf, bevel, double arcing, or no transfer.
    • Electrode: Verify the electrode belongs to the same torch and amperage family. Replace if the pit is deep, off-center, rough, or heat-discolored.
    • Swirl ring: Inspect gas holes, cracks, missing O-rings, burns, and part number. A wrong swirl ring can shift the arc off center.
    • Retaining cap: Confirm standard, contact, shielded contact, or gouging cap. Wrong caps can misseat the stack or trip cap-sensing circuits.
    • Shield or drag shield: Check whether the shield matches drag cutting, shielded cutting, gouging, or mechanized cutting. Wrong shield changes standoff and spatter protection.
    • Torch head: Check threads, cap seat, O-rings, and signs of arcing. A damaged head can mimic a consumable mismatch.
    • Air system: Confirm pressure and flow while air is flowing. Air problems and mismatched consumables can produce similar symptoms.
    • Packaging: Verify that parts have not been mixed between LC, Powermax, Thermal Dynamics, ESAB, or other torch families.

    Test Procedures

    • Known-good stack test: Install a complete verified stack from one torch family and one cutting mode. If symptoms stop, the previous stack was mismatched or worn.
    • Nozzle/amperage test: Match the nozzle amp rating to the selected output. A high-amp nozzle run too low can make a wide, weak cut; a low-amp nozzle run too high can overheat and fail.
    • Cap fault test: If the machine shows cap fault after new parts, inspect cap seating, retaining cap type, stack height, and parts-in-place switch before forcing the cap tighter.
    • Swirl-ring isolation test: Replace a questionable swirl ring with the verified part. If bevel or off-center electrode wear improves, the gas swirl path was wrong.
    • Air-flow comparison test: Purge the torch and check pressure while flowing. Do not blame consumable mismatch until air restriction, moisture, and oil are checked.
    • Process-mode test: Separate standard cutting, drag cutting, shielded-contact, mechanized, and gouging parts. Test only one complete mode at a time.

    Root Cause Analysis

    A plasma torch depends on tight geometry. The swirl ring directs gas, the electrode supplies the arc, the nozzle constricts the plasma stream, and the shield or drag cap sets working distance and protects the nozzle. The retaining cap holds that stack in position and may also close a safety circuit. When one part is wrong, the whole torch geometry changes.

    Consumable mismatch often appears right after a parts order, torch replacement, or switch from cutting to gouging. The machine may still blow air and make a pilot arc, but the arc no longer sits in the center of the nozzle. That causes double arcing, heat damage, short consumable life, rough cuts, transfer loss, and torch faults. Replacing the same wrong nozzle again will not fix the stack.

    Compatibility Notes

    Do not order plasma consumables by machine brand or amperage alone. Verify plasma cutter model, torch model, hand torch versus machine torch, amperage range, nozzle style, electrode style, swirl ring, retaining cap, shield, drag shield, spacer, O-rings, and cutting mode. A 40 amp nozzle from one torch family is not automatically compatible with another 40 amp plasma torch.

    Lincoln Tomahawk LC torch examples show why this matters. LC40, LC65, LC65M, LC105, and LC105M families use different electrodes, swirl rings, nozzles, retaining caps, shields, drag shield caps, and gouging parts. Some setups separate standard, direct-contact, shielded-contact, gouging, hand-torch, and machine-torch consumables. Treat fitment as Unknown (Verify) until the installed torch and full consumable stack are confirmed.

    What To Verify Before Ordering

    • Plasma cutter make, model, serial number, and manual revision.
    • Installed torch model, not just original machine package.
    • Hand torch, machine torch, CNC torch, or replacement torch.
    • Cutting amperage and nozzle amperage rating.
    • Standard cutting, drag cutting, shielded contact, gouging, grid cutting, or mechanized process.
    • Electrode, swirl ring, nozzle, retaining cap, shield, spacer, and O-ring part numbers.
    • Parts-in-place or cap-sensing requirements.
    • Air pressure, air flow, filter, dryer, and hose condition.
    • Material thickness, pierce height, cut height, and torch height control settings.
    • Whether the parts are OEM, aftermarket, or mixed from multiple kits.

    Common Wrong-Part Mistakes

    • Mixing gouging nozzles with cutting retaining caps or shields.
    • Using a shielded-contact retaining cap with a standard nozzle stack.
    • Installing a direct-contact nozzle and then using standoff settings from a different setup.
    • Putting LC65 hand torch parts into an LC65M machine torch without verification.
    • Ordering by “Tomahawk” or “Powermax” name without verifying the torch model.
    • Using the right nozzle amperage but the wrong swirl ring.
    • Replacing only the nozzle when the electrode caused the nozzle failure.
    • Overtightening the retaining cap to clear a fault caused by the wrong stack height.

    Field Fix vs Proper Fix

    ProblemField FixProper Fix
    Cap fault after parts changeHand-snug cap and reseat stackVerify cap, stack height, torch head, and parts-in-place circuit
    Heavy bevel with new nozzleInstall known-good nozzle/electrode setVerify swirl ring, shield, torch height, and full consumable family
    Nozzle burns immediatelyStop and replace damaged partsCorrect nozzle amperage, pierce height, air flow, and cutting/gouging mismatch
    Arc will not transferClean work clamp and reduce standoffVerify consumable mode, work return, air flow, and torch stack
    Short consumable life after re-orderCompare old and new part numbersOrder by torch model, process mode, and full matched kit

    Related Failure Paths

    • Double arcing: Wrong nozzle, damaged shield, incorrect standoff, low pressure, or misaligned stack lets the arc attach where it should not.
    • Nozzle damage: Mismatched amperage, wrong process mode, piercing too low, or bad electrode can ruin a nozzle quickly.
    • Electrode pitting: Wrong electrode or low air flow can create deep, off-center, or overheated electrode wear.
    • Cap fault/no fire: Wrong retaining cap or wrong stack height can leave the safety circuit open.
    • Heavy bevel: Swirl ring, nozzle, shield, torch height, and consumable wear all affect arc centering.
    • Consumable overheating: Wrong parts, clogged gas holes, poor air flow, or overtightened caps can concentrate heat in the torch.

    Safety Notes

    • Disconnect input power before servicing plasma torch consumables.
    • Plasma cutters use high voltage and DC output. Internal testing should be done only by qualified service personnel.
    • Let the torch cool before removing caps, nozzles, electrodes, or shields.
    • Do not bypass torch cap, parts-in-place, trigger, or safety circuits.
    • Do not use cracked retaining caps, burned torch heads, exposed conductors, or damaged torch leads.
    • Use proper eye, face, hand, body, and respiratory protection when plasma cutting.
    • Use ventilation or extraction when cutting painted, coated, galvanized, stainless, or unknown material.

    Sources Checked

    Sources checked include plasma consumable inspection references, torch cap fault guidance, Lincoln Tomahawk LC consumable tables, plasma air and cut-quality troubleshooting references, and related Weld Support Parts plasma support articles. Final replacement must be verified by exact plasma cutter, installed torch model, amperage, cutting mode, consumable stack, air requirement, and torch-head condition.

  • Plasma Arc Starting Then Stopping Troubleshooting: Pilot Arc Dropout, Transfer Loss, Air, Work Clamp, and Consumable Checks

    If a plasma arc starts and then stops, fires briefly then drops out, starts the pilot arc but will not transfer, or cuts for a second and shuts off, troubleshoot air supply, consumables, torch assembly, work-lead path, and duty-cycle protection before replacing the power supply. Most arc dropout problems come from worn electrode/nozzle, low or unstable air pressure while flowing, wet or oily air, wrong consumable stack, bad work clamp contact, excessive standoff, pierce height error, or torch cap/parts-in-place faults.

    The fast check is to inspect the electrode, nozzle, swirl ring, retaining cap, shield, and work clamp, then verify air pressure while air is actually flowing. Static pressure at the regulator is not enough. If the pilot arc starts but stops before cutting, check transfer path and standoff. If the arc transfers then stops mid-cut, check air flow, cut speed, duty cycle, consumable wear, and material thickness. For related plasma failures, see plasma torch nozzle damage causes, plasma cutter won’t pierce metal, and plasma cutter not cutting through.

    Common Symptoms

    • Pilot arc fires, then disappears before touching the plate.
    • Arc transfers to the work, cuts briefly, then shuts off.
    • Torch blows air but arc only flashes for a moment.
    • Arc starts at the plate edge but drops out during travel.
    • Machine shows air pressure, torch cap, parts-in-place, or thermal fault.
    • Nozzle and electrode fail quickly after arc dropout starts.
    • Cut has sudden bevel, heavy dross, or incomplete penetration before the arc stops.
    • Arc stops when crossing rust, paint, gaps, expanded metal, or poor work contact.
    • Arc restarts after the machine cools, then stops again during longer cuts.

    Likely Causes

    CauseWhat It DoesQuick Check
    Worn electrode or nozzleWeak pilot arc, poor transfer, arc dropout, bad cut qualityInspect pit depth and nozzle orifice shape
    Low air pressure while flowingArc loses force and consumables overheatCheck pressure during purge or cutting
    Wet or oily airDestabilizes arc and shortens consumable lifeDrain traps and inspect filters/dryer
    Wrong consumable stackMisaligns arc and may trip cap/parts safetyVerify electrode, swirl ring, nozzle, cap, and shield
    Loose retaining capMay open parts-in-place circuit or misseat consumablesHand-snug cap and inspect threads
    Poor work clamp pathArc cannot transfer or stay attached to the workClamp to clean bare metal near cut
    Standoff too highPilot arc cannot transfer reliablyUse correct drag shield or standoff guide
    Duty cycle or thermal protectionMachine cuts briefly, then shuts down to protect itselfCheck duty-cycle light, fan, and cooling interval

    Fast Diagnosis Sequence

    1. Stop cutting when the arc drops out repeatedly. Do not continue burning up consumables.
    2. Turn the machine off and disconnect input power before torch disassembly.
    3. Remove the consumables and inspect the electrode pit, nozzle orifice, swirl ring, retaining cap, shield, and O-rings.
    4. Replace the electrode and nozzle as a set if either part is worn, off-center, pitted, melted, or contaminated.
    5. Reassemble with the correct matched consumable stack for the torch and amperage.
    6. Verify air pressure and flow while air is flowing, not only at idle.
    7. Drain the compressor tank, water separator, and filter bowl. Check for oil carryover.
    8. Move the work clamp to clean bare metal close to the cut.
    9. Test on clean scrap at correct amperage, pierce height, and cut height.
    10. If dropout remains with clean consumables, correct air, and clean work return, follow the service manual for torch lead, trigger, pilot arc, or internal power-supply testing.

    Pilot Arc Starts Then Stops Before Cutting

    When the pilot arc starts and stops before cutting, the machine is making an arc but not transferring it to the work. Check work clamp contact first. Clamp to clean bare metal, not painted, rusty, greasy, or loose material. Keep the torch close enough for the arc to transfer. Excessive standoff, wrong shield, missing drag shield, or a bad work lead can make the pilot arc time out.

    • Clean the clamp location and cutting path.
    • Use the correct drag shield, standoff guide, or torch height.
    • Start at an edge when possible for thick material.
    • Verify the material is conductive and within machine capacity.
    • Check torch lead and work lead for cuts, loose connectors, and internal breaks.

    Arc Transfers Then Stops Mid-Cut

    If the arc transfers and then stops during the cut, look for air pressure drop, blocked filter, compressor recovery issue, wet air, travel speed mismatch, material too thick, worn consumables, or duty-cycle shutdown. A machine can show correct pressure at idle and still starve the torch when air is flowing.

    • Watch pressure while cutting or using purge mode.
    • Check compressor CFM, regulator response, hose size, and filter restriction.
    • Replace consumables if the nozzle hole is oval or the electrode pit is deep.
    • Slow down if sparks are not exiting the bottom of the plate.
    • Reduce arc-on time if the machine is reaching thermal limit.

    Inspection Steps

    • Electrode: Replace if the hafnium pit is deep, rough, off-center, or blown out.
    • Nozzle: Replace if the orifice is oval, nicked, enlarged, keyholed, or spatter-packed.
    • Swirl ring: Check cracks, plugged holes, burns, missing O-rings, and wrong orientation.
    • Retaining cap: Inspect threads, sensing surfaces, heat damage, and seating.
    • Shield/drag cap: Verify correct shield for drag, standoff, gouging, or mechanized cutting.
    • Air system: Check pressure under flow, moisture, oil, filter restriction, dryer condition, and hose leaks.
    • Work lead: Inspect clamp spring, cable lug, connector, and contact surface.
    • Torch lead: Look for crushed sections, cuts, loose plug, intermittent trigger, and damaged torch head.

    Test Procedures

    • Known-good consumable test: Install a complete matched electrode, nozzle, swirl ring, cap, and shield. If dropout stops, the old stack was worn or mismatched.
    • Flowing-air test: Use purge mode and confirm pressure/flow while air moves through the torch. Correct static pressure does not prove cutting pressure.
    • Clean-work test: Clamp directly to clean bare metal and cut clean scrap. If transfer improves, the original work return was poor.
    • Standoff test: Use the correct drag shield or standoff height. Too high can stop transfer; too low can damage the nozzle during piercing.
    • Thermal test: Let the machine cool and retry within rated duty cycle. If the arc returns after cooling, reduce cut length or upgrade capacity.
    • Hand-cut isolation test: For CNC/table setups, disconnect table control and test by hand where safe. If hand cutting works, inspect torch height control, CNC start signal, work lead routing, and program settings.

    Compatibility Notes

    Do not order plasma consumables by amperage alone. Verify the plasma cutter model, torch model, hand or machine torch, amperage, cutting mode, retaining cap, shield, nozzle, electrode, swirl ring, and parts-in-place design. Standard cutting, drag cutting, shielded contact cutting, gouging, and mechanized cutting can use different stacks.

    Lincoln Tomahawk examples show why the torch family matters. LC30, LC40, LC45, LC65, LC65M, LC105, and LC105M torches use different consumable references and different air requirements depending on machine and torch. A nozzle or retaining cap that looks close can still misalign the stack and cause starting, transfer, or dropout faults.

    What To Verify Before Ordering

    • Plasma cutter make, model, serial number, and manual revision.
    • Torch model and whether it is hand, machine, CNC, or replacement torch.
    • Cutting amperage and material thickness.
    • Correct electrode, nozzle, swirl ring, retaining cap, shield, spacer, and O-ring set.
    • Standard cutting, drag cutting, gouging, grid cutting, or mechanized process.
    • Air pressure and flow requirement from the machine manual.
    • Compressor capacity, filter, dryer, and hose size.
    • Work clamp, torch lead, and torch cap/parts-in-place system condition.
    • Duty-cycle requirement for the cut length and production use.

    Common Wrong-Part Mistakes

    • Replacing only the nozzle while leaving a worn electrode in service.
    • Mixing drag, shielded contact, gouging, and standard cutting consumables.
    • Using the wrong swirl ring and causing off-center arc flow.
    • Ordering by plasma machine model while ignoring the installed replacement torch.
    • Using a small compressor that cannot hold pressure while cutting.
    • Ignoring water or oil in the air because the torch still blows air.
    • Overtightening a retaining cap to clear a cap fault instead of fixing the stack.

    Field Fix vs Proper Fix

    ProblemField FixProper Fix
    Pilot arc starts then times outMove clamp to clean metalVerify work lead, standoff, consumables, and transfer path
    Arc stops mid-cutPause and check air pressureCorrect compressor flow, filter restriction, moisture, cut speed, and duty cycle
    Cap fault appearsHand-snug retaining capInspect cap, torch head, stack height, and parts-in-place system
    Nozzle burns quicklyReplace nozzle/electrode setCorrect pierce height, air quality, amperage match, and swirl ring condition
    Dropout on CNC onlyTry hand-cut testCheck torch height control, work return, controller signal, and program lead-in

    Related Failure Paths

    • Pilot arc failure: Weak or missing pilot arc can come from worn consumables, torch stack error, or internal pilot-arc circuit faults.
    • Nozzle damage: Low pierce height, bad air, or wrong amperage can destroy the nozzle and cause dropout.
    • Retaining cap fault: Loose, damaged, or wrong caps can prevent the torch from firing or staying active.
    • Electrode failure: Deep or off-center electrode wear causes weak arc behavior and poor transfer.
    • Air pressure drop: Compressor or filter restriction can stop an arc that initially starts normally.
    • Thermal shutdown: Exceeding duty cycle can make the cutter stop until it cools.

    Safety Notes

    • Disconnect input power before servicing torch consumables or opening machine covers.
    • Plasma cutters use high voltage. Internal troubleshooting should be done only by qualified service personnel.
    • Let the torch cool before removing retaining caps, nozzles, or electrodes.
    • Close and bleed compressed air before servicing air fittings.
    • Wear proper eye, face, hand, body, and respiratory protection for plasma cutting.
    • Do not bypass torch cap, parts-in-place, trigger, or safety circuits.
    • Use ventilation or fume extraction when cutting coated, painted, galvanized, stainless, or unknown material.

    Sources Checked

    Sources checked include plasma torch starting-problem references, air-pressure and air-quality guidance, Lincoln Tomahawk torch data, consumable-stack references, and related Weld Support Parts plasma support articles. Final parts selection must be verified by exact plasma cutter, torch model, amperage, cutting mode, air requirement, duty cycle, and installed consumable stack.

  • Plasma Torch Retaining Cap Damage Causes: Heat, Double Arcing, Loose Caps, and Wrong Consumable Stack

    If a plasma torch retaining cap is melted, cracked, burned, cross-threaded, stuck, discolored, or causing torch-cap faults, stop cutting and inspect the full consumable stack. The retaining cap holds the electrode, swirl ring, nozzle, and shield or drag shield in alignment. When it is loose, overtightened, wrong for the torch, heat-damaged, or packed with debris, the torch can misfire, double arc, cut with heavy bevel, destroy nozzles, or fail the parts-in-place safety circuit.

    The fast repair is to shut the plasma cutter off, disconnect input power, let the torch cool, remove the cap by hand, inspect the electrode, swirl ring, nozzle, shield, O-rings, cap threads, and torch head, then rebuild the torch with the correct matched consumables. Do not keep cutting with a damaged retaining cap. A damaged cap can let the stack seat crooked and can damage the nozzle, electrode, torch head, and cap-sensing system. For related plasma troubleshooting, see plasma torch nozzle damage causes, plasma cutter won’t pierce metal, and plasma cutter not cutting through.

    Common Symptoms

    • Retaining cap is melted, browned, warped, or heat-checked.
    • Cap threads are stripped, cross-threaded, gritty, or hard to start.
    • Torch shows a cap fault, parts-in-place fault, or will not fire after consumables are changed.
    • Nozzle and electrode fail quickly even after replacement.
    • Cut has sudden bevel, wide kerf, arc wander, or heavy dross.
    • Pilot arc starts weak, flickers, or fails to transfer.
    • Shield or drag shield does not seat squarely.
    • Cap must be overtightened to clear a fault or keep the torch firing.
    • Molten metal or spatter is packed inside the cap.
    • Cap gets unusually hot during short cuts.

    Likely Causes

    CauseWhat It DoesQuick Check
    Loose retaining capAllows consumables to seat incorrectly or opens cap-sensing circuitCap feels loose or fault clears when snugged
    Overtightened capDamages threads, seals, cap body, or torch headCap is hard to remove or threads are distorted
    Wrong consumable stackMisaligns electrode, swirl ring, nozzle, shield, and capPart numbers do not match torch/manual setup
    Double arcingMelts nozzle face, shield, and cap areaLook for arc marks, pitting, and off-center damage
    Piercing too lowBlows molten metal back into nozzle, shield, and capSpatter packed on front consumables
    Wet or oily airDestabilizes arc and shortens consumable lifeDrain filters and inspect air quality
    Low air flow or pressurePrevents proper cooling and arc controlCompare pressure and flow to machine manual
    Worn swirl ringCreates off-center gas swirl and arc attachmentInspect ring holes, cracks, burns, and seating

    Fast Diagnosis Sequence

    1. Stop cutting if the retaining cap is hot, melted, cracked, or faulting.
    2. Turn the plasma cutter off and disconnect input power before torch service.
    3. Let the torch cool. Do not force a hot retaining cap with pliers.
    4. Remove the retaining cap and lay out the consumable stack in order.
    5. Inspect the cap threads, inside bore, seating face, O-rings, and cap-sensing contact area where used.
    6. Inspect the nozzle orifice, electrode pit, swirl ring, shield, and drag shield.
    7. Verify every consumable part number against the torch and amperage setup.
    8. Check air pressure, air flow, filter bowl, moisture separator, and dryer condition.
    9. Reassemble by hand. The cap should seat snugly without force.
    10. Run a test cut on clean scrap at the correct pierce height and cut height.

    Inspection Steps

    • Cap threads: Look for cross-threading, galling, melted plastic, stripped metal, or debris that prevents full seating.
    • Cap body: Replace caps with heat distortion, cracks, arc marks, missing insulation, or out-of-round shape.
    • Cap-sensing surface: On torches with parts-in-place sensing, check that the cap can close the circuit correctly without overtightening.
    • Nozzle: Inspect for oval or keyhole orifice, melted face, nicks, or arc marks. A bad nozzle can damage the retaining cap and torch head.
    • Electrode: Replace electrodes with deep, off-center, rough, or blown-out pits.
    • Swirl ring: Check for plugged holes, cracks, burns, missing O-rings, or distortion that puts the arc off center.
    • Shield or drag shield: Inspect standoff surfaces, contact damage, spatter buildup, and wrong shield style.
    • Torch head: Check threads, O-rings, cap seat, torch body cracks, and signs of arcing inside the head.

    Test Procedures

    • Hand-seat test: Reinstall the cap by hand. If it will not seat smoothly, stop and inspect threads, stack height, and wrong consumables.
    • Cap fault test: If a torch-cap fault appears, confirm the cap is snug and aligned. If the fault remains, inspect the cap, torch head, consumable stack, and cap-sensing circuit per the manual.
    • Known-good stack test: Install a full known-good consumable set. If cutting improves, the old stack had a damaged or mismatched part.
    • Air quality test: Drain water traps, check filter elements, and look for oil or water at the torch. Wet air can destroy new parts quickly.
    • Pierce-height test: Pierce at the manual-specified height. Low pierce height throws molten metal back into the shield, nozzle, and cap.
    • Amperage match test: Confirm nozzle, electrode, shield, and retaining cap match the selected amperage and process: standard cutting, drag cutting, shielded contact, gouging, or mechanized cutting.

    Root Cause Analysis

    The retaining cap is not just a cover. It keeps the plasma consumables seated and aligned so the electrode, swirl ring, nozzle, and shield work as one controlled torch assembly. If the cap is damaged or the wrong cap is installed, the internal stack can shift. That changes gas flow, arc centering, pierce behavior, and nozzle cooling.

    Most retaining cap damage starts with another problem: worn nozzle, worn electrode, bad swirl ring, wrong shield, wet air, low pressure, piercing too close, dragging with the wrong consumables, or using gouging parts in a cutting setup. The cap may be the visible failed part, but the root cause is often heat, misalignment, arc blowback, or air quality.

    Compatibility Notes

    Do not order plasma retaining caps by machine brand alone. Verify the plasma cutter model, torch model, hand torch versus machine torch, amperage, nozzle style, shield style, drag-cutting setup, gouging setup, and parts-in-place system. A retaining cap for one torch family can look close but still seat the consumable stack incorrectly.

    Lincoln Tomahawk LC torch examples show why verification matters. LC40, LC65, LC65M, LC105, and LC105M torch families use different electrodes, swirl rings, nozzles, retaining caps, shields, and gouging accessories. Some setups also separate standard, shielded contact, and gouging retaining caps. Treat every retaining cap as torch-family and process-specific until verified.

    What To Verify Before Ordering

    • Plasma cutter make, model, serial number, and manual revision.
    • Torch model and whether it is hand, machine, mechanized, or CNC torch.
    • Amperage range and selected cutting amperage.
    • Standard cutting, drag cutting, shielded contact cutting, gouging, or mechanized cutting setup.
    • Retaining cap part number and any cap-sensing or parts-in-place requirement.
    • Matching electrode, swirl ring, nozzle, shield, spacer, and O-rings.
    • Air pressure and air flow requirement from the machine manual.
    • Air quality: water, oil, particulate, dryer, and filter condition.
    • Torch head thread condition and signs of heat or arc damage.

    Common Wrong-Part Mistakes

    • Installing a gouging retaining cap in a cutting setup or the reverse.
    • Mixing shielded contact consumables with standard consumables.
    • Replacing only the cap while leaving a damaged nozzle or electrode in service.
    • Overtightening the retaining cap to clear a cap fault.
    • Using aftermarket consumables that change stack height or seating pressure without verification.
    • Dragging the torch with non-drag consumables and overheating the shield/cap.
    • Ignoring wet air because the compressor pressure gauge looks normal.
    • Ordering parts by plasma cutter model while ignoring the installed replacement torch.

    Field Fix vs Proper Fix

    ProblemField FixProper Fix
    Loose cap faultSnug cap by handInspect cap, stack height, threads, and cap-sensing circuit
    Cap melted at frontReplace cap and shieldCorrect pierce height, air quality, nozzle/electrode wear, and amperage match
    Cap stuck on torchLet cool before removalReplace damaged cap and inspect torch head threads
    Cut bevel after new nozzleInspect retaining cap and swirl ringReplace worn alignment parts and verify full stack
    Consumables fail quicklyInstall new electrode/nozzle setFix air pressure, moisture/oil, piercing, standoff, and wrong consumables

    Related Failure Paths

    • Nozzle damage: A crooked, overheated, or double-arcing stack can melt or keyhole the nozzle.
    • Electrode failure: Off-center or deep pitting can point to poor gas swirl, bad air, wrong amperage, or misalignment.
    • Swirl ring failure: Plugged or cracked swirl rings skew the arc and can damage the cap and nozzle.
    • Cap fault/no fire: Loose, overtightened, damaged, or wrong caps can trigger parts-in-place faults.
    • Heavy dross and bevel: Arc misalignment, wrong standoff, worn consumables, or damaged retaining cap can distort the cut.
    • Torch head damage: Continuing with damaged caps can burn seats, threads, O-rings, and cap-sensing parts.

    Safety Notes

    • Disconnect input power before disassembling the plasma torch.
    • Plasma cutters use high voltage and DC output. Do not troubleshoot internal electrical circuits unless qualified.
    • Let the torch cool before removing the retaining cap or consumables.
    • Close and bleed compressed air before servicing air fittings.
    • Wear eye, face, hand, and body protection for plasma cutting.
    • Do not use damaged caps, cracked torch bodies, exposed conductors, or bypassed parts-in-place systems.
    • Use ventilation or extraction for plasma fumes and metal dust.

    Sources Checked

    Sources checked include plasma torch consumable references, Lincoln Tomahawk LC torch parts data, plasma cutting air-pressure and air-quality guidance, cap-fault troubleshooting references, and related Weld Support Parts plasma cutting articles. Final retaining cap replacement must be verified by exact plasma cutter, torch model, amperage, process, consumable stack, cap-sensing design, air requirement, and torch-head condition.

  • Hypertherm Powermax45 SYNC 088560 Plasma Cutter Fitment and Consumables Guide

    The Hypertherm Powermax 45 SYNC Plasma Cutter for Metalworking, 20 Ft. Handheld Torch, 088560

    “>Hypertherm Powermax45 SYNC Plasma Cutter for Metalworking, 20 Ft. Handheld Torch, 088560 is a 45 amp professional plasma cutting system built for metalworkers who need simplified setup, single-piece cartridge consumables, and reliable hand cutting performance. This guide is focused on ordering accuracy: power input, torch configuration, cut capacity, cartridge selection, air supply, and the fitment checks to complete before purchasing consumables or accessories.

    Key Takeaways

    Product Overview

    The Hypertherm Powermax45 SYNC 088560 is a portable plasma cutting system for fabrication, repair, maintenance, education, HVAC/mechanical work, agricultural repair, and metal shop use. Arc Weld Store lists this configuration with a 20 ft handheld torch and identifies it as a professional plasma cutter for metalworking applications.

    The main advantage of the SYNC platform is simplified consumable management. Instead of stacking separate plasma consumables, Hypertherm’s SmartSYNC platform uses a single-piece cartridge system. Hypertherm also identifies RFID-enabled SmartSYNC torches and cartridges that automatically set amperage and operating mode when correctly paired with the system. That reduces setup mistakes, but it does not remove the need to verify the correct cartridge for the cut type, amperage, torch, and material thickness.

    Upper-middle CTA: Hypertherm Powermax 45 SYNC Plasma Cutter for Metalworking, 20 Ft. Handheld Torch, 088560

    “>View this product at Arc Weld Store.

    Best For

    Key Specs

    ProductHypertherm Powermax45 SYNC Plasma Cutter for Metalworking, 20 Ft. Handheld Torch
    Arc Weld Store SKU088560
    BrandHypertherm
    ConfigurationCSA 200–240 V standard power supply with 75-degree hand torch and 20 ft torch lead
    ProcessesPlasma cutting, gouging, and marking when set up with the correct torch/cartridge configuration
    Input voltage200–240 V, 1-phase, 50/60 Hz
    Input current at 6.9 kW39/32 A at 200–240 V, 1-phase
    Output current9–45 A
    Rated output voltage155 VDC
    Duty cycle at 104°F / 40°C50% at 45 A; 60% at 41 A; 100% at 32 A
    Recommended cut capacity5/8 in. at 20 ipm
    Severance capacity1-1/8 in. at 5 ipm
    Pierce capacity1/2 in. for handheld use or with automatic torch height control
    Typical gouge capacity7.5 lb per hour metal removal; 0.12 in. deep x 0.26 in. wide groove profile
    Gas supplyClean, dry, oil-free air or nitrogen for cutting and gouging; marking gas support depends on setup and cartridge
    Recommended gas inlet flow rate / pressure188 l/min at 5.9 bar; 400 scfh / 6.7 scfm at 90 psi
    Input power cable length10 ft
    Power supply typeInverter – IGBT
    Engine drive requirement12.5 kVA / 10 kW for full 45 A output
    Dimensions with handles17.4 in. D x 6.8 in. W x 14.1 in. H
    Weight with 20 ft torch31 lb
    Warranty listed by Hypertherm literaturePower supply: 6-year; Torch: 1-year
    CPC / voltage divider / serial portNot listed for 088560 standard configuration; verify before ordering for CNC or mechanized integration

    Compatibility / Fitment Notes

    This product is a complete plasma cutting system configuration, but consumables and accessories still require fitment verification. The most important checks are system part number, torch style, input power, cartridge amperage, gas supply, material thickness, and intended cutting process.

    Before You Order

    Accessories / Compatible Products

    Consumables and accessories should be selected by system part number, torch type, process, and material thickness. Do not assume every SmartSYNC cartridge is correct for this 45 amp hand system. Compatibility must be verified against the Powermax45 SYNC documentation before ordering.

    Weld Support Parts Breakdown Reference

    For torch and consumable identification support, review the Hypertherm plasma torch parts breakdown. The page includes Powermax 45 Sync Smart Sync torch listings, including 75-degree hand torch and other torch styles. Use this only as a technical breakdown reference; order from Arc Weld Store after confirming the exact torch, cartridge, and system configuration.

    Common Applications

    Shipping / Returns Notes

    Arc Weld Store lists this product as typically shipping within 1–2 business days, shipping from Corydon, Indiana, with free ground shipping to the lower 48 on qualifying orders. Returns are listed as accepted on unused items in original packaging. For fitment help, Arc Weld Store advises emailing sales@arcweldinc.com with the part number, equipment model, and application before opening an incorrect item.

    FAQ

    What is the Arc Weld Store SKU for this Hypertherm Powermax45 SYNC?

    Arc Weld Store lists the SKU as 088560.

    What torch comes with Hypertherm 088560?

    Hypertherm ordering information identifies 088560 as the CSA 200–240 V standard power supply configuration with a 75-degree hand torch and 20 ft torch lead.

    What input power does the Powermax45 SYNC 088560 require?

    The verified CSA specification is 200–240 V, 1-phase, 50/60 Hz. Confirm your electrical service, plug, receptacle, circuit protection, and local code requirements before ordering.

    How thick can the Powermax45 SYNC cut?

    Hypertherm lists recommended cut capacity at 5/8 in. at 20 ipm, severance capacity at 1-1/8 in. at 5 ipm, and pierce capacity at 1/2 in. for handheld use or with automatic torch height control.

    Does the 088560 package include CNC ports?

    Not confirmed for this standard 088560 configuration. Hypertherm lists separate configurations with CPC port, voltage divider, and serial port options. Verify before buying for mechanized or CNC use.

    Which SmartSYNC cartridge should I buy?

    Choose by process, amperage, torch type, and material thickness. For example, Hypertherm lists cartridge options for 45 A drag cutting, FineCut hand cutting, mechanized/standoff cutting, and gouging. Compatibility: Unknown (Verify) until the exact torch, system, and application are confirmed.

    Can I use shop air with this plasma cutter?

    Yes, when the air supply meets Hypertherm requirements. The system requires clean, dry, oil-free air or nitrogen. Verify compressor capacity, moisture control, filtration, and regulator setup before use.

    Safety Notes

    Sources Checked

    End CTA: Ready to verify power, torch configuration, and consumables? Hypertherm Powermax 45 SYNC Plasma Cutter for Metalworking, 20 Ft. Handheld Torch, 088560

    Hypertherm Powermax 45 SYNC Plasma Cutter for Metalworking, 20 Ft. Handheld Torch, 088560

    $3,077.61

    In Stock

    View Product
    “>Check current stock at Arc Weld Store.

  • Listen with Audible