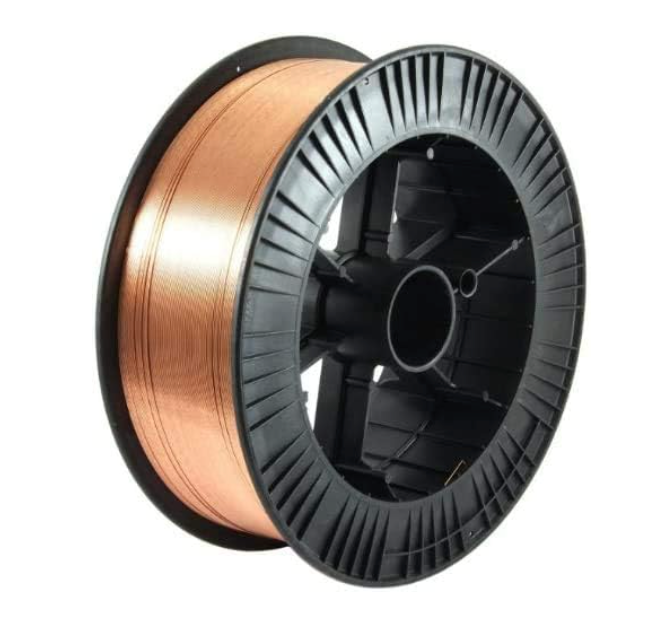
Tag: fabrication
-
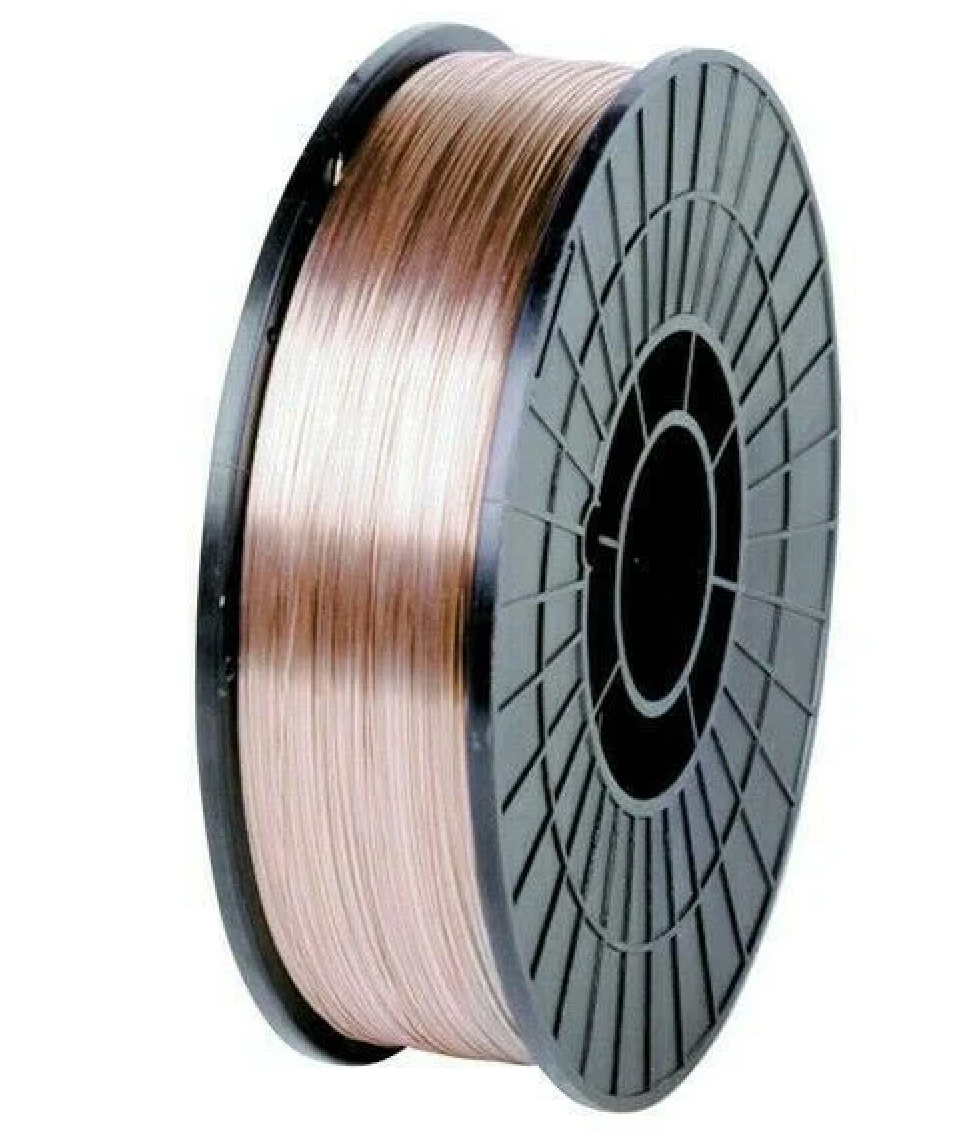
TC 70S-2 08 Washington Alloy .035, 11 Lb. 70S-2 MIG Wire, Pack of (1): Product Breakdown
“>
TC 70S-2 08 Washington Alloy .035, 11 Lb. 70S-2 MIG Wire, Pack of (1) is an ER70S-2 solid GMAW wire for mild and low-alloy steel work where stable feeding and weld soundness matter. For buyers and support teams, the main value is straightforward: this is a general-purpose solid wire with deoxidizers, supplied as one 11 lb spool in .035 in (0.9 mm). Use it only after you verify the job requirements, base metal condition, shielding gas, and equipment setup.
Key Takeaways
- ER70S-2 is a solid MIG wire used on mild and low-alloy steels.
- Added deoxidizers help when base metal has light surface contamination, but they do not replace proper cleaning.
- .035 in wire is a common size for general fabrication and repair, but the correct choice still depends on the machine, transfer mode, and joint details.
- Pack size is one spool, 11 lb. Verify spool dimensions and machine fit before purchase.
- Use a verified procedure from the machine, WPS, or qualified welding engineer when code work is involved.
What this wire is for
This product is intended for GMAW on steels where a dependable general-purpose wire is needed. ER70S-2 is commonly selected for shop fabrication, maintenance repair, and production work on carbon steel or low-alloy steel. The exact application still depends on joint design, shielding gas, base metal condition, and the procedure being used. If your job calls for aluminum, stainless, flux-cored, or hardfacing wire, this is not the correct filler metal.
Product and parts review
The available product information identifies this item as one spool of Washington Alloy TC 70S-2 08 in .035 in diameter, 11 lb, pack of one. Beyond that, confirm the following before it is placed into service:
- Wire type: solid MIG/GMAW wire, ER70S-2.
- Diameter: .035 in (0.9 mm).
- Net weight: 11 lb.
- Package quantity: one spool.
- Machine fit: Unknown (Verify) spool hub, spool diameter, and drive-roll compatibility.
- Shielding gas: Unknown (Verify) based on procedure and application.
If you are stocking wire for a maintenance crib, record the spool size, wire diameter, and machine compatibility on the shelf label. Do not assume every .035 solid wire fits every feeder without changes to drive rolls, liners, and contact tips.
Setup checks: inspect before feeding
- Check the spool label. Verify diameter, classification, and lot identification if your quality system requires traceability.
- Inspect wire condition. Look for rust, kinks, or contamination. If the wire is damaged, do not install it.
- Verify feeder setup. Confirm the drive rolls are the correct groove type for solid wire and that liner condition is acceptable.
- Check contact tip size. The tip should match the wire diameter. If not, verify the correct replacement before welding.
- Inspect shielding gas flow. Make sure the gas hose, regulator, and connections are leak-free and set according to the approved procedure.
- Verify polarity. Confirm the machine is set for the wire and transfer mode being used.
Troubleshooting and support
When a MIG wire does not run correctly, start with the feeder and the work setup before blaming the wire itself.
If the wire bird-nests or feeds inconsistently
- Check: Drive-roll tension. Too much tension can deform the wire; too little can slip.
- Inspect: Liner, contact tip, and gun cable routing for blockage or sharp bends.
- Verify: Spool brake setting and feeder alignment.
If the arc is unstable or spatter is high
- Check: Voltage, wire feed speed, and shielding gas flow.
- Inspect: Work clamp placement and base metal surface condition.
- Verify: That the wire classification, polarity, and gas blend match the approved procedure.
If porosity appears in the weld
- Check: Shielding gas coverage and leaks at the torch, hose, and fittings.
- Inspect: Rust, oil, paint, mill scale, and moisture on the joint.
- Verify: Whether the selected wire and gas are suitable for the job and whether the joint prep meets requirements.
How to use filler metal pages as a starting point
When you are selecting wire for a job, use approved filler metal references as a starting point, not as automatic procedure approval. The available internal reference pages on the Weld Support Parts blog can help you compare product categories and related wire types. If a job is outside your normal range, confirm the final selection against the WPS, the machine manual, or a qualified welding authority. Do not rely on product pages alone for code or critical work.
Related internal reference articles:
- Aluminum ER 5554 3/64″ X 5lb. MIG Welding Wire Spool By Washington Alloy – Weld Support Parts Blog
- Washington Alloy 7014 Stick Electrode – Smooth Welding with High Deposition
- Washington Alloy THF-700HT Hard-Face MIG Wire Review (2025): Built for Wear Resistance
- Rocaris 6 Pack Wire Wheel & Pen Brush Set: Carbon Steel for Weld Cleaning & Surface Prep
Buyer guidance for maintenance teams
For maintenance and fabrication buyers, the main checks are not marketing claims. They are feedability, repeatability, and fit with the shop process. Before ordering, verify the following:
- Diameter matches the feeder setup used on the machine.
- Spool size fits the wire feeder or spool gun arrangement. Unknown (Verify).
- Wire classification matches the material and procedure. Unknown (Verify) if the job is not plain carbon or low-alloy steel.
- Shielding gas and transfer mode are approved for the weld being made.
- Your inventory system can identify the spool as ER70S-2, .035 in, 11 lb.
If a team routinely changes between wire sizes or wire classes, label the cabinet and gun setup clearly. That reduces downtime and avoids wrong-wire installation.
Safety notes
- Use approved PPE, including helmet, gloves, jacket, and safety footwear.
- Keep the work area clear of flammables before striking an arc.
- Do not weld on unknown coatings, sealed containers, or contaminated material without proper hazard review.
- Handle the spool carefully. Cut wire ends can cause injury.
- Follow the machine manual and shop procedure for setup, lockout, and maintenance.
FAQ
Is TC 70S-2 08 Washington Alloy .035, 11 Lb. 70S-2 MIG Wire, Pack of (1) the same as ER70S-2?
The product description identifies it as ER70S-2 solid MIG wire. Verify the label on the spool and the supplier listing before use.
Can this wire be used on dirty or rusty steel?
ER70S-2 includes deoxidizers, but that does not replace cleaning. Best practice is still to remove rust, oil, paint, and scale as required by the job.
What shielding gas should be used?
Unknown (Verify). Gas choice depends on the approved procedure, base metal, transfer mode, and weld requirements. Check the WPS or machine documentation.
Will .035 in wire work in every MIG machine?
No. Machine feedability depends on the feeder, liner, drive rolls, gun, and tip size. Verify compatibility before loading the spool.
Sources Checked
- ArcWeld product reference for TC 70S-2 08 Washington Alloy .035, 11 Lb. 70S-2 MIG Wire, Pack of (1)
- Provided internal Weld Support Parts blog links
- No WSP lookup page was provided for this task
- No filler metal finder page was provided for this task
Related Arc Weld Part
TC 70S-2 08 Washington Alloy .035, 11 Lb. 70S-2 MIG Wire, Pack of (1)
TC 70S-2 08 Washington Alloy is an ER70S-2 solid MIG (GMAW) wire for welding mild and low-alloy steels where consistent feeding and sound weld quality matter; ER70S-2 chemistry includes added deoxidizers and is commonly selected for general fabrication and repair work (best results come from properly prepared base metal). This item is one (1) spool of .035 in (0.9 mm) wire, 11 lb, packaged as a pack of (1). Set up…
View at Arc Weld StoreRelated Weld Support Guides
- Aluminum ER 5554 3/64″ X 5lb. MIG Welding Wire Spool By Washington Alloy – Weld Support Parts Blog
- Washington Alloy 7014 Stick Electrode – Smooth Welding with High Deposition
- Washington Alloy THF-700HT Hard-Face MIG Wire Review (2025): Built for Wear Resistance
- Rocaris 6 Pack Wire Wheel & Pen Brush Set: Carbon Steel for Weld Cleaning & Surface Prep
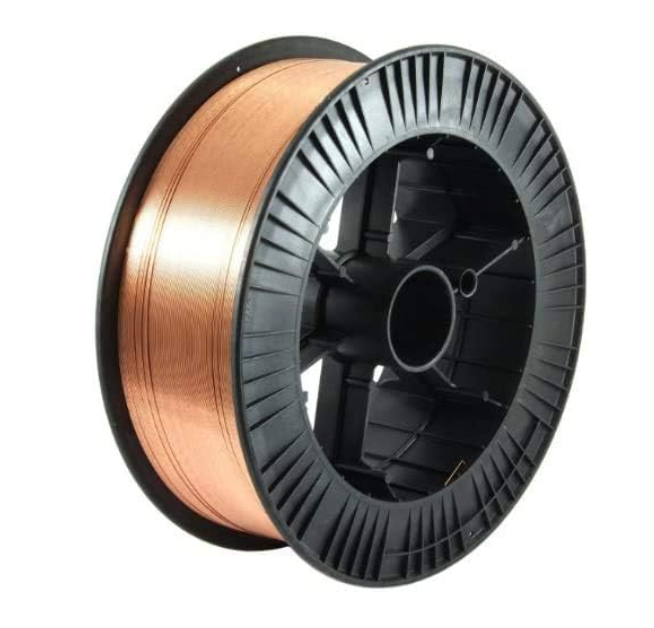
TC 70S-2 093 Washington Alloy .035, 33 Lb. 70S-2 MIG Wire, Pack of (1): Product Breakdown
“>
Washington Alloy TC 70S-2 093 is a .035 in (0.9 mm) ER70S-2 solid MIG wire on a 33 lb (15 kg) spool. For buyers and support teams, the main question is not whether the wire can weld mild steel—it can—but whether it matches the job’s fit-up, base-metal condition, and feeder setup. This article breaks down where this wire fits, what to verify before use, and how to troubleshoot common feeding and weld-quality issues without guessing at specifications that are not documented here.
Key Takeaways
- ER70S-2 is a solid MIG wire used for mild-steel fabrication, maintenance, and repair.
- The .035 in diameter is a common general-purpose size, but final selection depends on procedure, material thickness, and wire-feed setup.
- This product is described as triple-deoxidized with Al/Ti/Zr chemistry, which is intended to help when base metal has light mill scale or minor surface contamination.
- The listing indicates a 33 lb spool and pack of one.
- If your process, joint design, or code requirement is uncertain, verify the WPS, wire classification, and machine settings before welding.
What This Wire Is For
As listed, TC 70S-2 093 is aimed at mild-steel work in fabrication, maintenance, and repair. That makes it relevant for shops that need a practical solid wire for general production work and field repair where clean surface prep is not always perfect. The ER70S-2 classification is commonly used when a shop wants a wire that tolerates light oxidation better than a basic clean-steel setup.
Do not assume this wire is the right answer for every joint. A MIG wire selection still depends on base metal chemistry, joint design, shielding gas, transfer mode, and the required mechanical properties of the finished weld. If any of those points are unclear, treat this product as a candidate, not a final approval.
Inspect Before You Load the Spool
Before installing the spool, do a basic receiving check.
- Check the spool label against the purchase record. Confirm the product title and ER70S-2 classification.
- Inspect the wire surface for visible rust, oil, kinks, or loose winding.
- Verify the spool fits the feeder without forcing the hub or retainer.
- Inspect the drive rolls, inlet guide, liner, and contact tip for wear or debris before loading the wire.
- Verify the shielding gas, polarity, and wire-feed settings are correct for the procedure being used.
If the shop has recurring feed issues, the wire is not the first thing to blame. Check the feeder path, tension, liner condition, and tip wear before changing consumables again.
Troubleshooting Support: What to Check First
Problem: Erratic feeding or birdnesting
- Check drive-roll pressure. Too much pressure can deform the wire; too little can slip.
- Inspect the liner for wear, contamination, or tight bends in the gun cable.
- Verify the contact tip size matches the wire diameter. If unsure, use Unknown (Verify) until the correct tip is confirmed.
- Check the wire path from spool to gun for sharp drag points.
Problem: Excess spatter or unstable arc
- Inspect shielding gas flow and nozzle condition.
- Verify voltage and wire-feed speed against the procedure or WPS.
- Check that the work clamp has solid contact and the joint is clean enough for the process.
- Inspect for contamination such as paint, oil, or heavy scale.
Problem: Porosity in the weld bead
- Verify gas coverage at the nozzle and around the joint.
- Check for drafts, leaks, or a damaged gas hose.
- Inspect the base metal surface and remove moisture, oil, and heavy rust before welding.
- Verify the filler wire is not contaminated from poor storage.
Selection Support: Where to Confirm the Filler Metal
If your team needs a starting point for filler selection or cross-checking wire classifications, use the WSP resources as reference tools rather than automatic approvals. When available, the filler metal finder should be treated as a selection starting point, not a guarantee that a procedure is approved for your job, code, or base metal combination.
Use those pages to narrow down options, then verify the actual WPS, shielding gas, and wire classification before production use.
Product and Parts Notes
This listing is for one spool of Washington Alloy TC 70S-2 093. The documented size is .035 in and the documented spool weight is 33 lb. Beyond that, do not assume details such as drive-roll type, recommended gas mix, or exact machine compatibility unless your internal procedure sheet or manufacturer documentation confirms them. For uncertain technical details, mark them as Unknown (Verify).
For buyers, the important points are simple: confirm the classification, confirm the diameter, confirm the spool weight, and confirm that the feeder setup matches the wire path requirements of your machine. If the wire is being purchased for a repair bay, make sure the operators know whether the work is light fabrication, maintenance welding, or a qualified procedure with tighter limits.
Practical Use Notes
Triple-deoxidized ER70S-2 wires are often chosen when the surface is not ideal, but that does not eliminate prep. Remove loose scale, paint, oil, moisture, and heavy corrosion whenever possible. The more contaminated the joint, the less likely any MIG wire will produce reliable results. The right response is better cleaning, not overreliance on filler metal chemistry.
For shop support teams, the right workflow is: identify the base metal, confirm the required process, match the filler classification, and verify the feeder hardware. This wire may be a good general-purpose option, but the procedure still controls the final weld.
Safety Notes
- Use proper PPE for MIG welding, including eye, face, hand, and body protection.
- Keep the work area ventilated and control fumes at the source when possible.
- Do not weld on coated or unknown materials until hazards are identified.
- De-energize equipment before servicing the feeder, liner, or gun components.
- Store wire clean and dry to reduce contamination risk.
FAQ
Is TC 70S-2 093 suitable for mild steel?
Yes, the listed application is mild-steel fabrication, maintenance, and repair. Final suitability still depends on the WPS and job requirements.
Can I use this wire on material with light mill scale?
The product description says the triple-deoxidized ER70S-2 chemistry is suited for light mill scale or minor surface contamination. That is helpful, but it is not a substitute for proper cleaning.
Does .035 in wire work in every MIG machine?
No. Wire diameter compatibility depends on the feeder, drive rolls, liner, contact tip, and procedure. Verify the setup before loading the spool.
Is the shielding gas confirmed in the product listing?
Unknown (Verify). The available product information does not document a specific gas requirement.
Sources Checked
- ArcWeld product listing: TC 70S-2 093 Washington Alloy .035, 33 Lb. 70S-2 MIG Wire, Pack of (1)
- Provided product short description and source idea
- Allowed internal links provided in the task
This draft uses only the provided product information and internal links. Any details not explicitly documented should be treated as Unknown (Verify).
Related Arc Weld Part
TC 70S-2 093 Washington Alloy .035, 33 Lb. 70S-2 MIG Wire, Pack of (1)
Washington Alloy TC 70S-2 093 is a .035 in (0.9 mm) ER70S-2 solid MIG wire on a 33 lb (15 kg) spool for mild-steel fabrication, maintenance, and repair, delivering stable arc characteristics and consistent feeding; its triple-deoxidized ER70S-2 chemistry (Al/Ti/Zr) is well-suited for producing clean welds when the base metal has light mill scale or minor surface contamination, and this listing includes Pack of (1)…
View at Arc Weld StoreRelated Weld Support Guides
- Aluminum ER 5554 3/64″ X 5lb. MIG Welding Wire Spool By Washington Alloy – Weld Support Parts Blog
- Washington Alloy 7014 Stick Electrode – Smooth Welding with High Deposition
- Washington Alloy THF-700HT Hard-Face MIG Wire Review (2025): Built for Wear Resistance
- Rocaris 6 Pack Wire Wheel & Pen Brush Set: Carbon Steel for Weld Cleaning & Surface Prep