Category: Tig Support

Tig machines, consumables, parts breakdowns, and accessories

  • Why Your TIG Welds Have Porosity (And How to Fix It in 15 Minutes)

    Why Your TIG Welds Have Porosity (And How to Fix It in 15 Minutes)

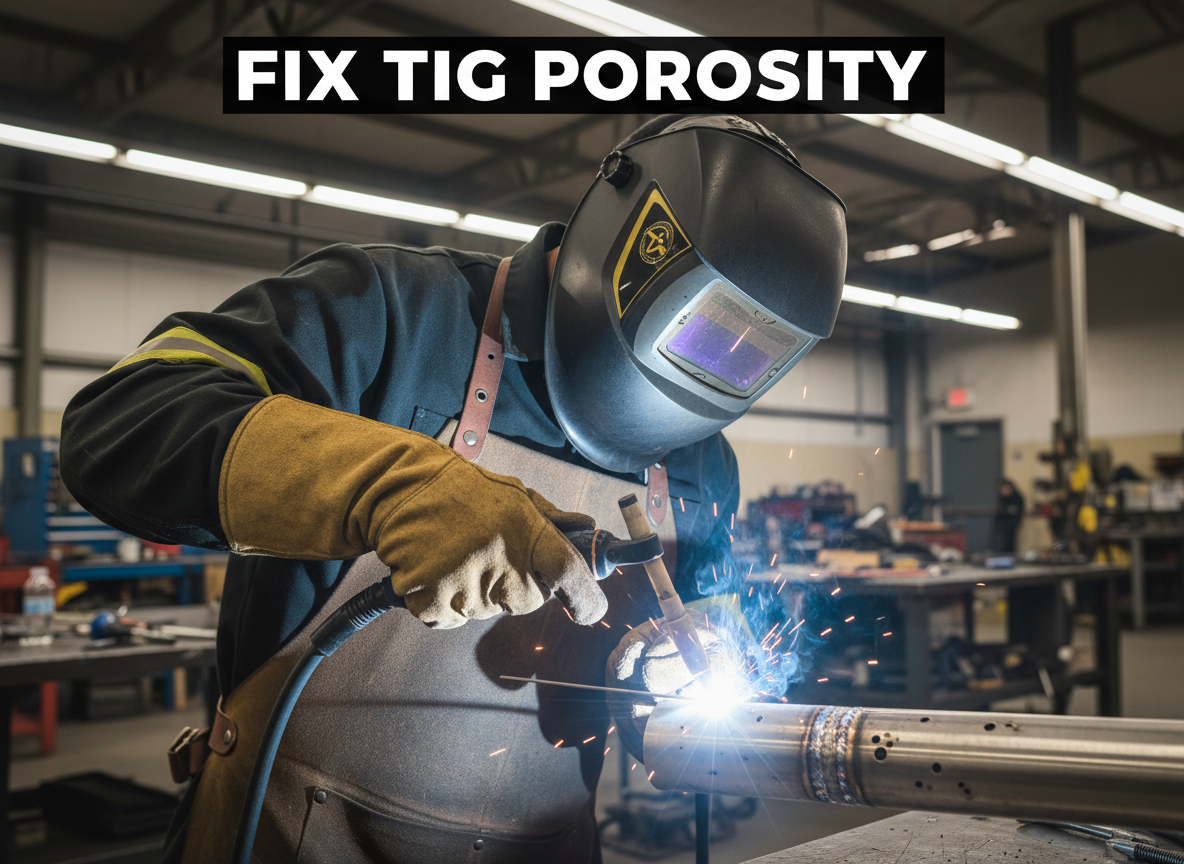
    Porosity in TIG welds—those small gas pockets trapped in the bead—kills strength and fails inspections. The good news: most porosity is caused by three fixable issues: contaminated gas, weak shielding coverage, or dirty base metal. Fix these, and your welds clean up fast.

    Key Takeaways

    • Porosity is caused by gas entrapment, not arc problems—focus on shielding and cleanliness
    • Diagnose in 5 minutes: check gas flow, inspect the torch, and clean your base metal
    • Most fixes cost under $20 and take less than 15 minutes
    • Gas lens collet bodies improve shielding coverage and reduce porosity risk
    • Test on scrap before returning to production

    Quick Diagnosis

    What you’ll see:

    • Small holes or bubbles in the weld bead (visible after cooling)
    • Bead surface looks rough or pitted
    • Porosity appears randomly or consistently across the weld

    Likely causes (ranked by frequency):

    1. Gas flow too low or regulator leaking
    2. Contaminated filler wire or tungsten
    3. Weak gas shielding (torch too far from work, wind, or bad gas lens)
    4. Dirty base metal (rust, mill scale, oil)
    5. Arc length too long or tungsten dipped in the puddle

    Safety Notes

    • Eye Protection: Use ANSI Z87.1-rated helmet with correct shade (typically #10–#12 for TIG). Porosity inspection requires close-up viewing—use a magnifying glass if needed.
    • Ventilation: TIG produces less fume than MIG or stick, but always weld in ventilated space or use a fume extractor. Tungsten inert gas (argon) is inert but displaces oxygen—ensure adequate air circulation.
    • Electrical Safety: Disconnect the welder before inspecting the torch or changing consumables.
    • Compressed Gas: Argon cylinders are pressurized. Never drop or expose to heat. Check regulator connections for leaks using soapy water (never a flame).

    Step-by-Step Troubleshooting

    Step 1: Check Gas Flow (Free)

    • Set regulator to 15–20 CFH (cubic feet per hour) for TIG.
    • Listen for a steady hiss at the torch nozzle.
    • If flow is weak or silent, check for kinks in the gas line or a leaking regulator.
    • Why: Low gas flow leaves the weld unshielded, allowing oxygen and nitrogen to enter the puddle and form gas pockets.

    Step 2: Inspect the Torch and Gas Lens (Free)

    • Remove the torch from the cable and look inside the nozzle.
    • Check for spatter buildup, cracks, or discoloration on the gas lens or collet body.
    • If the gas lens is damaged or heavily spattered, replace it (see “Recommended Fix” below).
    • Why: A damaged or dirty gas lens creates turbulence in the shielding gas stream, reducing coverage and trapping gas in the weld.

    Step 3: Clean the Base Metal (Free)

    • Use a wire brush, grinding wheel, or stainless steel brush to remove rust, mill scale, and oxidation.
    • Wipe with a clean cloth to remove dust and oils.
    • Weld within a few minutes of cleaning (oxidation returns quickly).
    • Why: Contaminants on the base metal release gases when heated, which get trapped in the molten puddle.

    Step 4: Test Arc Length and Technique (Free)

    • Keep the tungsten 1/8″ to 3/16″ above the base metal.
    • Maintain a steady, smooth arc without dipping the tungsten into the puddle.
    • Avoid moving the torch too fast or too far from the work.
    • Why: Long arc length weakens gas coverage. Dipping the tungsten introduces tungsten oxide and moisture, causing porosity.

    Step 5: Check Filler Wire and Tungsten (Low Cost)

    • Inspect the filler wire for dirt, rust, or kinks. Replace if contaminated.
    • Check the tungsten for cracks, balling, or discoloration. Replace if damaged.
    • Use the correct tungsten size for your amperage (typically 1/16″ to 3/32″ for most hobby/shop work).
    • Why: Contaminated consumables introduce gases and oxides directly into the weld.

    Fix Options (Ranked)

    1. Adjustment (Free)

    • Increase gas flow to 15–20 CFH.
    • Clean the base metal thoroughly.
    • Reduce arc length and improve torch angle.
    • Best for: First-time porosity or occasional issues.

    2. Consumable Replacement (~$10–$30)

    • Replace the filler wire spool if old or contaminated.
    • Replace the tungsten electrode if cracked or balled.
    • Best for: Consistent porosity after adjustments fail.

    3. Gas Lens Collet Body Replacement (~$15–$25)

    • Replace the gas lens and collet body to restore shielding coverage.
    • Improves gas flow pattern and reduces turbulence.
    • Best for: Persistent porosity despite clean base metal and correct gas flow.

    Recommended Fix (Product Section)

    Why a gas lens collet body works: A gas lens is a small brass component inside the torch that organizes the shielding gas flow into a smooth, laminar stream. Over time, spatter and oxidation clog the lens, creating turbulence and weak coverage. Replacing it restores full shielding and eliminates porosity caused by weak gas coverage.

    When to use it:

    • After cleaning the base metal and confirming gas flow are correct, but porosity persists.
    • When the old gas lens shows visible spatter, cracks, or discoloration.
    • As routine maintenance every 50–100 hours of welding.

    When NOT to use it:

    • If gas flow is low—fix the regulator first.
    • If the base metal is dirty—clean it before replacing the lens.
    • If the tungsten is dipped in the puddle—improve technique first.

    What to check before buying:

    • Verify your torch model (WP-17, WP-18, WP-26, WP-9, WP-20, WP-25, or SR series).
    • Confirm the collet size matches your tungsten diameter (typically 3/32″ for standard work).
    • Check that the package includes both the gas lens and collet body (some sell lens only).
    • Ensure the product is in stock and ships quickly (you’ll want to test immediately).
    • Look for 4+ star reviews from verified welders.

    No products found.

    Comparable Options

    If you prefer a larger pack or different torch size, consider:

    • 10-Pack 45V26 Collet Bodies (B07KCXHF4G): Same specs, larger quantity for shops doing frequent replacements.
    • Assorted Gas Lens Kit (B081LKNHGS): Multiple sizes (45V26, 45V27, 45V43) if you run different torch models.

    Common Mistakes

    • Assuming porosity is an arc problem. It’s not—porosity is a gas/contamination problem. Check shielding first.
    • Running gas flow too high. Above 25 CFH, excess gas creates turbulence and actually increases porosity. Stick to 15–20 CFH.
    • Skipping base metal cleaning. Rust and mill scale are the #1 cause of porosity in production shops. Always clean before welding.
    • Replacing the gas lens without checking the regulator. If the regulator leaks or is set too low, a new lens won’t help.
    • Ignoring tungsten contamination. If the tungsten is cracked or oxidized, replace it. A bad tungsten will cause porosity no matter how clean the base metal is.

    FAQ (Snippet-Optimized)

    Q: What causes porosity in TIG welding? Porosity is caused by gas entrapment—usually from weak shielding (low gas flow, damaged gas lens, wind), contaminated base metal, or a dipped tungsten. Fix shielding and cleanliness first.

    Q: How do I know if my gas lens is bad? Look inside the torch nozzle. If you see spatter buildup, cracks, or heavy discoloration, replace it. A clean lens should look bright and smooth.

    Q: Can I fix porosity by adjusting amperage? No. Amperage doesn’t cause porosity—gas coverage and cleanliness do. Adjust gas flow, clean the base metal, and check the torch instead.

    Q: How often should I replace my gas lens? Every 50–100 hours of welding, or whenever you see visible spatter or discoloration. Shops doing high-volume work replace them weekly.

    Q: Will a new gas lens fix all my porosity? Only if the porosity is caused by weak shielding. If the base metal is dirty or gas flow is low, a new lens alone won’t fix it. Address all three: gas flow, cleanliness, and torch condition.

    Next Steps

    For more TIG troubleshooting and gear guidance, check out these related posts:

    For more welding fixes and gear options, see our full resource page: https://blog.weldsupportparts.com/links/
  • STARTECWELD TIG 17F Series: 150 Amp Air-Cooled TIG Torch with Flexible Head & 25 ft Cable

    Introduction

    The STARTECWELD TIG 17F is a mid-range air-cooled TIG torch kit designed for welders who need reliable performance without premium pricing. It features a flexible head for maneuverability, a 25 ft power cable, and includes the 105Z57 connector for broad compatibility. This post breaks down what you get, how it compares to alternatives, and whether it fits your welding setup.

    Key Takeaways

    • 150 amp rating supports most hobby and semi-professional TIG welding tasks
    • Flexible head design improves access in tight or awkward positions
    • 25 ft cable length reduces the need for extension hoses
    • Includes 105Z57 connector; verify your machine’s input before ordering
    • Price-to-performance ratio competitive in the $200–$250 range

    What’s Included

    The STARTECWELD TIG 17F kit ships with:

    • TIG torch body (WP17F-25R-ST model)
    • 25 ft power cable with rubber insulation
    • 105Z57 connector/adapter for machine compatibility
    • Flexible head design (60° articulation for tight spaces)
    • Handle with ergonomic grip

    Torch Specifications

    SpecificationValue
    Amperage Rating150 A
    Cooling MethodAir-cooled
    Cable Length25 ft
    Head TypeFlexible
    Connector105Z57 (Dinse)
    Wire Size Compatibility10–25 mm²
    Duty CycleDepends on machine; verify with your welder

    Performance & Use

    The 150 amp rating handles aluminum, stainless steel, and mild steel in the 1/16″ to 3/16″ thickness range. The flexible head is a practical feature for welding inside corners, around tubing, or in confined spaces where a rigid torch would be awkward.

    Air cooling is sufficient for intermittent to moderate duty cycles. If you’re running continuous high-amperage passes, monitor the torch for heat buildup; water-cooled alternatives exist for heavy production work.

    Cable & Connector Notes

    The 25 ft cable reduces hose clutter and eliminates the need for extension hoses in most shop setups. The 105Z57 connector is standard on many Hobart, Miller, and aftermarket machines, but verify your machine’s input before purchasing. Some machines use different connectors (e.g., Tweco, Stud, or proprietary fittings).

    What to compare before you buy

    • Machine compatibility: Confirm your welder accepts 105Z57 connectors; if not, you’ll need an adapter or different torch.
    • Cable length: 25 ft is standard; if your machine is farther from the work area, consider extension hoses or a longer cable option.
    • Amperage headroom: 150 A is mid-range; verify your machine can deliver this amperage and that your power supply is adequate.
    • Cooling method: Air-cooled torches are lighter and cheaper but generate more heat than water-cooled alternatives; choose based on your duty cycle.
    • Flex vs. rigid head: Flexible heads are convenient for tight spaces but slightly less rigid; rigid heads offer better control for precision work.

    Comparable Amazon picks (optional)

    No products found.

    Safety Considerations

    Always inspect the torch cable for cracks, burns, or exposed wire before use. Damaged cables can cause electrical hazards and poor arc quality. Keep the torch dry and store it away from moisture and extreme temperatures.

    Ensure your machine is properly grounded and that all connectors are tight. Loose connections can cause arcing, overheating, and equipment damage.

    Verdict

    The STARTECWELD TIG 17F offers solid value for welders stepping up from 110V equipment or looking for a secondary torch. The flexible head and 25 ft cable are practical features, and the price is competitive. The main caveat: verify connector compatibility before ordering. If your machine uses a different connector type, you’ll need an adapter or a different torch.

  • TIG Torch Slipping Tungsten? Your Collet Body Is Worn (Here’s the Fix)

    Intro

    You’re TIG welding and the tungsten keeps slipping out of the collet. You tighten the back cap, it holds for a few seconds, then slides again. The arc starts inconsistent, the puddle wanders, and your bead looks rough. The problem isn’t the tungsten—it’s a worn collet body that can’t grip anymore.

    Key Takeaways

    • Tungsten slipping is almost always caused by a worn or damaged collet body, not the tungsten itself
    • A collet body wears from repeated insertion and removal of tungsten
    • Replacement collet bodies are cheap ($5–$15) and take 30 seconds to swap
    • Gas coverage improves dramatically with a fresh collet body
    • Keep spares on hand for every torch size you use

    The Problem

    A worn collet body shows up as:

    • Tungsten slides out even when the back cap is tight
    • Inconsistent arc initiation
    • Poor gas coverage (visible oxidation on the weld)
    • Difficulty maintaining arc length
    • Collet body threads are stripped or loose

    The collet is a small tapered sleeve that grips the tungsten. Every time you insert or remove tungsten, the collet compresses and expands. Over hundreds of cycles, the taper wears out. The grip weakens. Eventually, no amount of back cap tightening will hold the tungsten in place.

    Why It Matters

    A slipping tungsten means an unstable arc. Your puddle control suffers. Weld quality drops. On precision work (aerospace, stainless, thin-wall), a wandering arc is a reject. On production runs, it’s rework and lost time. Plus, a loose tungsten can break mid-weld and contaminate your shielding gas.

    The Fix

    1. Disconnect the torch and let it cool. Safety first.
    1. Unscrew the back cap and remove the old collet body.
    1. Inspect the threads. If they’re stripped, you may need a new torch head (rare).
    1. Install the new collet body. Slide it in and hand-tighten the back cap.
    1. Insert tungsten and tighten firmly. The tungsten should not move when you pull on it.
    1. Test the arc. You should see immediate improvement in arc stability and gas coverage.

    Why This Product Solves It

    The TIG Gas Lens Collet Body #17, 18, 26 Torch 2PK (45V27-1/8″) is a direct replacement for standard TIG torches and includes a gas lens design that improves shielding gas flow. The tapered bore is precision-machined to grip tungsten consistently, and the gas lens allows larger tungsten stick-out for better visibility and control. Two-pack means you have a spare.

    Product Link:  Product not found.

    “>
    Product not found.
     

    What to Check Before You Buy

    • Torch series: This fits #17, #18, and #26 torches (most common sizes)
    • Tungsten size: This collet is sized for 1/8″ (3.2mm) tungsten
    • Gas lens compatibility: Confirm your torch head accepts a gas lens (most do)
    • Thread type: Standard collet body threads (verify if you have an older torch)

    Real-World Use

    A TIG fabricator working on stainless tubing noticed poor gas coverage and arc wander. Swapped the collet body. Tungsten stayed put, arc was stable, and the bead came out clean. One collet body lasted 18 months before needing replacement.

    Common Mistakes

    • Tightening the back cap excessively (damages the new collet body)
    • Using the wrong collet size for your tungsten diameter (loose fit)
    • Not replacing the collet body when it’s visibly worn (keeps struggling with slipping)
    • Forgetting to clean the collet body threads before installation (cross-threading)
    • Buying a single collet body instead of keeping spares (downtime when it fails)

    Safety Notes

    Always let the torch cool before handling. Collet bodies get hot during welding. Wear gloves when removing hot components. If tungsten slips during welding, stop immediately—a loose electrode can break and contaminate your argon supply.

    Always follow the manufacturer’s instructions and your shop’s safety procedures. If you’re unsure about fitment or ratings, verify before you buy or install.

    Related Reading

  • TIG Torch Consumables Wearing Out Fast? Stock Up With This 123-Piece Kit

    TIG Torch Consumables Wearing Out Fast? Stock Up With This 123-Piece Kit

    Intro: TIG torch consumables wear out fast—especially with aluminum or stainless jobs. This 123-piece kit gives WP-17/18/26 users a complete, ready-to-go stock of nozzles, collets, and gas lenses for pro-level results without the downtime of waiting for parts.

    Key Takeaways

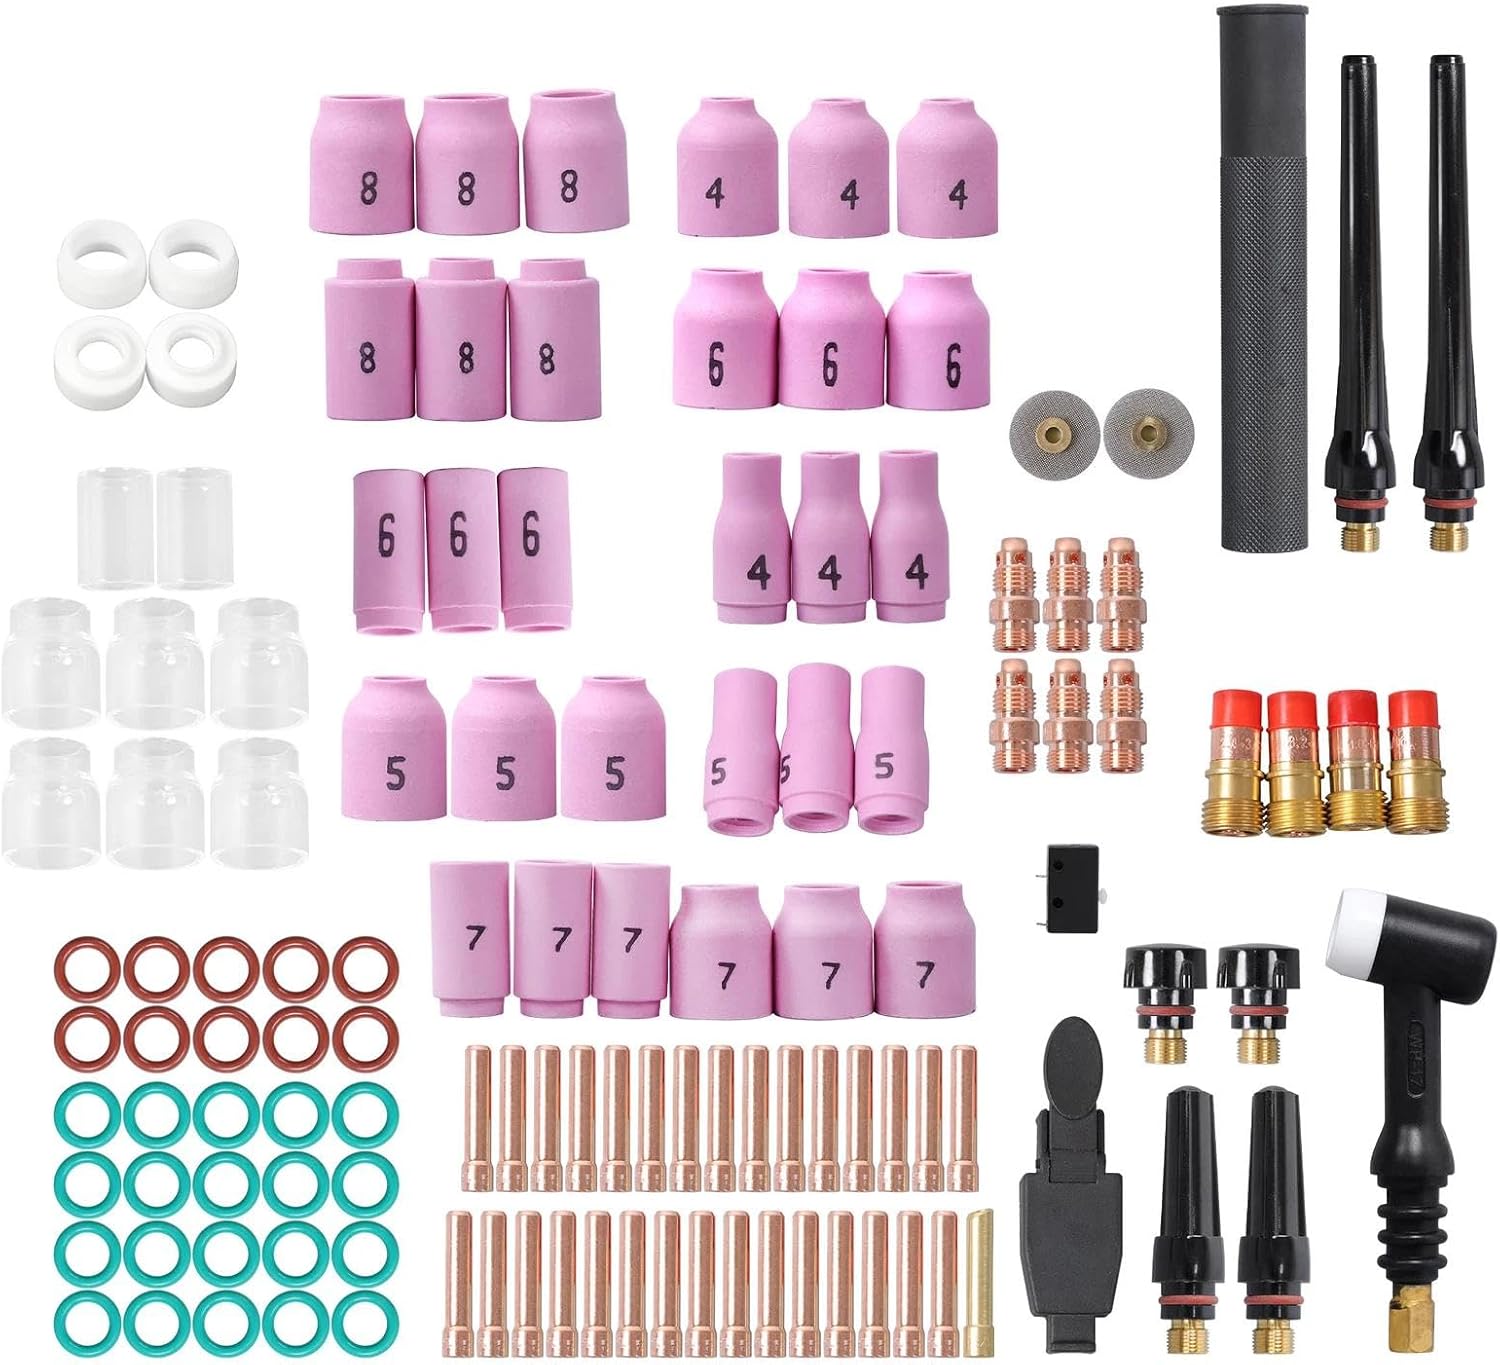
    • 123 pieces: nozzles, collets, gas lenses, and ceramic cups for WP-17/18/26 torches
    • Precision-manufactured for reliable fit and consistent gas coverage
    • Heatproof glass cups and alumina nozzles resist cracking under high temps
    • Supports both AC and DC TIG work; ideal for aluminum, stainless, and mild steel
    • One-time stock eliminates repeated small orders and shop delays

    PHUOC LOC THO for TIG Welding Torch Kit 123 Pcs Stubby Lens, Alumina Nozzle, Collets
    • For TIG Welding Torch Kit 123 Pcs Stubby Lens, Alumina Nozzle, Collets
    • Includes 123 pieces for TIG welding torch kit, featuring stubby lens, alumina nozzle, and collets for welding applications.
    • components like alumina nozzle and collets reliable performance and precise welding results with TIG torch kit 123 Pcs.
    • Upgrade Your Gear, Upgrade Your Performance – Choose Our Reliable Replacement Parts.
    • To ensure a perfect fit and make an informed decision, we encourage you to carefully review both the product’s dimensions and visually inspect it in the provided photos.

    Last update on 2026-07-14 / Affiliate links / Images from Amazon Product Advertising API

    Performance & Use

    All parts are precision-manufactured for reliable fit and gas coverage. Designed for both AC and DC TIG work (verify for your machine). Suits most US-shop WP-17/18/26 torches.

    What to compare before you buy

    • Torch compatibility: Verify your torch model (WP-17, WP-18, or WP-26) before ordering
    • Collet sizes: Kit includes 0.040″, 1/16″, 3/32″, and 1/8″ collets—confirm your electrode diameter
    • Glass vs. ceramic: Kit includes both heatproof glass cups and alumina nozzles; choose based on your material and duty cycle
    • Gas lens setup: Verify whether you run stubby or regular gas lens configuration
    • Storage: Check if included storage case or organizer meets your shop layout needs

    Comparable Amazon picks (optional)

    Durability & Build

    Heatproof glass cups and alumina nozzles resist cracking under high temps. All collets and lenses are built for repeated use—ideal for daily welding or instructional settings. Precision tolerances ensure tight, consistent seals that minimize gas leakage and porosity.

    Who It’s For

    • TIG welders running WP-17/18/26 torches on aluminum, stainless, or mild steel
    • Fabrication shops that need backup consumables in stock to avoid downtime
    • Instructors teaching TIG welding who need a complete parts kit for multiple torch setups
    • Hobbyists and pros upgrading from single-part orders to bulk stock

    Quick FAQ

    Q: Will this fit my torch?
    A: Compatible with WP-17, WP-18, WP-26 (verify torch model before ordering).

    Q: Are all parts included for aluminum and stainless?
    A: Yes, supports both (verify machine settings and gas type).

    Q: Are the cups glass or ceramic?
    A: Both heatproof glass and alumina nozzles included.

    Q: Can I use this for AC and DC TIG?
    A: Yes (verify for your machine).

    Q: Does it include a storage case?
    A: Unknown (Verify on listing).

    Safety Notes

    • Always allow torch to cool before handling consumables
    • Inspect collets and gas lenses for cracks or damage before use; replace if compromised
    • Verify gas flow and coverage before starting production welds
    • Follow ANSI Z49.1 safety standards for TIG welding
  • TIG Gas Lens Cups Cracking? Replace Them Before Porosity Hits

    Intro

    Your TIG welds are starting to show porosity or inconsistent gas coverage. You’ve checked your argon flow, regulator pressure, and torch angle. Everything checks out—except the welds still look rough.

    The problem might be hiding in plain sight: a cracked or worn gas lens cup.

    A damaged gas lens cup disrupts shielding gas flow, allowing air to contaminate the weld pool. Even a hairline crack can cause porosity that ruins structural welds. Unlike contact tips, gas lens cups get less attention—but they’re just as critical.

    Key Takeaways

    • Cracked or worn gas lens cups allow air into the shielding gas stream
    • Porosity, discoloration, and rough beads are signs of gas coverage failure
    • Gas lens cups wear faster with high amperage or prolonged duty cycles
    • Replacement is quick and inexpensive—$2–$8 per cup
    • Proper fitment requires matching your torch size and collet type

    The Problem

    A gas lens cup (also called a ceramic cup or nozzle) sits at the end of your TIG torch and directs shielding gas around the weld pool. Over time, thermal cycling and spatter impact cause:

    • Cracks: Hairline fractures that let air seep in
    • Erosion: The ceramic wears thin, reducing gas flow efficiency
    • Discoloration: Brown or white deposits indicate heat stress and gas leakage
    • Porosity: Air contamination creates gas pockets in the weld

    A cracked cup might look minor, but even a 1mm hairline fracture is enough to ruin a structural weld.

    Why It Matters

    Porosity from a bad gas lens cup is expensive:

    • Rework: Cutting out and re-welding porosity costs hours of labor
    • Inspection failures: Radiographic or ultrasonic testing will reject porosity
    • Safety risk: Porosity weakens the joint and can cause failure under load
    • Material waste: Scrap parts and wasted filler material
    • Reputation: Failed welds on customer parts damage trust

    A $5 replacement cup prevents all of this.

    The Fix

    Replace your gas lens cup as part of routine torch maintenance:

    1. Stop the welder and let the torch cool (5–10 minutes for high-amperage work)
    2. Unscrew the nozzle from the torch head (usually hand-tight or with a small wrench)
    3. Remove the collet body (the small metal piece holding the cup)
    4. Slide out the old cup and inspect the collet body for damage
    5. Install the new cup (check the size: 3/8″, 7/16″, 1/2″, etc.)
    6. Re-assemble: Collet body → new cup → nozzle
    7. Hand-tighten and resume welding

    Total time: 3–5 minutes.

    Why This Product Solves It

    The CK TIG Gas Lens Collet Body (available in multiple sizes) is a precision replacement for standard TIG torches (#17, #18, #26). It includes the collet body and gas lens cup assembly, ensuring proper gas flow and consistent shielding.

    Key benefits:

    • Precision fit: Engineered for standard torch sizes
    • Improved gas coverage: Larger diameter design provides better shielding gas distribution
    • Durability: Quality ceramic resists thermal cracking
    • Compatibility: Works with most standard TIG torches
    • Affordable: Packs of 2 cover extended service intervals

    Replace every 100–200 hours of welding or immediately if you see porosity or discoloration.

    What to Check Before You Buy

    • Torch size: Standard torches are #17, #18, or #26 (small torches are #9, #20, #24W, #25)
    • Cup size: Available in 3/8″ (3/32″), 7/16″ (1/8″), 1/2″ (5/32″), and larger
    • Collet type: Standard collet body vs. gas saver (gas saver is more efficient but less common)
    • Fitment: Unknown (Verify) — confirm your torch model and cup size before ordering

    Real-World Use

    A stainless steel fabrication shop doing heavy TIG work at 150–200 amps noticed porosity on every other weld. They replaced the gas lens cup and the porosity disappeared. The old cup had a hairline crack invisible to the naked eye. Now they replace cups every 150 hours as preventive maintenance.

    Common Mistakes

    • Ignoring discoloration: Brown or white staining on the cup is a sign of gas leakage—replace it immediately
    • Wrong cup size: Installing a 3/8″ cup on a 1/2″ collet body leaves gaps and allows air in
    • Over-tightening the nozzle: Hand-tight is enough; over-tightening can crack the cup
    • Not cleaning the torch head: Spatter and oxidation on the torch head can interfere with gas flow—clean it when you replace the cup
    • Waiting for complete failure: Replace cups at the first sign of porosity, not after multiple failed welds

    Safety Notes

    • Always wear ANSI Z87.1-rated safety glasses or a helmet when welding
    • Let the torch cool for 5–10 minutes before removing the cup—ceramic cups retain heat and can cause burns
    • Ensure proper ventilation; TIG welding produces fumes that require respiratory protection (OSHA guidelines)
    • Never touch the cup or nozzle immediately after welding

    Always follow the manufacturer’s instructions and your shop’s safety procedures. If you’re unsure about fitment or ratings, verify before you buy or install.

    Where to Buy

    Available at ArcWeld.store (stock and shipping: Unknown – verify)

  • 17-Piece TIG Welding Torch Kit for WP-17/18/26: Complete Consumables Breakdown

    TIG welding requires precision, and that starts with the right torch consumables. This 17-piece kit covers the essential nozzles, collets, and tungsten electrodes you need to set up and maintain WP-17, WP-18, and WP-26 torches without constant trips to the supply house.

    What’s Included

    The kit bundles five gas lens cups (sizes #4 through #8), three collet bodies (1.0mm, 1.6mm, 2.4mm), three back cups (short, middle, long), and three tungsten electrodes (1.0mm, 1.6mm, 2.4mm). Each piece is sized for standard argon TIG work.

    No products found.

    What to Compare Before You Buy

    • Cup size range: Verify the kit covers your electrode diameter (1.0mm, 1.6mm, or 2.4mm).
    • Material compatibility: Alumina nozzles work for argon; check if your machine uses argon-only or mixed gas.
    • Collet fit: Confirm collet sizes match your torch model (WP-17/18/26 series).
    • Tungsten type: This kit includes pure tungsten (WP); for AC welding, pure tungsten is standard. For DC, ER/EWTh-2 is often preferred.
    • Backup stock: Consider ordering two kits to avoid downtime during replacements.

    Comparable Amazon Picks (Optional)

    Performance & Use

    Nozzle sizing: The five nozzle sizes (#4–#8) correspond to cup diameters from 6.5mm to 12.5mm. Larger cups protect the weld pool in high-amperage work; smaller cups suit precision joints. Alumina nozzles are durable and resist thermal shock.

    Collet bodies: The three sizes (1.0mm, 1.6mm, 2.4mm) fit standard tungsten electrodes. Collets must grip the electrode firmly to prevent arc instability. Replace if they show wear or if the electrode spins during striking.

    Tungsten electrodes: Pure tungsten (WP) is ideal for AC welding because it forms a stable ball at the tip. For DC electrode-negative (DCEN), consider upgrading to thoriated or lanthanated tungsten for better arc starting and longevity.

    Back cups: The three back cup sizes (short, middle, long) control gas coverage. Use the short cup for tight spaces, the middle cup for standard work, and the long cup for maximum shielding in high-wind conditions or when welding aluminum.

    Compatibility Check

    This kit fits WP-17, WP-18, and WP-26 torches, which are among the most common TIG torch models. Verify your torch model before ordering. If you use a different torch series (SR, DB, PTA), check the product listing for compatibility.

    Storage & Maintenance

    Store nozzles and collets in a dry container to prevent oxidation. Tungsten electrodes should be kept clean and dry; contamination reduces arc quality. Inspect collets before each use—replace if bent or worn.

    When to Replace

    • Nozzles: Replace when eroded, cracked, or discolored from heat.
    • Collets: Replace when they no longer grip the electrode or show visible wear.
    • Tungsten: Blunt or contaminated electrodes should be re-sharpened or replaced.

    FAQ

    Q: Can I use these nozzles with a gas lens?
    A: Yes, the nozzles in this kit are compatible with standard gas lens assemblies. Gas lenses improve shielding and allow tighter torch angles.

    Q: What gas should I use?
    A: Pure argon is standard for most TIG work. For stainless steel and aluminum, argon with 1–5% hydrogen or helium is common. Check your machine’s manual.

    Q: How long do tungsten electrodes last?
    A: Depends on use. A sharpened electrode can last 1–2 hours of active welding. Contaminated or blunt electrodes should be replaced.

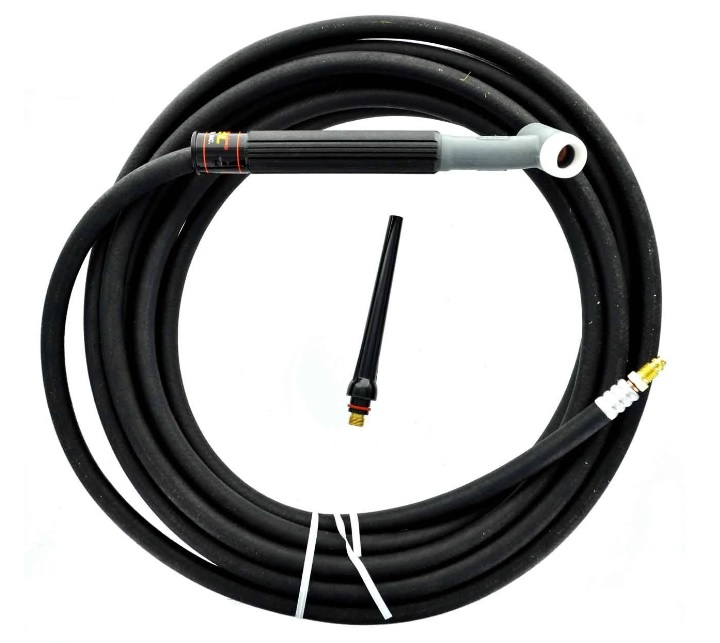
  • Weldtec WT-17F-12RT TIG Torch Kit, 12.5′, Flex Head, Twister Cable, Rubber (WT-17F-12RT)

    Weldtec WT-17F-12RT TIG Torch Kit, 12.5′, Flex Head, Twister Cable, Rubber (WT-17F-12RT)

    If your current TIG torch is stiff, leaking, or just fighting you in tight spots, a complete torch kit is usually faster than piecing together parts. The Weldtec WT-17F-12RT is positioned as a WP-17 style air-cooled TIG torch kit with a flex head and a shorter 12.5 ft lead for closer-in work. Fitment matters here—torch series, connector style, and your machine’s gas/power setup decide whether this is a clean swap or a headache.

    Key Takeaways

    • A WP-17 style air-cooled torch kit is a common repair/upgrade path for light-to-medium TIG work (verify your machine connection).
    • Flex-head torches help when you cannot rotate the part or when torch angle control is the difference between clean tie-in and undercut.
    • Cable length is a real usability factor: shorter leads reduce drag on the bench, but limit reach (choose intentionally).
    • If you are unsure on fitment, confirm torch series and connector details before ordering.

    Performance & Use
    A WP-17 style torch is typically used for general DC TIG on steel/stainless and light aluminum work where an air-cooled torch is appropriate. The practical advantage of a flex head is access: you can keep your wrist in a neutral position and still present the tungsten at the right angle, especially on fillets, inside corners, and small assemblies.

    What to compare before you buy

    • Torch series: Confirm this kit matches the torch family you intend to run (listed as “WT-17F…”; verify WP-17 compatibility).
    • Connection type to your machine: DINSE size, power cable end, and gas connection style are Unknown (Verify) from the product page.
    • Valve vs non-valve: This kit is labeled as a torch kit; confirm whether it includes a gas valve on the torch body (Unknown (Verify)).
    • Lead length: 12.5 ft is helpful for bench work; if you routinely weld on larger frames or around a shop, you may prefer longer.
    • Consumables ecosystem: Confirm what front-end parts it uses (cups/collets/gas lens compatibility is Unknown (Verify)).

    Durability & Build
    Torch life is usually decided by heat management, cable strain, and how often the torch gets dragged across sharp edges. A “twister” style cable is commonly chosen for flexibility and handling, but exact cable construction details are not specified on the ArcWeld.store page. Plan on protecting the lead where it crosses table edges and consider a cable cover if you work around hot spatter and abrasive dust.

    Power / Specs

    • Product type: TIG torch kit
    • Model/SKU: WT-17F-12RT (SKU shown on page: WT-17F-12RT)
    • Lead length: 12.5 ft (as titled on product page)
    • Head type: Flex head (as titled on product page)
    • Cooling: Air-cooled (implied by WP-17 style; Unknown (Verify) if explicitly stated)
    • Amperage rating: Unknown (Verify)
    • Included accessories/consumables: Unknown (Verify)

    Who It’s For

    • Welders replacing a worn WP-17 style torch and wanting a full kit instead of chasing leaks and intermittent connections.
    • Bench and fab-table TIG work where a shorter lead reduces snagging and improves torch control.
    • Anyone who needs flex-head access for corners, small parts, and awkward joint angles.

    Quick FAQ
    Q: Will this fit my TIG welder?
    A: Unknown (Verify). You need to match torch series and the machine connection (power connector and gas setup). If you do not know your connector type, confirm before ordering.

    Q: Is a 12.5 ft lead long enough?
    A: For bench work, often yes. For large frames, field repairs, or walking around a table, you may want longer. Measure your typical work envelope.

    Q: Does it come with cups/collets/tungsten?
    A: Unknown (Verify). Do not assume consumables are included unless the product page lists them.

    Safety Notes

    • Confirm torch and cable ratings match your process and duty cycle. Running an air-cooled torch beyond its intended heat load shortens life and increases burn risk.
    • Inspect gas hoses and fittings for leaks before welding. Shielding gas leaks can cause porosity and create unsafe conditions in enclosed spaces.
    • Keep leads away from sharp edges, hot slag, and moving equipment.

    Always follow the manufacturer’s instructions and your shop’s safety procedures. If you’re unsure about fitment or ratings, verify before you buy or install.

    Where to Buy
    ArcWeld.store (verified product page): Weldtec WT-17F-12RT TIG Torch Kit, 12.5', Flex Head, Twister Cable, Rubber

    ” target=”_blank” rel=”noreferrer noopener”>
    Weldtec WT-17F-12RT TIG Torch Kit, 12.5', Flex Head, Twister Cable, Rubber

    Weldtec WT-17F-12RT TIG Torch Kit, 12.5', Flex Head, Twister Cable, Rubber

    $194.77

    Sold Out

    View Product

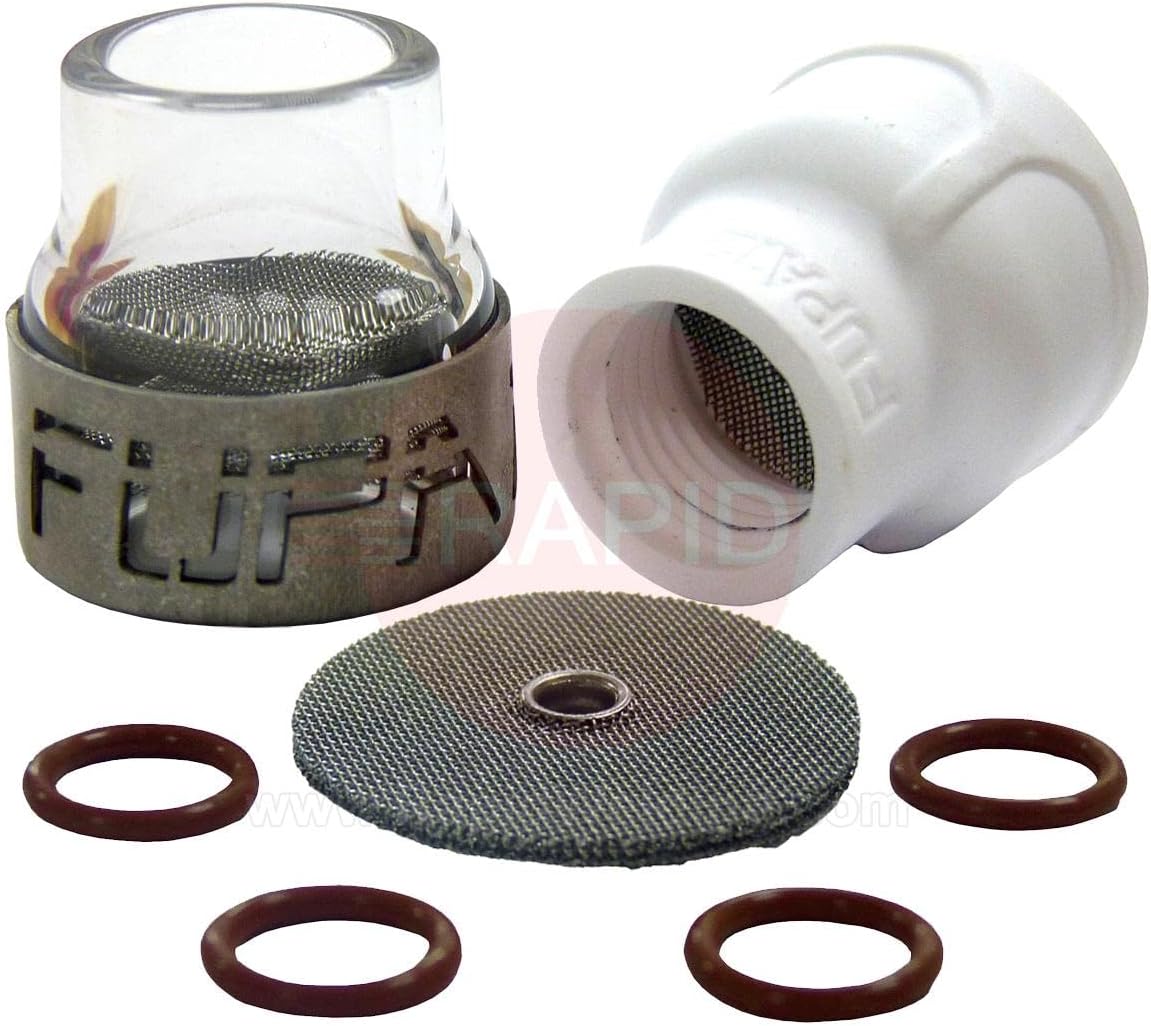
  • Furick Cup Dual FUPA #12 TIG Cup Kit (B09717HYGY): What It Is, When It Helps, and What to Compare

    Furick Cup Dual FUPA #12 TIG Cup Kit (B09717HYGY): What It Is, When It Helps, and What to Compare

    If you’re running TIG and you’re trying to improve coverage, visibility at the puddle, or consistency on longer beads, your cup setup matters more than most people think. A cup kit is not a magic fix, but it can reduce variables—especially when you’re troubleshooting gas coverage problems that look like “tungsten issues” or “bad filler” but are actually shielding-related.

    This post covers one specific Amazon kit so you can verify what you’re buying, compare it to alternatives, and avoid guessing on fitment.

    No products found.

    Product (verified)

    Amazon listing title: Furick Cup Dual FUPA #12 Welding Cup Kit w/Titanium Diffuser
    Verified ASIN: B09717HYGY
    Amazon URL used to confirm ASIN:https://www.amazon.com/Furick-Cup-Welding-Titanium-Diffuser/dp/B09717HYGY?tag=weldsupport-20

    What this is (plain-English)

    This is a TIG cup kit built around a #12 cup format with a diffuser component. In practice, cup/diffuser setups are used to shape and stabilize shielding gas flow at the nozzle, which can help when you’re pushing cup size, stickout, or trying to keep coverage stable around corners and transitions.

    Unknown (Verify): exact torch series compatibility (WP-17/18/26 vs WP-9/20), included parts list, and whether any adapters are required. Confirm on the listing and/or manufacturer documentation before buying.

    Who this is for

    • TIG welders who are actively troubleshooting coverage/oxidation issues and want to eliminate “cup setup” as a variable.
    • Shops that standardize torch consumables and want a known kit instead of mixing random cups/diffusers.
    • Anyone doing cosmetic stainless work where coverage consistency is obvious in the finish.

    When it’s not the right fix

    If your issue is actually gas supply, leaks, contaminated tungsten, or poor prep, a new cup kit won’t solve it. Treat this as a consumable/torch-end choice, not a process substitute.

    Performance & Use

    Cup setups affect how forgiving your shielding is. The right setup can make your results more repeatable; the wrong setup can make it harder to see what’s actually going wrong.

    What to compare before you buy

    • Torch series fitment: confirm your torch (WP-17/18/26, WP-9/20, etc.) and whether adapters are required (Unknown—Verify).
    • Cup size vs access: larger cups can help coverage but can block access in tight joints.
    • Diffuser style: verify what’s included and how it’s intended to be used (Unknown—Verify).
    • Consumable availability: can you easily replace cups/diffusers without buying the whole kit again?
    • Your typical stickout and joint type: long stickout and tight corners punish marginal shielding setups.

    Comparable Amazon picks (optional)

    (Verified ASINs; plain affiliate links only.)

    Setup checklist (quick)

    • Confirm torch model/series and consumable family before ordering (do not assume).
    • Inspect for leaks at torch head, back cap, and fittings before blaming the cup.
    • If you change cup/diffuser setup, change one variable at a time and document results.

    Safety note

    Shielding gas displaces oxygen. Use ventilation appropriate for the space, and do not treat “no visible smoke” as “safe air.” If you’re welding stainless or anything with coatings, fume control matters.

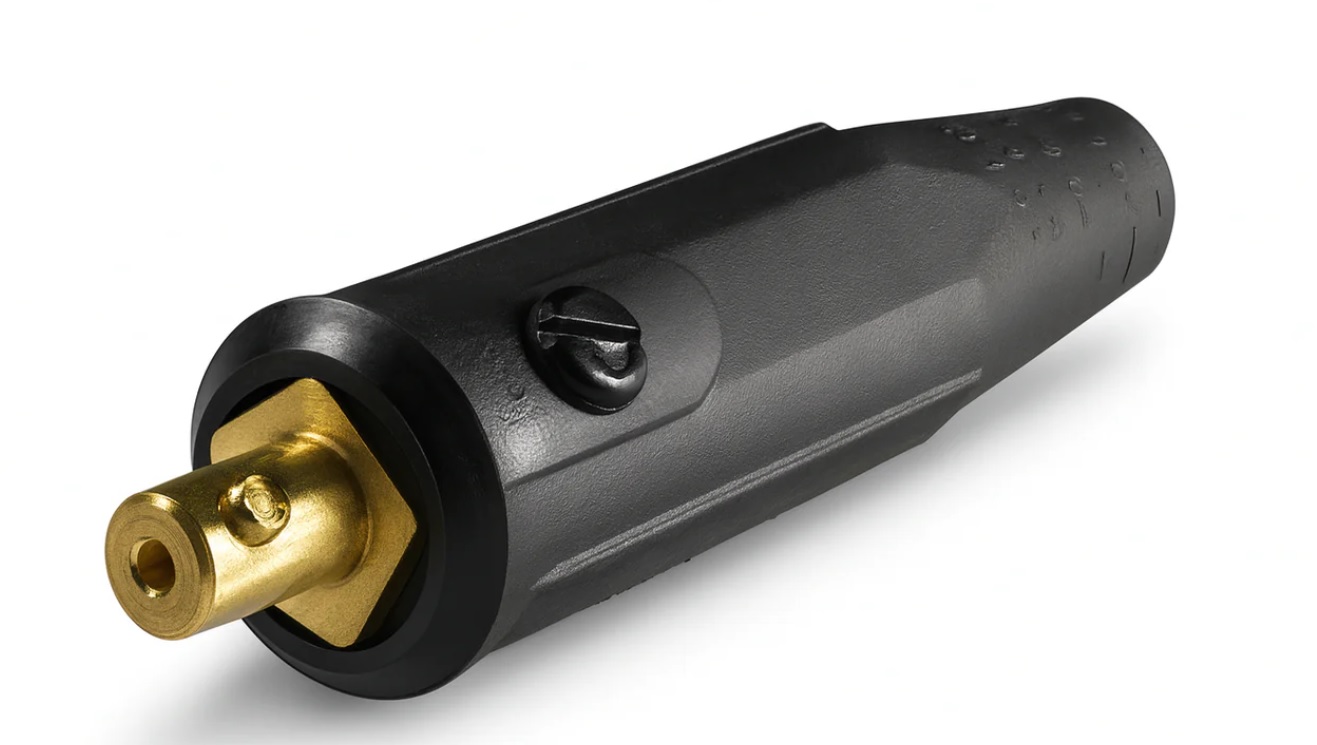
  • Miller 194722, Torch Adapter, Torch Di-917F, 125A to 150A (50 mm)

    Miller 194722, Torch Adapter, Torch Di-917F, 125A to 150A (50 mm)

    Intro
    If your TIG torch lead doesn’t match your machine’s output connector, you don’t have a welding problem—you have a fitment problem. The Miller 194722 torch adapter is meant to bridge that gap for specific air-cooled TIG torch setups. The key is verifying connector style and torch compatibility before you order.

    Key Takeaways

    • This is a fitment part. Confirm your machine output style and torch lead style first.
    • Compatibility is model- and connector-specific. If you guess, you’ll buy twice.
    • If any detail below is not confirmed for your setup, treat it as Unknown (Verify) and verify before purchase.

    Performance & Use
    This adapter is intended to connect certain air-cooled TIG torches to a specific output style. In practice, it matters most when you’re moving a torch between machines, upgrading to a machine with an international/DINSE-style output, or replacing a missing/incorrect adapter.

    What to compare before you buy

    • Machine output connection type (international/DINSE style vs other) — Unknown (Verify)
    • Output size: 50 mm is referenced for this part (verify your receptacle size)
    • Torch type and lead style (air-cooled, one-piece vs two-piece) — Unknown (Verify)
    • Torch family fitment: WP-17 / WP-9 / WP-50 / WP-3 are explicitly referenced for use (verify your exact torch variant)
    • Gas routing (gas-through vs separate line) — Unknown (Verify)

    Durability & Build
    Adapters fail from heat, poor contact, and repeated twisting. The practical check is whether the connection seats fully, locks correctly, and stays cool under normal duty. If the connection gets hot, stop and re-check contact surfaces and cable sizing (Unknown (Verify)).

    Power / Specs

    • Part number: 194722 (confirmed)
    • Described use: Air-cooled TIG torch adapter for Syncrowave 200 International (confirmed via manufacturer page)
    • Output size referenced: 50 mm (confirmed via ArcWeld.store snippet and common listing language; verify on your machine)
    • Amperage reference in name: 125A to 150A (as labeled; do not treat as a universal rating—verify for your torch/machine)

    Who It’s For

    • Shops running multiple TIG machines where torches get swapped
    • Anyone adapting a WP-17/WP-9-family air-cooled torch to a different output style
    • Maintenance teams replacing a missing adapter on legacy TIG equipment

    Quick FAQ
    Q: Will this fit every TIG machine with a DINSE connector?
    A: Unknown (Verify). “50 mm” is referenced, but connector standards and gas routing vary. Verify your machine’s output receptacle and torch lead type.

    Q: Does it work with water-cooled torches?
    A: Unknown (Verify). This part is described for air-cooled torch use; confirm your torch lead configuration.

    Q: What info should I email for fitment help?
    A: Machine model, torch model, and the exact part number you’re trying to fit. ArcWeld.store offers fitment help by email.

    Safety Notes (include verbatim closing line)
    A loose or incorrect connector can overheat, arc, and damage the machine output or torch lead. After installation, do a short test weld and check for heat at the connection.
    Always follow the manufacturer’s instructions and your shop’s safety procedures. If you’re unsure about fitment or ratings, verify before you buy or install.

    Where to Buy (ArcWeld.store link + optional Amazon fallback)

    ” target=”_blank” rel=”noreferrer noopener”>
    Miller 194722, Torch Adapter, Torch Di-917F, 125A to 150A

    Miller 194722, Torch Adapter, Torch Di-917F, 125A to 150A

    $60.20

    In Stock

    View Product
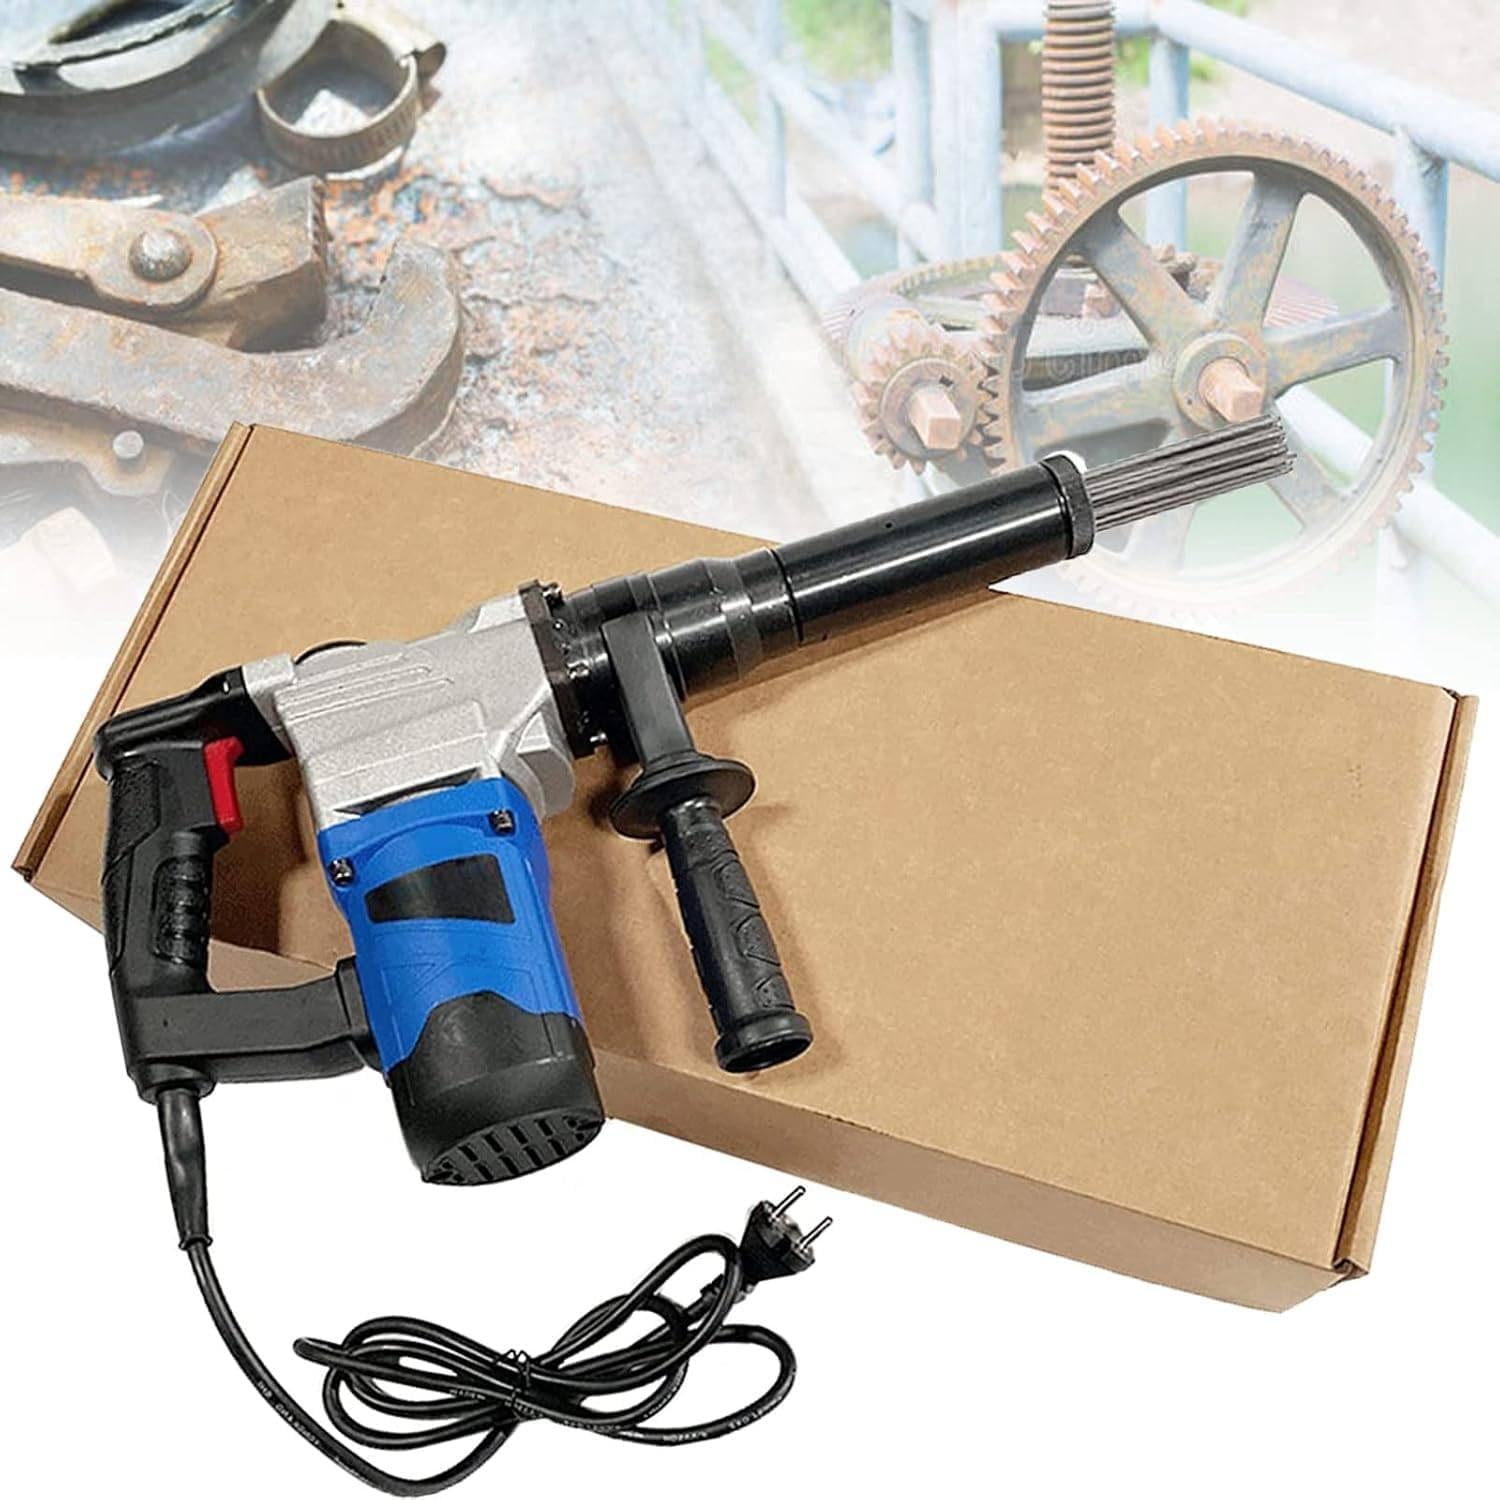
  • Needle Scaler for Welding Slag and Rust: When a Handheld Electric Needle Scaler Makes Sense

    Needle Scaler for Welding Slag and Rust: When a Handheld Electric Needle Scaler Makes Sense

    If you’re cleaning weld slag, heavy rust, or old coatings, a needle scaler can be the right tool—especially when a grinder is too aggressive or you need to get into texture and corners.

    This post is a practical buying guide built around one handheld electric needle scaler listing, with a focus on what to compare before you spend money and what to verify in the listing.

    Key Takeaways

    • Needle scalers are for chipping/peening action—good for slag, rust, and coatings in tight areas.
    • Electric models can be convenient, but you still need to verify voltage, duty cycle, and replacement needle availability.
    • Expect noise, vibration, and flying debris—PPE is not optional.
    • For flat surface blending, abrasives often finish cleaner than needle scaling.

    Product (Verified)

    No products found.

    What a needle scaler is best at A needle scaler uses multiple steel needles that rapidly strike the surface. That impact action is useful when you need to:

    • Break loose slag and spatter residue
    • Knock off flaking rust and scale
    • Strip coatings in uneven areas
    • Work around edges, corners, and textured surfaces

    It’s usually not the best tool for:

    • Final cosmetic finishing (it can leave a peened texture)
    • Precision prep on thin sheet (risk of distortion/marking)
    • Quiet/low-vibration work (it’s the opposite)

    Performance & Use A needle scaler is a “get it off” tool, not a “make it pretty” tool. In a welding workflow, it’s often used before switching to abrasives for blending, or before repainting/coating.

    What to compare before you buy

    • Voltage and plug requirements (verify your shop power matches the listing)
    • Duty cycle / run time limits (many handheld tools overheat if pushed)
    • Replacement needles availability and cost (consumable item)
    • Tool weight and vibration control (fatigue matters)
    • Intended use case: slag/rust/coatings vs fine finishing (don’t mix expectations)

    Comparable Amazon picks (optional)

    How to use a needle scaler without making a mess (or damaging work)

    • Start with light pressure and let the needles do the work
    • Keep the tool moving; don’t dwell in one spot
    • Use it for removal, then switch to abrasives if you need a smoother finish
    • Plan containment: chips and debris go everywhere

    Safety notes (quick) Needle scaling throws debris and is loud. At minimum: safety glasses + face shield, hearing protection, and gloves. If you’re removing coatings, assume unknown dust until proven otherwise—use ventilation and appropriate respiratory protection per your shop policy.

    Where to Buy (Amazon) GTANND Electric Needle Scaler listing (ASIN: B0D9N7RLDK)
    https://www.amazon.com/GTANND-Electric-Derusting-Hand-Held-Portable/dp/B0D9N7RLDK?tag=weldsupport-20

  • Listen with Audible