Author: Adam

  • Jackson Safety 14834 SC-6 Hard Hat Review: Basic Head Protection for Shop and Jobsite Use

    Affiliate disclosure: This post may contain Amazon affiliate links. As an Amazon Associate, we may earn from qualifying purchases.

    Last update on 2026-06-04 / Affiliate links / Images from Amazon Product Advertising API

    Key Takeaways

    • Jackson Safety 14834 SC-6 is a white hard hat/head protection option with 4-point suspension.
    • Listed specs show HDPE blended plastic construction, medium size, and 1.88 lb item weight.
    • Best fit: weld shops, fabrication areas, maintenance crews, and general industrial environments where head protection is required.
    • Confirm current Amazon availability before publishing, because this ASIN appears in multiple Amazon regions and third-party listings.

    What Is the Jackson Safety 14834 SC-6?

    The Jackson Safety 14834 SC-6 is a basic white hard hat designed for industrial head protection. It uses a smooth dome-style shell and 4-point suspension system, making it a straightforward option for shop, maintenance, and jobsite use.

    This is not a welding helmet and does not protect your eyes from arc flash. It is head protection only. Welders still need proper welding eye and face protection when striking an arc.

    Best Uses

    The SC-6 makes sense for:

    • Fabrication shops
    • Maintenance departments
    • Construction sites
    • General industrial work
    • Areas requiring basic overhead head protection

    It is most useful when you need a hard hat for general shop safety, not a specialty welding hood or face shield setup.

    Specs

    ModelKey SpecsBest For
    Jackson Safety 14834 SC-6White, 4-point suspension, HDPE blended plastic, Medium, 1.88 lb listed weightBasic head protection in shop/jobsite settings

    Safety Notes

    A hard hat does not replace welding PPE. When welding, cutting, or grinding, use the correct helmet, safety glasses, face shield, gloves, FR clothing, and respiratory protection where needed.

    Check your jobsite requirements before use. Hard hats should be inspected regularly for cracks, deformation, damaged suspension, UV degradation, or impact damage. Replace damaged head protection instead of trying to reuse it.

    Where to Buy

    Amazon option:

    Last update on 2026-06-04 / Affiliate links / Images from Amazon Product Advertising API

    Arc Weld Store availability: Unknown.

    FAQ

    Is the Jackson Safety SC-6 a welding helmet?

    No. It is head protection, not a welding helmet. You still need a proper welding helmet for arc welding.

    What color is this model?

    This ASIN is listed as white.

    What suspension does it use?

    Listings show a 4-point suspension.

    Is this ANSI rated?

    Some listings show ANSI Z87.1, but that standard is usually associated with eye/face protection, not hard-hat impact classification. Verify the exact head protection rating from the manufacturer or product packaging before relying on it for a regulated jobsite.

    Should I use this for grinding?

    Only as head protection. For grinding, use safety glasses and/or a face shield rated for the task.

  • Weldmark 13N26 TIG Collet Body Review: .040″ Replacement Parts for #9, #20, and #25 TIG Torches

    If your TIG torch setup uses a #9, #20, or #25 style torch, the Weldmark 13N26 collet body is a small but important consumable to keep on hand. This 5-pack is made for .040″ tungsten setups and helps hold the collet and tungsten in the proper position during TIG welding.

    Weldmark TIG Collet Body #9, 20, 25 Torch Pk = 5 (13N26 – .040″)
    • Weldmark by CK Worldwide
    • Used with #9, 20, and 25 Tig Torches

    Last update on 2026-06-04 / Affiliate links / Images from Amazon Product Advertising API

    Key Takeaways

    • Fits #9, #20, and #25 TIG torch styles.
    • Made for .040″ tungsten setups.
    • Sold as a 5-pack.
    • Useful for shop inventory, repair kits, and TIG consumable drawers.
    • Verify torch compatibility before ordering.

    What This Product Is

    The Weldmark 13N26 is a TIG torch collet body. It threads into the front end of a compatible TIG torch and works with the collet, tungsten, cup, and back cap to hold the electrode securely.

    This part is listed for:

    ItemDetail
    ProductWeldmark TIG Collet Body
    Part Number13N26
    Tungsten Size.040″
    Torch Fitment#9, #20, #25
    Pack Size5
    ASINB071LQVCMK

    Best For

    This part is best for welders who already run #9, #20, or #25 TIG torches and need replacement front-end consumables.

    Common use cases:

    • TIG torch maintenance
    • Replacing worn collet bodies
    • Stocking consumables for a fab shop
    • Keeping spare TIG parts in a service kit
    • Supporting .040″ tungsten applications

    Pros and Cons

    Pros

    • Comes in a 5-pack
    • Common TIG consumable size
    • Fits popular #9, #20, and #25 torch styles
    • Small part that is easy to stock in bulk

    Cons

    • Only for .040″ tungsten
    • Not universal across all TIG torches
    • Specs should be verified against your torch setup before buying

    Compatibility Notes

    This listing indicates compatibility with #9, #20, and #25 TIG torches. Before ordering, confirm:

    • Your torch series
    • Tungsten diameter
    • Existing collet body part number
    • Cup and collet compatibility

    If you are switching tungsten sizes, you may also need matching collets and cups.

    Where to Buy

    Amazon option:

    Weldmark TIG Collet Body #9, 20, 25 Torch Pk = 5 (13N26 – .040″)
    • Weldmark by CK Worldwide
    • Used with #9, 20, and 25 Tig Torches

    Last update on 2026-06-04 / Affiliate links / Images from Amazon Product Advertising API

    Affiliate disclosure: As an Amazon Associate, Weld Support Parts may earn from qualifying purchases.

    Safety Notes

    TIG torch consumables are small parts, but they still affect weld quality and torch reliability. Always inspect your torch front end before welding.

    Basic checks:

    • Confirm all torch parts are tight before use.
    • Do not weld with damaged cups, collets, or collet bodies.
    • Wear proper welding PPE.
    • Use ANSI Z87.1-rated eye protection when grinding, cutting, or working near welding operations.
    • Follow your machine, torch, and tungsten manufacturerโ€™s setup guidance.

    FAQ

    What torch does the Weldmark 13N26 fit?

    This listing identifies it for #9, #20, and #25 TIG torch styles.

    What tungsten size is this for?

    This version is for .040″ tungsten.

    Is this a single part or a pack?

    This listing is for a 5-pack.

    Will this fit every TIG torch?

    No. TIG torch parts are not universal. Verify your torch series and part number before ordering.

    What other parts may I need with it?

    Depending on your setup, you may also need matching collets, cups, back caps, and tungsten.

    Sources Checked

    • Uploaded Arc Weld / Amazon inventory export
    • Product title and ASIN from inventory file
    • Unknown specs not confirmed beyond uploaded product data

  • Plasma Cutter Wonโ€™t Pierce Metal: Causes and Fixes

    A plasma cutter that fails to pierce metal will produce arc instability, excessive spatter, or no full penetration. This issue is typically related to air supply, consumable wear, or incorrect setup parameters. Identifying the restriction point in the system is critical for restoring proper cut initiation.

    Key Takeaways

    • Insufficient air pressure is a leading cause of failed pierce
    • Worn consumables disrupt arc focus and energy transfer
    • Incorrect amperage or travel setup prevents full penetration
    • Material thickness must match machine capability

    Problem / Context

    Plasma cutting relies on a high-velocity ionized gas stream to melt and eject metal. When the system cannot pierce, the arc may start but fail to transfer enough energy into the material. This results in surface gouging instead of a full cut-through.

    Root Causes

    • Low air pressure or flow: weak arc and poor metal ejection
    • Moisture in air supply: destabilizes plasma arc
    • Worn electrode or nozzle: reduces arc concentration
    • Incorrect amperage setting: insufficient heat input
    • Excessive stand-off distance: arc loses intensity before contact
    • Material too thick: exceeds machine rating

    Solution / Explanation

    • Verify air compressor output meets cutter requirements (pressure and CFM)
    • Install a moisture separator or dryer to remove water contamination
    • Inspect and replace consumables if wear is visible
    • Set amperage appropriate to material thickness
    • Maintain correct torch height during pierce and cut
    • Confirm material thickness is within rated capacity

    Specs / Verification Notes

    • Air Pressure Requirement: Unknown (Verify)
    • Air Flow (CFM): Unknown (Verify)
    • Amperage Range: Machine dependent
    • Maximum Pierce Thickness: Unknown (Verify)
    • Consumable Type: Model-specific

    Comparison Table

    IssueSymptomCorrection
    Low Air PressureWeak arc, no penetrationIncrease PSI/CFM
    Worn ConsumablesWide arc, spatterReplace electrode/nozzle
    Moisture in AirArc instabilityAdd dryer/filter
    Incorrect SettingsIncomplete pierceAdjust amperage

    Safety Notes

    Follow ANSI Z49.1 for safe cutting practices. Ensure proper ventilation and use appropriate eye and face protection rated for plasma cutting. Disconnect power before servicing consumables or air systems.

    FAQ

    Why wonโ€™t my plasma cutter pierce thick steel?

    The material may exceed the machineโ€™s rated pierce capacity or settings may be too low.

    Does air pressure affect piercing?

    Yes. Low pressure reduces arc force and prevents molten metal from being expelled.

    How often should consumables be replaced?

    Replace when wear is visible or cut quality declines. Frequency depends on usage and material.

    Next Step

    Check air supply and inspect consumables before the next cut. Correct setup and maintenance resolve most piercing failures without equipment changes.

    Sources Checked

    • ANSI Z49.1 Safety in Welding and Cutting
    • Plasma cutter manufacturer manuals (general reference)
    • Air compressor and filtration guidelines
  • 7018 Rod Sticking: Causes & Solutions

    Introduction

    Welding with 7018 rods can be challenging, especially when they start sticking during operation. This issue not only affects the quality of the weld but also disrupts workflow. Understanding the underlying causes and solutions can help welders achieve more efficient results.

    Key Takeaways

    – 7018 rods are prone to sticking due to improper technique or settings.
    – Correct amperage and angle can reduce sticking.
    – Proper rod storage is crucial for optimal performance.
    – Using the right equipment can significantly improve weld quality.

    Problem / Context

    Sticking occurs when the electrode fuses to the workpiece, interrupting the arc and making it difficult to complete the weld. This is a common issue with 7018 rods, which require precise conditions to function correctly.

    Causes

    Low Amperage

    – Inadequate amperage fails to sustain the arc, causing the rod to stick.

    Incorrect Angle

    – Holding the rod at an incorrect angle reduces arc stability.

    Poor Rod Condition

    – Moisture absorption in 7018 rods can lead to sticking.

    Fixes

    Step 1: Adjust Amperage

    Increase Amperage: Slowly increase amperage until the arc is stable and the rod flows smoothly without sticking.

    Step 2: Correct Angle

    Maintain a 10-15 Degree Angle: Keep the rod at a consistent angle to ensure smooth arc movement.

    Step 3: Ensure Dry Storage

    Proper Storage: Store rods in a dry, sealed container or rod oven to prevent moisture absorption.

    Step 4: Consistent Movement

    Steady Motion: Employ a steady, consistent movement along the weld joint to reduce sticking.

    Product Section

    Washington Alloy 7018 Stick Electrode 5LB Package (7018 1/8″)
    • All-position, Flux coated
    • 70,000 lbs Tensile Strength
    • 5 Lb Package

    Last update on 2026-06-04 / Affiliate links / Images from Amazon Product Advertising API

    Safety Notes

    Eye Protection: Follow ANSI Z87.1 standards for eye protection.
    Welding Codes: Adhere to AWS D1.1 and D1.3 for safe and effective welding practices.

    FAQ

    What amperage should be used for 7018 rods?

    Amperage settings typically range from 90 to 160 amps, depending on the rod diameter. Adjust based on welding parameters and practice.

    How should 7018 rods be stored?

    Store in a temperature-controlled rod oven at 250ยฐF (121ยฐC) to keep them dry and prevent moisture absorption.

    Can rod sticking damage my welding machine?

    Prolonged sticking can overheat and damage your welding machine, so it’s vital to address issues promptly.

    Conclusion / Next Step

    Addressing 7018 rod sticking involves proper technique and equipment adjustments. By implementing these solutions, welders can enhance their welding performance and minimize disruptions. For more tips on stick welding, explore additional resources and comparisons of welding rods like 7018 vs 6011.

  • TIG Tungsten Contamination: Causes and Prevention Guide

    Intro

    TIG tungsten contamination is a common issue that can compromise weld quality and integrity. Understanding its causes and implementing effective prevention techniques is essential for achieving optimal TIG welding results. This guide will explore the underlying causes of contamination and present practical solutions.

    Key Takeaways

    – Tungsten contamination negatively impacts weld quality.
    – Proper handling and storage are crucial.
    – Correct torch angle and distance minimize contamination.
    – Contamination can lead to additional costs due to rework.
    – Regular maintenance is essential.

    Problem / Context

    TIG tungsten contamination often leads to poor welds, characterized by inclusions and brittleness. These imperfections can compromise structural integrity and require time-consuming rework.

    Causes

    Improper Handling: Touching the tungsten electrode with fingers can introduce oils.
    Contaminated Shielding Gas: Moisture or impurities in the gas can cause contamination.
    Incorrect Torch Setup: Incorrect angle or distance from the workpiece can increase contamination risks.
    Machine Settings: Improper settings can lead to arc instability, causing contamination.

    Fixes

    1. Handling and Storage
    – Use clean gloves when handling electrodes.
    – Store tungsten in a clean, dry environment.

    2. Torch Setup
    – Maintain a 15-degree torch angle.
    – Keep a steady distance from the workpiece, approximately 1/8 inch (3.2 mm).

    3. Gas Purity
    – Ensure the use of high-quality gas.
    – Regularly inspect and replace gas hoses.

    4. Machine Settings
    – Calibrate equipment according to material specifications.
    – Regularly check connections for leaks.

    5. Routine Maintenance
    – Regularly sharpen tungsten electrodes.
    – Clean welding surface before starting.

    Product Section

    CK T3327GT2 2% Thoriated Tungsten Electrode 3/32″ X 7″, 10 pack
    • 2% Thoriated (Red) EWTh-2/WT20
    • Principal Oxide: 1.7โ€“2.2% Thorium Oxide
    • Radioactive. Best for use in Direct Current (D/C) applications using transformer based constant current power sources.
    • Best for use on non corroding steels, titanium alloys, nickel alloys, copper alloys
    • Good D/C arc starts and stability, medium erosion rate, medium amperage range, medium tendency to spit.

    Last update on 2026-06-04 / Affiliate links / Images from Amazon Product Advertising API

    Safety Notes

    – Comply with ANSI Z87.1 to protect eyes from UV exposure.
    – Follow AWS D1.1/D1.3 standards to ensure safety compliance.

    FAQ

    1. What causes tungsten contamination?
    – It’s mainly due to improper handling, contaminated gas, and incorrect torch setup.

    2. How can I prevent tungsten contamination?
    – Proper electrode handling and maintaining a clean working environment are key.

    3. Why does gas quality matter?
    – Impure gas can introduce contaminants into the weld pool.

    4. What torch angle should I use?
    – A 15-degree angle is typically optimal.

    5. How often should tungsten be inspected?
    – Before each welding session to ensure its integrity.

    Conclusion / Next Step

    Preventing TIG tungsten contamination requires vigilance, proper technique, and routine maintenance. By understanding its causes and implementing these preventative steps, welders can achieve cleaner, more reliable welds. For more advanced tips, consider exploring TIG Welding Tips and the Tungsten Types Guide.

  • Why Your MIG Weld Has Porosity (and How to Fix It Fast)

    Porosity in MIG welding shows up as pinholes or small voids in the weld bead. It weakens the weld and usually points to shielding gas failure or contamination. This guide breaks down the exact causes and the fastest way to fix it using proper setup and wire selection.

    Key Takeaways

    • Porosity is caused by poor shielding gas coverage or contamination
    • Dirty metal and bad wire are the most common causes
    • Gas flow, nozzle condition, and wire choice fix most issues
    • ER70S-6 wire helps reduce porosity on less clean steel

    What Causes MIG Weld Porosity

    Porosity occurs when atmospheric gases get trapped in the weld pool as it solidifies. In MIG welding, shielding gas is supposed to prevent this. When coverage fails, defects form.

    • Low shielding gas flow
    • Wind or airflow disrupting gas
    • Dirty or oily metal
    • Rusty or contaminated wire
    • Improper stickout or angle
    • Clogged nozzle or diffuser

    How to Fix MIG Porosity

    • Set gas flow to 20โ€“30 CFH (verify for your setup)
    • Keep stickout around 3/8โ€โ€“1/2โ€
    • Clean metal to bare steel
    • Check for gas leaks
    • Replace worn nozzle or diffuser
    • Switch to ER70S-6 wire if needed

    Recommended Wire for Reducing Porosity

    Hobart ER70S-6 MIG Welding Wire (.030โ€)


    Type: Solid MIG wire

    Diameter: .030โ€

    Material: Mild steel

    Deoxidizers: Higher than ER70S-3

    Specs: Unknown (Verify)

    Hobart H305406-R22 10-Pound ER70S-6 Carbon-Steel Solid Welding Wire, 0.030-Inch
    • Carbon-steel sound, porosity-free welds with powerful deoxidizers for your work with shielding gases.
    • Great for construction work, farm implement fabrication, shaft buildup, tanks, truck bodies and general shop applications with poor fit-up or rusty, oily plates.
    • 10-Pound spool
    • Country of Origin: Made in China

    Last update on 2026-06-04 / Affiliate links / Images from Amazon Product Advertising API


    ER70S-6 wire is more forgiving on dirty steel and helps reduce porosity compared to ER70S-3.

    Gas Flow Setup

    • Typical: 20โ€“30 CFH (verify)
    • Too low = poor coverage
    • Too high = turbulence
    • Avoid drafts when welding

    Wire Comparison

    WireKey DifferenceBest Use
    ER70S-6More deoxidizersDirty steel
    ER70S-3Cleaner arcClean material

    Safety Notes

    Use ANSI Z87.1 compliant eye protection and proper PPE. Ensure ventilation and follow AWS welding safety guidelines.

    FAQ

    Q: Can too much gas cause porosity?
    A: Yes. It can create turbulence and pull in air.

    Q: Does wire matter?
    A: Yes. ER70S-6 is more forgiving on dirty steel.

    Next Step

    Check your gas flow and nozzle first. If needed, switch to ER70S-6 wire and clean your material before welding.

  • Ground Clamp Replacement Guide: FGC200 200 Amp Clamp for Welding Setups

    Why this matters

    A weak ground clamp causes arc instability, poor starts, and wasted time. If the clamp is loose, corroded, or undersized for the job, the machine cannot deliver a consistent return path.

    For a simple replacement path, the FGC200 Ground Clamp 200 Amp is a verified option to check first. The key is matching the clamp to the current load and the cable setup you already run.

    When to replace the clamp

    • Arc starts are erratic
    • The clamp jaws are dirty or burnt
    • The spring tension is weak
    • The cable connection is damaged
    • You need a new clamp for a 200 amp class setup

    Compatibility table

    Part typePart numberCompatible modelsNotesUse cases
    Ground clampFGC200Welding setups using a 200 amp clamp classConfirm cable lug size and connection method before orderingMIG, TIG, Stick return path
    Work clampFGC200General welding machine ground leadsMatch amperage needs to the workpiece and cable sizeShop and field welding

    Copy table

    AAWP box: 

    Last update on 2026-06-04 / Affiliate links / Images from Amazon Product Advertising API

    What to verify before you buy

    • Cable connection style
    • Lug or clamp attachment method
    • Current demand of the machine and workpiece
    • Clamp jaw condition and contact surface

    Recommended use case

    Choose this clamp if you need a straightforward replacement for a worn ground clamp in a 200 amp class setup and want a simple upgrade path without changing the rest of the lead assembly.

    Safety note

    Shut the machine off before replacing the clamp. Make sure the work lead is connected correctly and the contact surface is clean. For structural work, follow the applicable welding procedure and code requirements.

  • TIG Gas Lens Compatibility Guide: 45V26 Gas Lens for WP-17, WP-18, and WP-26 Torches

    Why this matters

    If your TIG arc is wandering, the tungsten is overheating, or shielding gas coverage is inconsistent, the gas lens setup may be the problem. A correct gas lens collet body helps smooth gas flow and improves shielding around the tungsten.

    If you are setting up a WP-17WP-18, or WP-26 style torch, the 45V26 family is a common front-end consumable to verify first. This guide is about fitment, not guesswork. Check the torch body, tungsten size, and cup setup before ordering.

    When to replace or upgrade the front end

    • Arc starts feel unstable
    • Gas coverage looks uneven
    • Tungsten contamination happens often
    • The collet body is worn, pitted, or damaged
    • You need a setup matched to a standard TIG torch body

    Compatibility table

    Part typePart numberCompatible modelsVerifiedNotesUse cases
    Gas lens collet body45V26WP-17, WP-18, WP-26Verified on Amazon listing3/32″ size listed; confirm tungsten diameter before orderingGeneral TIG front-end setup
    Gas lens body45V2617/18/26-style TIG torchesVerified on Amazon listingCheck cup and collet compatibility before installMild steel, stainless, aluminum TIG work

    Copy table

    AAWP box: 

    STARTECHWELD 45V26 TIG Gas Lens 3/32โ€ Gas Lens collet body Fit TIG WP17, WP18, WP26 (5 Pack) 45V26
    • TIG Gas Lens 45V26 Tig Torch Gas Lens 3/32โ€
    • Work With: TIG 17, 18, 26 Series Torches
    • 3/32″ Tungsten Electrodes Standard 10N Series Collet
    • 54N Series Gas Lens Ceramic Cups Setup
    • Pack of 5

    Last update on 2026-06-04 / Affiliate links / Images from Amazon Product Advertising API

    What to verify before you buy

    • Torch model:ย WP-17,ย WP-18, orย WP-26
    • Tungsten diameter: match theย 3/32″ย size if that is your setup
    • Cup size: confirm your cup and back cap arrangement
    • Collet body thread and front-end style: match the torch family, not just the size

    Recommended use case

    Choose this setup if you want a standard TIG consumable path for a common 17/18/26-series torch and you need a verified 45V26 replacement path.

    Safety note

    Disconnect power before changing TIG consumables. Verify torch and consumable fitment against the manufacturer documentation before use. For procedure-controlled welding, follow the applicable welding code and work instructions.

  • Best MIG Contact Tips for Burnback Prevention

    If your MIG gun keeps burning back to the tip, the problem is usually not the whole gun. It is often the contact tip, tip size, wire fit, or feed consistency. That is where a simple consumable choice can make a real difference.

    For this guide, the main focus is a practical MIG contact tip setup for .035 wire and common Lincoln/Tweco style guns. Fitment matters. Verify your gun series before ordering.

    What burnback usually means

    Burnback happens when the wire melts back into the contact tip before the feed system can push fresh wire forward. The tip overheats, the arc gets unstable, and the wire can fuse to the tip.

    What to check first

    • Contact tip size matches the wire diameter.
    • Tip is not worn oval or cratered.
    • Wire feed is smooth with no drag.
    • Liner, drive rolls, and tension are set correctly.
    • Stickout and travel speed are consistent.

    Good fitment target

    For many common MIG setups, a standard .035 contact tip in the 11-35 style is a practical choice when you are running .035 wire. If you are using a different wire size, match the tip to the wire โ€” do not force the fit.

    Where this helps most

    This is useful on general fab, repair work, and shop maintenance where you want a steady arc and less downtime. If your system is already clean and the wire feed is stable, a fresh correctly sized tip can solve a lot of โ€œbad welderโ€ complaints fast.

    See the full burnback fix guide for more troubleshooting steps.

    Read the burnback troubleshooting article for a deeper breakdown of causes.

    Check the wire feed slipping guide if the wire is not feeding consistently.

    See the MIG gun trigger switch repair post if your gun has an intermittent trigger.

    Where to buy

    No products found.

    Bottom line

    A correctly sized contact tip will not fix every MIG problem, but it is one of the first consumables to inspect when burnback starts. Start with fitment, then check the feed path, then tune the settings.

    Meta Title: Best MIG Contact Tips for Burnback Prevention | WSP

    Meta Description: Learn how to choose MIG contact tips that reduce burnback, improve wire feed consistency, and keep your arc stable on common shop setups.

    Focus Keyword: MIG contact tips for burnback

    Tags: MIG contact tips, burnback, MIG burnback, wire feed, contact tip size, welding consumables, MIG gun parts, Tweco MIG gun, Lincoln Magnum, welding troubleshooting

  • Miller LPR-100 Gen II Half Mask Respirator (low-profile under-helmet design)

    If your main requirement is โ€œfits under my hood,โ€ the LPR-100 is one of the few half masks designed specifically around that constraint. The filter layout stays tight to the face to reduce interference with the helmet shell and bib.
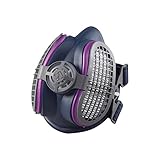
    No products found.

    Manufacturer-sourced specs (verify exact variant/size)

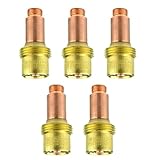
    • Filter type: P100 particulate filter
    • Filtration efficiency: 99.97% (P100 class)
    • Design intent: low-profile to fit under most welding helmets
    • Sizes: S/M and M/L (choose for seal, not โ€œwhat you usually wearโ€)

    Best for

    • MIG and stick welding in shops where you need a practical under-hood solution
    • Anyone who keeps abandoning bulky respirators because they wonโ€™t clear the helmet

    Watch-outs

    • Fit is everything: do a seal check every time you don it. If it leaks, it doesnโ€™t matter what the label says.

    GVS Elipse P100 (SPR457 M/L)

    The Elipse is popular for one reason: itโ€™s compact. The filters sit close to the cheeks, which can reduce the โ€œmask hits the hoodโ€ problem compared to many cartridge-style respirators.

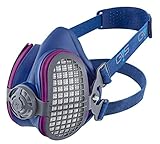
    GVS SPR457 Elipse P100 Dust Half Mask Respirator with replaceable and reusable filters included, blue, m/l size
    • This mask is recommended for dust and fumes containing substances such as micro-organisms, marble, gypsum, titanium oxide, soapstone, rock wool, wood, detergents, textile fibres, spices, salt, animal feeds, etc.. Protects against dust that can cause lung disease. In particular, protects against coal, silica, cotton, iron ore, graphite, kaolin, zinc, aluminium dusts. Protects against harmful dusts such as asbestos, bauxite, coal, silica, iron, and against toxic dusts.
    • Extremely lightweight and compact to give the wearer as much comfort as possible. It offers a full range of vision without interfering with other eye or ear protection which users are required to wear.
    • Low breathing resistance to reduce the risk of user fatigue and to add additional comfort. Filters last up to 5 years and can be easily replaced.
    • Made from soft thermoplastic odorless elastomer that is hypoallergenic (without latex and silicone) and an easy-to-adjust headband
    • NIOSH Approval number: P100 TC-84A-6949. Elipse P100 respirator has met the requirements of 42CFR84 (Code of Federal Regulations).

    Last update on 2026-06-04 / Affiliate links / Images from Amazon Product Advertising API

    Manufacturer-sourced specs (verify exact model)

    • Approval: NIOSH P100
    • Intended protection: harmful dusts and metal fumes (per manufacturer wording)
    • Filter type: pleated HESPA P100 style (manufacturer terminology varies by region)
    • Form factor: compact twin-filter half mask

    Best for

    • Tight-clearance helmets and welders who need a slim profile for fitment
    • Grinding + welding workflows where you want one compact half mask (with correct filters)

    Watch-outs

    • Comfort is user-specific. If the seal pressure points you, youโ€™ll stop wearing itโ€”size correctly.

    3M 7502 Half Facepiece (7500 Series)

    This is the โ€œbuild a systemโ€ option. The 7500 series facepiece is known for comfort, and the bayonet connection opens up a wide range of 3M filters/cartridgesโ€”useful if you switch between particulate-only and nuisance/OV situations (based on your hazard assessment).

    Last update on 2026-06-04 / Affiliate links / Images from Amazon Product Advertising API

    Manufacturer-sourced specs (series-level; verify exact configuration)

    • Facepiece material: silicone
    • Connection: 3M bayonet-style filter/cartridge interface
    • Suspension: drop-down style (helps doff without removing hard hat/hood in some setups)
    • Size: 7502 = Medium (in the 7500 series sizing)

    Best for

    • Welders who prioritize comfort and want flexible filter options
    • Shops standardized on 3M cartridges/filters

    Watch-outs

    • Cartridge/filter choice changes profile. Some combinations will fit under a hood; some wonโ€™t. Keep it low-profile if โ€œunder helmetโ€ is the goal.

    TOP PICK (plain text callout)

    TOP PICK: Miller LPR-100 Gen II โ€” If your #1 requirement is โ€œfits under my welding helmet,โ€ start here. Itโ€™s purpose-built around low-profile clearance, which is the usual deal-breaker with half masks.


    Buying Guide: how to choose a respirator that fits under a welding helmet

    1. Prioritize seal over brand
      A perfect โ€œunder-helmetโ€ shape that leaks is a fail. Choose the size that seals on your face, then solve clearance.
    2. Keep the filter profile tight
      Under-hood fit usually fails at the cheeks. Compact filters (or low-profile P100 designs) reduce helmet interference.
    3. Match filters to the job (donโ€™t guess)
    • Welding fume and grinding dust often point you toward P100 particulate filtration.
    • If you have solvents/paint/cleaners in the area, you may need additional cartridge capability (follow your shopโ€™s safety program).
    1. Donโ€™t ignore ventilation and capture
      A respirator is not a substitute for fume extraction. If you can add local capture, do itโ€”less exposure, less filter loading, better visibility.
    2. Do a quick fit check every time
      Negative/positive pressure checks take seconds and prevent hours of exposure.

    FAQ

    Q1) Whatโ€™s the best welding respirator that fits under a helmet?
    For most people, itโ€™s the one that seals correctly and stays low-profile at the cheeks. Purpose-built low-profile designs (like the LPR-100 style) are often the easiest starting point.

    Q2) Do I need P100 filters for welding?
    Many welding and grinding exposures are particulate-based, where P100 is commonly used. Your exact needs depend on the materials, coatings, ventilation, and your shopโ€™s safety requirements.

    Q3) Why does my respirator break seal when I drop my hood?
    Usually the helmet shell contacts the filter area and shifts the mask. Fix it by switching to a lower-profile filter design, adjusting headgear, or changing helmet clearance.

    Q4) Can I wear a half-mask with safety glasses under a hood?
    Yes, but fogging and seal interference are common. Anti-fog eyewear, proper hood ventilation, and correct strap routing help. If glasses break the seal, address that first.

    Q5) When should I step up to a PAPR?
    If you canโ€™t get a reliable seal, you have high fume loads, or you need higher comfort for long shifts, a PAPR may be the practical solution (shop policy and budget permitting).


    Safety Notes (ANSI/ISEA Z87.1 + PPE reminders)

    • Wear ANSI/ISEA Z87.1 compliant eye protection under the hood when required by your environment and task.
    • Respiratory protection only works when it seals and is worn consistently. Facial hair can prevent a proper seal on tight-fitting respirators.
    • Use fume extraction when possible, maintain adequate ventilation, and follow your shopโ€™s hazard assessment and PPE program.
    • Replace filters per manufacturer guidance and when breathing resistance increases or filters are damaged/loaded.
Listen with Audible