Author: Adam

  • How to Reduce TIG Tungsten Grinding Dust in a Small Shop

    How to Reduce TIG Tungsten Grinding Dust in a Small Shop

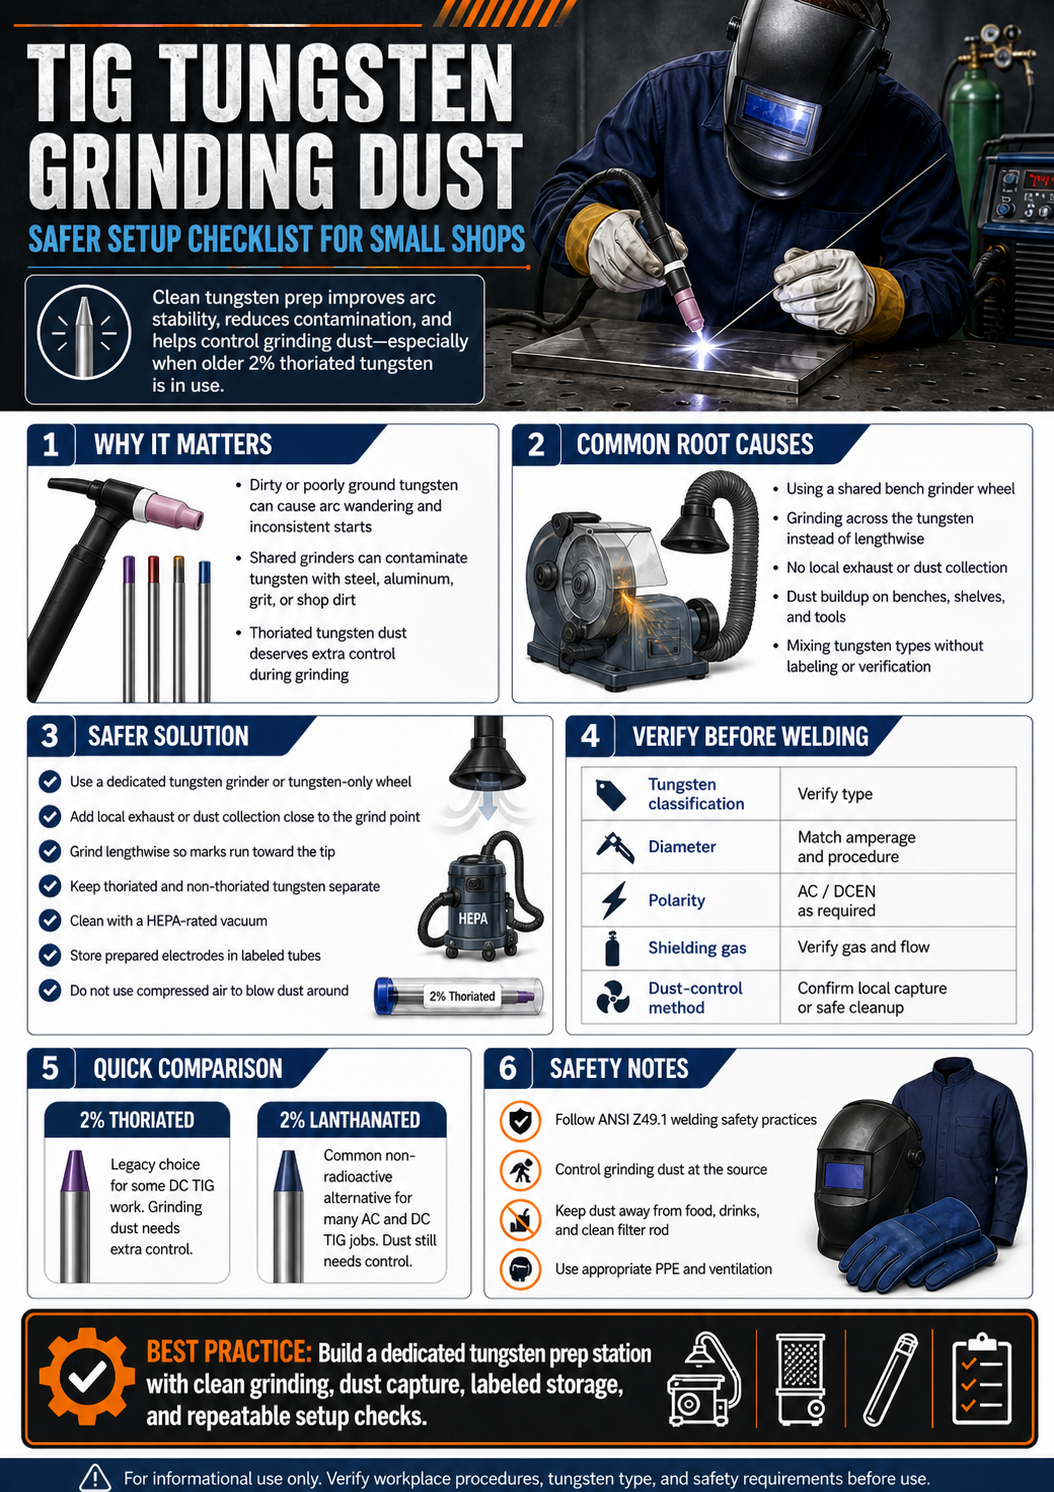
    TIG welding often depends on a clean, consistent tungsten point. The problem is that grinding tungsten electrodes can create fine dust, especially when older 2% thoriated tungsten is used. A simple shop setup can reduce exposure, improve point consistency, and keep tungsten prep from contaminating other grinding work.

    Key Takeaways

    • Dedicated tungsten grinding is cleaner than using a shared bench grinder wheel.
    • Thoriated tungsten grinding dust deserves extra control because thorium is radioactive.
    • Local exhaust, dust collection, and good housekeeping are more important than speed.
    • Lanthanated tungsten is a common non-radioactive alternative for many AC and DC TIG jobs.
    • Always verify tungsten type, diameter, current range, and job procedure before changing electrodes.

    Problem / Context

    A small TIG station may have a good machine, clean filler rod, and proper shielding gas, but still struggle with arc wandering, tungsten inclusions, and inconsistent starts. One overlooked cause is poor tungsten preparation. A shared grinder can load the tungsten with steel, aluminum, abrasive grit, or shop dirt. A poorly controlled grind can also send fine tungsten dust into the work area.

    This matters most when grinding thoriated tungsten. AWS safety guidance notes that thoriated tungsten contains thorium and that grinding dust can create an inhalation or ingestion concern. The safest approach is to control dust at the source and avoid casual dry grinding in open shop air.

    Root Causes

    • Using a shared grinder wheel that has already touched steel, stainless, or aluminum.
    • Grinding across the tungsten instead of lengthwise with the electrode axis.
    • Using thoriated tungsten without a dust-controlled sharpening process.
    • Letting grinding dust accumulate on benches, grinder guards, shelves, or nearby tools.
    • Switching tungsten types without checking procedure requirements and arc performance.
    • Using the wrong tungsten diameter for the amperage range. Unknown (Verify).

    Solution

    Set up a dedicated tungsten prep area instead of treating tungsten sharpening as a general grinding task. The setup should include a dedicated grinding surface, controlled dust capture, clear labeling for tungsten types, and a cleaning method that does not blow dust into the air.

    • Use a dedicated tungsten grinder, diamond wheel, or tungsten-only grinding attachment.
    • Position local exhaust or dust collection close to the grinding point.
    • Grind lengthwise so grind marks run toward the electrode tip.
    • Keep thoriated tungsten separate from lanthanated, ceriated, or other non-thoriated electrodes.
    • Clean with a HEPA-rated vacuum or other approved dust-control method. Do not use compressed air to scatter dust.
    • Store prepared tungstens in labeled tubes so clean points do not pick up bench contamination.

    Specs / Verification Notes

    Item to VerifyWhy It MattersStatus
    Tungsten classificationConfirms whether the electrode is thoriated, lanthanated, ceriated, pure tungsten, or another type.Unknown (Verify)
    Tungsten diameterDiameter must match the machine setting, torch capacity, and job procedure.Unknown (Verify)
    Welding polarityDCEN, AC, and special waveforms may require different tungsten choices and tip geometry.Unknown (Verify)
    Shielding gasGas type and flow affect arc behavior and tungsten life.Unknown (Verify)
    Dust-control methodOpen grinding is not the same as local capture or dust collection.Unknown (Verify)

    Product Section

    The following product was checked for a visible Amazon ASIN and cross-checked against manufacturer or welding-supply listings for the same Weldcraft part number. Verify diameter, package quantity, tungsten type, and seller listing before purchase.

    Miller Weldcraft WL2332X7 2% Lanthanated Tungsten Electrode 3/32 X 7″, 10 Pack
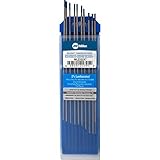
    • 2% Lanthanated (Blue) EWLa-2/WL20
    • Principal Oxide: 1.8 โ€“ 2.2% Lanthanum Oxide
    • Non-Radioactive. Best general purpose electrode for both Alternating Current (A/C) or Direct Current (D/C) using inverter or transformer based constant current power sources.
    • Good for low-alloyed steels, non corroding steels, aluminum alloys, magnesium alloys, titanium alloys, nickel alloys, copper alloys.
    • Good arc starts and stability, medium to high amperage range, low errosion rate.

    Last update on 2026-06-06 / Affiliate links / Images from Amazon Product Advertising API

    Comparison Table

    OptionUse CaseDust ConcernVerification Needed
    2% thoriated tungstenLegacy DC TIG procedures and qualified work where specifiedHigher concern when grinding because thorium is presentConfirm procedure requirement and dust controls
    2% lanthanated tungstenCommon non-radioactive option for many AC and DC TIG applicationsNo thorium dust, but grinding dust still needs controlConfirm machine, material, and procedure acceptance
    Pre-ground tungstenRepeat work where consistent tip geometry mattersReduces in-shop grindingConfirm point angle, flat, diameter, and tungsten type
    Dedicated tungsten grinderShops that sharpen oftenCan improve containment if paired with dust controlConfirm collector, wheel type, and electrode size range

    Safety Notes

    ANSI Z49.1 covers safety in welding, cutting, and allied processes, including protection of personnel, ventilation, fire prevention, and confined spaces. TIG welding still requires proper helmet shade, eye protection, gloves, clothing, ventilation, and protection from hot metal and ultraviolet radiation.

    AWS safety guidance for thoriated tungsten recommends dust-collecting grinders, local exhaust, and respiratory protection where needed to prevent inhalation of dust. Treat grinder dust as a controlled waste stream and follow workplace, local, and regulatory disposal rules.

    Do not use compressed air to clean tungsten grinding dust from a bench or grinder. Do not grind thoriated tungsten near food, drinks, open toolboxes, welding coupons, or clean filler rod. Do not assume a non-radioactive tungsten eliminates all respiratory risk; fine grinding dust should still be controlled.

    FAQ

    Is thoriated tungsten banned?

    Not universally. Some workplaces restrict or phase it out, while some qualified procedures still specify it. Verify the job requirement, employer policy, and local rules before use.

    Can lanthanated tungsten replace thoriated tungsten?

    Often, but not automatically. Lanthanated tungsten is widely used as a non-radioactive alternative, but procedure, machine type, base metal, amperage, and acceptance requirements must be verified.

    Should tungsten be sharpened on a belt sander?

    Only if the belt is dedicated to tungsten and dust is controlled. A shared belt can contaminate the tungsten and spread dust across the shop.

    Why does the arc wander after sharpening?

    Common causes include cross-grinding marks, an off-center point, contamination from a shared wheel, an oversized ball, incorrect tungsten diameter, or poor gas coverage.

    Is a tungsten grinder required?

    No, but a dedicated grinder or controlled sharpening setup can improve consistency and reduce contamination. The key requirement is a clean, repeatable grind with appropriate dust control.

    Next Step

    Build a small tungsten prep checklist at the TIG bench: tungsten type, diameter, point style, grinding direction, dust control, and storage tube. Keep the checklist with the torch consumables so every tungsten is prepared the same way before welding starts.

    Sources Checked

    • AWS Safety and Health Fact Sheet No. 27, Thoriated Tungsten Electrodes.
    • AWS Safety and Health Fact Sheet No. 2, Radiation.
    • ANSI Z49.1:2021, Safety in Welding, Cutting, and Allied Processes.
    • Miller Weldcraft product listing for Weldcraft 2% Lanthanated Tungsten WL2332X7.
    • Amazon product listing showing ASIN B00VMH8T6M for Miller Weldcraft WL2332X7.
    • Cyberweld listing for Weldcraft 2% Lanthanated Tungsten WL2332X7.
  • MIG Nozzle Gel: When It Helps, When It Does Not, and How to Use It Safely

    MIG nozzle gel is used to reduce weld spatter buildup on MIG gun nozzles and contact tips. It is not a fix for poor settings, contaminated wire, bad gas coverage, or worn consumables. Used correctly, it can help keep the front end of a MIG gun cleaner during short-arc and general shop welding work.

    Key Takeaways

    • Nozzle gel helps limit spatter sticking to MIG nozzles and contact tips.
    • It should be applied lightly. Excess gel can create contamination concerns.
    • It does not correct voltage, wire feed, shielding gas, or stickout problems.
    • Always verify the product label and safety data before use.
    • Keep gel containers away from arc heat, sparks, grinding dust, and open flame unless the label specifically allows the exposure.

    Problem / Context

    MIG spatter often collects inside the nozzle and around the contact tip. As buildup increases, shielding gas flow can become restricted, the arc may become less stable, and the operator may need to stop more often to clean the gun.

    Nozzle gel is a maintenance aid for the MIG gun front end. It creates a temporary barrier that helps reduce spatter adhesion. It should be treated as support equipment, not as a substitute for proper setup.

    Root Causes

    • Incorrect voltage or wire-feed speed for the wire size and material thickness.
    • Excessive stickout.
    • Poor work clamp connection.
    • Dirty base metal, mill scale, oil, paint, or rust.
    • Wrong shielding gas mix or incorrect gas flow.
    • Drafts disturbing shielding gas coverage.
    • Worn contact tip, damaged nozzle, or loose front-end parts.
    • Poor travel angle or inconsistent gun distance.

    Solution

    • Clean the nozzle before applying gel.
    • Dip only the hot front end of the nozzle lightly, unless the manufacturer gives different instructions.
    • Do not pack gel into the nozzle bore.
    • Keep gel away from the weld joint, especially on code work or critical welds.
    • Reapply only as needed after cleaning spatter.
    • Replace damaged nozzles and contact tips instead of trying to compensate with more gel.

    Specs / Notes

    ItemNotes
    ProcessMIG / GMAW support
    Primary useReducing spatter adhesion on nozzle and contact tip area
    Compatible metalsUnknown (Verify)
    Temperature ratingUnknown (Verify)
    Silicone-free statusUnknown (Verify)
    Paintable surface suitabilityUnknown (Verify)
    Code welding suitabilityUnknown (Verify with procedure, inspector, and product SDS)
    StorageVerify label and SDS before shop use

    Product Section

    Verified Amazon ASIN found for a MIG nozzle gel product:

    Last update on 2026-06-05 / Affiliate links / Images from Amazon Product Advertising API

    Product note: The Amazon listing identifies this item as Forney 37031 Nozzle Gel For Mig Welding, 16-Ounce, White, with ASIN B00IOX4GBE. Verify current availability, label details, SDS, and shop suitability before use.

    Shop Reference Table

    ConditionLikely CheckNozzle Gel Role
    Light spatter on nozzleConfirm settings and clean nozzleHelpful as a light barrier
    Heavy spatter after every weldCheck voltage, wire speed, gas, stickout, and base metal cleanlinessMay help cleanup but will not solve root cause
    Porosity appearsCheck gas coverage, drafts, contamination, and consumablesStop and inspect; do not add more gel near weld area
    Nozzle bore restrictedRemove spatter and inspect nozzleClean first, then apply lightly
    Critical weld procedureConfirm approved consumables and procedure limitsUse only if allowed by procedure and inspector

    Safety: ANSI / AWS / OSHA Notes

    AWS/ANSI Z49.1:2021 covers safety and health in welding, cutting, and allied processes, including protection of personnel, ventilation, fire prevention, confined spaces, and general-area protection. OSHA identifies welding, cutting, and brazing hazards that include metal fumes, ultraviolet radiation, burns, eye damage, electrical shock, cuts, and crush injuries.

    • Wear proper welding helmet, eye protection, gloves, jacket, and task-appropriate PPE.
    • Maintain ventilation suitable for the welding process and material.
    • Keep the gel container closed when not in use.
    • Do not place containers where sparks, hot slag, or grinding debris can enter.
    • Review the product SDS before use, especially in enclosed areas or production work.
    • Follow local hot-work, fire-watch, and shop safety requirements.

    FAQ

    Does nozzle gel stop all MIG spatter?

    No. It helps reduce spatter sticking to the nozzle and contact tip area. It does not eliminate spatter caused by poor setup, contamination, or worn parts.

    Can nozzle gel cause weld contamination?

    It can if overused or transferred into the weld area. Apply lightly and keep it away from the joint. For critical welding, verify acceptability with the welding procedure, inspector, and SDS.

    Should the contact tip be dipped into gel?

    Follow the product label. In general shop practice, the front end is treated lightly to reduce spatter adhesion. Avoid packing gel into the nozzle or creating buildup around the wire path.

    Is nozzle gel the same as anti-spatter spray?

    No. Nozzle gel is typically used at the MIG gun front end. Anti-spatter spray is commonly applied to work surfaces, fixtures, or surrounding areas when allowed by the application. Always verify the product label.

    Can nozzle gel be used for TIG or stick welding?

    This post is focused on MIG / GMAW front-end support. Use for other processes is Unknown (Verify) unless the specific product label states otherwise.

    Next Step

    Before adding more nozzle gel, clean the MIG gun front end and check voltage, wire feed, stickout, shielding gas flow, work clamp contact, and base metal cleanliness. Use gel lightly after the root causes of excessive spatter have been reviewed.

    Sources

    • Amazon product listing: Forney 37031 Nozzle Gel For Mig Welding, 16-Ounce, White. ASIN: B00IOX4GBE.
    • American Welding Society: AWS/ANSI Z49.1:2021 Safety in Welding, Cutting, and Allied Processes.
    • OSHA: Welding, Cutting, and Brazing hazards and solutions.
    • OSHA: 29 CFR 1910.252 General Requirements for Welding, Cutting, and Brazing.

  • ArcOne S240-10 Auto-Darkening Welding Filter: Shade 10 Lens Support Guide

    A 2 x 4-inch auto-darkening filter is often used when a welder wants an auto-darkening function in a compact helmet or fixed-front hood format. The ArcOne S240-10 is listed under ASIN B00206Y4B8 as a horizontal single auto-darkening filter for welding with a fixed shade 10 dark state.

    This guide covers practical selection points, common fit and visibility issues, safety checks, and when a fixed shade 10 auto-darkening filter may or may not be the right choice.

    Key Takeaways

    • Verified ASIN: B00206Y4B8.
    • Product type: auto-darkening welding helmet filter lens.
    • Category: Welding Helmet Support.
    • Known listing details include 2 x 4 inch size, shade 10, two independent sensors, 5.25 square inch active viewing area, and 0.5 millisecond switching speed.
    • Always confirm helmet fit, safety markings, and shade suitability before welding.

    Problem / Context

    Many compact welding hoods use a 2 x 4 inch filter opening. A passive lens can work well, but it requires the operator to flip the hood down before striking the arc. An auto-darkening filter can help reduce repeated hood flipping and can make arc starts easier to see.

    The main concern is not only whether the lens darkens. The filter also needs to fit the helmet correctly, provide the correct shade for the process, and remain protected from spatter, grinding dust, and handling damage.

    Root Causes

    • Wrong lens size: A 2 x 4 inch filter may not fit every helmet shell or retaining frame.
    • Shade mismatch: Shade 10 may be appropriate for many common arc welding ranges, but the required shade depends on process, amperage, electrode size, and viewing conditions.
    • Blocked sensors: Hood position, work angle, pipe joints, or tight spaces can block sensor exposure to the arc.
    • Dirty cover plates: Spatter and smoke film can reduce visibility and affect sensor response.
    • Assumed compatibility: A lens should never be assumed compatible with a helmet unless size, retaining system, and safety requirements are confirmed.

    Solution

    Use the ArcOne S240-10 only where a 2 x 4 inch horizontal auto-darkening filter is suitable for the helmet and the welding process. Before use, inspect the helmet shell, retaining clips, cover plates, gasket or lens frame, and filter condition. Replace cracked, loose, or contaminated components before welding.

    For welding procedures that require a shade lighter or darker than shade 10, select a different approved filter or an adjustable-shade helmet. Do not use a fixed shade lens as a substitute for a procedure-specific shade selection review.

    Specs / Notes

    ASINB00206Y4B8
    BrandArcOne
    Model / part referenceS240-10 / S240-10AON
    Product typeHorizontal single auto-darkening welding filter
    Lens size2 x 4 inch listing format; listed product dimensions also show 2″L x 4.25″W
    Dark shadeShade 10
    SensorsTwo independent sensors
    Active viewing area5.25 square inches
    Switching speed0.5 milliseconds
    Dark-to-light delay0.2 seconds
    Water / dust resistanceListed as water and dust resistant; verify current manufacturer documentation before industrial use
    Battery requirementListed as batteries not required
    Helmet compatibilityUnknown (Verify)
    ANSI marking on current unitUnknown (Verify)

    Product Section

    The ASIN below was verified as an Amazon product listing for the ArcOne S240-10 horizontal single auto-darkening welding filter.

    ArcOne S240-10 Horizontal Single Auto-Darkening Filter for Welding, 2 x 4, Shade 10
    • Two independent sensors, High Definition clear view technology
    • 5.25 square inches of active viewing area
    • Switching speed of 0.5 milliseconds
    • Water and dust resistant
    • Dark to light state delay of 0.2 seconds

    Last update on 2026-06-05 / Affiliate links / Images from Amazon Product Advertising API

    Selection Table

    Use CaseCheck Before UseSupport Note
    Replacing a passive 2 x 4 lensOSHA tables list the minimum shade by process and currentDo not force the filter into a tight or warped holder
    Stick weldingConfirm shade 10 is suitable for amperage and electrode sizeTest the response before welding in a tight joint
    MIG / flux-cored weldingConfirm shade and sensor exposureGun angle and joint position can shadow sensors
    TIG weldingConfirm low-amp sensitivity requirementsFixed shade 10 may be too dark for some low-amperage work
    Pipe or restricted-position weldingCheck for sensor blockageUse only with an approved helmet and eye protection program
    Training or shop useConfirm ANSI / employer safety requirementsUse only with approved helmet and eye protection program

    Safety: ANSI / AWS Notes

    Welding eye and face protection should comply with applicable ANSI Z87.1 and ANSI Z49.1 safety requirements. The correct filter shade depends on the welding or cutting process, amperage, and work conditions. OSHA filter shade tables provide minimum protective shade guidance for common welding and cutting operations.

    Wear approved safety glasses under the welding helmet where required. Inspect the auto-darkening filter before use. Do not weld with a cracked filter, a missing cover plate, a loose retaining frame, a damaged helmet shell, or a lens that does not darken correctly during a safe function check.

    FAQ

    Is B00206Y4B8 a verified Amazon ASIN?

    Yes. B00206Y4B8 was found as an Amazon ASIN for the ArcOne S240-10 horizontal single auto-darkening welding filter.

    Is shade 10 right for every welding process?

    No. Shade 10 is common for many arc welding applications, but shade selection must be matched to the process, amperage, electrode size, and applicable safety rules.

    Will this fit every 2 x 4 welding hood?

    No. The size format is 2 x 4 inch, but helmet compatibility is Unknown (Verify). Confirm the retaining system, cover plate size, and manufacturer requirements before use.

    Does an auto-darkening lens replace safety glasses?

    No. Safety glasses may still be required under the hood for impact protection and workplace compliance.

    What should be checked before striking an arc?

    Check lens condition, cover plates, helmet fit, shade suitability, sensor visibility, and whether the filter darkens correctly during a safe pre-use check.

    Next Step

    Before ordering or installing the ArcOne S240-10, confirm that the helmet accepts a 2 x 4 inch horizontal filter and that shade 10 matches the welding process and amperage range used in the shop.

    Sources

    • Amazon product listing for ASIN B00206Y4B8, ArcOne S240-10 Horizontal Single Auto-Darkening Filter for Welding.
    • Device.Report product data for ArcOne S240-10AON, including ASIN, model reference, size, and listing details.
    • OSHA 1910.133 Eye and Face Protection, filter lens shade guidance for radiant energy.
    • OSHA Eye Protection Against Radiant Energy During Welding and Cutting fact sheet.
    • AWS Eye and Face Protection for Welding and Cutting Operations, Fact Sheet No. 31.
  • Welding Fume Extractor Not Pulling Smoke: Causes and Fixes

    A welding fume extractor that fails to pull smoke effectively exposes operators to hazardous fumes and reduces overall shop safety. Poor suction is typically caused by airflow restriction, filter saturation, or incorrect positioning. Diagnosing the airflow path is critical to restoring proper extraction performance.

    Key Takeaways

    • Clogged filters are the most common cause of weak suction
    • Improper hood positioning reduces capture efficiency
    • Airflow restrictions limit extraction performance
    • Undersized systems struggle with high-fume processes
    • Routine maintenance prevents most extraction failures

    Problem / Context

    Fume extraction systems are designed to capture and remove airborne contaminants at the source. When suction drops, fumes remain in the breathing zone, increasing exposure risk. This issue is often gradual and may go unnoticed until visible smoke buildup occurs.

    Root Causes

    • Clogged filters: saturated media reducing airflow
    • Blocked ducting: debris or buildup restricting flow
    • Poor hood placement: positioned too far from the arc
    • Leaks in system: air loss reducing suction at the source
    • Undersized extractor: insufficient CFM for application
    • Fan or motor wear: reduced airflow performance

    Solution / Explanation

    • Replace or clean filters according to manufacturer guidelines
    • Inspect ducting for obstructions and remove debris
    • Position extraction hood as close to the weld arc as possible
    • Check system for air leaks and seal connections
    • Verify extractor capacity matches welding process requirements
    • Inspect fan and motor performance for wear or failure

    Specs / Verification Notes

    • Airflow Capacity (CFM): Unknown (Verify per unit)
    • Filter Type: HEPA or multi-stage (application dependent)
    • Duct Diameter: System dependent
    • Capture Velocity: Unknown (Verify)
    • Process Type: MIG, TIG, Stick, Flux-Cored (fume levels vary)

    Product Option

    ArcOne S240-10 Horizontal Single Auto-Darkening Filter for Welding, 2 x 4, Shade 10
    • Two independent sensors, High Definition clear view technology
    • 5.25 square inches of active viewing area
    • Switching speed of 0.5 milliseconds
    • Water and dust resistant
    • Dark to light state delay of 0.2 seconds

    Last update on 2026-06-05 / Affiliate links / Images from Amazon Product Advertising API

    Comparison Table

    IssueSymptomImpactFix
    Clogged FilterWeak suctionPoor air qualityReplace filter
    Blocked DuctReduced airflowFume buildupClear obstruction
    Poor Hood PlacementSmoke not capturedOperator exposureReposition hood
    Undersized UnitConstant smokeIneffective extractionUpgrade system

    Safety Notes

    Follow ANSI Z49.1 and OSHA ventilation standards for welding environments. Always verify proper airflow before welding. Use respiratory protection if extraction is insufficient.

    FAQ

    Why is my fume extractor not pulling smoke?

    This is usually caused by clogged filters, airflow restrictions, or improper hood placement.

    How often should filters be replaced?

    Filter replacement depends on usage, but should be done when airflow noticeably decreases.

    Does hood position affect performance?

    Yes. The hood must be positioned close to the arc to effectively capture fumes.

    Next Step

    Inspect filters and airflow path before the next weld. Adjust hood position and confirm suction strength using a visible smoke test.

    Sources Checked

    • ANSI Z49.1 Safety in Welding and Cutting
    • OSHA ventilation guidelines
    • Fume extraction system manufacturer documentation
  • Plasma Cutter Not Cutting Through: Causes and Fixes

    A plasma cutter that fails to cut through material typically indicates issues with air supply, consumables, or machine setup. This problem reduces cut quality, increases dross, and can damage the torch if ignored. Diagnosing the root cause quickly restores performance and prevents unnecessary wear.

    Key Takeaways

    • Insufficient air pressure is a leading cause of poor cutting performance
    • Worn consumables reduce arc energy and cut penetration
    • Incorrect amperage settings limit cutting capability
    • Slow or inconsistent travel speed affects cut-through
    • Moisture in air supply degrades plasma arc quality

    Problem / Context

    Plasma cutting relies on a high-temperature ionized gas stream to melt and eject metal. When any part of the systemโ€”air supply, power, or consumablesโ€”is compromised, the arc loses effectiveness. This results in incomplete cuts, excessive slag, or arc instability.

    Root Causes

    • Low air pressure: insufficient airflow reduces arc force
    • Moisture contamination: water in air disrupts plasma stability
    • Worn consumables: degraded electrodes and nozzles reduce performance
    • Incorrect amperage: not matched to material thickness
    • Slow travel speed: excessive heat buildup without full penetration
    • Poor ground connection: unstable arc behavior

    Solution / Explanation

    • Verify air pressure meets machine specifications
    • Install air dryers or filters to remove moisture
    • Replace consumables regularly based on wear
    • Adjust amperage according to material thickness
    • Maintain consistent travel speed during cutting
    • Ensure clean and secure ground clamp connection

    Specs / Verification Notes

    • Air Pressure: Unknown (Verify per machine manual)
    • Amperage Range: Machine dependent
    • Consumable Life: Usage dependent
    • Cut Thickness Capacity: Unknown (Verify)
    • Air Quality Requirement: Dry, oil-free air

    Comparison Table

    CauseSymptomImpactFix
    Low Air PressureWeak arcNo full cut-throughIncrease pressure
    Worn ConsumablesWide arcPoor cut qualityReplace parts
    Moisture in AirArc sputteringInconsistent cutsDry air supply
    Low AmperageSlow cuttingIncomplete penetrationIncrease output

    Safety Notes

    Follow ANSI Z49.1 safety standards for plasma cutting. Ensure proper grounding and use appropriate PPE including eye protection and gloves. Never operate a plasma cutter with damaged consumables or unstable air supply.

    FAQ

    Why is my plasma cutter not cutting all the way through?

    This is usually caused by low air pressure, worn consumables, or incorrect amperage settings.

    Can bad air quality affect plasma cutting?

    Yes. Moisture or oil in the air supply disrupts the plasma arc and reduces cutting efficiency.

    How often should consumables be replaced?

    Replacement depends on usage and material, but worn consumables should be changed as soon as cut quality declines.

    Next Step

    Check air supply quality and consumable condition before the next cut. Adjust settings based on material thickness and confirm stable operation on scrap material.

    Sources Checked

    • ANSI Z49.1 Safety in Welding and Cutting
    • Plasma cutter manufacturer’s operation manuals
    • AWS cutting process references (general guidance)
  • Auto-Darkening Welding Helmet Not Working: Causes and Fixes

    An auto-darkening welding helmet that fails to activate properly creates serious visibility and safety issues. Common failures include delayed darkening, flickering lenses, or complete non-response. These problems are typically related to sensors, power supply, or lens degradation.

    Key Takeaways

    • Dead or weak batteries are a leading cause of failure
    • Blocked or dirty sensors prevent proper arc detection
    • Lens cartridges degrade over time and may require replacement
    • Incorrect sensitivity or delay settings can mimic failure
    • Low amperage welding may not trigger some helmets reliably

    Problem / Context

    Auto-darkening helmets rely on arc sensors and electronic filters to instantly adjust shade levels. When the system fails, the user may experience flash exposure or inconsistent visibility. These issues can occur suddenly or develop gradually due to wear or environmental conditions.

    Root Causes

    • Low or dead battery: insufficient power for lens activation
    • Obstructed sensors: dirt, spatter, or positioning blocking detection
    • Damaged lens cartridge: internal failure or aging electronics
    • Incorrect sensitivity setting: arc not detected at lower amperage
    • Cracked or worn cover lens: reduces sensor accuracy
    • Cold temperatures: slows LCD response time

    Solution / Explanation

    • Replace batteries or confirm solar-assisted units are receiving light
    • Clean sensor areas and remove any obstructions
    • Adjust sensitivity and delay settings for the welding process
    • Inspect outer and inner cover lenses for damage
    • Test helmet under normal arc conditions to confirm response
    • Replace lens cartridge if failure persists after basic checks

    Specs / Verification Notes

    • Shade Range: Unknown (Verify)
    • Switching Speed: Unknown (Verify)
    • Power Source: Battery / Solar (model dependent)
    • Sensor Count: Unknown (Verify)
    • Operating Temperature Range: Unknown (Verify)

    Comparison Table

    IssueSymptomCorrection
    Dead BatteryNo darkeningReplace battery
    Dirty SensorsIntermittent responseClean sensors
    Low SensitivityNo activation at low ampsIncrease sensitivity
    Damaged LensFlicker or delayReplace cartridge
    Cold ConditionsSlow responseWarm helmet before use

    Safety Notes

    Follow ANSI Z87.1 and ANSI Z49.1 standards for eye and face protection. Never weld with a malfunctioning helmet. Verify proper operation before each use to prevent arc flash exposure.

    FAQ

    Why is my welding helmet not darkening?

    This is usually caused by low battery power, blocked sensors, or incorrect sensitivity settings.

    Can auto-darkening helmets stop working over time?

    Yes. Lens cartridges degrade and may eventually fail, requiring replacement.

    Do low amperage welds affect helmet performance?

    Some helmets may not detect low-amperage arcs unless the sensitivity is properly adjusted.

    Next Step

    Test the helmet with a known-working welding setup after the adjustments. If the issue persists, replace the lens cartridge or upgrade the helmet to ensure reliable protection.

    Sources Checked

    • ANSI Z87.1 Eye and Face Protection
    • ANSI Z49.1 Safety in Welding and Cutting
    • Welding helmet manufacturer manuals (general reference)
  • Oxy-Acetylene Torch Backfire vs Flashback: Causes and Fixes

    Backfire and flashback events in oxy-acetylene torches indicate improper gas flow, tip condition issues, or unsafe operating practices. While a backfire is typically a momentary pop, a flashback is more serious and can travel into the torch or hoses, creating a significant safety hazard.

    Key Takeaways

    • Backfire is a short pop; flashback is a sustained flame reversal
    • Dirty or damaged tips are a common cause
    • Incorrect gas pressures disrupt flame stability
    • Blocked hoses or regulators increase flashback risk
    • Flashback arrestors are critical safety components

    Problem / Context

    Oxy-fuel systems rely on controlled gas flow and proper mixing at the torch tip. When this balance is disrupted, combustion can occur inside the tip or travel backward into the system. Understanding the difference between backfire and flashback is essential for safe troubleshooting and prevention.

    Root Causes

    • Clogged or dirty tip: restricts gas flow and causes unstable combustion
    • Incorrect gas pressure: improper oxygen-to-fuel ratio
    • Loose tip or connections: creates internal leaks
    • Overheating tip: increases risk of ignition inside the tip
    • Blocked hoses or regulators: restricts flow and pressure stability
    • Missing flashback arrestors: no protection against reverse flame travel

    Solution / Explanation

    • Clean torch tips using proper tip cleaners sized for the orifice
    • Verify gas pressures match manufacturer recommendations
    • Tighten all connections securely before operation
    • Allow the torch to cool if overheating occurs
    • Inspect hoses and regulators for restrictions or damage
    • Install and maintain flashback arrestors on both oxygen and fuel lines

    Specs / Verification Notes

    • Operating Pressure (Oxygen): Unknown (Verify)
    • Operating Pressure (Acetylene): Unknown (Verify)
    • Tip Size: Application dependent
    • Flashback Arrestor Rating: Unknown (Verify)
    • Hose Type: Grade R or T (application dependent)

    Comparison Table

    ConditionSymptomSeverityCorrection
    BackfireLoud pop, flame extinguishesLowClean tip, adjust pressure
    FlashbackHissing or whistling, flame inside torchHighClean or replace the tip
    Clogged TipUnstable flameMediumHissing or whistling, flame inside the torch
    Low Gas PressureWeak or sputtering flameMediumAdjust regulator settings

    Safety Notes

    Follow ANSI Z49.1 and CGA safety guidelines for oxy-fuel systems. Always use flashback arrestors and check valves. Shut off the gas supply immediately if a flashback is suspected. Never operate damaged equipment.

    FAQ

    What is the difference between backfire and flashback?

    Backfire is a brief pop with flame extinguishing, while flashback involves flame traveling back into the torch or hoses.

    What should be done during a flashback?

    Immediately shut off oxygen first, then fuel gas, and inspect the system before reuse.

    Can dirty tips cause flashback?

    Yes. Restricted gas flow from clogged tips is a common trigger for both backfire and flashback.

    Next Step

    Inspect the torch system, clean the tip, and verify gas pressures before next use. Install flashback arrestors if not already present to reduce risk.

    Sources Checked

    • ANSI Z49.1 Safety in Welding and Cutting
    • CGA (Compressed Gas Association) safety guidelines
    • Oxy-fuel torch manufacturer manuals (general reference)
  • Stick Welding Rod Sticking: Causes and How to Fix It

    When your stick electrode keeps sticking to the workpiece, it usually means the arc isnโ€™t stable enough to stay lit. This is one of the most common frustrations in stick welding and is typically caused by low amperage, poor technique, or improper setup.

    Key Takeaways

    • Rod sticking is usually caused by low amps or weak arc starts
    • Correct amperage and arc length are critical
    • Moisture and rod condition can affect performance
    • Technique (especially arc striking) plays a big role

    Whatโ€™s Causing the Problem

    1) Amperage Too Low

    • Not enough heat to maintain the arc
    • The electrode fuses to the base metal instead of melting properly

    2) Poor Arc Start Technique

    • Tapping too lightly or dragging incorrectly
    • Not establishing a strong initial arc

    3) Incorrect Arc Length

    • Holding the rod too close chokes the arc
    • Too far causes instability and extinguishing

    4) Damp or Contaminated Rods

    • Moisture affects arc stability and slag formation
    • Especially common with 7018 rods

    5) Improper Ground Connection

    • Weak or inconsistent electrical circuit
    • Causes erratic arc behavior

    How to Fix It

    Step 1: Increase Amperage

    • Adjust amps based on rod size:
      • 1/8″ (3.2 mm) rod โ†’ ~90โ€“130 amps
    • Start in the middle of the range and adjust as needed

    Step 2: Improve Arc Start

    • Use a scratch or tap method with confidence
    • Strike the arc like lighting a match, then lift slightly

    Step 3: Maintain Proper Arc Length

    • Keep arc length about equal to rod diameter
    • Too short = sticking
    • Too long = unstable arc

    Step 4: Use Dry Electrodes

    • Store rods in a dry environment
    • Use a rod oven for low-hydrogen electrodes (like 7018)

    Step 5: Check Ground Clamp

    • Attach to clean, bare metal
    • Ensure a tight connection

    Common Mistakes to Avoid

    • Running amps too low โ€œto be safe.โ€
    • Hesitating during arc start
    • Welding with damp rods
    • Ignoring poor ground connections
    • Holding too tight or an inconsistent arc length

    Best Settings / Guidelines

    ParameterTypical Range
    Amperage90โ€“130A (1/8″ / 3.2 mm rod)
    Arc LengthEqual to rod diameter
    Rod ConditionDry, properly stored
    Ground ContactClean, solid connection
    Travel SpeedModerate, consistent

    Always verify amperage with rod manufacturer recommendations.

    Safety Notes

    • Wear proper eye protection (ANSI Z87.1) and welding helmet
    • Stick welding produces significant fumesโ€”ensure ventilation
    • Keep gloves dry to avoid shock risk
    • Inspect electrode holder and cables for damage

    FAQ

    Why does my rod stick immediately when I strike an arc?
    Usually due to low amperage or poor arc start technique.

    Can moisture really affect stick welding?
    Yesโ€”especially with low-hydrogen rods like 7018.

    Whatโ€™s the best rod for beginners?
    6013 is more forgiving and easier to start than 7018.

    Does polarity matter for sticking?
    Yesโ€”incorrect polarity can cause poor arc stability.

    Should I increase amps if my rod sticks?
    Yesโ€”slightly increasing amperage often solves the issue.

    Sources Checked

    • American Welding Society
    • Lincoln Electric stick welding guides
    • Miller Electric setup and troubleshooting resources

  • Why Your TIG Weld Is Getting Contaminated (And How to Fix It)

    TIG contamination shows up as a dull, dirty weld, unstable arc, or blackened tungsten. Itโ€™s usually caused by poor shielding, dirty material, or tungsten issues, and it will quickly ruin weld quality if not corrected.

    Key Takeaways

    • Contamination is usually caused by air exposure or dirty surfaces
    • Tungsten condition directly affects arc stability
    • Shielding gas problems are a top cause
    • Cleanliness is critical for TIG welding success

    Whatโ€™s Causing the Problem

    1) Poor Shielding Gas Coverage

    • Gas flow is too low or disrupted
    • Drafts pulling shielding gas away
    • Leaks in hoses or fittings

    2) Dirty Base Material

    • Oil, grease, oxidation, or coatings
    • The aluminum oxide layer was not removed
    • Stainless contamination from improper tools

    3) Contaminated Tungsten

    • Touching the puddle or filler rod
    • Improper grinding direction
    • Using the wrong tungsten type for the job

    4) Incorrect Gas Flow Settings

    • Too low โ†’ inadequate shielding
    • Too high โ†’ turbulence pulling in air

    5) Bad Technique

    • Long arc length exposing the weld to the atmosphere
    • Improper torch angle
    • Inconsistent filler rod feeding

    How to Fix It

    Step 1: Set Proper Gas Flow

    • Typical range: 15โ€“25 CFH (7โ€“12 L/min)
    • Use lower end indoors, higher if needed for coverage

    Step 2: Clean the Material Thoroughly

    • Use a dedicated stainless steel brush for aluminum/stainless steel
    • Remove all oil and grease with acetone
    • Grind or wire brush to clean the metal surface

    Step 3: Prepare Tungsten Correctly

    • Grind longitudinally (not around)
    • Keep a sharp, clean point for DC welding
    • Replace tungsten if contaminated

    Step 4: Check Equipment

    • Inspect gas lines and connections for leaks
    • Clean the nozzle and check the gas lens if installed
    • Ensure proper cup size for coverage

    Step 5: Improve Technique

    • Keep arc length short and consistent
    • Maintain proper torch angle (~10โ€“15ยฐ)
    • Feed the filler rod smoothly without touching the tungsten

    Common Mistakes to Avoid

    • Welding on dirty or oxidized metal
    • Letting tungsten touch the weld puddle
    • Running gas flow too high or too low
    • Using contaminated filler rods
    • Ignoring drafts in the work area

    Best Settings / Guidelines

    ParameterTypical Range
    Gas Flow15โ€“25 CFH (7โ€“12 L/min)
    Arc LengthShort and consistent
    Torch Angle10โ€“15ยฐ
    Tungsten PrepSharp point (DC), clean grind
    Filler RodClean, matched to material

    Always verify with your machine settings and material requirements.

    Safety Notes

    • Wear proper eye protection (ANSI Z87.1) and a welding helmet
    • Avoid breathing shielding gas in confined areas
    • Use proper ventilation when cleaning with solvents
    • Keep gloves clean to prevent contaminating filler rods

    FAQ

    Why does my tungsten turn black?
    This usually indicates poor shielding gas coverage or contamination.

    Can I reuse contaminated tungsten?
    Yes, but it must be re-ground properly before reuse.

    Does gas type matter for contamination?
    Yesโ€”pure argon is standard for TIG and provides proper shielding.

    Why is aluminum more prone to contamination?
    Aluminum forms an oxide layer that must be removed before welding.

    Can drafts really affect TIG welding?
    Yesโ€”even small air movement can disrupt shielding gas.

    Sources Checked

    • American Welding Society
    • Lincoln Electric TIG welding resources
    • Miller Electric application and troubleshooting guides

  • Why Your MIG Weld Has Porosity (And How to Fix It Fast)

    Porosity in MIG welds shows up as pinholes, surface bubbles, or internal voids that weaken the joint. Itโ€™s one of the most commonโ€”and preventableโ€”issues in shop welding. The root cause is always the same: contamination or inadequate shielding gas coverage.

    Key Takeaways

    • Porosity is caused by gas coverage failure or contamination
    • The most common issues are gas flow, leaks, and dirty material
    • Wind, improper nozzle distance, and bad technique can all introduce air
    • Fixes are usually simple: clean, adjust flow, check equipment

    Whatโ€™s Causing the Problem

    1) Poor Shielding Gas Coverage

    • Flow rate too low or too high (turbulence)
    • Leaks in hoses or fittings
    • Blocked or dirty nozzle/diffuser

    2) Contaminated Base Metal

    • Oil, rust, mill scale, paint, or moisture
    • Galvanized coatings releasing gas during welding

    3) Environmental Factors

    • Wind or drafts blowing shielding gas away
    • Outdoor welding without protection

    4) Incorrect Technique

    • Stickout too long (reduces gas effectiveness)
    • Travel angle pushing gas away from puddle
    • Moving too fast for proper shielding

    How to Fix It

    Step 1: Set Proper Gas Flow

    • Typical MIG range: 20โ€“30 CFH (9โ€“14 L/min)
    • Indoors: stay near 20โ€“25 CFH
    • Outdoors: increase slightly or use wind blocks

    Step 2: Check for Leaks

    • Inspect all connections from tank to gun
    • Listen for hissing or use leak detection fluid
    • Replace cracked hoses or worn O-rings

    Step 3: Clean the Material

    • Grind to bright metal before welding
    • Remove coatings, oil, and moisture
    • Use acetone if needed (let fully evaporate)

    Step 4: Inspect Gun Components

    • Clean or replace nozzle and diffuser
    • Ensure no spatter is blocking gas flow
    • Confirm proper contact tip size

    Step 5: Adjust Technique

    • Keep stickout around 3/8″โ€“1/2″ (10โ€“12 mm)
    • Maintain steady travel speed
    • Use correct gun angle (10โ€“15ยฐ push or drag)

    Common Mistakes to Avoid

    • Running gas too high (creates turbulence)
    • Welding over dirty or painted surfaces
    • Ignoring small gas leaks
    • Letting spatter clog the nozzle
    • Welding in open air without shielding from wind

    Best Settings / Guidelines

    ParameterTypical Range
    Gas Flow20โ€“30 CFH (9โ€“14 L/min)
    Stickout3/8″โ€“1/2″ (10โ€“12 mm)
    Travel Angle10โ€“15ยฐ
    Wire SpeedVaries by machine/material
    VoltageVaries by machine/material

    Always confirm with your machineโ€™s chart or manufacturer specs.

    Safety Notes

    • Wear proper eye protection (ANSI Z87.1) and welding helmet
    • Avoid inhaling fumesโ€”especially on coated or galvanized steel
    • Ensure adequate ventilation when cleaning with solvents
    • Keep gloves and sleeves dry to prevent contamination and burns

    FAQ

    What does porosity look like in a weld?
    Small holes, bubbles, or pits on the surface or inside the weld bead.

    Can porosity be fixed after welding?
    Not reliablyโ€”grind out the affected area and reweld with proper prep.

    Is too much gas flow bad?
    Yesโ€”excessive flow can create turbulence and pull in air.

    Does wire type affect porosity?
    Yesโ€”low-quality or contaminated wire can introduce gas pockets.

    Can humidity cause porosity?
    Yesโ€”moisture on the material or in the air can contribute.

    Sources Checked

    • American Welding Society (general guidance on shielding gas and weld quality)
    • Lincoln Electric application notes on MIG porosity causes
    • Miller Electric troubleshooting resources for shielding gas issues
Stream with Amazon Music