If you’re setting up a home welding shop or upgrading your garage workspace, a DIY welding cart is one of the smartest first builds you can take on. Not only does it give you a place to store your welder, cables, and consumables, but it also keeps your setup mobile, compact, and organized. Whether you MIG, TIG, or stick weld, a well-built cart saves time and space — and prevents that classic tool scramble mid-project.
Why Build Your Own Welding Cart?
Buying a pre-built welding cart can get expensive fast — especially if you want heavy-duty shelves, drawer space, or features like bottle racks and grounding studs. A DIY cart lets you:
-
Customize dimensions to fit your welder or plasma cutter
-
Add racks for clamps, grinders, and cables
-
Use scrap metal or repurposed materials to save cash
-
Learn or refine your fabrication skills in the process
For beginner to intermediate welders, it’s a perfect project to practice clean welds, square tubing, and caster alignment.
Planning Your Layout
Before you cut any steel, think about how you work. Ask yourself:
-
Do you need it to roll under a bench when not in use?
-
Will it carry a gas cylinder for MIG or TIG welding?
-
How many shelves or drawers do you need?
-
Will you add a power strip or extension cord holder?
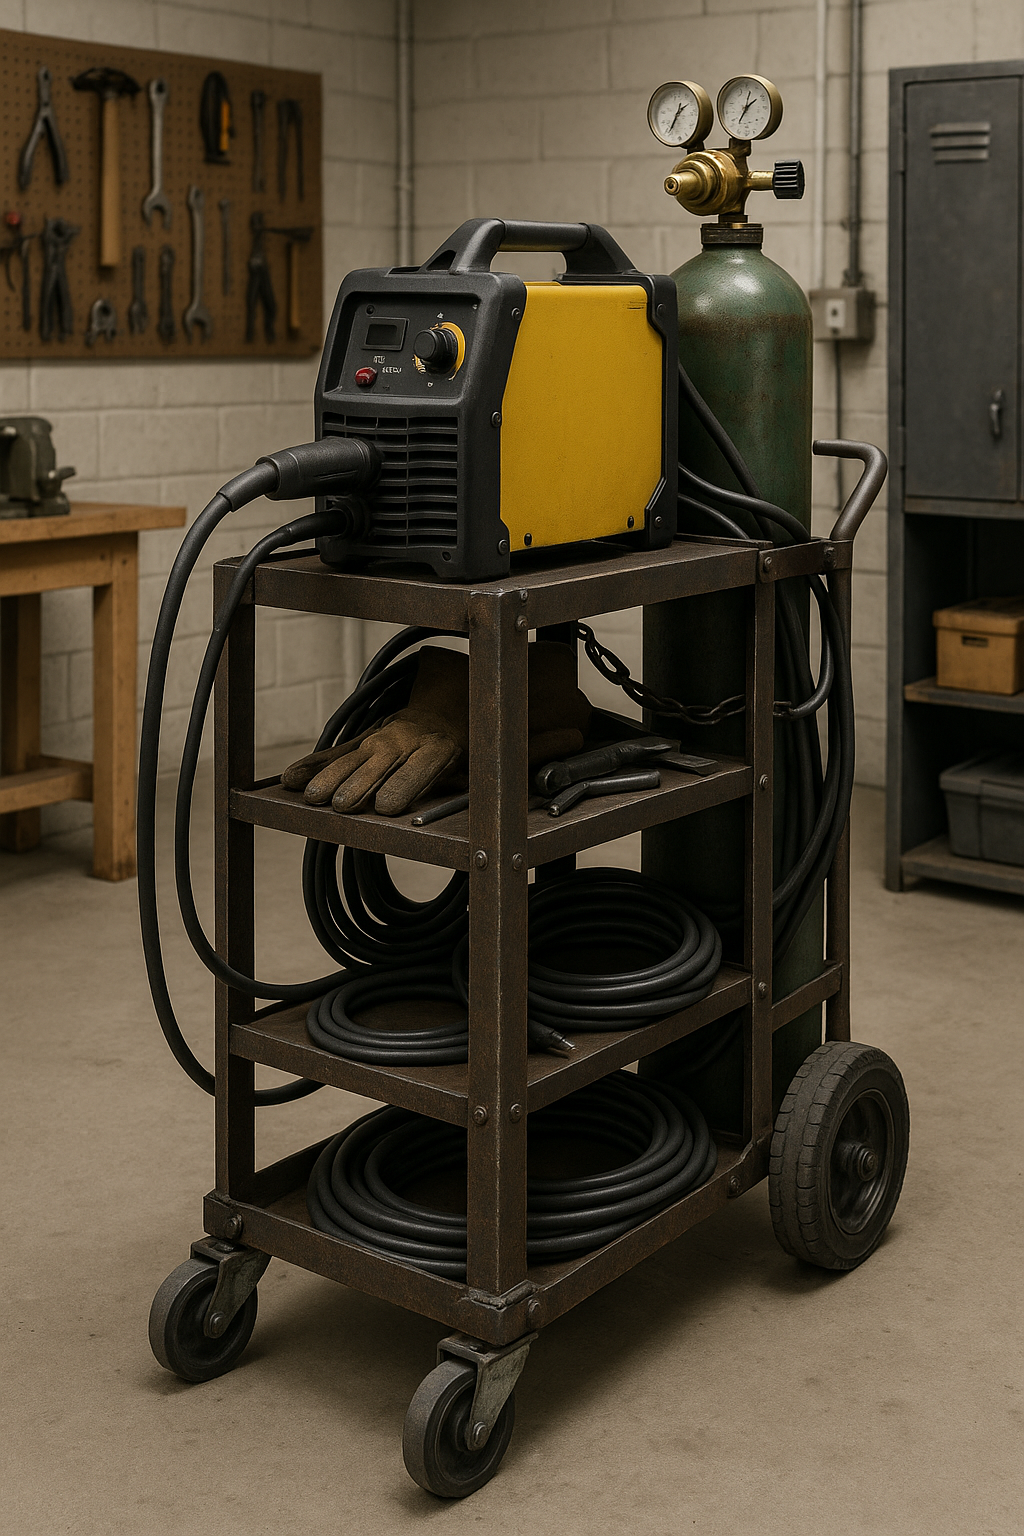
A typical layout might include:
-
Top shelf for the welder or plasma cutter
-
Middle shelf for accessories like wire spools, clamps, or gloves
-
Bottom shelf for heavier items or shielding gas bottles
-
Cable hooks on the sides
-
Locking casters for stability and movement
Optional upgrades: drawer slides, fire extinguisher mount, or tool trays for pliers, nozzles, and brushes.
Materials and Tools Needed
You don’t need much to get started. A basic welding cart can be made using:
Materials
-
1″ square tubing (14–16 gauge is plenty strong)
-
Sheet metal for shelves
-
Casters (2 fixed, 2 swivel with brakes)
-
Flat bar or angle iron for supports
-
Paint or powder coat (optional)
Tools
-
MIG welder or stick welder
-
Angle grinder with cut-off and flap discs
-
Clamps, tape measure, square, marker
-
Drill and bits (for mounting shelves or accessories)
-
Safety gear: gloves, helmet, fire-resistant clothing
If you’re light on tools, consider picking up a basic welding kit or angle grinder set — many solid options are available online.
Welding Cart Build Tips
-
Start square: Make sure your tubing is squared and clamped before tacking. Check alignment often.
-
Tack first, weld later: Fully weld only after everything is fit up correctly. This reduces warping and rework.
-
Weight balance matters: Place your gas bottle over the axle line if possible to avoid tipping.
-
Ground smart: Consider welding on a ground stud or using a dedicated clamp location to make setup faster.
Once your cart is fully assembled, give it a cleanup with acetone or alcohol, hit it with primer, and paint to match your shop’s vibe — or go all black for a classic industrial look.
Final Thoughts
A welding cart might not be glamorous, but it’s a game-changer for productivity and workspace efficiency. Building your own lets you tailor it exactly to your tools, your space, and your welding style. Plus, it gives you one more project under your belt — and a functional one at that.
Disclaimer: Some of the links in this post may be affiliate links. That means we may earn a commission if you purchase through them, at no additional cost to you. Every product we recommend is something we’d use in our own shop.

Leave a Reply