Tag: aluminum MIG

  • ESAB Aluminum Spool Gun Setup Guide: Rebel Compatibility, Argon, Wire Size, and Feed Checks

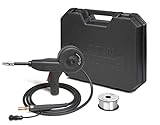
    Set up an ESAB aluminum spool gun by verifying the machine supports the exact spool gun, connecting the gun fully, using 100% argon shielding gas, installing the correct aluminum contact tip, loading clean aluminum wire, setting light drive tension, and testing feed before welding. Aluminum wire is soft and will birdnest, shave, or burn back if the spool gun tension, tip size, spool brake, gas flow, or wire alloy is wrong.

    For ESAB Rebel 215-family machines, ESAB documentation directs aluminum wire welding to an optional spool gun and tells the operator to refer to the spool gun manual for setup. Do not assume every ESAB Rebel uses the same spool gun. Rebel 215, 205, 235, 285, EM 210, EMP 210, and Fabricator models can differ by connector, trigger circuit, spool gun rating, wire size range, and regional package. For related setup and feed-path checks, see ESAB Rebel drive roll setup, MIG wire feeding at inconsistent speed, and spool gun setup troubleshooting.

    Common Symptoms When Setup Is Wrong

    • Spool gun trigger does nothing.
    • Wire feeds but there is no arc.
    • Wire feeds but no shielding gas reaches the nozzle.
    • Aluminum wire birdnests inside the gun.
    • Wire shaves, buckles, or stalls at the drive roll.
    • Wire burns back into the contact tip.
    • Weld bead is black, sooty, porous, or contaminated.
    • Arc starts rough and then fades or pops.
    • Spool overruns after trigger release.
    • Gun works briefly, then stops feeding as the tip heats.

    Setup Checklist

    Setup PointCorrect CheckWrong Setup Symptom
    Machine compatibilityVerify exact ESAB model and approved spool gunNo response, wrong plug, no auto-detect, no output
    Shielding gasUse 100% argon for aluminum MIGBlack soot, porosity, unstable arc
    Wire alloyMatch ER4043 or ER5356 to the base metal/applicationCracking, poor appearance, wrong strength/corrosion behavior
    Wire diameterMatch gun rating, drive roll, tip, and machine settingSlipping, shaving, burnback, poor starts
    Contact tipUse correct aluminum wire size and spool gun tip seriesWire drag, tip burnback, intermittent feed
    Spool tensionEnough brake to stop overrun without draggingLoops, nests, or slow feed
    Drive tensionLight pressure that feeds without flattening wireWire shaving or slipping
    Base metal prepRemove oxide, oil, marker, moisture, and coatingPorosity, soot, poor wetting

    Connection Procedure

    1. Turn off input power before connecting the spool gun.
    2. Verify the spool gun model is approved for the exact ESAB machine.
    3. Plug the spool gun power/control connector fully into the machine.
    4. Tighten the threaded collar or retaining hardware if used on that gun.
    5. Connect the gas hose as required by the spool gun and machine setup.
    6. Connect the work clamp to clean bare aluminum or a clean welding table tied to the work.
    7. Install the correct contact tip and nozzle for aluminum wire.
    8. Select MIG or spool gun mode according to the machine control panel/manual.
    9. Set the machine for aluminum wire, wire diameter, and material thickness when that menu is available.
    10. Open the argon cylinder, set flow, and confirm gas at the gun nozzle.

    Loading Aluminum Wire in the Spool Gun

    1. Use clean, dry aluminum wire. Do not use dirty or oxidized wire from an open shop shelf.
    2. Install the correct small spool size for the gun.
    3. Route the wire from the spool into the drive path without crossing or bending it sharply.
    4. Set spool brake light enough that the motor can pull smoothly.
    5. Set drive tension low, then increase only until the wire feeds reliably.
    6. Remove the contact tip for the first feed test if the gun manual allows it.
    7. Jog wire through the gun and watch for shaving, pulsing, or spool overrun.
    8. Install the correct contact tip and clip the wire clean before welding.

    Inspection Steps

    • Spool gun plug: Look for bent pins, loose collar, wrong connector, or incomplete seating.
    • Trigger response: Confirm the gun motor starts only when the spool gun trigger is pulled.
    • Gas path: Confirm argon reaches the gun nozzle, not just the regulator outlet.
    • Drive roll: Check that the groove matches aluminum wire size and is not packed with aluminum shavings.
    • Drive pressure: Inspect the wire after feeding. Flat spots mean too much pressure.
    • Spool brake: Watch the spool after trigger release. It should stop without coasting into loose loops.
    • Contact tip: Replace tight, worn, spatter-packed, or wrong-size tips. Aluminum expands with heat and can seize in a marginal tip.
    • Nozzle: Clean soot and spatter so argon coverage stays even.
    • Work lead: Aluminum oxide and dirty clamps can cause erratic starts and poor arc stability.

    Test Procedures

    • Dry feed test: Feed wire with no arc and watch the spool, drive roll, and tip exit. Feed should be smooth, not pulsed.
    • Spool brake test: Trigger and release. If the spool overruns, add slight brake. If feed slows, reduce brake.
    • Drive tension test: Feed against a soft insulated surface. The wire should feed without flattening. Do not crush aluminum to stop slipping.
    • Gas test: Confirm argon flow at the nozzle. No gas at the spool gun causes immediate soot and porosity.
    • Scratch-clean test weld: Brush a small test coupon with a dedicated stainless brush, wipe contamination off, then weld a short bead.
    • Tip heat test: If feed stops after several starts, replace the tip and reduce stickout/heat problems before changing the gun.

    Aluminum Weld Quality Checks

    Aluminum spool gun problems often show up as weld appearance problems. Black soot usually points to poor cleaning, wrong gas, long arc, bad shielding coverage, or contaminated wire. Porosity usually points to moisture, oil, oxide, leaks, drafts, or insufficient argon coverage. A spool gun can feed correctly and still make bad aluminum welds if the material is not cleaned or the gas is wrong.

    • Use 100% argon, not C25 or CO2.
    • Remove oxide with a stainless brush dedicated to aluminum.
    • Remove oil, marker, cutting fluid, and moisture before welding.
    • Keep wire covered and dry when not in use.
    • Use push technique in most aluminum MIG work to keep shielding and cleaning action ahead of the puddle.
    • Maintain consistent stickout and travel speed.

    Compatibility Notes

    For Rebel 215-family documentation, ESAB states aluminum wire welding requires an optional spool gun. That statement supports using a spool gun for aluminum on those machines, but it does not identify every compatible spool gun part number for every Rebel variant. Verify the exact machine name, serial/region, front connector, control-pin layout, and the spool gun manual before ordering.

    Retail listings commonly describe Tweco 1027-1397 as a 160 amp, 12 ft spool gun for ESAB Rebel 215 units and Tweco 1027-1398 / 1027-1399 as 200 amp spool guns for Rebel 205, 235, and 285 machines. Treat retail compatibility as a lead, not final proof. Final fitment must come from ESAB/Tweco documentation, the machine manual, or a confirmed parts breakdown for the exact machine.

    What To Verify Before Ordering

    • Exact ESAB machine model: Rebel 215, EMP 215ic, EM 215ic, EMP 205ic AC/DC, Rebel 235, Rebel 285, EM 210, EMP 210, or other.
    • Machine serial number and regional version.
    • Approved spool gun part number and cable length.
    • Connector type, trigger/control plug, and pin layout.
    • Spool gun amperage rating and duty cycle.
    • Wire diameter range and aluminum alloy compatibility.
    • Contact tip series, nozzle, diffuser, and liner/jump liner used by the spool gun.
    • Maximum spool size accepted by the gun.
    • Shielding gas hose routing and required fittings.

    Common Wrong-Part Mistakes

    • Ordering a Rebel 215 spool gun for a Rebel 205, 235, or 285 without verifying the connector.
    • Using consumables for the main MIG gun instead of the spool gun.
    • Using C25 or CO2 because the machine was last set up for steel.
    • Over-tightening drive tension until the aluminum wire is flattened.
    • Leaving the spool brake loose and creating loops inside the gun.
    • Using the wrong contact tip size and blaming the spool gun motor.
    • Trying to weld dirty aluminum and diagnosing the result as a gas valve failure.

    Field Fix vs Proper Fix

    ProblemField FixProper Fix
    Spool gun does nothingReseat plug and check modeVerify approved gun, connector, trigger circuit, and machine support
    Wire slipsIncrease tension slightlyVerify roll groove, tip size, spool brake, and wire condition
    Wire birdnestsCut out wire and reduce tensionReset drive tension and spool brake; replace damaged tip or liner
    Black sootConfirm argon and clean test couponCorrect gas, cleaning, travel angle, leaks, and contaminated wire
    BurnbackReplace contact tipCorrect wire speed, tip size, stickout, and feed drag

    Safety Notes

    • Disconnect input power before connecting or removing spool gun plugs.
    • Secure argon cylinders upright and protect valve/regulator assemblies.
    • Keep hands away from spool gun drive parts while jogging wire.
    • Point the gun away from the face, hands, body, and other people during feed tests.
    • Wear eye protection when clipping aluminum wire.
    • Use ventilation; aluminum welding fumes and coatings can still be hazardous.
    • Do not weld unknown coated aluminum or castings without identifying contamination and fume hazards.

    Sources Checked

    Sources checked include ESAB Rebel operating documentation, spool gun product references, and related Weld Support Parts MIG feed and spool gun troubleshooting articles. Final spool gun and consumable selection must be verified by exact ESAB model, serial/region, connector, approved spool gun part number, wire alloy, wire diameter, contact tip series, shielding gas, and duty-cycle requirement.

  • ESAB Rebel Aluminum MIG Setup Issues: Wire Feed, U-Groove Rolls, PTFE Liner, Contact Tip, Gas, and Spool Gun Checks

    ESAB Rebel aluminum MIG setup issues usually show up as birdnesting, wire shaving, burnback, erratic starts, black soot, lack of fusion, poor bead wet-out, or aluminum wire that feeds briefly and then buckles. The first checks are wire diameter, aluminum alloy, U-groove drive roll, PTFE/Teflon liner, contact tip size, spool brake tension, drive-roll pressure, gun cable routing, polarity, 100% argon shielding gas, and whether the Rebel model is better served by a spool gun.

    Do not try to fix aluminum feed problems by crushing the wire harder with the drive rolls. Aluminum wire has low column strength compared with steel wire. If the contact tip is tight, the liner is steel, the gun cable is bent, the drive roll is wrong, or the spool brake drags, the wire will buckle before it reaches the arc. Remove the contact tip, keep the torch lead straight, and test feed before changing welding parameters.

    Related setup checks include ESAB Rebel wire feeding problems, ESAB MIG gas flow troubleshooting, MIG spool gun birdnesting causes, and Tweco Fusion 180 Rebel gun references.

    Common Symptoms

    SymptomLikely CauseFirst Check
    Aluminum wire birdnests at feederWrong liner, too much pressure, cable dragRemove contact tip and test feed with torch straight
    Wire shavings in feederWrong roll, pressure too high, rough guideUse U-groove roll and lower pressure
    Burnback into contact tipWire slowing before arc or tight tipReplace tip with correct aluminum-compatible size
    Black soot or gray weldWrong gas, poor cleaning, long stickout, low gas coverageVerify 100% argon and clean oxide layer
    Cold lumpy beadTravel too slow/fast, low voltage, poor prep, thick sectionReset Rebel program and test on clean scrap
    Arc starts then stubsWire feed drag, wrong WFS/voltage, poor work clampCheck feed path and clamp to clean aluminum

    Compatibility Notes for ESAB Rebel Aluminum MIG

    Do not order aluminum setup parts by โ€œRebelโ€ name alone. Rebel EMP 205ic AC/DC, EMP 215ic, EM 215ic, EMP 235ic, EM 235ic, and EMP 285ic packages may use different torch packages, connectors, drive rolls, and accessory kits. ESAB manual guidance for the Rebel EMP 215ic / EM 215ic standard MXL 200 MIG torch says aluminum welding requires replacing the standard steel conduit liner with a Teflon/PTFE liner and ordering U-groove drive rolls for 1.0 mm / 1.2 mm aluminum wire. Verify your exact manual before ordering.

    If your Rebel uses a replacement Tweco-style gun, confirm the rear connector and consumable family before buying tips or liners. WSPโ€™s ESAB MIG machine support page is a general support reference, while the Tweco Fusion 180 gun breakdown lists Rebel 8-pin rear-connector versions. That confirms the installed gun matters; it does not make every Rebel liner, tip, or drive roll universal.

    Inspection Steps

    1. Confirm the process. Aluminum MIG on Rebel is DC MIG with shielding gas, not AC TIG. Use the correct MIG mode and polarity from the manual.
    2. Verify shielding gas. Use 100% argon for standard aluminum MIG unless the wire/procedure specifies otherwise.
    3. Confirm wire alloy and size. 4043 and 5356 behave differently. Verify wire diameter against roll, tip, liner, and machine range.
    4. Install the correct drive roll. Use a smooth U-groove roll where ESAB specifies it for aluminum. Do not use aggressive knurled flux-core rolls on soft aluminum wire.
    5. Install the correct liner. Replace the standard steel conduit with the specified PTFE/Teflon liner where required.
    6. Remove the contact tip and test feed. If wire feeds smoothly without the tip, replace or resize the tip.
    7. Set low drive pressure. Use only enough pressure to feed without slip. Excess pressure flattens aluminum and creates shavings.
    8. Set spool brake correctly. Too tight causes drag; too loose can overrun and tangle.
    9. Keep the gun cable straight. Tight loops make push aluminum feeding unreliable.
    10. Clean the aluminum. Remove oil, moisture, and oxide with proper solvent and stainless brush dedicated to aluminum.

    Spool Gun vs Standard MIG Torch

    A standard MIG torch can work for some Rebel aluminum setups when the correct liner, U-groove rolls, tip, wire size, and short straight torch path are used. A spool gun is often the better fix when soft wire keeps buckling because the spool gun puts the wire drive close to the arc and shortens the feed path. ESAB compact MIG guidance specifically recommends a spool gun for better feeding performance of soft aluminum wire.

    Field Fix vs Proper Fix

    ProblemField FixProper Fix
    Aluminum birdnestingClear jam and straighten torch leadInstall correct U-groove roll, PTFE liner, tip, and pressure setting
    Wire shavingBack off pressure and clean feederReplace wrong roll/guide and contaminated liner
    BurnbackReplace contact tipFix wire drag, stickout, WFS/voltage balance, and tip size
    Sooty beadIncrease cleaning and check gasVerify argon, prep, stickout, flow, travel angle, and oxide removal
    Repeat push-feed failureUse shorter/straighter gun pathSwitch to approved spool gun setup if compatible

    Common Wrong-Part Mistakes

    • Trying to push aluminum through the standard steel liner.
    • Using V-groove or knurled rolls instead of the specified U-groove aluminum roll.
    • Running 100% CO2 or C25 instead of argon for aluminum MIG.
    • Ordering tips by wire diameter only without checking gun series and thread.
    • Over-tightening drive pressure to overcome a tight tip or liner drag.
    • Assuming all Rebel models use the same gun, liner, drive roll, or spool gun adapter.
    • Welding through oxide, oil, moisture, or mill finish and blaming the machine.

    What To Verify Before Ordering

    • Exact Rebel model: EMP 205ic AC/DC, EMP/EM 215ic, EMP/EM 235ic, EMP 285ic, or other.
    • Machine serial/product number and region-specific manual.
    • Installed MIG gun model, connector type, and cable length.
    • Wire diameter and alloy: 4043, 5356, or other.
    • Drive roll groove and size.
    • PTFE/Teflon liner size and length.
    • Contact tip series, bore, and thread.
    • Approved spool gun compatibility if using a spool gun.
    • Shielding gas, polarity, and material thickness range.

    Related Failure Paths

    • Aluminum wire birdnesting from feed-path drag.
    • Contact tip burnback from tight or overheated tip.
    • Porosity from wrong gas, poor cleaning, or long stickout.
    • Cold lap from low heat or travel-speed mismatch.
    • Wire shaving from excessive pressure or wrong drive roll.
    • Arc stubbing from poor work clamp or unstable feed.

    Safety Notes

    • Disconnect input power before changing drive rolls, liners, or gun parts.
    • Do not point the gun at yourself or others while feeding wire.
    • Wear eye protection when clipping aluminum wire or clearing birdnests.
    • Use ventilation and avoid welding through coatings, oils, or unknown contamination.
    • Argon can displace oxygen in confined areas; control ventilation and cylinder handling.
    • If the Rebel continues to feed erratically after setup checks, use qualified ESAB service support.

    Sources Checked

    • ESAB Rebel EMP 215ic / EM 215ic instruction manual.
    • ESAB compact MIG setup guidance.
    • ESAB Rebel support and manual search resources.
    • Weld Support Parts ESAB MIG support and Tweco Fusion gun pages.
    • Weld Support Parts Rebel feed, gas, and spool-gun troubleshooting pages.
  • MIG Spool Gun Birdnesting Causes: Aluminum Wire Feed, Spool Tension, Drive Pressure, Contact Tip, and Gun Setup

    MIG spool gun birdnesting happens when aluminum wire buckles, loops, or piles up inside the spool gun instead of feeding smoothly through the contact tip. The usual symptom is a stalled arc, a tangled loop near the small spool or drive roll, burnback at the contact tip, or wire that feeds by hand but jams under trigger power. The most common causes are too much drive-roll pressure, spool brake drag, wrong contact tip size, dirty contact tip, incorrect wire diameter, rough wire spool, poor spool alignment, wrong drive roll, worn guide, excessive gun angle, or contaminated soft aluminum wire.

    A spool gun shortens the aluminum wire path, but it does not eliminate setup problems. Start by removing the contact tip, clipping the wire clean, checking spool rotation, and feeding wire through the gun with the nozzle removed. If the wire feeds smoothly without the contact tip, replace the tip and verify size. If it still buckles, inspect drive pressure, spool drag, drive roll, inlet guide, liner/outlet guide, and wire condition.

    Related feed-path checks include MIG wire feed birdnesting causes, Lincoln Magnum PRO gun liner troubleshooting, Lincoln POWER MIG wire feed troubleshooting, and Miller spool gun support.

    Common Symptoms

    SymptomLikely CauseFirst Check
    Wire loops inside spool gunToo much drive pressure or blocked tipRemove contact tip and test feed
    Wire feeds then suddenly stopsSpool drag, bad wire cast, worn guideCheck spool rotation and wire path
    Wire shavings in gunPressure too high, wrong roll, dirty guideBack off tension and clean drive path
    Burnback into contact tipWire delivery slows before arcReplace tip and verify stickout
    Birdnesting after trigger releaseSpool overrun or brake setting issueCheck spool brake and spool cover
    Aluminum wire kinks on startsSoft wire, wrong tip, rough spool, poor angleVerify wire alloy/diameter and tip size

    Root Cause Analysis

    Aluminum wire is soft and has less column strength than steel wire. A spool gun improves feeding by putting the small wire spool close to the arc, but the wire can still buckle if anything resists movement at the tip, guide, drive roll, or spool. Birdnesting is usually a backpressure problem: the motor pushes, the wire cannot exit cleanly, and the soft wire curls into the easiest open space inside the gun.

    Inspection Steps

    1. Disconnect input power before opening the gun or drive compartment.
    2. Clip out the birdnest. Do not pull tangled aluminum through the contact tip or guide.
    3. Remove the nozzle and contact tip. A dirty, tight, or overheated tip is one of the fastest ways to create backpressure.
    4. Check wire by hand. The wire should pull from the spool without jerking, scraping, or digging into the spool flange.
    5. Check spool brake tension. Too tight causes drag; too loose can overrun when feeding stops.
    6. Inspect drive pressure. Use the minimum pressure that feeds without slipping. Too much pressure flattens aluminum wire.
    7. Inspect the drive roll and inlet guide. Confirm the roll matches wire diameter and is intended for the spool gun setup.
    8. Inspect the outlet guide or short liner. Replace it if it is grooved, packed with aluminum dust, cut short, or misaligned.
    9. Install the correct contact tip. Aluminum expands with heat, so use the manufacturer-recommended tip size and series.
    10. Test feed before welding. Feed wire with the gun straight, then run a short bead on clean scrap.

    Visual Wear Indicators

    PartWear IndicatorRepair
    Contact tipOval bore, wire sticking, blackened faceReplace with correct size
    Drive rollSmooth groove, aluminum packed in grooveClean or replace roll
    Inlet/outlet guideGrooved, sharp edge, aluminum dustReplace guide
    Wire spoolWire crossed, dirty, oxidized, poor castReload or replace wire
    Spool brakeSpool jerks, drags, or overrunsReset brake tension

    Compatibility Notes

    Spool gun parts are not universal. Verify the spool gun model, wire diameter, contact tip series, drive roll, gun tube, nozzle, diffuser, short liner or outlet guide, and machine connector before ordering. WSP lists model-specific Miller pages such as Miller Spoolmate 100 parts and Miller Spoolmate 150 parts. Use those pages only after confirming the actual gun model. A Spoolmate, Spoolmatic, Lincoln 100SG, Hobart spool gun, and Tweco-style spool gun do not share one universal contact tip and drive system.

    Common Wrong-Part Mistakes

    • Ordering contact tips by welder model instead of spool gun model.
    • Using a steel MIG contact tip that is too tight for aluminum feeding.
    • Running 0.030 wire through a 0.035 drive setup without verification.
    • Over-tightening drive pressure to stop slipping, which flattens soft wire.
    • Using dirty or oxidized aluminum wire and blaming the spool gun.
    • Assuming a spool gun fixes poor gas coverage, dirty aluminum, wrong polarity, or poor work clamp contact.

    Field Fix vs Proper Fix

    ProblemField FixProper Fix
    Wire jammed at tipClip wire and replace tipVerify tip series, bore, stickout, and heat buildup
    Wire flatteningBack off pressureSet minimum pressure and verify roll groove
    Spool draggingLoosen brake slightlyCorrect spool seating, cover clearance, and brake adjustment
    Wire shavingClean drive pathReplace worn roll, guide, or contaminated wire
    Repeated birdnestingReload wire and test feedInspect full gun setup and replace worn feed parts

    What To Verify Before Ordering

    • Spool gun brand and exact model.
    • Welder model and spool-gun connector compatibility.
    • Wire diameter: 0.030, 0.035, 3/64, or other.
    • Wire alloy: 4043, 5356, or other aluminum filler.
    • Contact tip series, thread, and bore.
    • Drive roll part number and groove size.
    • Inlet guide, outlet guide, liner, diffuser, and nozzle style.
    • Spool size and wire spool hub fit.

    Safety Notes

    • Disconnect input power before opening the spool gun or feeder.
    • Do not point the gun at yourself or others while feeding wire.
    • Wear eye protection when clipping aluminum wire or clearing a birdnest.
    • Do not bypass gun trigger, spool cover, or feeder safety features.
    • Use proper ventilation and clean aluminum before welding.

    Sources Checked

    • Weld Support Parts MIG birdnesting and Lincoln spool-gun support pages.
    • Weld Support Parts Miller Spoolmate support pages.
    • Miller aluminum MIG and Spoolmate setup references.
    • Lincoln Electric aluminum feeding guidance.
  • Lincoln Drive Roll Pressure Adjustment Guide: Wire Feed Slip, Burnback, Birdnesting, and Wire Shaving Fixes

    Lincoln drive roll pressure should be set only tight enough to feed wire without slipping. Too little pressure causes the drive rolls to spin while the wire stalls. Too much pressure crushes or flattens the wire, creates copper dust or wire shavings, loads the liner with debris, and can lead to birdnesting or burnback. If a Lincoln POWER MIG, Weld-Pak, SP, LN, or Power Feed machine has erratic wire feed, adjust pressure only after confirming the drive-roll groove, contact tip, liner, spool brake, and wire size are correct.

    The practical test is simple: remove the contact tip, keep the gun cable straight, jog wire, and increase pressure gradually until the wire feeds consistently without deep roll marks. Do not use pressure to force wire through a clogged liner or undersized tip. If wire slips because of downstream drag, more pressure makes the feed path worse.

    Related feed-path checks include MIG wire feed slipping troubleshooting, MIG wire feed stuttering fixes, MIG birdnesting causes, and the Lincoln MIG gun selection chart.

    Common Symptoms

    SymptomPressure ConditionFirst Check
    Drive rolls spin but wire does not moveToo loose or downstream restrictionRemove contact tip and test feed
    Wire has deep roll marksToo tight or wrong grooveBack off pressure and verify roll type
    Copper dust or shavings near feederToo tight, wrong roll, dirty linerClean feeder and inspect liner
    Birdnesting at drive rollsPressure too high or wire blocked downstreamCheck liner, tip, spool brake, and guides
    Burnback into contact tipFeed slows before arcCheck tip, liner drag, and pressure
    Flux-core slips under smooth rollWrong roll typeVerify knurled roll if specified

    Root Cause Analysis

    The drive roll grips the filler wire and pushes it through the inlet guide, outlet guide, gun liner, contact tip, and arc. Pressure is only one part of that system. A correct pressure setting with the wrong groove can still shave wire. A correct roll and pressure setting can still fail if the liner is kinked, the contact tip is undersized, the spool brake is too tight, or the gun cable is looped sharply.

    Drive Roll Groove Selection

    Wire TypeTypical Roll StylePressure Note
    Solid steel wireSmooth V-grooveUse minimum pressure that feeds without slip
    Flux-cored wireKnurled V-groove where specifiedEnough bite without crushing the wire
    Aluminum wireSmooth U-grooveLower pressure than steel; avoid shaving and buckling
    Hardfacing or large cored wireMachine-specific rollVerify feeder rating and wire-size range

    Adjustment Procedure

    1. Disconnect input power before changing rolls or guides. Reconnect power only for controlled feed testing.
    2. Confirm wire size and type. Match the wire spool to the drive-roll groove, contact tip, liner, and polarity.
    3. Verify the groove facing outward. On many Lincoln rolls, the visible size marking must match the wire being fed.
    4. Remove the contact tip. This separates tip restriction from pressure trouble.
    5. Straighten the gun cable. Tight loops add drag and make pressure adjustment inaccurate.
    6. Start with light pressure. Jog wire and increase pressure gradually until the wire feeds smoothly.
    7. Check the wire surface. Stop if the wire is flattened, deeply marked, shaved, or throwing copper dust.
    8. Reinstall the correct contact tip. Test feed again with the tip installed.
    9. Run a short weld test. If burnback or stutter returns, check liner drag, spool brake, and tip size before adding more pressure.

    Compatibility Notes for Lincoln Feeders

    Lincoln drive rolls are not universal. POWER MIG 140C, 140T, 180C, 180T, 180 Dual, and 210 are listed in one drive-system group, while POWER MIG 200, 215, 216, 255, 256, 260, 300, and 350MP are listed in another. Retail Weld-Pak, Pro-MIG, Easy-MIG, and SP machines may use still different drive-roll groups by code number. Always verify machine model, code number, wire size, wire type, and drive-system letter before ordering.

    For gun-side checks, compare the installed gun to the Lincoln Magnum PRO 100L breakdown, Lincoln Magnum 100L breakdown, or Lincoln Magnum 250L breakdown. Wrong contact tips and liners can create feed drag that gets mistaken for low drive-roll pressure.

    Field Fix vs Proper Fix

    ProblemField FixProper Fix
    Wire slippingIncrease pressure slightlyVerify tip, liner, groove, spool brake, and guides
    Wire shavingBack off pressure and clean feederInstall correct roll and replace contaminated liner
    BirdnestingCut out jam and reloadFix downstream drag before resetting pressure
    Flux-core slippingCheck roll grooveUse correct cored-wire roll and pressure
    Aluminum bucklingReduce pressure and straighten cableUse U-groove rolls, correct liner, and proper aluminum setup

    Common Wrong-Part Mistakes

    • Using drive-roll pressure to overcome a clogged liner.
    • Running solid wire in a knurled groove and creating wire shavings.
    • Running flux-core wire in a smooth groove when a knurled roll is required.
    • Installing the roll with the wrong wire-size groove facing the wire.
    • Ordering drive rolls by โ€œLincoln MIGโ€ instead of machine model and code number.
    • Changing drive rolls while leaving a worn contact tip in the gun.

    What To Verify Before Ordering

    • Lincoln machine model and code number.
    • Drive-system reference group or feeder model.
    • Wire diameter and wire type.
    • Roll groove style: smooth V, knurled V, U-groove, or machine-specific.
    • Incoming guide and outgoing guide part requirements.
    • Installed gun model, contact tip size, and liner range.
    • Whether the machine has been fitted with a replacement gun or feeder adapter.

    Safety Notes

    • Keep fingers clear of drive rolls while jogging wire.
    • Do not point the MIG gun at yourself or another person while feeding wire.
    • Wear eye protection when clipping wire or clearing birdnests.
    • Disconnect input power before opening feeder parts or changing drive rolls.
    • If the feeder motor runs inconsistently after the mechanical feed path is verified, use qualified Lincoln service support.

    Sources Checked

    • Lincoln Electric 2024 Expendable Parts Guide.
    • Lincoln Electric MIG problems and remedies guidance.
    • Lincoln Electric aluminum feeding guidance.
    • Weld Support Parts Lincoln gun selection and Magnum gun pages.
    • Weld Support Parts MIG wire feed troubleshooting pages.
  • Aluminum MIG Wire Feeding Problems: Birdnesting, Burnback, Shaving, and Drive Roll Setup

    Aluminum MIG wire feeding problems usually start because aluminum wire is soft and does not push through a standard MIG gun like steel wire. Birdnesting, slipping drive rolls, shaved wire, burnback, and an erratic arc are usually caused by too much drive roll pressure, the wrong drive roll groove, a long or dirty liner path, wrong contact tip size, tight spool brake, or trying to push aluminum through a gun setup that needs a spool gun or push-pull gun instead.

    Do not fix aluminum feed problems by simply tightening the drive roll tension. That often makes the problem worse. The correct fix is a soft-wire feed path: correct aluminum wire diameter, U-groove drive rolls where required, clean liner or aluminum-specific liner, correct contact tip, light spool brake, short/straight gun path, 100% argon shielding gas, and the correct spool gun or push-pull setup for the machine.

    Common Symptoms

    SymptomLikely CauseFirst Check
    Birdnesting at feederToo much drive pressure, liner drag, or blocked tipBack off tension and inspect tip/liner
    Wire shavings near rollsWrong roll groove or too much pressureUse proper aluminum drive roll setup
    Wire slips but does not feedSpool brake too tight, wrong groove, or liner dragCheck spool hub and gun cable path
    Burnback into contact tipWire slows before reaching arcReplace tip and test wire feed with gun straight
    Erratic arcUneven feed or poor current transferCheck tip size, liner, rolls, and work clamp
    Aluminum starts then jamsSoft wire buckling under resistanceShorten feed path or use spool/push-pull gun

    What Wears Out First

    The contact tip usually causes the first visible problem. Aluminum expands with heat and is soft enough to drag in a tight, worn, or dirty tip. If the wire burns back repeatedly, replace the contact tip before changing machine settings.

    The liner is next. A liner that worked for steel wire may contain steel dust, rust, copper flakes, or sharp bends. Aluminum wire can hang up in that resistance and buckle at the feeder. The longer the gun cable, the more the liner matters.

    Drive Roll and Tension Setup

    • Use the correct groove: aluminum commonly requires a U-groove roll so the wire is supported without sharp-edge shaving.
    • Do not over-tighten: soft aluminum deforms easily. Tight rolls can flatten wire and fill the liner with shavings.
    • Avoid using pressure as a fix: if the wire will not feed with light pressure, find the restriction.
    • Check groove size: .030, .035, 3/64, and 1/16 aluminum wires require matching feed components.
    • Clean the rolls: aluminum debris in the groove can reduce grip and create more shaving.

    Spool Gun vs Push-Pull vs Standard MIG Gun

    SetupBest UseFeed Risk
    Standard MIG gunShort gun, correct liner, limited aluminum workHighest risk of buckling and burnback
    Spool gunSmall jobs, field repair, short aluminum feed pathBetter feed because wire spool is at the gun
    Push-pull gunProduction aluminum and longer gun reachBest control when correctly matched to machine

    If aluminum keeps birdnesting through a standard gun, the machine may not be the problem. The feed path may simply be too long for soft aluminum wire. A compatible spool gun or push-pull gun shortens or controls the wire path and is often the correct repair, not another tension adjustment.

    Inspection Steps

    1. Stop welding and cut the wire clean.
    2. Remove the contact tip and check whether wire feeds freely without it.
    3. Lay the gun cable straight and jog wire slowly.
    4. Open the drive compartment and look for shaved aluminum dust.
    5. Verify drive roll type, groove size, and wire diameter.
    6. Back off drive tension, then increase only until wire feeds without slipping.
    7. Check spool brake. The spool should not coast, but it should not drag hard.
    8. Inspect liner type, liner length, and inlet/outlet guides.
    9. Install a new contact tip matched to the aluminum wire diameter.
    10. Verify 100% argon shielding gas for aluminum MIG unless the procedure specifies otherwise.

    Common Wrong-Part Mistakes

    • Using steel-wire V-groove rolls for soft aluminum wire.
    • Using knurled rolls that shave aluminum and contaminate the liner.
    • Leaving a steel liner in place after it has collected steel dust and debris.
    • Using a contact tip that is too tight after the gun heats up.
    • Trying to push aluminum through a long standard MIG gun cable.
    • Ordering a spool gun by appearance instead of machine compatibility.
    • Assuming every Miller, Lincoln, or Hobart aluminum spool gun fits every MIG welder from that brand.

    Compatibility Notes

    Verify spool gun, push-pull gun, liner, contact tip, and drive roll compatibility by machine model, serial/code where available, gun connector, wire diameter, and wire alloy. For Miller spool gun parts, Weld Support Parts lists the Miller Spoolmate 100 Consumables page and the Miller Spoolmate 150 Spool Gun Parts page. For general feed-path parts, check Drive Rolls, MIG Liners, and MIG Contact Tips.

    Field Fix vs Proper Fix

    A field fix is replacing the contact tip, straightening the gun cable, reducing drive pressure, cleaning aluminum shavings from the rolls, and loosening the spool brake slightly.

    The proper fix is matching the whole feed system to aluminum: correct wire diameter, correct roll profile, clean or aluminum-rated liner, correct tip, proper gas, light drive pressure, and the correct spool gun or push-pull gun when a standard gun cannot feed reliably.

    Related Failure Paths

    • Birdnesting at feeder
    • Burnback into contact tip
    • Wire shaving at drive rolls
    • Aluminum liner drag
    • Wrong spool gun compatibility
    • Poor argon coverage
    • Erratic arc from unstable wire feed

    Safety Notes

    Keep fingers clear of drive rolls while jogging wire. Aluminum wire can exit the gun quickly and cause puncture injury. Turn off and disconnect input power before servicing internal feeder parts. Use proper welding PPE and ventilation. If the gun connector, cable, or feeder motor overheats, stop welding and inspect the equipment before continuing.

  • Millermatic 252 Spool Gun Setup Issues: Spoolmatic 15A/30A Aluminum MIG Troubleshooting

    If a Millermatic 252 will not feed aluminum through the spool gun, has no arc, no gas, birdnesting inside the spool gun, burnback at the tip, or welds with heavy black soot, check the spool gun connection and aluminum setup before blaming the welder. The Millermatic 252 supports direct connection of optional Spoolmate and Spoolmatic spool guns without an added module, but the gun plug, weld cable, gas hose, polarity, shielding gas, wire size, contact tip, spool brake, and gun selector behavior still have to be correct.

    The most common setup failures are simple: the gun trigger plug is not seated, the threaded collar is loose, the weld cable is not connected to the correct output terminal, the spool gun gas hose is not connected to the regulator/flowmeter, the wrong gas is being used, or both the MIG gun and spool gun triggers are being pulled. For aluminum MIG, verify 100% argon shielding gas, clean aluminum wire, correct contact tip size, smooth spool rotation, and a clean workpiece.

    Common Symptoms

    • No wire feed from spool gun: Trigger plug, gun selector logic, spool gun motor, wire jam, tip blockage, or spool brake issue.
    • No arc but wire feeds: Weld cable connection, work clamp, polarity, output setting, or gun connection problem.
    • No gas at spool gun: Empty cylinder, closed valve, wrong hose routing, disconnected gas hose, regulator issue, or blocked gun gas path.
    • Burnback into contact tip: Wire speed too low, contact tip too small, wire drag, wrong stickout, or unstable start.
    • Birdnesting inside spool gun: Spool tension too loose/tight, dirty wire, wrong drive tension, wrong tip, or soft aluminum wire snagging.
    • Black soot on aluminum welds: Poor cleaning, wrong gas, long arc, bad gas coverage, travel issue, or contaminated wire/base metal.
    • Porosity: Loss of argon shielding, dirty aluminum, moisture, wind, leak, or blocked nozzle/diffuser.

    What This Setup Does

    A spool gun moves soft aluminum wire from a small spool mounted in the gun instead of pushing it through the main machine gun cable. This reduces feeding problems with aluminum wire. On the Millermatic 252, the spool gun still needs three working paths: trigger/control connection, weld power connection, and shielding gas connection. If any one path is wrong, the gun may feed but not weld, weld but produce porosity, or fail to feed at all.

    Compatibility Notes

    The Millermatic 252 supports direct connection of optional Spoolmate 200 and Spoolmatic spool guns, and Miller literature notes no extra module is required for those supported spool gun / push-pull gun connections. The ownerโ€™s manual connection section specifically covers Spoolmatic 15A and 30A gun hookup. If the gun is not a Spoolmate 200, Spoolmatic 15A, Spoolmatic 30A, or an approved XR push-pull setup, treat compatibility as Unknown (Verify).

    For standard MIG gun parts on the same machine, use the Miller MIG gun selection chart. For Miller MIG support categories, see Miller MIG support. For the machine-family overview, see Millermatic 252 MIG welder features and reviews. For related feed checks, see MIG wire feed issues and MIG consumables.

    Correct Connection Checks

    Connection AreaWhat To CheckFailure Symptom
    Gun trigger plugPlug fully inserted and threaded collar tightenedNo feed, no response, intermittent trigger
    Weld cableRouted through front panel and connected to weld output terminalWire feeds but no arc or weak arc
    Gas hoseConnected to regulator/flowmeterNo gas, porosity, black soot
    Shielding gas100% argon for aluminum MIGContamination, soot, porosity
    Work clampClean, tight connection to work or tableErratic arc, no arc, popping
    Gun front endCorrect tip, clean nozzle, proper stickoutBurnback, poor starts, porosity

    Important Two-Gun Behavior

    The Millermatic 252 can have two welding guns connected at the same time, but only one gun should be used at a time. If both triggers are pulled at the same time, weld output and the wire-feed motor are disabled. If the spool gun suddenly seems dead, make sure the main MIG gun trigger is not being pressed, hung up, or stored in a way that closes the trigger.

    Spool Gun Feed Problems

    • Check the contact tip: Aluminum expands with heat. A tight, damaged, or wrong-size tip can cause burnback and feed stoppage.
    • Check the spool brake: Too tight causes drag. Too loose causes overrun and tangled wire.
    • Check drive tension: Too much tension deforms soft aluminum wire. Too little tension slips.
    • Check wire condition: Oxidized, dirty, kinked, or loosely wound aluminum wire feeds poorly.
    • Check gun angle: Sharp bends near the gun body and poor cable handling can increase feed drag.
    • Check wire size: Tip, drive roll, and machine settings must match the aluminum wire diameter.

    Aluminum Weld Quality Problems

    When the spool gun feeds but the weld looks dirty, start with cleaning and gas coverage. Aluminum oxide, oil, marker, moisture, saw lubricant, and handling contamination can all create porosity or soot. Use a stainless brush dedicated to aluminum, remove oxide in the weld zone, and keep 100% argon coverage stable at the puddle. Do not weld aluminum with C25 or CO2 shielding gas.

    Setup Issue Diagnosis Table

    ProblemLikely CauseFirst Fix
    Spool gun does nothingTrigger plug loose or wrong gunSeat plug and tighten collar
    Wire feeds but no arcWeld cable/work clamp problemCheck output cable and work lead
    Wire feeds but no gasGas hose not routed to regulatorConnect gas hose and verify flow
    Wire burns backTip/wire speed/stickout issueInstall correct tip and adjust feed
    Wire tangles in gunSpool tension or drive tension wrongReset spool brake and drive pressure
    Porosity on aluminumDirty base metal or poor argon coverageClean metal and check gas flow
    Machine disables outputBoth gun triggers pulledRelease unused gun trigger

    What To Verify Before Ordering Parts

    • Exact spool gun model: Spoolmate 200, Spoolmatic 15A, Spoolmatic 30A, or other.
    • Gun serial/part number and barrel style.
    • Wire diameter and alloy.
    • Contact tip size and tip series.
    • Nozzle and diffuser condition.
    • Trigger plug condition and threaded collar.
    • Weld cable lug and gas hose fittings.
    • Whether the gun is direct-connect or requires a control not used on this setup.

    Common Wrong-Part Mistakes

    • Ordering consumables for the main MDX-250 or M-25 MIG gun instead of the spool gun.
    • Assuming every Miller spool gun uses the same tip, nozzle, and diffuser.
    • Using steel MIG settings and C25 gas for aluminum spool gun welding.
    • Replacing the machine gas valve before checking the separate spool gun gas hose routing.
    • Overtightening drive tension until soft aluminum wire is flattened.
    • Ignoring the main gun trigger while diagnosing a โ€œdeadโ€ spool gun.

    Field Fix vs Proper Fix

    Field fix: Reseat the trigger plug, tighten the collar, confirm the weld cable and gas hose are connected, install a clean correct-size tip, back off excessive spool tension, and test on clean aluminum with argon.

    Proper fix: Verify the exact spool gun model, replace worn spool gun consumables with the correct series, repair damaged trigger/gas/power leads, confirm argon flow at the gun, clean the aluminum correctly, and document the wire alloy, wire size, voltage, wire speed, and gas flow that produce a sound weld.

    Safety Notes

    • Disconnect input power before internal machine service.
    • Secure shielding gas cylinders upright.
    • Wear eye protection when clipping aluminum wire.
    • Keep hands clear of drive rolls and spool gun feed parts while testing.
    • Use ventilation; aluminum welding can still produce hazardous fumes, especially on coated or contaminated material.
    • Do not weld unknown aluminum castings or coated material without identifying contamination and fume hazards.
  • Lincoln Magnum PRO 100SG Spool Gun: Aluminum MIG Feed Fix

    Soft aluminum MIG wire is hard to push through a standard MIG gun. It birdnests, shaves, slips at the drive rolls, and burns back into the tip right when the bead should be starting clean. The Lincoln Electric Magnum PRO 100SG spool gun, ASIN B00CP96KJO, is a replacement and upgrade path for welders who already own a compatible Lincoln machine and want more reliable aluminum wire feeding without fighting a long liner path.

    This post focuses on troubleshooting aluminum MIG feed problems, when a spool gun makes sense, what wears first, what to verify before buying, and what spare consumables to keep with the gun.

    Key Takeaways

    • The Lincoln Magnum PRO 100SG is a 4-pin spool gun, product number K3269-1, sold on Amazon under ASIN B00CP96KJO.
    • It is intended to improve feeding of soft aluminum wire by keeping the small wire spool at the gun instead of pushing aluminum through a long MIG gun liner.
    • Verify welder compatibility before buying; 4-pin does not mean universal.
    • The verified kit contents include a 10 ft cable, 0.035 in 4043 aluminum wire, 0.030โ€“0.035 in drive roll, KP2744-035T contact tips, and an electrical harness with toggle switch.
    • Stock extra 0.035 contact tips and aluminum wire because tip wear, wire shaving, and burnback can still happen if setup is wrong.

    The Problem: Aluminum Wire Keeps Birdnesting or Stuttering

    If your aluminum MIG setup keeps birdnesting, the machine may not be the real problem. Aluminum wire is softer than steel wire, so it is easier to deform at the drive rolls and harder to push through a long cable. Once the wire gets scraped, flattened, or restricted, the feed becomes inconsistent and the arc starts popping, surging, or burning back.

    Before replacing a welder, check the wire path. If the problem gets worse when the gun lead is looped, bent, or moved, you are probably dealing with friction, not a voltage setting. For more feed-path diagnosis, see best contact tips for MIG burnback and the MIG porosity fix guide.

    Why a Spool Gun Fixes Many Aluminum Feed Problems

    A spool gun moves the aluminum wire spool to the gun handle. Instead of pushing soft wire from the feeder, through a long liner, and out the contact tip, the gun feeds from a short path near the arc. That shorter path reduces the chance of wire shaving, liner drag, birdnesting, and feed hesitation.

    The Lincoln Magnum PRO 100SG is best viewed as an aluminum MIG feed upgrade for compatible Lincoln compact wire feeder/welders, not as a universal fix for every MIG machine. If your welder is not listed for K3269-1 compatibility, treat fitment as Unknown (Verify).

    Root Causes This Upgrade Helps Address

    • Soft aluminum wire shaving in the feeder.
    • Birdnesting caused by pushing aluminum through a long standard liner.
    • Feed stutter that changes when the gun lead bends.
    • Burnback caused by inconsistent wire delivery at the contact tip.
    • Arc starts that feel erratic even after cleaning the base metal and checking gas flow.

    Root Causes It Will Not Fix

    • Wrong shielding gas for aluminum.
    • Dirty aluminum, oxide contamination, oil, or moisture.
    • Wrong contact tip size.
    • Incorrect spool gun tension or wire brake setup.
    • Unsupported welder compatibility.
    • Poor work clamp connection.
    • Operator technique problems, including excessive stickout or wrong gun angle.

    Product Recommendation

    Best overall upgrade for compatible Lincoln compact MIG machines: Lincoln Electric Magnum PRO 100SG Spool Gun, 4-pin, K3269-1.

    Lincoln Electric Magnum PRO 100SG Spool Gun – for Aluminum MIG Welding – 4 Pin, 10 FT Cable – K3269-1
    • ERGONOMIC, BALANCED DESIGN – Weighing only 3.5 lbs, the lightweight gun allows for easy control while welding
    • HASSLE FREE SET UP – The Magnum PRO 100SG Spool Gun directly connects to multiple Lincoln Electric welding machines without the need for any adapters
    • DURABLE STORAGE AND TRAVEL CASE – The sturdy design of the carrying case keeps the spool gun out of harmโ€™s way between uses
    • PREMIUM MAGNUM PRO EXPENDABLES – Patented features designed with both performance and productivity in mind help extend service life, reducing downtime and overall costs
    • MACHINE COMPATIBILITY – 4-Pin connector is compatible with Lincoln Electric welders including the Power MIG 210MP, Power MIG 140C, Power MIG 211i, Power MIG 215i, SP-140T, and SP-180T

    Last update on 2026-07-01 / Affiliate links / Images from Amazon Product Advertising API

    This is the main buy when your goal is to add aluminum MIG capability to a compatible Lincoln setup and reduce the feed problems that happen when soft wire is pushed through a standard MIG gun. It is not the budget choice compared with replacing a contact tip or liner, but it is the more serious upgrade path when aluminum work is recurring.

    What to Verify Before Buying

    • Machine compatibility: Confirm your Lincoln welder supports K3269-1 / 4-pin Magnum PRO 100SG. Do not rely on connector shape alone.
    • Wire diameter: Verified setup information references 0.030โ€“0.035 in aluminum wire capability. Your exact wire choice should match the gun setup and machine chart.
    • Wire alloy: Verified included wire is 0.035 in 4043 aluminum alloy. Other alloys require setup confirmation.
    • Duty cycle: Published seller/spec references list 130 amps at 30% duty cycle. Verify against Lincoln documentation for your exact package and application.
    • Consumables: The verified included contact tip part is KP2744-035T. Keep spares available before starting a project.

    Comparison Table

    OptionBest ForWhat It SolvesLimitations
    Replace contact tip onlyCheap first troubleshooting stepBurnback, spatter-packed tip, poor current transferWill not fix long-path aluminum wire drag
    Replace standard MIG linerSteel MIG feed issues or contaminated linerStutter, drag, wire debris, rough feedStill not ideal for soft aluminum wire on long leads
    Lincoln Magnum PRO 100SGRecurring aluminum MIG work on compatible Lincoln machinesSoft aluminum feeding, birdnesting, wire shaving, feed hesitationCompatibility must be verified; not universal
    Higher-capacity spool gunHeavier aluminum work or higher duty cycle needsMore demanding production useMay require a different welder, connector, or budget

    What Wears Out First

    • Contact tips: Replace when the bore wears, wire starts sticking, or burnback appears.
    • Nozzle area: Clean spatter buildup before it disrupts shielding gas or overheats the tip.
    • Drive roll path: Watch for aluminum shavings, slipping, or wire deformation.
    • Wire spool: Replace contaminated or poorly stored aluminum wire. Aluminum cleanliness matters.
    • Trigger/cable strain points: Inspect if feed cuts in and out when the cable moves.

    Visual Wear Indicators

    • Wire burns back into the contact tip after short starts.
    • Aluminum shavings collect inside the gun or near the wire path.
    • The contact tip opening looks enlarged, oval, dark, or spatter-packed.
    • The wire exits with a scratchy or pulsing feel instead of a steady feed.
    • The bead has inconsistent width because wire speed is not staying stable.

    Common Misdiagnosis

    Many welders chase voltage and wire feed speed first. That can waste time. If the aluminum wire is not feeding smoothly, settings changes only hide the root cause. Confirm wire payoff, tip size, drive roll tension, gas coverage, and base-metal cleanliness before assuming the machine is defective.

    If the weld has holes or black soot, do not blame the spool gun first. Aluminum porosity can come from poor cleaning, wrong gas, leaks, excess stickout, or contaminated filler. See the MIG porosity troubleshooting guide for gas and contamination checks.

    If Ignored

    • Repeated birdnesting wastes aluminum wire and shop time.
    • Burnback can destroy contact tips and stop the weld mid-joint.
    • Wire shaving can contaminate the feed path and create more drag.
    • Inconsistent feed can cause poor fusion, ugly starts, and failed practice coupons or repairs.
    • Operators may over-tighten drive rolls, making soft-wire deformation worse.

    Recommended Shop Setup

    • Lincoln Magnum PRO 100SG spool gun for compatible Lincoln machines.
    • Extra KP2744-035T 0.035 contact tips or verified equivalent.
    • Clean 0.035 in 4043 aluminum wire for general aluminum repair work where appropriate.
    • Dedicated stainless brush for aluminum cleaning.
    • Clean nozzle tools and anti-spatter workflow appropriate for your process.
    • Clear helmet cover lenses so the puddle is visible. If visibility is the issue, read why you canโ€™t see your weld pool and best welding helmet replacement lenses.

    Recommended Spare Quantity

    • Contact tips: Keep at least 5โ€“10 verified 0.035 tips with the spool gun.
    • Aluminum wire: Keep one sealed spare 1 lb spool if aluminum repair work is recurring.
    • Nozzle: Keep one spare if your work creates heavy spatter or the gun travels to jobsites.
    • Cover lenses: Keep a multi-pack near the welder so visibility problems do not get mistaken for technique problems.

    Related Failures

    • Birdnesting at the feeder after switching to aluminum wire.
    • Burnback into the contact tip during starts and stops.
    • Porosity after wire feed becomes inconsistent.
    • Spatter buildup around the nozzle and contact tip.
    • Poor weld pool visibility from scratched helmet lenses.

    FAQ

    Is B00CP96KJO the Lincoln Magnum PRO 100SG spool gun?

    Yes. ASIN B00CP96KJO was verified as the Lincoln Electric Magnum PRO 100SG spool gun, commonly associated with Lincoln product number K3269-1.

    Does the Magnum PRO 100SG fit every Lincoln welder?

    No. It is a 4-pin spool gun for compatible Lincoln machines, but compatibility is not universal. Check your welder manual or Lincoln compatibility table before buying.

    Will a spool gun stop all aluminum porosity?

    No. A spool gun improves wire feeding, but porosity can still come from poor cleaning, oxide, moisture, wrong gas, leaks, drafts, or technique.

    What wire size is the 100SG commonly set up for?

    Verified product information references 0.030โ€“0.035 in wire setup, with included 0.035 in 4043 aluminum wire. Verify your exact wire alloy and diameter against your welder setup chart.

    What consumable should I buy with the spool gun?

    Start with spare 0.035 contact tips that match the Magnum PRO 100SG setup. The verified included tip part is KP2744-035T. Also keep clean aluminum wire and replacement helmet cover lenses on hand.

    Safety Notes

    • Disconnect input power before installing adapters, harnesses, or servicing the gun.
    • Follow the Lincoln manual for installation, setup, and machine compatibility.
    • Wear welding gloves, flame-resistant clothing, and eye/face protection rated for welding.
    • Use proper ventilation when welding aluminum and when running repeated test beads.
    • Do not troubleshoot live electrical connections unless qualified to do so.

    Sources Checked

    • Lincoln Electric Magnum PRO 100SG K3269-1 product page.
    • Lincoln Electric Magnum PRO 100SG product literature PDF.
    • Lincoln Electric POWER MIG 215 MPi literature referencing K3269-1 package inclusion.
    • Lincoln Electric SP-140T literature referencing Magnum PRO 100SG 4-pin accessory details.
    • Amazon product identity check for ASIN B00CP96KJO.
    • Weld Support Parts internal posts on MIG burnback, porosity, wire feed issues, and helmet lens visibility.
  • Weldpro Omni 210 MultiProcess Welder Review (2025): Precision Power for Every Job

    Weldpro Omni 210 MultiProcess Welder Review (2025): Precision Power for Every Job

    Quick Look

    The Weldpro Omni 210 brings full multi-process capability into one compact frame โ€” MIG, Stick, AC/DC TIG, flux core, spool gun, and pulse welding. Designed for welders who want pro-level precision without hauling multiple machines, it blends smart controls with a durable, field-ready design.

    Key Takeaways

    • Processes: MIG, Flux Core, Stick, Spool Gun, AC/DC TIG (6-in-1)
    • Input Power: Dual Voltage 110 V / 220 V
    • Output Current: Up to 200 A for MIG and TIG
    • Synergic MIG: Auto-set function for easy setup and consistent bead quality
    • Display & Controls: Digital interface with VRD, hot start, arc force, and protection indicators

    Performance and Use

    The Omni 210 balances brute amperage with refined control. Its synergic MIG mode automatically adjusts wire feed to match voltage and gas settings, letting you focus on torch control. The AC/DC TIG function expands capability to aluminum and stainless work, while the built-in pulse mode minimizes heat distortion on thin metals.

    With its digital multi-function display and onboard thermal/overload protection, this machine handles everything from home fabrication to light industrial jobs. Welders switching between steel, aluminum, and stainless will appreciate the one-machine workflow.

    In-Box / Not Included

    Included:

    • Weldpro Omni 210 power source
    • MIG gun and ground clamp
    • TIG torch with foot pedal
    • Power adapter for 110 V / 220 V
    • User manual

    Not Included:

    • Shielding gas and cylinders
    • Wire spool and consumables
    • Spool gun sold separately

    Applications

    • Shop and field fabrication
    • Aluminum TIG or MIG projects
    • Structural repair and automotive restoration
    • Maintenance welding across multiple metals

    Comparison Table

    ModelInput / OutputBest ForAmazon
    Weldpro Omni 210110 V/220 V โ€ข 200 A โ€ข 6-in-1Aluminum and multiprocess weldingSee on Amazon

    Safety Notes

    Always follow ANSI Z49.1 welding safety standards. Keep power leads dry, use grounded outlets, and wear appropriate PPE. Verify duty cycle before extended runs โ€” exceeding rated limits can trigger thermal protection.

    FAQ

    Q: Can it weld aluminum out of the box?
    Yes, when paired with a spool gun or by using the AC TIG mode.

    Q: Does it include a foot pedal?
    Yes โ€” a foot pedal is included for TIG operation.

    Q: Is this beginner-friendly?
    The synergic MIG and digital display make setup easy for new users, while advanced controls appeal to professionals.

    No products found.

    Where to Buy

    Amazon: Weldpro Omni 210 6-in-1 MultiProcess Welder

    We may earn a commission from qualifying purchases made through our links, at no extra cost to you.

  • ARCCAPTAIN 250A MIG Welder Review (2025): 6-in-1 Powerhouse for MIG, TIG, and Stick

    ARCCAPTAIN 250A MIG Welder Review (2025): 6-in-1 Powerhouse for MIG, TIG, and Stick

    Intro
    The ARCCAPTAIN 250A MIG Welder is a true multi-process workhorse, built for welders who need versatility without sacrificing arc stability. With MIG, Flux-Core, Stick, Lift TIG, Spool Gun, and Spot functions, it covers nearly every job in one machineโ€”ideal for shops, farms, and field repair crews.


    Key Takeaways

    • Processes: MIG / Flux-Core / Stick / Lift TIG / Spool Gun / Spot (6-in-1).
    • Input Power: 110 V / 220 V dual-voltage inverter.
    • Output Range: 30 โ€“ 250 A.
    • Display: 4.3″ LED digital screen with synergic settings.
    • Features: Hot Start, Arc Force, Anti-Stick, and Auto-detect voltage.

    Performance and Build

    The 250A delivers a clean, consistent arc with smooth wire feed at up to 42 lb/hr. On 220 V power, it can MIG weld up to 3/8 in (9.5 mm) steel or aluminum with a spool gun. Synergic control automatically adjusts voltage and wire speed, while the digital display gives real-time amperage and voltage feedbackโ€”perfect for switching between gas and gasless wire on the fly.

    Its metal frame, quick-connect torch, and large internal spool hub make it a durable choice for both shop and portable work.


    Applications

    • Light fabrication and farm repair
    • Aluminum MIG with spool gun
    • Shop TIG and Stick welding
    • Automotive frame and body projects
    • Field or maintenance welding jobs

    Comparison Table

    ModelKey SpecsBest ForAmazon
    ARCCAPTAIN 250A MIG Welder110/220 V โ€ข 30-250 A โ€ข MIG / Flux / Stick / Lift TIG / Spool / Spot โ€ข 4.3″ LEDMulti-process welding โ€ข aluminum and steel projectsSee Price on Amazon

    Safety Notes

    Use gloves rated for MIG current above 200 A and ensure cables are properly sized. Maintain adequate ventilation when flux-core welding indoors. Always inspect ground clamps for corrosion and replace any cracked gas hoses.


    FAQ

    Q: Can this welder handle aluminum MIG?
    A: Yesโ€”when paired with a spool gun and pure argon shielding gas.

    Q: Does it support Lift TIG?
    A: Yes, via optional 17-series TIG torch and argon setup (DC only).

    Q: Can it run on household 120 V outlets?
    A: Yes, at reduced output up to about 130 A. Full power requires 220 V.

    Q: Is a spool gun included?
    A: No, itโ€™s optional. The unit includes MIG torch, ground clamp, electrode holder, and basic consumables.


    ARCCAPTAIN 250A MIG Welder, 110V 220V Gas MIG/Gasless MIG/Stick/Lift TIG/Spool Gun/Spot 6 in 1 Welding Machine Aluminum Welding Machine Professional Welder Machine with Large LED Display
    • PROFESSIONAL 6-IN-1 WELDER: ARCCAPTAIN 250Amps welding machine that included Gas MIG/ Gasless MIG/ Lift TIG/ MMA/ Spot/ Spool Gun meet your different requirements (Need to buy extra Lift tig torch and spool gun). Suitable for welding mild Steel, carbon steel, stainless steel and aluminum.
    • DIGITAL WELDING MACHINE๏ผšThe MIG welder features a fully digital MCU and a high-integrity circuit design, which improves welding stability and performance. The intelligent fan speeds up heat dissipation and extends the service life of the machine.The MIG welder features some special functions that included adaptive crater, burn-back adjustment and pre-flow/post-flow, which improve your welding efficiency.
    • SYNERGIC MIG & MANUAL MIG: Synergic control automatically match the recommend current and wire feeding speed when selecting the diameter of welding wire and gas material, also you can adjust the welding current according to your welding habit. Easy to work with beginner. Maunual MIG for better custom settings, suitable for professionals
    • EASY TO USE: The welding machine is fully equipped with accessories and can start welding after opening the box. Package includes 1ร— MIG250 MIG welder machine, 1ร— 10 ft MIG torch, 1ร— 10 ft Earth clamp, 1ร— 10 ft Stick holder, 2ร— Contact tip(.030″ & .035″), 3ร— Wire feed rollers(K & V), 1ร— 10 ft gas hose, 1ร— 220V to 110V Wire adapter, 1ร— User manual.
    • SAFETY PROTECTION: Every single of our welder machines passed various authoritative Laboratory tests in simulating extremely harsh environments before leaving our ARCCAPTAIN factory that conforms to the high standards. We take care of our customerโ€™s safety based on VRD, over current/over voltage/over current/over-load/overheating protection function. Note: DO NOT power on until the screen turns off and the fan stops working

    Last update on 2026-07-01 / Affiliate links / Images from Amazon Product Advertising API

    Where to Buy
    Amazon: ARCCAPTAIN 250A 6-in-1 MIG Welder
    Disclosure: We may earn a small commission at no extra cost to you.

Stream with Amazon Music