Your MIG gun stops feeding wire mid-weld. You power down, open the feeder, and find the wire welded solid into the contact tip. This is contact tip burnback—and it costs you time, consumables, and weld quality. The good news: it’s preventable with the right tip and maintenance routine.
Key Takeaways
Contact tip burnback happens when the wire binds inside the tip under heat and spatter, creating a weld joint between wire and tip
Worn or undersized tips are the primary culprit; spatter buildup traps heat and restricts wire flow
Replacing the contact tip is the fastest, lowest-cost fix; cleaning alone rarely solves the root problem
Proper nozzle cleaning and tip inspection after every 8–10 hours of welding prevents burnback
Using the correct tip size for your wire diameter and amperage reduces friction and heat
The Problem
Contact tip burnback occurs when the wire gets stuck inside the contact tip and actually welds itself to the copper. This happens because:
Heat accumulation: Spatter builds up on the inside of the tip, trapping heat and raising the temperature above the wire’s melting point
Friction: A worn or undersized tip creates drag, slowing wire feed and causing the wire to heat up further
Electrical resistance: A corroded or damaged tip increases resistance, generating more heat at the contact point
Wire binding: The wire catches on rough edges inside the tip, creating a mechanical bind that generates friction heat
The result: the wire literally welds itself to the tip, and your feeder can’t push it through.
Why It Matters
Burnback stops your weld mid-joint. You lose:
Production time: Downtime to clear the jam, replace the tip, and re-feed wire
Weld quality: Restarting a weld often leaves a weak restart point or incomplete fusion
Consumables: You waste wire, spatter, and tips
Equipment stress: Forcing the feeder to push a jammed wire can damage the drive rollers
On a job site or in a production shop, one burnback can cascade into multiple restarts and rework.
The Fix
Contact tip burnback is a tip problem, not a feeder problem. Here’s what to do:
Power down the welder and open the feeder.
Clip the wire at the contact tip with wire cutters.
Pull the wire back 3–4 inches to clear the jam.
Remove the nozzle and inspect the tip for spatter, corrosion, or pitting.
Replace the contact tip with a new one (don’t try to clean a burnt tip—it’s damaged).
Clean the nozzle with a nozzle dip or brass brush to remove spatter.
Re-feed the wire and resume welding.
Prevention: Replace contact tips every 8–10 hours of welding, or sooner if you notice spatter buildup or inconsistent arc.
Why This Product Solves It
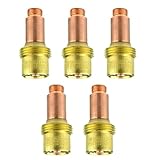
The Miller MDX Series MIG Contact Tip (.045″ or 1.2mm) is engineered for consistent wire flow and durability. Miller’s AccuLock design ensures:
Precise bore: The .045″ bore is sized for .045″ wire, eliminating undersizing friction
Copper construction: High-conductivity copper dissipates heat faster than lesser materials
Smooth interior: No pitting or rough edges means wire slides freely, reducing burnback risk
Reliable fit: AccuLock threads ensure the tip seats flush, preventing spatter leakage
Using the correct tip size for your wire diameter is non-negotiable. A .035″ tip on .045″ wire will jam; a .045″ tip on .035″ wire will spit spatter. Miller tips are sized precisely to match your wire.
” target=”_blank” rel=”noreferrer noopener”>Miller MDX Series MIG Contact Tip (.045″ or 1.2mm), part no. T-M045 (10 per pack)
What to Check Before You Buy
Wire diameter: Confirm your wire size (.023″, .030″, .035″, or .045″). The tip bore must match.
Gun compatibility: Miller MDX tips work with Miller MDX-100 and MDX-250 guns. If you use a different gun (Lincoln, ESAB, Tweco), verify fitment first.
Amperage range: Unknown (Verify). Contact Miller or ArcWeld.store for your specific amperage range.
Quantity: This pack includes 10 tips—a good supply for regular replacement.
Real-World Use
A fabrication shop running a Miller MDX-100 on .045″ mild steel was experiencing burnback every 30–40 minutes. The operator was using undersized .035″ tips (wrong size). After switching to Miller .045″ tips and cleaning the nozzle every 4 hours, burnback stopped entirely. Production time increased by 15%.
Common Mistakes
Using the wrong tip size: Biggest cause of burnback. Always match tip bore to wire diameter.
Not cleaning the nozzle: Spatter buildup traps heat. Clean the nozzle every 4–8 hours.
Reusing burnt tips: A burnt tip is damaged. Replace it; don’t try to clean it.
Ignoring wire speed surges: If the feeder suddenly pushes harder, the tip is likely binding. Replace it immediately.
Assuming it’s a feeder problem: Burnback is almost always a tip or nozzle issue, not a feeder malfunction.
Safety Notes
Contact tips get hot during welding. Always allow the gun to cool before removing the nozzle or tip. Wear welding gloves when handling hot consumables. If you’re replacing tips while the welder is still warm, keep your hands clear of the arc area and power down the welder first.
Always follow the manufacturer’s instructions and your shop’s safety procedures. If you’re unsure about fitment or ratings, verify before you buy or install.
🔦【Multi Angled & Wide Adjustment】This cable railing kit works for 3/16″ wire rope in multi angled stairways or horizontal sections cable railing systems. The multi adjustable angle feature enables the turnbuckle to rotate from 0 to180 degrees, closed-body of the turnbuckle adjust freely length from the min 7.2″ to max 10.1 inch”. This cable railing hardware kit package can make 20 cable runs.
🔦【T316 Marine Grade Stainless Steel】This 3/16″ Cable Railing Hardware Kit made from T316 marine grade stainless steel, which means it’s excellent resistance to rust, corrosion with long-lasting protection. It can handle extreme weather conditions, even in coastal areas where there’s a lot of humidity and salty air. CKE Swage Toggle Turnbuckle for Wood Post is ideal for indoor and outdoor black deck stair cable railing kit system.
🔦【Size】Fit for 3/16 inch stainless steel cable, apply for both wood posts. Turnbuckle: 7.2″ Deck Toggle End: 3″. We suggest the post spacing about 3-4 ft between wood post ends, and the cable spacing about 3″ to 4″ for each post.
🔦【Applications】This 3/16″ Swage Toggle Turnbuckle Cable Railing Hardware Kit with wide adjustable range with cleanly looks solve the problem for tighten and adjust the tension of attached cable in multi angled stairways and ramps also for horizontal section cable railing systems for straight, stair or angled sections when using timber posts. This cable railing kit is installed simply by tightening the screws, please refer the picture of 3 to install.
🔦【Package List & 100% Satisfaction Guarantee】20 Set 180 Degree Adjustable Angle Cable Railing Kit (Kti Includes: 20 Pcs Swage Toggle Turnbuckles, 20 Pcs Deck Toggle Terminal, 80 Pcs screws, 1 Pcs CKE Patent Design Spanner Multi Tool). This package can make 20 cable runs. ⭐Buy with confidence: If you’re not satisfied with this item at anytime within two years after purchased, we’ll provide a refund or replacement.
Last update on 2026-05-05 / Affiliate links / Images from Amazon Product Advertising API
Silicone facepieces seal better than rubber and last longer
Half-face respirators are lighter and more comfortable than full-face for all-day wear
Size matters—small, medium, large; wrong size = seal failure
Replace filters every 40 hours of use or when hard to breathe through
Comparison Table
Model
Type
Size Range
Filter Type
Best For
Price Range
3M 6502QL
Half-face, reusable
Small/Medium/Large
Bayonet P100
Daily welding, MIG/TIG
$35–$50
Honeywell 5500
Half-face, reusable
Small/Medium/Large
Bayonet P100
General welding, grinding
$30–$45
3M 6391
Half-face, reusable
Large only
Bayonet P100
Larger faces, high-volume use
$40–$55
3M 2097 Filters
Replacement filters
Universal fit
P100 + organic vapor relief
Filter replacement
$8–$12 per pair
Product Sections
3M 6502QL Rugged Comfort Quick Latch Respirator
The 3M 6502QL is the gold standard for welding shops. Quick Latch design means you can snap cartridges on and off without twisting, saving time between jobs. Silicone facepiece seals tight and won’t degrade like rubber. Cool Flow exhalation valve reduces fogging and heat buildup.
Key Specs:
Facepiece: Silicone, soft and durable
Filter connection: Bayonet (quick-click)
Sizes: Small, Medium, Large
Exhalation valve: Yes (reduces heat/moisture)
Reusable: Yes (lasts 5+ years with care)
NIOSH certified: Yes (ANSI Z87.1)
Best for: Daily MIG/TIG welding, confined spaces, high-fume environments.
🔦【Multi Angled & Wide Adjustment】This cable railing kit works for 3/16″ wire rope in multi angled stairways or horizontal sections cable railing systems. The multi adjustable angle feature enables the turnbuckle to rotate from 0 to180 degrees, closed-body of the turnbuckle adjust freely length from the min 7.2″ to max 10.1 inch”. This cable railing hardware kit package can make 20 cable runs.
🔦【T316 Marine Grade Stainless Steel】This 3/16″ Cable Railing Hardware Kit made from T316 marine grade stainless steel, which means it’s excellent resistance to rust, corrosion with long-lasting protection. It can handle extreme weather conditions, even in coastal areas where there’s a lot of humidity and salty air. CKE Swage Toggle Turnbuckle for Wood Post is ideal for indoor and outdoor black deck stair cable railing kit system.
🔦【Size】Fit for 3/16 inch stainless steel cable, apply for both wood posts. Turnbuckle: 7.2″ Deck Toggle End: 3″. We suggest the post spacing about 3-4 ft between wood post ends, and the cable spacing about 3″ to 4″ for each post.
🔦【Applications】This 3/16″ Swage Toggle Turnbuckle Cable Railing Hardware Kit with wide adjustable range with cleanly looks solve the problem for tighten and adjust the tension of attached cable in multi angled stairways and ramps also for horizontal section cable railing systems for straight, stair or angled sections when using timber posts. This cable railing kit is installed simply by tightening the screws, please refer the picture of 3 to install.
🔦【Package List & 100% Satisfaction Guarantee】20 Set 180 Degree Adjustable Angle Cable Railing Kit (Kti Includes: 20 Pcs Swage Toggle Turnbuckles, 20 Pcs Deck Toggle Terminal, 80 Pcs screws, 1 Pcs CKE Patent Design Spanner Multi Tool). This package can make 20 cable runs. ⭐Buy with confidence: If you’re not satisfied with this item at anytime within two years after purchased, we’ll provide a refund or replacement.
Last update on 2026-05-05 / Affiliate links / Images from Amazon Product Advertising API
Honeywell North 5500 Series P100 Half Mask
The Honeywell 5500 is the budget-friendly alternative that doesn’t sacrifice protection. Direct cartridge-to-face seal (no valve) makes it simple and reliable. Soft elastomer facepiece is comfortable for 8-hour shifts. Compatible with a wide range of filter types.
Key Specs:
Facepiece: Elastomer (soft, durable)
Filter connection: Direct bayonet
Sizes: Small, Medium, Large
Exhalation valve: No (simpler design)
Reusable: Yes (lasts 3–5 years)
NIOSH certified: Yes
Best for: Budget-conscious shops, occasional welding, grinding and sanding.
READY TO WEAR CONVENIENCE: Includes 2 multi-contaminant P100 cartridge/filter combos for excellent protection against gases, vapors and particulates; economical safe breathing solution that does not compromise on features
COST-EFFECTIVE REUSABILITY: Cartridges and filters are easily replaced so the facepiece can be reused; compatible with all of our N-Series cartridge types for other uses around the home; latex-free mask is non-allergenic, tough and long-lasting
SECURE FIT: Contoured face seal with variable thickness for optimal seal in all facial areas; fits most face shapes & sizes; threaded cartridge connectors prevent accidental disconnection; low-profile cartridge allows increased field of vision
LONGWEARING COMFORT: Strategically placed exhalation valve keeps mask cool and comfortable; strong support around the chin area and good flexibility on the nose bridge; upper strap features minimum give for strong support through extended wear on the job
BACKPACK ADAPTOR OPTION: NIOSH-Approved for use with backpack adaptor for welding and painting applications (adaptor sold separately); sealed packaging ensures a tamper-free 100% hygienic product
Last update on 2026-05-05 / Affiliate links / Images from Amazon Product Advertising API
3M 6391 Half Facepiece Respirator (Large)
The 3M 6391 is the large-size version of the 6502, designed for welders with bigger faces or those who need maximum comfort. Same silicone quality and Cool Flow valve as the 6502. Wider straps distribute pressure evenly.
Key Specs:
Facepiece: Silicone, large fit
Filter connection: Bayonet
Sizes: Large only
Exhalation valve: Yes (Cool Flow)
Reusable: Yes (lasts 5+ years)
NIOSH certified: Yes
Best for: Large-face welders, all-day high-volume welding, TIG work.
Amazon:
No products found.
3M 2097 P100 Particulate Filters (Replacement)
Fresh filters are critical. The 3M 2097 includes organic vapor relief, which helps with the smell of welding fumes. Magenta color makes it easy to spot when they’re saturated (turn dark brown). Compatible with 3M 6500 series respirators and most half-face masks.
READY TO WEAR CONVENIENCE: Includes 2 multi-contaminant P100 cartridge/filter combos for excellent protection against gases, vapors and particulates; economical safe breathing solution that does not compromise on features
COST-EFFECTIVE REUSABILITY: Cartridges and filters are easily replaced so the facepiece can be reused; compatible with all of our N-Series cartridge types for other uses around the home; latex-free mask is non-allergenic, tough and long-lasting
SECURE FIT: Contoured face seal with variable thickness for optimal seal in all facial areas; fits most face shapes & sizes; threaded cartridge connectors prevent accidental disconnection; low-profile cartridge allows increased field of vision
LONGWEARING COMFORT: Strategically placed exhalation valve keeps mask cool and comfortable; strong support around the chin area and good flexibility on the nose bridge; upper strap features minimum give for strong support through extended wear on the job
BACKPACK ADAPTOR OPTION: NIOSH-Approved for use with backpack adaptor for welding and painting applications (adaptor sold separately); sealed packaging ensures a tamper-free 100% hygienic product
Last update on 2026-05-05 / Affiliate links / Images from Amazon Product Advertising API
How to Choose the Right Respirator
1. Get the Right Size Try on small, medium, and large. The mask should feel snug but not painful. You should feel gentle suction when you inhale. If it shifts or gaps appear, try the next size.
2. Check Your Filter Type Most modern half-face respirators use bayonet cartridges (click-on). Older models use threaded cartridges (screw-on). Know which one you have before buying filters.
3. Consider Comfort Silicone facepieces (3M 6502, 6391) are more comfortable for all-day wear. Elastomer (Honeywell 5500) is cheaper but less comfortable. Cool Flow valves reduce heat buildup.
4. Plan for Filter Replacement P100 filters last 40 hours of use. If you weld 8 hours a day, 5 days a week, you’ll need new filters every 1–2 weeks. Budget accordingly.
5. Check Compatibility Not all filters fit all masks. 3M 6500 series uses bayonet cartridges. Honeywell 5500 uses direct bayonet. Verify before buying.
FAQ
Q: Can I use an N95 for welding? A: No. N95 masks are for dust and pollen, not welding fumes. Welding fumes contain toxic metals (manganese, chromium, nickel). You need a P100 respirator.
Q: How long do P100 filters last? A: 40 hours of use or until they become hard to breathe through. If your filters are dark brown, replace them. Don’t guess—replace them.
Q: Can I reuse a P100 filter? A: No. Once saturated, they lose efficiency. Throw them away and install fresh filters.
Q: What if I have a beard? A: Shave the area where the mask contacts your face. Even 1/8 inch of beard hair breaks the seal. A leaking mask doesn’t protect you.
Q: Do I need a fit test? A: OSHA recommends annual fit testing in high-risk environments. For shop use, do a quick seal check: cover the cartridges, inhale hard, and feel for leaks around the edges.
Safety Notes
Welding fumes contain manganese, chromium, nickel, and other toxic metals. Chronic exposure causes neurological damage, respiratory disease, and kidney problems. ANSI Z87.1 requires proper respiratory protection in confined spaces or high-fume environments. A proper seal is critical—a leaking mask gives false confidence and exposes you to harmful particulates.
Always wear a properly sealed P100 respirator when welding in enclosed or poorly ventilated spaces.
You’re wearing a P100 respirator. You’ve got fresh filters. But you can still smell the fumes.
That’s not normal—and it means your mask isn’t protecting you.
Here’s why it happens and how to fix it.
Symptoms You Have a Seal Problem
Fume smell inside the mask during welding
Visible fumes leaking around the mask edges
Filters turn dark/brown faster than expected
Lip tingling or throat irritation despite wearing the mask
Fogging inside the mask (moisture escaping, not just condensation)
Root Cause: Poor Mask Seal
A P100 filter only works if air passes through the filter, not around it.
If you smell fumes, one of these is happening:
1. Facial Hair Breaks the Seal Beards, stubble, and sideburns create gaps between your face and the silicone facepiece. Even 1/8 inch of beard hair defeats the seal. Air (and fumes) bypass the filter entirely.
2. Wrong Size Mask Half-face respirators come in small, medium, and large. A loose mask won’t seal; a too-tight mask causes discomfort and users remove it. Either way, you get leakage.
3. Damaged Facepiece Cracked silicone, worn straps, or a loose exhalation valve let unfiltered air in. Silicone degrades over time, especially if stored in sunlight or heat.
4. Filters Not Seated Properly Cartridges must click or screw in fully. Partial insertion leaves gaps. Dirty filter threads prevent a tight seal.
5. Exhalation Valve Failure The one-way valve lets breath out but keeps fumes out. If it’s stuck open or damaged, fumes flow straight in.
Per NIOSH and ANSI Z87.1, a proper seal is non-negotiable for respiratory protection.
The Fix: 5 Steps to Stop Fume Leakage
1. Shave Your Face Trim or shave facial hair where the mask contacts your skin. This is the #1 reason for seal failure. Check the mask fit line—anything touching that area must go.
2. Verify Your Size Try on multiple sizes. The mask should feel snug but not painful. You should feel gentle suction when you inhale. If it shifts or gaps appear, try the next size up or down.
3. Check Filter Seating Remove and reinstall cartridges. They should click (bayonet) or screw (threaded) until snug. Don’t force—just firm pressure. Wipe threads clean if they’re dusty.
4. Inspect the Facepiece Look for cracks, tears, or discoloration in the silicone. Check the exhalation valve for cracks or debris. If damaged, replace the facepiece (most respirators have replaceable parts).
5. Replace Old Filters P100 filters last 40 hours of use or until they become hard to breathe through. If your filters are dark brown or you’ve been using them for weeks, replace them. Clogged filters don’t seal well and reduce airflow.
Real-World Tip
Experienced welders do a fit test before every shift: put on the mask, cover the filter cartridges with your hands, and inhale hard. If you feel air being sucked in around the edges, the seal is broken. If it holds vacuum, you’re good.
This takes 5 seconds and catches seal problems before you start welding.
Welding fumes contain manganese, chromium, nickel, and other toxic metals. ANSI Z87.1 requires proper respiratory protection in confined spaces or high-fume environments. A proper seal is critical—a leaking mask gives false confidence and exposes you to harmful particulates.
If your MIG wire feed “slips” (you hear clicking, the rolls spin but wire stalls, or the arc keeps cutting out), you’re not dealing with a settings problem first—you’re dealing with a wire-path problem. This guide walks you through a fast diagnosis and a clean troubleshooting path that fixes most slipping feeds in minutes.
You’ll start with the highest-failure consumables and only adjust tension/settings after you’ve confirmed the wire can physically move through the gun.
Where to Buy (Quick Fix Parts)
Most “slipping” wire feed problems trace back to a restriction at the end of the gun or inside the liner, which makes the drive rolls lose traction. The three most likely failed components are:
Contact tip (burnt, oversized, spattered, or wrong size for wire)
Gun liner (dirty, kinked, wrong length, worn)
Drive rolls (wrong groove/type for wire, worn, misaligned)
Top Pick (Primary Fix)
If you need the fastest, highest-probability replacement: start with a fresh contact tip in the correct wire size.
Last update on 2026-05-05 / Affiliate links / Images from Amazon Product Advertising API
Step-by-Step Fix
Stop and make it safe
Turn the machine off before opening the feeder or handling the drive rolls.
Wear gloves and eye protection (ANSI Z87.1 safety glasses under your hood).
Rule out tip/nozzle restriction (fastest test)
Remove the nozzle.
Remove the contact tip.
Try feeding wire with the gun lead straight.
If it feeds smoothly with the tip removed, your restriction is likely the tip/nozzle/diffuser area.
Replace the contact tip (don’t “clean it and hope”)
If there’s burnback, ovaling, heavy spatter, or the wrong size tip: replace it.
Unknown (Verify): exact tip-to-wire fit guidance varies by manufacturer—confirm with your gun manual.
Check drive-roll type and groove
Solid wire typically wants a V-groove.
Flux-core often wants a knurled roll (varies by wire type—verify wire manufacturer guidance).
Make sure the roll matches your wire diameter (e.g., 0.030 in / 0.035 in).
Set drive-roll tension correctly (minimum effective tension)
Start low.
Increase tension only until wire feeds consistently without slipping.
Too much tension can deform wire, increase liner drag, and create a “feeds bad everywhere” problem.
Check spool brake / hub tension
If the spool is hard to pull and the wire “snaps” tight when you stop feeding, the brake may be too tight.
Set it so the spool doesn’t overrun, but also doesn’t fight the drive system.
Suspect the liner if the symptom changes with lead position
If it slips when the lead is curved but feeds when straight, the liner is likely dirty, kinked, worn, or cut wrong.
Parts That Actually Fix This
Liner
Replace when:
Feed changes dramatically with gun lead position
You see wire shavings/dust inside the gun
You’ve had repeated birdnesting or burnback events
Adjust/clean when:
The liner is new and you suspect contamination from wire dust (blow out per manufacturer guidance; avoid unsafe practices)
Contact tips
Replace when:
Any burnback, ovaling, heavy spatter clogging, or erratic arc starts
Wire feels “sticky” through the tip even with the gun straight
Adjust when:
Tip is correct size and clean, and restriction is clearly elsewhere
Drive rolls
Replace when:
Groove is worn smooth, chipped, or misaligned
Correct groove/type still slips at reasonable tension
Adjust when:
Wrong groove selected or tension is clearly excessive/insufficient
Diffuser / nozzle (when relevant)
Replace when:
Spatter buildup blocks gas flow and physically crowds the tip area
Threads are damaged or the tip won’t seat correctly
Replace vs Adjust (Fast Decision Table)
Problem
Adjust First
Replace
Wire slips only when gun lead is bent
Straighten lead, reduce drive-roll tension
Liner
Clicking at feeder + wire shavings
Reduce tension, confirm correct roll groove/type
Drive rolls (if worn)
Arc stutters and wire feels tight at the tip
Remove nozzle/tip and test feed
Contact tip
Slips worse at higher wire speed
Reduce spool brake tension, confirm roll traction
Liner (if friction-related)
Copy table
Rule: If not fixed in 2–3 minutes → replace the consumable.
Prevention Tips
Keep wire clean and covered; wire dust increases liner drag over time.
Don’t crank drive-roll tension “just to make it feed”—set the minimum that works.
Store consumables (tips/liners) dry and organized by wire size to avoid mix-ups.
Replace tips proactively if you’re doing frequent starts/stops or running hot (burnback risk increases).
Avoid tight loops in the gun lead during welding; tight bends increase friction and accelerate liner wear.
FAQ
Why does my MIG wire feed slip but not birdnest?
Birdnesting is usually the feeder pushing wire into a restriction until it tangles. Slipping can happen earlier—when the rolls can’t maintain traction due to friction, wrong rolls, or low tension.
How do I know if it’s the liner or the contact tip?
Quick test: remove the contact tip and feed wire with the lead straight. If it feeds smoothly, suspect the tip/nozzle area. If it still struggles—especially when the lead is bent—suspect the liner.
Can drive-roll tension being too tight cause slipping?
Yes. Too much tension can deform wire, increase drag through the liner, and create inconsistent feeding that looks like slipping or surging.
Should I change voltage or wire speed to fix slipping?
Not first. Fix the mechanical feed path (tip, liner, rolls, spool brake) before touching settings. Settings changes can mask the real issue and waste time.
Black soot and dirty tungsten usually point back to shielding gas coverage—either turbulence, leaks, or a setup that can’t maintain a stable argon envelope. A gas lens kit is one of the simplest upgrades to stabilize coverage, especially with longer stickout or tight joints. Not sure if this is your issue? See the full troubleshooting guide → TIG Welds Turning Black and Sooty? Fix Gas Coverage Fast
3/32″ Tungsten Electrodes Standard 10N Series Collet
54N Series Gas Lens Ceramic Cups Setup
Pack of 5
Last update on 2026-05-05 / Affiliate links / Images from Amazon Product Advertising API
Key Takeaways
A gas lens helps create more stable, laminar shielding gas flow
Better coverage can reduce soot, oxidation, and tungsten contamination
Match the kit to your torch family (commonly 17/18/26 style)
Replace damaged screens/cups—dirty hardware can cause “mystery” contamination
If specs aren’t clearly listed, treat it as Unknown (Verify) before buying
Product Picks (verify fitment before ordering)
1) 45V26 TIG Gas Lens (3/32 in) — TOP PICK (Most common fix)
Short description: A standard 45V26-reference gas lens collet body for common 17/18/26-style TIG torches. Key specs (manufacturer verified): Ref number 45V26; intended for 3/32 in (2.4 mm) tungsten; torch family 17/18/26 (Verify exact torch compatibility). Best for: Most welders seeing soot/dirty tungsten after switching cups, changing stickout, or fighting inconsistent coverage. ArcWeld link: N/A Amazon:
3/32″ Tungsten Electrodes Standard 10N Series Collet
54N Series Gas Lens Ceramic Cups Setup
Pack of 5
Last update on 2026-05-05 / Affiliate links / Images from Amazon Product Advertising API
2) 17/18/26 Gas Lens Kit (cups + lens + collets)
Short description: A bundled kit can be the fastest way to replace multiple wear items at once (cups, collets, lens). Key specs: Unknown (Verify) Best for: If your cup is chipped, your lens screen is dirty, and you want a clean reset. ArcWeld link: N/A Amazon: Unknown (Verify)
3/32″ Tungsten Electrodes Standard 10N Series Collet
54N Series Gas Lens Ceramic Cups Setup
Pack of 5
Last update on 2026-05-05 / Affiliate links / Images from Amazon Product Advertising API
3) Jumbo Cup Gas Lens Kit (for longer stickout)
Short description: Larger cups can improve coverage in joints where you need extra tungsten stickout. Key specs: Unknown (Verify) Best for: Corners, fillets, and tight access where coverage breaks down. ArcWeld link: N/A Amazon: Unknown (Verify)
Buying Guide: How to Choose
Torch family fit (17/18/26 vs other): Don’t assume—verify your torch style before ordering.
Tungsten diameter: Match the lens/collet body to your tungsten size (common: 1/16 in, 3/32 in, 1/8 in).
Cup size and access: Bigger cups can help coverage but may not fit tight joints.
Quality and consistency: If listings don’t clearly state reference numbers (like 45V26) and fitment, treat as Unknown (Verify).
FAQ
What does a gas lens actually change? It helps straighten and stabilize gas flow, so coverage is less turbulent and more consistent.
Can too much gas cause soot? Yes. Excess flow can create turbulence that pulls air into the shield.
Do I still need to regrind tungsten after soot shows up? Yes. Once contaminated, it’s faster and more reliable to regrind than to “burn it clean.”
Will a gas lens fix leaks or bad gas? No. Fix leaks, confirm 100% argon, and check connections first.
Safety Notes
Use appropriate PPE and ensure eye protection meets ANSI Z87.1. Maintain ventilation—shielding issues can tempt people to hover and “test” the arc repeatedly, increasing UV exposure.
Your MIG wire is burning back and fusing to the contact tip, stopping your weld cold. This happens when the wire arcs at the tip instead of at the workpiece—a sign of poor contact, dirty metal, or feeding issues. Fix it in 10 minutes with the right diagnosis.
Key Takeaways
Contact tip burnback stops the arc and wastes time; most fixes are free or under $30
Root causes: dirty contact tip, poor base metal prep, wire feed tension, or loose electrical connections
Quick fix: clean the tip, prep your metal, check wire tension, and verify electrical connections
Prevent burnback: replace tips every 50–100 hours of welding, use fresh wire, and keep the gun cable straight
Quick Diagnosis
What You’ll See:
Wire sticks to the contact tip instead of feeding smoothly
Arc won’t start or cuts out mid-weld
Tip glows red or shows visible discoloration
Wire may be bent or balled up inside the tip
Most Likely Causes (Ranked by Frequency):
Dirty or worn contact tip (most common)
Rusty or mill-scale base metal (prevents good arc start)
Wire feed tension too tight or too loose
Loose electrical connections (gun, ground clamp, or machine)
Bent gun cable or kinked liner (restricts wire flow)
Safety Notes
PPE: Wear ANSI Z87.1-rated helmet (down), welding gloves, and long sleeves. Contact tip burnback can cause sudden arc flare.
Ventilation: MIG welding produces fume; ensure adequate shop ventilation or use a fume extractor per ANSI Z49.1.
Electrical: Disconnect the machine or switch to standby before removing the tip or inspecting the gun.
Hot Tip: Contact tips retain heat; let cool for 30 seconds before touching.
Step-by-Step Troubleshooting
Step 1: Inspect the Contact Tip (Free)
Remove the nozzle and diffuser from the gun.
Look inside the tip opening. If you see spatter, discoloration, or a balled-up wire, the tip is dirty or worn.
Why: Spatter buildup reduces contact between the wire and tip, causing arcing instead of feeding.
Fix: Use a small wire brush or a contact tip cleaner to scrub the inside of the tip. If the opening is enlarged or pitted, replace the tip (see Step 5).
Step 2: Check Your Base Metal (Free)
Inspect the area where you’re welding. Look for rust, mill scale (gray/black oxide), or paint.
Why: Dirty metal prevents good electrical contact, forcing the wire to arc at the tip instead of the workpiece.
Fix: Use a wire brush, flap disc, or grinder to clean the weld area to bare metal. Wipe away dust.
Step 3: Verify Wire Feed Tension (Free)
Locate the wire drive roll tension knob on your machine (usually on the side of the feeder).
Loosen it slightly, then tighten until you feel light resistance when pushing the wire by hand.
Why: Too much tension deforms the wire and causes slipping; too little causes the wire to slip in the rolls, starving the arc.
Fix: Adjust to a gentle grip—the wire should feed smoothly without binding.
Step 4: Check Electrical Connections (Free)
Verify the ground clamp is clamped directly to clean, bare metal on the workpiece.
Check that the gun cable is plugged firmly into the machine.
Inspect the gun trigger connection for corrosion or looseness.
Why: Loose connections increase resistance, weakening the arc and causing burnback.
Fix: Clean corroded connections with a wire brush and re-tighten.
Step 5: Inspect the Gun Cable and Liner (Free to $30)
Straighten the gun cable. If it’s kinked or coiled, it restricts wire flow.
Look inside the cable for a white or clear plastic liner. If it’s cracked, burnt, or clogged, the wire binds.
Why: A damaged liner creates friction, slowing the wire and causing it to arc at the tip.
Fix: If the cable is kinked, straighten it. If the liner is damaged, replace the gun cable or just the liner (see Step 6).
Step 6: Replace the Contact Tip and Liner (if needed) ($20–$50)
If the tip is pitted, enlarged, or won’t clean, replace it with a new one matching your wire size (0.035″, 0.8mm, etc.).
If the liner is clogged or damaged, replace it too.
Why: A worn tip has poor contact; a clogged liner starves the arc.
Fix: Install new consumables and test.
Fix Options (Ranked)
Adjustment (Free) — Clean the tip, prep the metal, adjust wire tension, and check electrical connections.
Consumable Change (~$20–$50) — Replace the contact tip and/or liner if they’re worn or clogged.
Gun Cable Replacement (~$50–$150) — If the cable is kinked or the liner is damaged beyond cleaning.
Machine Check (~$100+) — If burnback persists after all above steps, the machine’s wire feeder or power supply may need service.
Recommended Fix: Contact Tip Replacement Kit
If you’ve cleaned the tip and it still won’t work, or if you’re welding regularly, a multi-pack of contact tips ensures you always have a fresh tip on hand. Worn tips are the #1 cause of burnback; replacing them every 50–100 hours of welding prevents the problem before it starts.
Why It Works:
New copper tips have perfect contact geometry, ensuring smooth wire feed and strong arc start.
High-quality copper resists spatter buildup and heat damage longer than worn tips.
A 30-pack gives you backups, so you’re never stuck mid-job.
When to Use It:
Your tip is pitted, enlarged, or won’t clean.
You weld more than 10 hours per week.
You want to prevent burnback before it happens.
When NOT to Use It:
If the problem is dirty metal or loose electrical connections (fix those first).
If the gun cable is kinked (straighten or replace the cable first).
What to Check Before Buying:
Match the tip size to your wire (0.035″, 0.8mm, etc.).
Confirm compatibility with your gun type (15AK, 24KD, MB15, etc.).
Verify the tip is copper, not steel (copper conducts better).
Check reviews for spatter resistance and durability.
1. Package Includes 30 Premium Quality .035” (Ø0.9mm)welding Tips.
2.Premium Contact Tips – Compatible with Lincoln, Tweco, Binzel, and Similar Mini MIG Gun Styles.
3. Made of high-quality copper, this welding contact tip offers excellent conductivity, high temperature resistance, and wear resistance, ensuring long-lasting performance.
4.Thread:M6×1.0thd.
5.If you have any questions, feel free to get in touch. We’re here to offer service and help you out in any way we can!
Last update on 2026-05-05 / Affiliate links / Images from Amazon Product Advertising API
Comparable Options
If you prefer a smaller pack or different wire size:
Using a worn tip and hoping it works. A pitted tip won’t conduct current evenly; replace it.
Not cleaning the base metal. Rust and mill scale block the arc; always prep the metal first.
Over-tightening wire feed tension. This deforms soft wire (especially aluminum) and causes slipping.
Ignoring a kinked gun cable. A bent cable restricts wire flow just as much as a clogged liner.
Blaming the machine when the problem is the tip. 90% of burnback is a dirty or worn tip; check it first.
FAQ
Q: Can I clean a burnt contact tip and reuse it? A: Yes, if it’s just spatter. Use a contact tip cleaner or small wire brush. If the opening is enlarged or pitted, replace it—a worn tip won’t conduct properly.
Q: How often should I replace my contact tip? A: Every 50–100 hours of welding, or sooner if you see spatter buildup or burnback. Frequent welders replace tips monthly.
Q: Why does my wire burn back even after I cleaned the tip? A: Check your base metal (is it rusty?), wire feed tension (is it too tight?), and electrical connections (is the ground clamp clean?). Burnback is rarely just the tip.
Q: Can a kinked gun cable cause burnback? A: Yes. A bent cable restricts wire flow, starving the arc. Straighten the cable or replace it if it’s cracked.
Q: What’s the difference between burnback and wire sticking? A: Burnback is when the wire fuses to the tip (arc at the tip, not the workpiece). Wire sticking is when the wire jams in the tip but hasn’t melted. Both have similar causes: dirty tip, poor prep, or feeding issues.
Next Steps
Clean your contact tip and base metal — most burnback stops here.
Check wire feed tension and electrical connections — free fixes that work 80% of the time.
Replace the tip if it’s pitted or worn — use the kit above for a reliable spare.
Weld slag, rust, and mill scale don’t come off easily by hand. The SWANSOFT 1100W electric needle scaler is a handheld power tool that vibrates 23 hardened needles at 4,500 strokes per minute to strip contaminants in minutes. Built for fabrication shops, pipeline crews, and field repairs, this scaler handles heavy rust, old paint, and welding spatter without damaging the base metal.
1100W motor delivers consistent power for thick rust and slag removal
Lightweight pistol grip reduces hand fatigue during extended use
Industrial-grade durability rated for shipbuilding, construction, and fabrication
Includes needle set and carrying case for portability and storage
What Is an Electric Needle Scaler?
An electric needle scaler is a handheld power tool that removes surface contaminants through rapid needle vibration. Unlike angle grinders (which use abrasive discs) or wire wheels (which can leave residue), needle scalers strike the surface with hardened steel needles, chipping away rust, slag, and paint without altering the base metal’s profile or hardness.
The SWANSOFT 1100W model is designed for industrial use: shipbuilding, pipeline fabrication, structural steel prep, and post-weld cleanup. It’s faster than manual chipping and safer than grinding for delicate surfaces.
Specifications:
Motor power: 1100W
Stroke frequency: 4,500 strokes per minute (SPM)
Needle count: 23 hardened steel needles
Needle length: 3 × 180 mm (7.1 inches)
Grip style: Pistol (ergonomic handle)
Weight: ~3.5 kg (7.7 lbs)
Power supply: 220V (verify your shop’s electrical setup)
【High-Efficiency Rust Removal】SWANSOFT electric needle scaler features a 1100W pure copper motor that provides stable and robust power, ensuring efficient rust removal while extending its service life.
【Enhanced Safety with Switch Lock】The electric descaling gun is carefully designed with a safety switch lock, preventing accidental start-ups and improving operational safety for a worry-free user experience.
【23 Descaling Needles Included】Equipped with 23 hardened descaling needles (3 x 180 mm), providing improved abrasion resistance and superior rust removal capabilities to effectively tackle even the toughest rust stains.
【Sturdy All-Steel Construction】Designed with an all-steel structure, it is suitable for various working environments and ensures long-term stability and performance.
【Versatile Electric Needle Scaler】Ideal for removing coatings, rust, and welding slag and other surface deposits in shipbuilding, construction, and casting – an ideal professional tool for surface preparation.
Last update on 2026-05-04 / Affiliate links / Images from Amazon Product Advertising API
What to Compare Before You Buy
Voltage requirement: This model runs on 220V. Verify your shop has 220V service before ordering. Step-down transformers are available but add cost and reduce power.
Needle replacement cost: Needles wear out after 20–40 hours of heavy use. Budget $15–$30 for replacement sets.
Noise level: Electric needle scalers produce ~95 dB. Hearing protection is mandatory.
Surface compatibility: Needle scalers work on steel, cast iron, and aluminum but can damage soft metals (copper, lead). Test on scrap first.
Dust generation: Heavy dust and fume release. Use in well-ventilated areas or with a dust collection system.
Angle grinders with wire wheels — Faster on light rust; risk of over-grinding and heat damage.
Chipping hammers — Manual, low-cost; slow for heavy slag and rust.
Abrasive blasting — Fastest for large surfaces; requires containment and PPE.
Final Thoughts
The SWANSOFT 1100W electric needle scaler is a workhorse for any fabrication shop that handles post-weld cleanup and rust removal. The 23-needle design and 4,500 SPM vibration rate make quick work of slag and mill scale. If your shop runs 220V power and you’re prepping structural steel or pipeline work, this tool will pay for itself in labor savings within weeks.
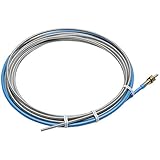
The WP-17FV TIG torch delivers precision and control for air-cooled TIG welding. With a flexible head design and gas valve control, this torch handles steel, stainless, and aluminum in tight spaces. Built for 150-amp duty, it’s suited for hobby shops and professional fabricators who need reliable performance without water cooling.
Key Takeaways
Flexible head design enables welding in tight, hard-to-reach areas
Gas valve control lets you manage shielding gas flow during the weld
150-amp air-cooled rating supports MIG/TIG hybrid machines and dedicated TIG units
12-foot cable reduces need for extension cords; standard M16×1.5 connector
Aluminum oxide nozzles and collets included; compatible with WP-17/18/26 consumables
What Is the WP-17FV?
The WP-17FV is a complete TIG torch assembly designed for air-cooled welding. Unlike water-cooled torches, air-cooled models rely on ambient air circulation and are lighter, more portable, and require no cooling loop setup. The “FV” designation indicates a flexible head with a gas valve—two features that make this torch practical for fabrication shops and field work.
【Flex Head Body with Gas Valve】This TIG welding torch features a flex head body design with a gas valve. The flex head allows for better maneuverability in tight spaces, while the gas valve provides control over the of gas during the welding process.
【Air Cooled】Designed for air cooling, this TIG torch ensures efficient heat dissipation during welding operations. It helps to prevent overheating, ensuring a longer lifespan for the torch and maintaining consistent performance.
【Reliable Materials】Crafted with reliable materials, this TIG torch head and body are made to withstand the demanding conditions of welding. The conductive connectors are made of high copper content, enhancing electrical conductivity and durability. The handle is made of impact-resistant polymer, providing a comfortable grip and long-lasting performance.
【150 Amps】With a welding current rating of 150 amps, this TIG torch is suitable for a wide range of welding applications. Whether you’re working on thin materials or thicker metals, this torch can deliver the necessary power for efficient and precise welds.
【 Options】This TIG welding torch is available with different options to suit your specific needs. You can choose between a flexible head, depending on your welding preferences. The flexible head allows for easier access to hard-to-reach areas. Additionally, you can opt for a torch with or without a valve, providing flexibility and control during the welding process.
Last update on 2026-05-04 / Affiliate links / Images from Amazon Product Advertising API
What to Compare Before You Buy
Duty cycle tolerance: Air-cooled torches max out at 35% duty cycle. If you’re running back-to-back welds for 8+ hours, consider water cooling or rotating torches.
Cable length: 12 feet is standard but may require an extension for large fabrication tables. Verify your workspace layout.
Consumable compatibility: Confirm that your machine’s gas lens, collets, and nozzles match WP-17/18/26 specs. Mismatched parts cause gas leaks and poor arc starts.
Flex head angle: The 60° bend is fixed. If you need a straight head or different angle, you’ll need a separate torch.
Gas valve response: Integral valves add weight but give you independent gas control. Test the valve’s responsiveness before committing to high-production runs.
Structural steel TIG welding (1/8″ to 3/16″ material)
Stainless steel fabrication and repair
Aluminum sheet and thin-wall tubing
Field repairs where portability matters
Hobby and small-shop production
Not ideal for:
Heavy production runs (>4 hours continuous)
Thick material (>1/4″) requiring high amperage
Situations requiring precise gas metering (use a foot pedal instead)
Setup & Maintenance
Inspect the torch head for cracks or burns before use. Damaged ceramic nozzles reduce gas coverage.
Attach the cable to your TIG welder’s torch receptacle. Verify polarity (usually DCEN for steel).
Install the gas lens and collet per your machine’s manual. Misalignment causes porosity.
Test the gas valve by triggering it without striking an arc. You should hear a clear click and feel gas flow.
Clean the nozzle after each shift. Spatter buildup restricts gas flow and causes contamination.
Troubleshooting
Issue
Cause
Fix
No gas flow
Valve stuck or kinked hose
Clean valve; check hose for kinks or blockages
Weak arc start
Contaminated collet or nozzle
Replace consumables; verify gas lens seating
Torch overheating
Exceeding duty cycle
Rotate torches or allow 15-minute cool-down
Porosity in weld
Poor gas coverage
Replace nozzle; increase gas flow 5–10 CFH
Copy table
Comparable Alternatives
If the WP-17FV doesn’t fit your needs, consider:
Water-cooled torches (WP-17W, WP-26W) — Better for high-duty-cycle work; require a cooling loop.
Lift-start torches (WP-17V) — Simpler arc initiation for beginners; no foot pedal required.
Torch kits with consumables — Pre-packaged with nozzles, collets, and gas lenses to reduce setup time.
Final Thoughts
The WP-17FV is a solid, no-frills TIG torch for welders who value control and portability over maximum duty cycle. The flexible head and gas valve make it practical for tight spaces and field work. If your shop runs under 35% duty cycle and you’re welding material under 1/4″, this torch will serve you well for years.
If your MIG wire feed feels jittery, surging, or “stuttering” mid-bead, treat it as a feed-path problem first, not a voltage/WFS tuning problem. In most cases, the arc is only “acting up” because the wire is not moving smoothly through the gun.
This guide gives you a symptom-first diagnosis and a one-variable-at-a-time fix you can run in under 10 minutes.
Where to Buy (Quick Fix Parts)
Most “stuttering wire feed” problems come from wire drag (liner/tip) or inconsistent push (drive rolls/spool tension). These are the first parts to inspect and replace.
Most likely failed components
MIG gun liner (kinked, dirty, rust dust, worn): creates drag → wire surges and the arc pops
Avoid tight loops in the gun lead during welding and storage.
Replace contact tips proactively when arc stability drops (interval = Unknown; depends on duty cycle, wire type, and technique).
If you run dirty environments, consider a routine: inspect tip + blow out/clean liner on a schedule (interval = Unknown (Verify)).
Safety note: When troubleshooting, wear proper PPE: welding helmet rated to ANSI Z87.1, welding gloves, and ensure adequate ventilation—especially when removing spatter and running test beads.
H2: FAQ
Why does my MIG wire feed stutter only at the start of the weld?
Common causes are wire payoff/spool brake issues, a slightly restricted tip, or the wire not seated smoothly through the inlet/liner. Straighten the lead and do the quick tip swap first.
Can a bad contact tip cause wire feed surging?
Yes. If the wire drags or sticks in the tip (wrong size, spatter restriction, worn bore), the feeder pushes, slips, then pushes again—felt as surging.
Should I increase drive-roll tension to stop stuttering?
Not as a first move. Too much tension can crush soft wire, create shavings, and make the problem worse. Fix drag first (tip/liner/lead routing), then set tension to the minimum that feeds reliably.
Is stuttering wire feed an electrical problem?
Sometimes, but most of the time it’s mechanical friction in the feed path. Prove the wire path is smooth before chasing electrical faults.
If your TIG welds are coming out black, sooty, or “dirty,” you’re not alone—this is one of the most common early warning signs of shielding gas problems. It usually shows up mid-bead when everything seems set correctly. Here’s why it happens and how to fix it.
Symptoms (what you’ll see)
Black soot around the bead (sometimes a “smoke trail” look)
Tungsten turns dark/sooty or balls up unexpectedly
Porosity starts showing up even on clean steel
Arc feels unstable or wanders
Weld color looks dull/gray instead of clean and consistent
Root cause (what’s actually happening)
Black soot is typically a sign that your weld puddle (and/or hot tungsten) is seeing oxygen and contaminants because shielding gas coverage is breaking down. That can come from too little flow, turbulent flow, a leak, a blocked cup/screen, or drafts pulling the argon away.
On steel, poor shielding can leave soot and surface oxidation; on stainless, it can show up as heavy discoloration; on aluminum, it often stacks with porosity and “dirty” looking puddle behavior. The key point: argon has to form a stable envelope around the tungsten and puddle—when it doesn’t, contamination happens fast.
The fix (step-by-step)
Check flow rate and stop turbulence Start around 15–20 CFH (0.42–0.57 m³/h) for typical cups, then adjust. Too low starves coverage; too high can create turbulence that pulls air in.
Inspect the cup, collet body, and gas lens screen Remove the cup and look for spatter, dust, or a partially blocked gas lens screen. If the screen is dirty or damaged, replace it.
Leak-check the gas path Confirm tight connections from the regulator to the torch. If you suspect leaks, isolate sections (regulator, hose, torch) and re-test. Leaks can cause inconsistent shielding and “random” soot.
Increase stickout control (or switch to a gas lens) If you’re running long tungsten stickout (common in corners/fillets), a standard setup can lose coverage. A gas lens helps laminar flow and supports longer stickout without losing shielding.
Fix post-flow and regrind tungsten If the tungsten is sooty/contaminated, stop and regrind. Also ensure post-flow is long enough to protect the tungsten as it cools.
Safety note during troubleshooting
If you’re chasing shielding issues, don’t “test” by hovering the torch and blasting gas near your face. Keep your hood down and gloves on—hot tungsten and UV exposure are still hazards even during quick checks.
Real-world tip (what experienced welders do)
When soot shows up, experienced TIG welders don’t keep pushing the bead hoping it clears. They stop, regrind the tungsten, and do a fast gas-system sanity check: flow, leaks, cup/lens condition, and drafts. If they’re working with longer stickout or tight joints, they often move straight to a gas lens setup because it reduces sensitivity to small technique changes.