Tag: torch consumables

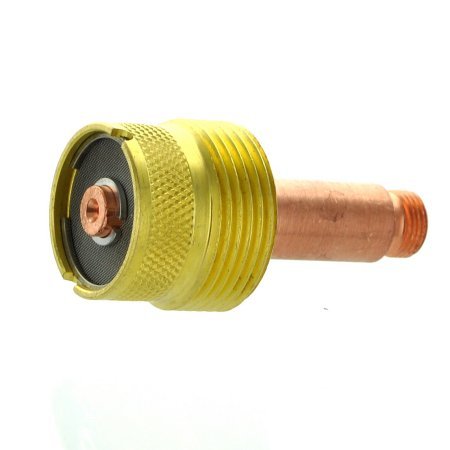
  • Large Diameter TIG Gas Lens Collet Body #17, 18, 26 Torch 2PK (995795-1/8″): Product Breakdown

    Large Diameter TIG Gas Lens Collet Body #17, 18, 26 Torch 2PK (995795-1/8″): Product Breakdown

    Product not found.
    “>Large Diameter TIG Gas Lens Collet Body #17, 18, 26 Torch 2PK (995795-1/8")

    The Large Diameter TIG Gas Lens Collet Body #17, 18, 26 Torch 2PK (995795-1/8″) is a TIG torch consumable support part used at the front end of the torch assembly. In practice, the collet body holds the tungsten in place and supports gas lens flow through the torch setup. For maintenance buyers and weld support teams, the main question is not whether the part is complex. It is whether the part matches the torch series, fits the tungsten size, and keeps the front end stable enough for consistent work.

    This breakdown stays focused on inspection, fit-up, and replacement planning. It does not assume job-specific approvals or torch compatibility beyond the product name. If your torch, cup, collet, or tungsten setup differs, verify before use.

    Key Takeaways

    • This is a TIG gas lens collet body intended for torch sizes #17, 18, and 26 as stated in the product name.
    • The part is packaged as a 2-pack.
    • The listed tungsten size is 1/8 inch in the product name.
    • For exact fit, torch compatibility, and internal dimensions, verify against your torch setup. Unknown (Verify) where not confirmed by the source.
    • Use this part when you need to restore tungsten support, improve consistency at the front end, or replace a worn collet body.

    What the Part Does

    A TIG gas lens collet body sits inside the torch head and supports the collet and tungsten. In a gas lens setup, it also helps condition shielding gas flow as it exits the torch. That matters when the front end is worn or misaligned. A worn collet body can contribute to tungsten movement, poor grip, inconsistent stickout control, or disturbed shielding gas coverage.

    In field terms, the collet body is a support component. It is not the torch body, not the cup, and not the tungsten itself. If the torch is acting up, this part is one of the first consumables to inspect.

    Inspect Before You Replace

    Before installing a new collet body, work through the front-end stack in order.

    • Check: Examine the cup for cracks, heat damage, and cross-threading. If the cup is damaged, gas flow problems may not be caused by the collet body alone.
    • Inspect: Look at the tungsten for contamination, dulling, or bent geometry. A damaged tungsten can mimic front-end alignment problems.
    • Verify: Confirm the collet size and tungsten size match the setup. The product name indicates 1/8 inch tungsten. Unknown (Verify) for any other size use.
    • Check: Make sure the collet body threads and contact surfaces are clean. Debris in the torch head can prevent proper seating.
    • Inspect: Look for discoloration, pitting, or distortion that suggests overheating or mechanical wear.

    If the tungsten slips, the arc wanders, or the front end cannot hold repeatable stickout, the collet body should be part of the troubleshooting path. For a related support discussion, see TIG Torch Slipping Tungsten? Your Collet Body Is Worn (Hereโ€™s the Fix).

    Troubleshooting Support: Common Symptoms

    • Symptom: Tungsten slips in the torch. Check the collet, collet body, and collet size before assuming the torch head is faulty.
    • Symptom: Shielding gas coverage looks uneven. Inspect the gas lens, cup, and front-end cleanliness. Gas flow disruption can come from clogging or damage.
    • Symptom: The front end overheats or discolors quickly. Verify amperage, cup selection, and duty cycle practices. Unknown (Verify) for application-specific thermal limits.
    • Symptom: Arc starts are inconsistent. Check tungsten condition and seating first. Then inspect the collet body and torch wear surfaces.

    For wear pattern reference, the article TIG Torch Consumable Wear Signs: Cup Cracks, Collet Slip, Gas Lens Clogs, and Dirty Tungsten is a useful maintenance starting point.

    Product and Parts Breakdown

    The product listed by ArcWeld is Large Diameter Gas Lens Collet Body for TIG torch #17, 18, 26. The product title and source description are the only confirmed identifiers here. Do not assume additional dimensions, thread details, material grades, or certification claims unless your internal sourcing or the vendor page confirms them. Unknown (Verify).

    Use case: front-end replacement in a compatible TIG torch setup where a gas lens collet body is required and the tungsten size matches the consumable stack.

    Package count: 2-pack, as stated in the product title.

    Compatibility note: Torch series #17, 18, and 26 are listed in the product name. Do not assume every torch built around those numbers uses the same front-end consumables without checking your current parts. Verify torch make, series, cup type, collet, and tungsten size before ordering.

    Product source: Product not found.

    “>ArcWeld product page.

    How to Verify Fit in the Shop

    1. Identify the torch series. Confirm whether the torch is actually a #17, #18, or #26 style front end.
    2. Measure the tungsten. Confirm that the tungsten size matches the product listing. The title indicates 1/8 inch.
    3. Match the collet and cup stack. Check whether the current assembly uses a gas lens setup or a different front-end arrangement.
    4. Dry-fit the components. Assemble by hand before live use. Make sure the parts seat fully and thread smoothly.
    5. Test under controlled conditions. Run a short weld or gas check and observe gas coverage, tungsten stability, and arc consistency.

    Safety Notes

    • Allow the torch to cool before handling front-end parts.
    • Do not force threaded parts. Cross-threading can damage the torch and consumables.
    • Keep tungsten free of contamination.
    • Confirm shielding gas flow before welding. Poor gas coverage can produce weld defects and arc instability.
    • If the setup is uncertain, stop and verify the torch parts list before energizing the system.

    FAQ

    Is this collet body for every TIG torch?
    No. The product name lists torch sizes #17, 18, and 26, but you still need to verify your exact torch setup and front-end consumables. Unknown (Verify) for any torch not confirmed by the source.

    Does this work with 1/8 inch tungsten?
    The product title indicates 1/8 inch. Verify the complete consumable stack and torch configuration before ordering or installing.

    Is this a replacement for a worn gas lens setup?
    It can be used as a replacement front-end support part in a matching gas lens assembly, but compatibility must be verified against your torch and cup system.

    What should I check if tungsten keeps slipping?
    Check the tungsten size, collet condition, collet body wear, and thread cleanliness. Also inspect the cup and torch head for damage.

    Sources Checked

“>Large Diameter TIG Gas Lens Collet Body #17, 18, 26 Torch 2PK (995795-1/8″)
  • Internal link: TIG Torch Slipping Tungsten? Your Collet Body Is Worn (Hereโ€™s the Fix)
  • Internal link: TIG Torch Consumable Wear Signs: Cup Cracks, Collet Slip, Gas Lens Clogs, and Dirty Tungsten
  • Related Arc Weld Part

    Large Diameter TIG Gas Lens Collet Body #17, 18, 26 Torch 2PK (995795-1/8")

    Large Diameter TIG Gas Lens Collet Body #17, 18, 26 Torch 2PK (995795-1/8")

    Large Diameter Gas Lens Collet Body for TIG torch #17, 18, 26

    View at Arc Weld Store

    Related Weld Support Guides

  • Weldmark TIG Collet Body #9, 20, 25 Torch Pk = 5 (13N29-1/8″): Replacement Part Breakdown

    When a TIG torch starts acting up, the collet body is one of the first parts to inspect. A worn or mismatched collet body can cause tungsten slippage, poor gas flow, heat buildup, and inconsistent arc starts. For maintenance buyers and welding support teams, the key is not just replacing a small part, but verifying the torch series, the tungsten size, and the wear condition before the order is placed.

    This breakdown covers the Weldmark TIG Collet Body #9, 20, 25 Torch Pk = 5 (13N29-1/8″) listed under ASIN B0728LD49J. Product naming suggests it is intended for Torch #9, #20, and #25 applications, but final fit should always be confirmed against the torch body, cup, collet, and tungsten setup in service. If your torch uses a different consumable family, do not assume interchangeability.

    Key Takeaways

    • Collet bodies are wear parts. Replace them when the tungsten slips, the bore is deformed, or gas coverage becomes erratic.
    • Check the torch series first. A part listed for #9, #20, and #25 torches may not fit every torch branded as TIG-compatible.
    • Use the tungsten diameter, cup size, and back cap arrangement as verification points before ordering.
    • If the existing part is heat-blued, rounded out, cracked, or packed with debris, treat it as a service failure and inspect the rest of the torch stack.

    What This Part Does

    The collet body holds the collet and tungsten assembly in alignment inside the torch. It also contributes to shielding gas routing through the torch front end. If the bore is worn or contaminated, the tungsten may not clamp properly. That can show up as wandering arc starts, inconsistent stickout, or a tungsten that slowly creeps backward under vibration or heat cycling.

    This is a support component, not a process-setting part. Replacing it does not fix the wrong amperage, the wrong gas, or a poor purge setup. It only restores the mechanical condition needed for normal torch operation.

    Inspect Before You Replace

    Use a flashlight and clean gloves. Remove the cup, collet, tungsten, and back cap. Then work through these checks:

    • Check the bore: Look for oval wear, scoring, or tungsten marking inside the collet body.
    • Inspect the threads: Verify the front-end threads are not stripped, cross-threaded, or packed with spatter and dust.
    • Examine heat damage: Blueing, discoloration, and softened edges can indicate excessive heat or poor gas coverage.
    • Verify collet grip: A loose tungsten after tightening usually means the collet body, the collet, or both are worn.
    • Check for contamination: Grinding dust, oxides, and anti-spatter residue can interfere with gas flow and clamping.

    If the torch has a history of overheating, also inspect the torch head, cable bend relief, gas hose routing, and the regulator flow setting. A consumable failure may be a symptom, not the root cause.

    Troubleshooting Support: Check, Inspect, Verify

    Check: Is the tungsten sliding even after tightening? If yes, confirm the collet size, the collet condition, and the collet body bore.

    Inspect: Compare the removed part to the replacement. Look for length, thread form, and shoulder geometry. Do not rely on appearance alone if the torch family is not known.

    Verify: Match the torch model and the consumable family before installation. If documentation is missing, treat the compatibility as Unknown (Verify).

    Check: Is arc behavior unstable only after torch servicing? That can point to a misassembled front end, damaged insulators, or a missing component.

    Inspect: Confirm the stack-up order from back cap to tungsten. A small assembly error can create gas leaks or poor electrical contact.

    Verify: The cup, collet, collet body, and tungsten size must all belong to the same service configuration.

    Product / Parts Notes

    The product linked for this article is the Weldmark TIG Collet Body #9, 20, 25 Torch Pk = 5 (13N29-1/8″) on Amazon, ASIN B0728LD49J. The registry identifies it as a verified Amazon affiliate product. Specific dimensional and material details were not provided in the source set here, so those remain Unknown (Verify).

    Use the product listing as a parts reference only after you confirm:

    • torch series or torch model
    • tungsten diameter
    • collet body thread and length requirements
    • cup and insulator stack compatibility

    Do not order based on the description alone if your torch is unmarked, heavily modified, or using mixed consumables from more than one family.

    Related Internal Reading

    Safety Notes

    • Disconnect the machine or isolate the torch before servicing consumables.
    • Let the torch cool before handling the front end. Heat damage can make small parts look normal while still being unsafe to touch.
    • Do not force threaded parts together. Cross-threading can ruin the torch head or insulator stack.
    • If shielding gas leaks or the torch runs hot after reassembly, stop and recheck the stack before welding.

    FAQ

    How do I know the collet body is worn?

    Look for a tungsten that no longer holds securely, visible bore wear, burned discoloration, or distorted threads. If the tungsten slips after normal tightening, the part is likely worn or contaminated.

    Can I use this collet body in any TIG torch?

    No. The listing indicates Torch #9, #20, and #25 applications, but the actual torch family must be verified. If the torch model is unknown, treat compatibility as Unknown (Verify).

    Is this a fix for poor arc starts by itself?

    Sometimes, but not always. A new collet body can correct poor tungsten grip or damaged gas routing. It will not fix wrong gas settings, bad tungsten prep, contamination, or a damaged torch cable.

    Should I replace the collet too?

    Yes, inspect it closely. If the collet is flattened, oxidized, or no longer grips well, replace it with the collet body so the front-end stack starts from a known condition.

    Sources Checked

    • Forge OS ASIN registry entry for B0728LD49J
    • Provided Amazon affiliate product shortcode for B0728LD49J
    • Allowed internal links listed for this draft

    Matched Replacement Option

    No products found.

    Disclosure: As an Amazon Associate, Weld Support Parts may earn from qualifying purchases.

    Related Weld Support Guides

  • Torch Gun Nozzle Insulators – 34ct insulator [Set of 2]: Product Breakdown

    Torch Gun Nozzle Insulators – 34ct insulator [Set of 2]: Product Breakdown

    Product not found.
    “>Torch Gun Nozzle Insulators - 34ct insulator [Set of 2]

    Torch Gun Nozzle Insulators – 34ct insulator [Set of 2] are small support parts, but they matter. In MIG gun service, the nozzle insulator helps separate the nozzle from the rest of the torch assembly and support consistent fit at the front end of the gun. When this part wears, cracks, or is installed incorrectly, operators usually notice fit problems before they see a complete failure. That makes inspection important during routine consumable checks.

    This breakdown stays focused on what can be verified from the product listing and on practical shop checks. If you are buying for maintenance stock, use the checks below to confirm you are replacing the correct part before you order in volume.

    Key Takeaways

    What This Part Does

    A nozzle insulator is a front-end torch support component. In service, it helps maintain separation and positioning around the nozzle area. That matters because the front end of the gun sees heat, spatter, and repeated handling. Even if the part is light and small, it can still affect how the nozzle seats and how stable the consumable stack feels during operation.

    From a maintenance standpoint, this is the kind of part that is easiest to overlook until the nozzle starts feeling loose, the front end does not assemble smoothly, or the operator reports repeated consumable mismatch. When that happens, inspect the part before changing larger torch components.

    Product / Parts Section

    Product: Torch Gun Nozzle Insulators – 34ct insulator [Set of 2]

    Source listing note: 100-34CT

    Listed weight: 0.01 lb

    Compatibility: Unknown (Verify)

    Assembly details: Set of 2 as listed

    Use the ArcWeld product page as the reference point for the listing only. Do not assume the part will fit a specific gun series unless your existing torch parts match the same design and part reference.

    Product not found.

    “>View the ArcWeld product listing

    How to Inspect the Part in the Shop

    Use a simple inspection sequence during torch maintenance:

    1. Power down and isolate the equipment. Verify the machine is off and the gun is safe to handle.
    2. Remove the nozzle. Inspect the insulator for heat damage, cracking, hardening, or carbonized buildup.
    3. Check the seating surfaces. Verify the insulator sits flat and does not rock or bind when installed.
    4. Inspect for spatter intrusion. Excess spatter can deform the front-end fit and may be a sign the part should be replaced.
    5. Compare against the old part. Verify shape, mounting profile, and thickness against the removed insulator before installing the new one.
    6. Test the assembly by hand. Reinstall the nozzle and confirm the front end assembles without forcing the parts.

    If the part does not seat cleanly, stop and verify torch model, nozzle type, and the full consumable stack. Do not force a fit.

    Troubleshooting Support

    Problem: Nozzle feels loose after replacement.
    Check the insulator orientation first. Inspect the nozzle and contact surfaces for spatter buildup. Verify the torch model and the part reference before assuming the new part is defective.

    Problem: Front end overheats faster than expected.
    Inspect for damaged insulation, heavy spatter, and poor nozzle seating. Verify that the gun is assembled with the correct consumables and that the front end is clean.

    Problem: Consumables do not assemble smoothly.
    Check for distortion, debris, or carbon deposits. Verify that the nozzle, diffuser, and insulator set are the correct matched parts for the torch.

    Problem: Repeated part failures in short service intervals.
    Inspect operator technique, spatter levels, and duty cycle conditions. Verify that the front-end components are not being damaged by impact, abuse, or incorrect installation.

    Check / Inspect / Verify Before Ordering

    Related Welding Support Reference

    If you are also checking wire selection for a MIG setup, use the Weld Support Parts blog post below as a starting point for a wire discussion. It is a selection reference, not a procedure approval:

    Aluminum ER 5554 3/64โ€ณ X 5lb. MIG Welding Wire Spool By Washington Alloy โ€“ Weld Support Parts Blog

    For torch consumable context, this related TIG consumables breakdown may also be useful when comparing how front-end parts are organized in a complete torch system:

    17-Piece TIG Welding Torch Kit for WP-17/18/26: Complete Consumables Breakdown

    Safety Notes

    FAQ

    Q: What is this part used for?
    A: It is a torch gun nozzle insulator used at the front end of the MIG gun assembly. Exact torch compatibility is Unknown (Verify).

    Q: Can I buy this by visual match alone?
    A: No. Verify the torch model, nozzle family, and old part profile before ordering.

    Q: Is this a complete torch consumable kit?
    A: No. It is a support part listed as a 34ct insulator [Set of 2], not a complete torch assembly.

    Q: What should I inspect if the new part does not fit?
    A: Check the nozzle, diffuser, and front-end seating surfaces for wear or spatter, then verify the torch model and part reference.

    Sources Checked

    All uncertain technical details are marked Unknown (Verify). No compatibility claims, pricing, or certification claims are made beyond the provided source material.

    Related Arc Weld Part

    Torch Gun Nozzle Insulators - 34ct insulator [Set of 2]

    Torch Gun Nozzle Insulators – 34ct insulator [Set of 2]

    100-34CT Dimensions: -Overall Product Weight:0.01 lb

    View at Arc Weld Store

    Related Weld Support Guides

  • CK SGL-KITM TIG Accessory Kit, Stubby Gas Lens, 4GL, 1/16, 3/32, 1/8: Product Breakdown

    CK SGL-KITM TIG Accessory Kit, Stubby Gas Lens, 4GL, 1/16, 3/32, 1/8: Product Breakdown

    Product not found.
    “>CK SGL-KITM TIG Accessory Kit, Stubby Gas Lens, 4GL, 1/16, 3/32, 1/8

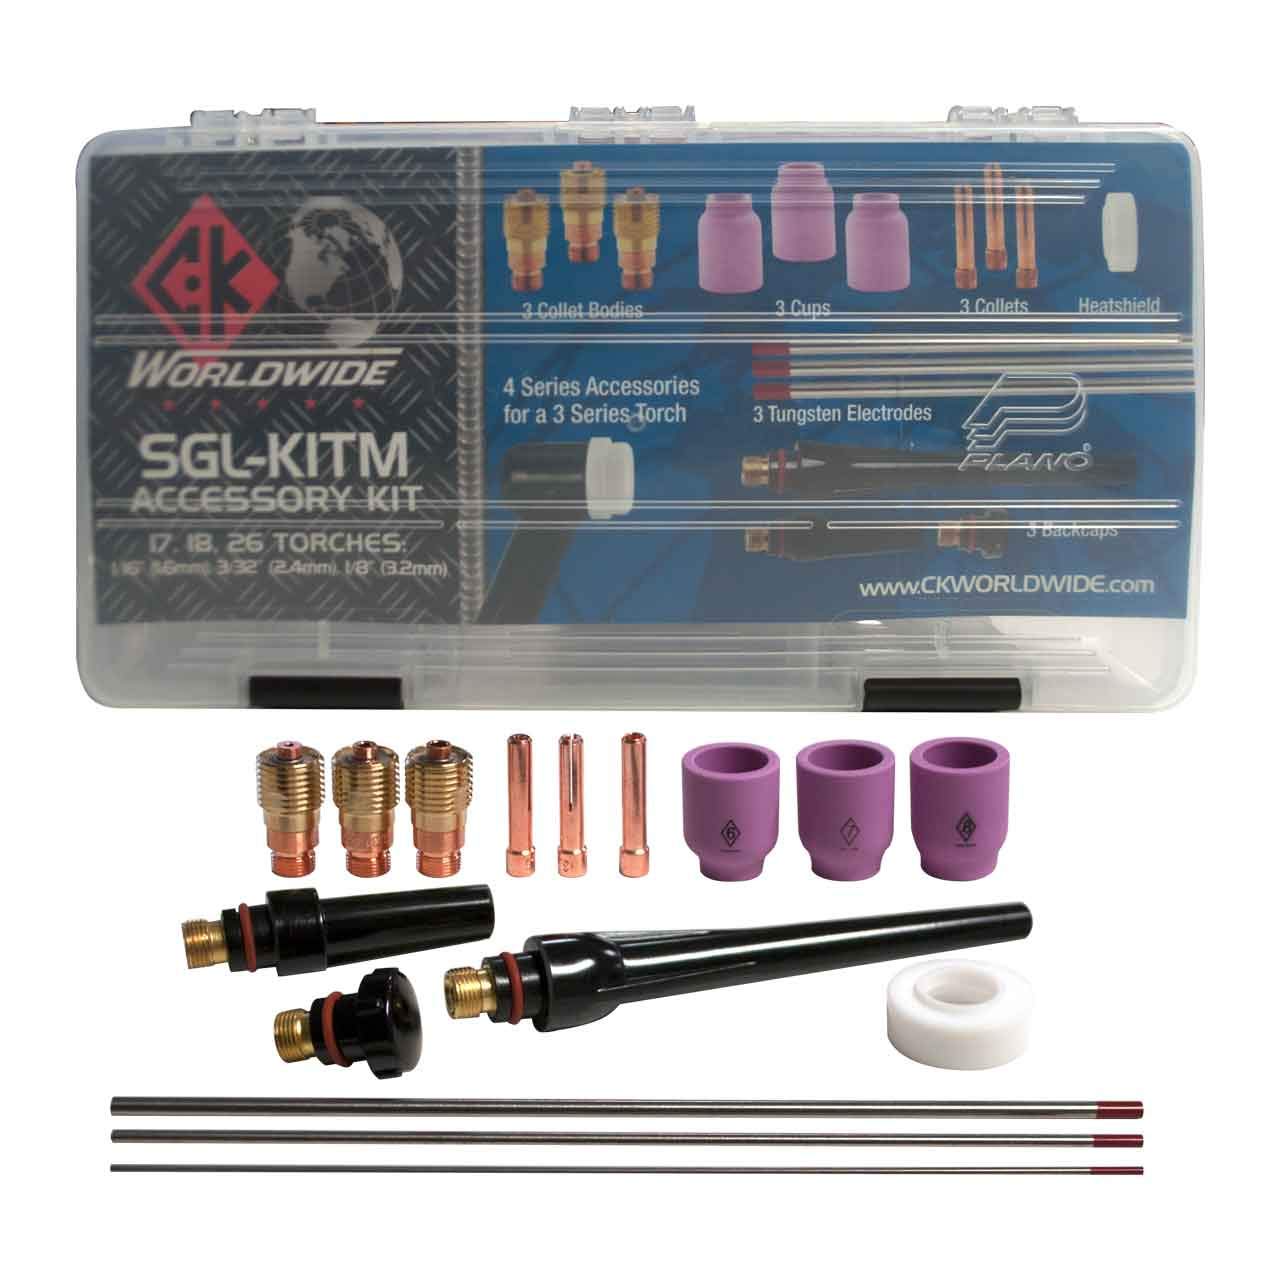
    The CK SGL-KITM TIG accessory kit is a consumable set built around a stubby gas lens setup. For shops that run TIG work on thin material, tight access joints, or jobs that need better torch visibility, the main value is simple: it consolidates common gas lens and collet body sizes into one kit so the welder can match the torch setup to the tungsten and cup arrangement being used.

    This breakdown focuses on what the kit is for, how to inspect it before use, and what to verify when the arc starts acting up. If you are buying for a welding bay, maintenance cart, or service truck, treat this as a consumable fit-check guide first and a product summary second.

    Key Takeaways

    What the kit is intended to do

    A gas lens helps smooth shielding gas flow at the torch end. In practical terms, that can improve shield coverage around the tungsten and weld puddle, especially when stickout increases or access is limited. A stubby arrangement shortens the front-end stack and can make the torch less bulky in confined positions. For welders, that usually means better line of sight and easier movement around corners, tube joints, and tight fillets.

    Because this is a consumable accessory kit, the real value is in setup flexibility. The included 1/16, 3/32, and 1/8 sizes cover common tungsten diameters used in TIG work, but the operator still has to confirm that the torch body, collet body, cup, and tungsten all match the intended configuration. Do not assume every accessory in the kit is a universal fit.

    Product and parts breakdown

    Product: CK SGL-KITM TIG Accessory Kit, Stubby Gas Lens, 4GL, 1/16, 3/32, 1/8

    Source listing: ArcWeld product page for CK Worldwide accessory kit

    Listed compatibility: CK Worldwide TIG torches 17, 18, and 26

    Included sizes: three gas lens sizes identified as 4GL, plus collet body sizes 1/16, 3/32, and 1/8

    Material and finish: Unknown (Verify)

    Country of origin: Unknown (Verify)

    Thread or cup standards: Unknown (Verify)

    When receiving the kit, sort the parts by size and confirm each piece is present. Shops should log the kit on the consumables shelf the same way they would log nozzles, collets, or back caps. That makes replenishment and cross-checking easier when a torch is down.

    Inspection steps before first use

    1. Check packaging and count parts. Verify the number of gas lenses and collet bodies against the listing.
    2. Inspect the machined surfaces. Look for burrs, damaged threads, or bent components.
    3. Match tungsten diameter. Confirm the selected collet body matches the tungsten size being installed.
    4. Dry fit the stack. Assemble the torch front end without striking an arc to confirm parts seat correctly.
    5. Verify torch model fit. Confirm the torch is one of the listed CK Worldwide models, or mark the compatibility as Unknown (Verify) before proceeding.

    Troubleshooting and support

    If shielding coverage looks poor, do not immediately blame the power source. Front-end consumables are often the cause.

    Check: Is the gas lens installed correctly and seated fully? Misalignment can disrupt gas flow.

    Inspect: Look for clogged passages, damaged cup seating, or contamination on the tungsten and collet body.

    Verify: Confirm gas flow rate, tungsten stickout, and cup setup are appropriate for the joint. Those values are application-dependent and should be set by procedure or shop standard. Unknown (Verify) if not documented.

    If the tungsten keeps moving or the arc starts inconsistently, the issue may be mechanical rather than electrical.

    Check: Is the correct collet body size installed for the tungsten diameter?

    Inspect: Look for wear in the collet, damaged threads, or heat distortion.

    Verify: The tungsten is straight, clean, and cut to the shopโ€™s accepted prep standard.

    If a torch feels too bulky for the joint, the stubby layout may help, but only if the rest of the setup is matched correctly.

    Check: Cup size, tungsten length, and work angle.

    Inspect: Clearance around the joint and whether the torch front end is contacting the part.

    Verify: The job actually benefits from a shorter front-end arrangement. If not, use the standard consumable configuration approved for that weld.

    Safety notes

    FAQ

    Q: What is the main benefit of a stubby gas lens kit?
    A: It can improve access and visibility at the torch head while supporting gas coverage at the tungsten. The practical benefit depends on the torch setup and job geometry.

    Q: Which torches does this kit fit?
    A: The listing states CK Worldwide TIG torches 17, 18, and 26. If you are using a different torch, verify fit before purchase or installation.

    Q: Why are there three collet body sizes in one kit?
    A: The 1/16, 3/32, and 1/8 sizes allow the user to match common tungsten diameters without swapping to a different consumable family.

    Q: Can this kit be used on all TIG welding jobs?
    A: No. Use depends on torch model, tungsten size, cup setup, and weld access. Confirm the application requirements and verify the front-end configuration before production welding.

    Sources Checked

    Related Arc Weld Part

    CK SGL-KITM TIG Accessory Kit, Stubby Gas Lens, 4GL, 1/16, 3/32, 1/8

    CK SGL-KITM TIG Accessory Kit, Stubby Gas Lens, 4GL, 1/16, 3/32, 1/8

    Complete TIG torch accessory kit from CK Worldwide featuring stubby gas lens design for improved visibility and precision. Compatible with CK Worldwide TIG torches 17, 18, and 26. Includes three gas lens sizes (4GL) and three collet body sizes (1/16, 3/32, 1/8) for versatile tungsten electrode compatibility. Essential consumables for TIG welding on mild steel, stainless, and aluminum.

    View at Arc Weld Store
  • ARCCAPTAIN TIG Torch Consumables Kit: Complete 11-Piece Setup for WP-17/18/26 Torches

    TIG welding demands precision, and that starts with reliable consumables. A worn collet, damaged cup, or mismatched gas lens can derail your arc quality and waste time troubleshooting. The ARCCAPTAIN 11-piece TIG torch consumables kit bundles the essential parts you need to keep your torch running clean and consistent.

    What’s Included in This Kit

    The ARCCAPTAIN kit covers the core consumables for WP-17, WP-18, and WP-26 torches:

    • 1x Alumina Nozzle โ€” Ceramic cup for shielding gas flow
    • 2x Collets โ€” Electrode holders (standard sizes for 1/16″ and 3/32″ tungsten)
    • 2x Back Caps โ€” Torch body connectors
    • 2x Gas Lenses โ€” Improved gas coverage and shielding
    • 2x Ceramic Cups โ€” Replacement nozzles for wear
    • 2x Insulating Bushings โ€” Electrical isolation components

    This multi-pack approach means you have spares on hand, reducing downtime when a part fails mid-job.

    Who Should Buy This Kit

    This kit is ideal for:

    • Hobby and shop welders stepping up from single-piece replacements to a complete consumables set
    • TIG welders running WP-17/18/26 torches who want to avoid emergency supply runs
    • Fabricators and instructors who need backup parts for multiple torches or training setups
    • Budget-conscious shops looking for a multipack at a reasonable price point

    No products found.

    Performance & Use

    What to Compare Before You Buy

    • Torch Compatibility โ€” Verify your torch model (WP-17, WP-18, or WP-26); this kit is NOT compatible with WP-9 or larger industrial torches
    • Tungsten Size โ€” Confirm whether you run 1/16″, 3/32″, or mixed tungsten sizes; collet sizing matters for arc stability
    • Gas Lens vs. Standard Cup โ€” Gas lenses improve shielding in drafty environments; standard cups work fine for bench work
    • Material Grade โ€” Alumina cups are standard; some shops prefer ceramic for specific applications
    • Quantity โ€” This is an 11-piece set; if you run multiple torches daily, consider buying two kits

    Comparable Amazon Picks (Optional)

    Installation & Maintenance

    Swapping consumables is straightforward:

    1. Cool the torch โ€” Let it sit for 2โ€“3 minutes after your last weld
    1. Unscrew the back cap โ€” Use a 7/16″ or 1/2″ wrench; don’t force it
    1. Remove the old collet and cup โ€” They slide out together
    1. Insert new collet and cup โ€” Align the collet with the torch body; it should sit flush
    1. Reattach the back cap โ€” Hand-tighten, then snug with a wrench; over-tightening can crack the collet

    Maintenance tip: Clean the torch body and collet threads every 20โ€“30 hours of welding to prevent carbon buildup and stuck parts.

    Durability & Lifespan

    Consumables wear at different rates depending on amperage, duty cycle, and shielding gas:

    • Collets โ€” 40โ€“80 hours of active welding before replacement
    • Ceramic cups โ€” 30โ€“60 hours; cracks indicate replacement time
    • Gas lenses โ€” 50โ€“100 hours; clogging reduces gas coverage
    • Back caps โ€” 100+ hours; rarely need replacement unless cross-threaded

    At $25โ€“$35 for this 11-piece kit, you’re looking at roughly $2โ€“$3 per consumable part, making it a cost-effective backup supply.

    Safety Notes

    • Always wear welding gloves when handling hot torches or consumables
    • Ensure your torch is cool before disassembly
    • Check gas lens alignment; misaligned lenses can cause poor shielding and porosity
    • Use only argon or argon/COโ‚‚ blends with this torch; check your machine’s gas compatibility

    When to Replace This Kit’s Parts

    Replace consumables when you notice:

    • Erratic arc โ€” Worn collet or misaligned cup
    • Visible cracks or pitting on ceramic cups
    • Gas coverage loss โ€” Clogged gas lens or damaged nozzle
    • Difficulty inserting tungsten โ€” Worn collet

        1. Read with Kindle Unlimited