Tag: TIG support

  • Weldmark TIG Collet Body #9, 20, 25 Torch Pk = 5 (13N29-1/8″): Replacement Part Breakdown

    When a TIG torch starts acting up, the collet body is one of the first parts to inspect. A worn or mismatched collet body can cause tungsten slippage, poor gas flow, heat buildup, and inconsistent arc starts. For maintenance buyers and welding support teams, the key is not just replacing a small part, but verifying the torch series, the tungsten size, and the wear condition before the order is placed.

    This breakdown covers the Weldmark TIG Collet Body #9, 20, 25 Torch Pk = 5 (13N29-1/8″) listed under ASIN B0728LD49J. Product naming suggests it is intended for Torch #9, #20, and #25 applications, but final fit should always be confirmed against the torch body, cup, collet, and tungsten setup in service. If your torch uses a different consumable family, do not assume interchangeability.

    Key Takeaways

    • Collet bodies are wear parts. Replace them when the tungsten slips, the bore is deformed, or gas coverage becomes erratic.
    • Check the torch series first. A part listed for #9, #20, and #25 torches may not fit every torch branded as TIG-compatible.
    • Use the tungsten diameter, cup size, and back cap arrangement as verification points before ordering.
    • If the existing part is heat-blued, rounded out, cracked, or packed with debris, treat it as a service failure and inspect the rest of the torch stack.

    What This Part Does

    The collet body holds the collet and tungsten assembly in alignment inside the torch. It also contributes to shielding gas routing through the torch front end. If the bore is worn or contaminated, the tungsten may not clamp properly. That can show up as wandering arc starts, inconsistent stickout, or a tungsten that slowly creeps backward under vibration or heat cycling.

    This is a support component, not a process-setting part. Replacing it does not fix the wrong amperage, the wrong gas, or a poor purge setup. It only restores the mechanical condition needed for normal torch operation.

    Inspect Before You Replace

    Use a flashlight and clean gloves. Remove the cup, collet, tungsten, and back cap. Then work through these checks:

    • Check the bore: Look for oval wear, scoring, or tungsten marking inside the collet body.
    • Inspect the threads: Verify the front-end threads are not stripped, cross-threaded, or packed with spatter and dust.
    • Examine heat damage: Blueing, discoloration, and softened edges can indicate excessive heat or poor gas coverage.
    • Verify collet grip: A loose tungsten after tightening usually means the collet body, the collet, or both are worn.
    • Check for contamination: Grinding dust, oxides, and anti-spatter residue can interfere with gas flow and clamping.

    If the torch has a history of overheating, also inspect the torch head, cable bend relief, gas hose routing, and the regulator flow setting. A consumable failure may be a symptom, not the root cause.

    Troubleshooting Support: Check, Inspect, Verify

    Check: Is the tungsten sliding even after tightening? If yes, confirm the collet size, the collet condition, and the collet body bore.

    Inspect: Compare the removed part to the replacement. Look for length, thread form, and shoulder geometry. Do not rely on appearance alone if the torch family is not known.

    Verify: Match the torch model and the consumable family before installation. If documentation is missing, treat the compatibility as Unknown (Verify).

    Check: Is arc behavior unstable only after torch servicing? That can point to a misassembled front end, damaged insulators, or a missing component.

    Inspect: Confirm the stack-up order from back cap to tungsten. A small assembly error can create gas leaks or poor electrical contact.

    Verify: The cup, collet, collet body, and tungsten size must all belong to the same service configuration.

    Product / Parts Notes

    The product linked for this article is the Weldmark TIG Collet Body #9, 20, 25 Torch Pk = 5 (13N29-1/8″) on Amazon, ASIN B0728LD49J. The registry identifies it as a verified Amazon affiliate product. Specific dimensional and material details were not provided in the source set here, so those remain Unknown (Verify).

    Use the product listing as a parts reference only after you confirm:

    • torch series or torch model
    • tungsten diameter
    • collet body thread and length requirements
    • cup and insulator stack compatibility

    Do not order based on the description alone if your torch is unmarked, heavily modified, or using mixed consumables from more than one family.

    Related Internal Reading

    Safety Notes

    • Disconnect the machine or isolate the torch before servicing consumables.
    • Let the torch cool before handling the front end. Heat damage can make small parts look normal while still being unsafe to touch.
    • Do not force threaded parts together. Cross-threading can ruin the torch head or insulator stack.
    • If shielding gas leaks or the torch runs hot after reassembly, stop and recheck the stack before welding.

    FAQ

    How do I know the collet body is worn?

    Look for a tungsten that no longer holds securely, visible bore wear, burned discoloration, or distorted threads. If the tungsten slips after normal tightening, the part is likely worn or contaminated.

    Can I use this collet body in any TIG torch?

    No. The listing indicates Torch #9, #20, and #25 applications, but the actual torch family must be verified. If the torch model is unknown, treat compatibility as Unknown (Verify).

    Is this a fix for poor arc starts by itself?

    Sometimes, but not always. A new collet body can correct poor tungsten grip or damaged gas routing. It will not fix wrong gas settings, bad tungsten prep, contamination, or a damaged torch cable.

    Should I replace the collet too?

    Yes, inspect it closely. If the collet is flattened, oxidized, or no longer grips well, replace it with the collet body so the front-end stack starts from a known condition.

    Sources Checked

    • Forge OS ASIN registry entry for B0728LD49J
    • Provided Amazon affiliate product shortcode for B0728LD49J
    • Allowed internal links listed for this draft

    Matched Replacement Option

    No products found.

    Disclosure: As an Amazon Associate, Weld Support Parts may earn from qualifying purchases.
    Related Weld Support Guides

  • CK 3P8GS Glass Cup Size 8, 1/2″ x 1-7/8″, 10 pack: Product Breakdown

    CK 3P8GS Glass Cup Size 8, 1/2″ x 1-7/8″, 10 pack: Product Breakdown

    Product not found.
    “>CK 3P8GS Glass Cup Size 8, 1/2" x 1-7/8", 10 pack

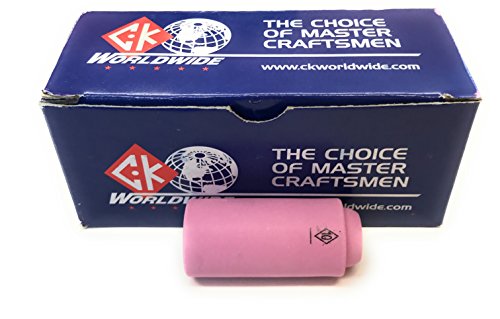
    The CK 3P8GS Glass Cup Size 8, 1/2" x 1-7/8", 10 pack is a TIG torch support part for situations where visibility matters. The product description identifies it as a high-temperature glass cup used for work in inside corners, inside pipe, and around tubing. That makes it relevant to fabricators and maintenance crews who need better line-of-sight to the arc and puddle while working in tight geometry.

    This article is a practical breakdown for buyers and support teams. It focuses on what this part is for, what to verify before ordering or installing, and how to troubleshoot common fit and performance issues. Use the product details as a starting point, then confirm torch compatibility and size requirements before putting the cups into service.

    Key takeaways

    • Glass cups are selected when visibility around the weld zone is a priority.
    • This listing is for a package of 10 cups.
    • Size and torch compatibility must be verified before use.
    • Glass consumables need inspection for chips, cracks, and heat damage before each job.
    • If fit or gas coverage is uncertain, treat the setup as Unknown (Verify) until the torch and accessory stack-up are confirmed.

    What the product is used for

    High-temperature glass cups are used to help improve visibility in restricted TIG welding positions. In practice, that means they are useful when the operator needs to watch the tungsten, filler addition, and puddle movement more clearly than with an opaque cup. The product description specifically points to inside corners, inside pipe, and work around tubing.

    That use case is important for welders and supervisors because visibility can affect torch angle, access, and consistency. A clearer view can help the operator maintain control in confined areas, but the cup still has to match the torch and the job setup. Do not assume a glass cup is suitable for every torch body, collet body, or gas lens arrangement. Verify the full stack-up before installation.

    Check before you order

    Before purchasing, confirm the torch family, cup size requirement, and any related accessory dimensions. The listing identifies the part as Size 8 with overall dimensions of 1/2" x 1-7/8", but the exact torch compatibility is not stated in the product data provided here. If your maintenance records or job traveler do not already identify the correct setup, mark it Unknown (Verify) and match it to the torch hardware in hand.

    • Check the torch model and accessory thread or interface requirements.
    • Inspect the existing cup and holder for size markings, wear, and damage.
    • Verify that the work area actually benefits from improved visibility before changing consumables.
    • Confirm the pack quantity of 10 is appropriate for your usage rate and spares policy.

    Install and setup support

    Install the cup only after the torch has been made safe and cooled. Remove the current cup and compare the physical dimensions, seating surface, and fit behavior against the new glass cup. Because no compatibility chart is provided in the source data, the exact mating parts remain Unknown (Verify). Do not force a cup into a holder or assume a loose fit is acceptable.

    When setting up for first use, use a short verification pass:

    • Check that the cup seats evenly without rocking.
    • Inspect the gas coverage at a low-risk test weld or dry run position.
    • Verify the torch can still reach the joint without overextending the operator’s wrist or changing technique beyond normal practice.

    Troubleshooting and support

    If the part does not perform as expected, work through the issue in order. Start with fit, then condition, then gas flow and technique. Do not jump straight to process changes until the hardware is confirmed.

    Problem: the cup does not fit correctly

    • Check the torch cup interface and compare it to the removed part.
    • Inspect for burrs, deformation, or contamination on the holder.
    • Verify the size designation is correct for the torch assembly. If not confirmed, treat it as Unknown (Verify).

    Problem: visibility improved, but gas coverage seems inconsistent

    • Check the gas supply, torch assembly, and any other accessories already in use.
    • Inspect for leaks, loose connections, or damaged sealing surfaces.
    • Verify that the issue is not related to technique, stickout, or work position before replacing additional parts.

    Problem: the cup shows damage after use

    • Check for impact marks from handling or contact with the workpiece.
    • Inspect for cracks, chips, or heat stress before reuse.
    • Verify the operator is giving the cup enough clearance in tight corners and pipe work.

    Product and parts notes

    The available product data identifies this as the CK 3P8GS Glass Cup Size 8, 1/2" x 1-7/8", 10 pack. It is presented as a glass high-temperature cup for TIG use in visibility-limited applications. No additional specs, material certifications, or compatibility claims are provided in the source data, so those details remain Unknown (Verify).

    For buyers, the main value point is practical access in constrained weld positions. For maintenance teams, the pack of 10 may help reduce small-part shortages at the bench or in the field, but order quantity should still match the shop’s usage and consumable control process.

    Safety notes

    • Handle glass consumables carefully. Chips and cracks can worsen during use.
    • Let the torch cool before changing cups or inspecting the holder.
    • Do not use damaged cups in production welding.
    • Verify the torch is isolated and the work area is safe before maintenance.
    • Use normal TIG PPE and follow site welding safety procedures.

    FAQ

    What is the CK 3P8GS glass cup used for?

    It is used in TIG applications where visibility is important, especially inside corners, inside pipe, and around tubing.

    Does this product listing confirm torch compatibility?

    No. The provided product data does not include a compatibility chart. Torch fit remains Unknown (Verify) until matched to the actual torch hardware.

    How should I inspect the cup before use?

    Check for chips, cracks, or deformation. Inspect the seating area and verify the cup installs evenly and securely before welding.

    Why choose a glass cup instead of a standard opaque cup?

    The main reason is visibility. A glass cup can help the operator see the weld zone better in tight or obstructed positions, but it still has to be properly matched to the torch setup.

    Sources checked

    • ArcWeld product page: CK 3P8GS Glass Cup Size 8, 1/2" x 1-7/8", 10 pack

    Related Arc Weld Part

    CK 3P8GS Glass Cup Size 8, 1/2" x 1-7/8", 10 pack

    CK 3P8GS Glass Cup Size 8, 1/2" x 1-7/8", 10 pack

    Glass high temperature glass cups are used in applications where visibility is an issue such as inside corners, inside pipe, around tubing, etc. Package of 10

    View at Arc Weld Store
  • Weldtec Speedway SW-320 Torch Body, Rigid, Water, 320A: Product Breakdown

    Weldtec Speedway SW-320 Torch Body, Rigid, Water, 320A: Product Breakdown

    Product not found.
    “>Weldtec Speedway SW-320 Torch Body, Rigid, Water, 320A

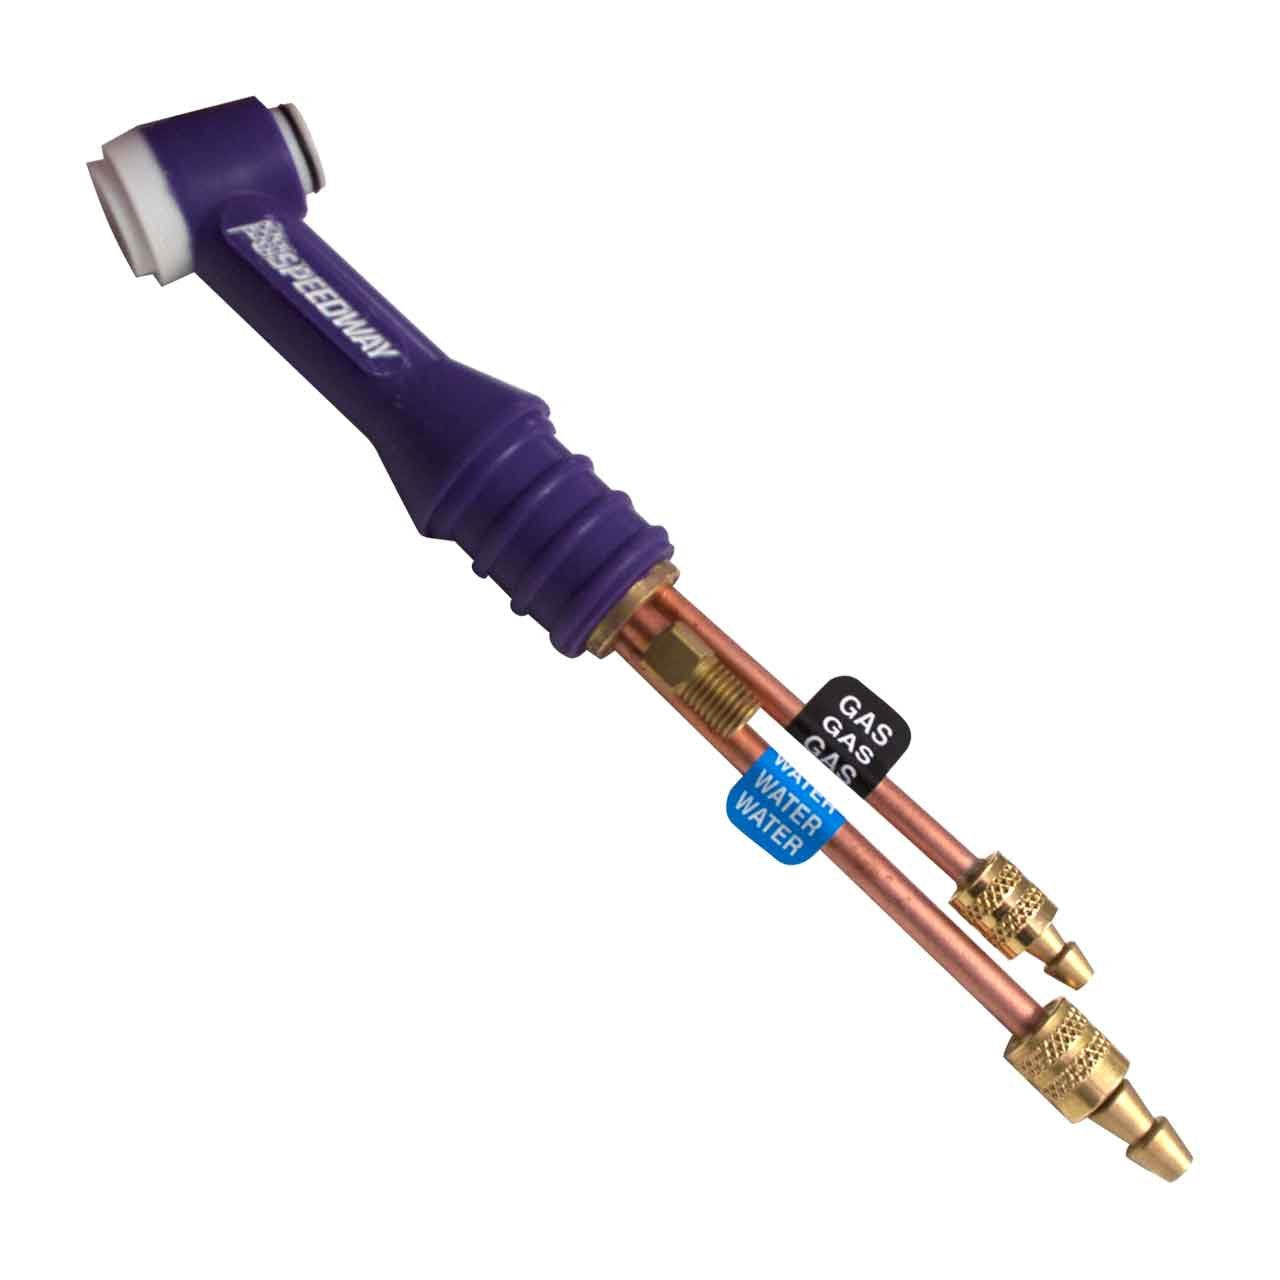
    The Weldtec Speedway SW-320 Torch Body, Rigid, Water, 320A is a TIG torch body built for water-cooled service and rigid-body handling. For buyers, maintenance teams, and welders, the main question is not whether the torch body is “high performance,” but whether it matches the actual duty cycle, cooling setup, and operator needs in your shop. This breakdown focuses on what to verify before purchase, what to inspect after installation, and where support issues usually show up in service.

    Key Takeaways

    • The SW-320 is a rigid, water-cooled torch body intended for TIG welding applications.
    • The 320A rating is provided in the product name, but the exact rating basis and conditions are Unknown (Verify).
    • Rigid torch bodies are generally chosen when straight access and repeatable hand position matter more than torch flex.
    • Water cooling adds heat management, but only if the cooler, hoses, and connections are correctly matched and maintained.
    • Before buying, verify the torch body interface, hose routing, and the rest of the torch package so you do not end up with a partial fit issue.

    What this torch body is for

    As listed, the SW-320 is a torch body only. That matters for buyers. A torch body is not the full torch setup, and it does not eliminate the need to verify the rest of the system: power cable, water lines, gas delivery, back-end connections, and consumable compatibility. In a maintenance environment, the most common mistake is assuming a torch body will integrate with whatever is already on the cart. That assumption should be checked, not trusted.

    The rigid-body design is usually best when the operator wants stable positioning and direct access to the weld area. If the application needs more bend or a highly flexible feel, compare the SW-320 against the complete torch kit options and do not assume rigid is the best fit for every job.

    Practical buyer checks before ordering

    1. Check the duty cycle need. Verify whether your application truly needs a water-cooled torch body. If welding time, current, or heat load are not demanding, the added complexity may not be justified.
    2. Inspect the machine-side setup. Confirm your TIG power source and cooler arrangement support a water-cooled torch body. Unknown (Verify) for exact connector requirements.
    3. Verify hose and cable routing. A rigid body may work well on the bench but create interference in tight fixtures or field work.
    4. Confirm consumable family. Do not assume the torch body matches the same cup, collet, or gas lens setup as another torch without checking the correct parts list.
    5. Review the full package. If you only need a replacement torch body, make sure the rest of the torch assembly remains serviceable and compatible.

    Inspection and setup checks

    Use a simple verify routine when the torch arrives or when it comes back from service.

    • Check exterior condition: inspect the torch body for dents, crushed sections, heat damage, or signs of impact.
    • Inspect the fittings: verify that threaded ends, adapters, and hose ends are clean and undamaged.
    • Verify water flow path: confirm the supply and return lines are routed correctly and not reversed. If the machine setup is not clearly labeled, mark it.
    • Check for leaks: pressure test or run the cooler at low risk conditions first. Any moisture at fittings should be corrected before welding.
    • Inspect the grip and handle area: look for looseness, cracked insulation, or worn spots that could affect handling.
    • Verify torch head alignment: on a rigid body, the operator should not need to force position or compensate for obvious twist.

    Troubleshooting support: common issues and what to check

    Issue: Torch runs hot faster than expected.
    Check the cooler operation first. Verify coolant level, pump output, hose restriction, and whether flow is reaching the torch. Confirm the torch is actually plumbed as a water-cooled body and not partially blocked. Also verify the welding current and arc-on time against the actual application. If the torch is being run beyond its practical setup, the problem is not the torch body alone.

    Issue: Poor gas coverage.
    Inspect the gas line, seals, and front-end consumables. Verify that the torch body connections are tight and that there is no damage at the hose assembly. A torch body can be sound while a bad seal or damaged consumable creates the defect.

    Issue: Water leaking at a fitting.
    Check hose seating, O-rings if used in your configuration, and any adapter interfaces. Dry the area, restart the system, and observe where the leak begins. Do not keep welding with an active leak.

    Issue: Torch feels awkward in hand.
    Confirm the torch body type is right for the work position. A rigid body can improve control in some setups and be uncomfortable in others. Verify whether the issue is torch geometry, hose drag, or cable management before replacing parts.

    Product and parts section

    This article covers the Weldtec Speedway SW-320 Torch Body, Rigid, Water, 320A as listed in the ArcWeld product source. The provided product information identifies it as a rigid, water-cooled torch body in the Speedway Series. Other specifications beyond that description are Unknown (Verify).

    For direct product reference, use the ArcWeld listing here:

    Product not found.

    “>Weldtec Speedway SW-320 Torch Body, Rigid, Water, 320A

    If your job requires a complete torch kit rather than the body alone, compare the SW-320 body to the linked related overview below before you commit to a service path or replacement strategy.

    Weldtec Speedway SW-320-25DX Deluxe Water-Cooled TIG Torch Kit, 25’, Braided – A Comprehensive Overview

    Safety notes

    • Always lock out or de-energize equipment before changing torch parts or inspecting electrical connections.
    • Water-cooled systems can leak. Verify connections before striking an arc.
    • Do not touch hot front-end parts immediately after welding.
    • Use the correct PPE for TIG work, including eye protection and gloves appropriate to the task.
    • If the torch body, cable, or hose assembly shows damage, remove it from service until repaired or replaced.

    FAQ

    Is the SW-320 a complete torch setup?
    No. The provided source identifies it as a torch body. Verify the rest of the TIG torch assembly separately.

    Can I assume it will fit my existing TIG machine?
    No. Compatibility is Unknown (Verify) unless you confirm the machine-side connectors, cooler requirements, and hose routing against your existing setup.

    Does the 320A rating mean it will run that output in every job?
    No. The rating appears in the product name, but the actual rating basis, duty cycle conditions, and application limits are Unknown (Verify).

    Should I choose a rigid torch body over a flexible one?
    Only if the job benefits from stable hand position and direct access. For tight or awkward weld positions, compare the torch body style against the actual work area.

    Sources Checked

    • ArcWeld product page: Weldtec Speedway SW-320 Torch Body, Rigid, Water, 320A
    • Internal related article: Weldtec Speedway SW-320-25DX Deluxe Water-Cooled TIG Torch Kit, 25’, Braided – A Comprehensive Overview

    Related Arc Weld Part

    Weldtec Speedway SW-320 Torch Body, Rigid, Water, 320A

    Weldtec Speedway SW-320 Torch Body, Rigid, Water, 320A

    Weldtec Speedway SW-320 Torch Body – Rigid, Water-Cooled, 320A The Weldtec Speedway SW-320 is a high-performance TIG torch body built to handle demanding welding applications. Rated for 320 amps and water-cooled for maximum heat control, this rigid-body torch is part of the Speedway Series—known for reliability, comfort, and durability. Whether you're working in a shop or field environment, the SW-320 delivers con…

    View at Arc Weld Store

    Related Weld Support Guides

  • CK300 TIG Torch Support: Parts Lookup and Buying Checks

    CK300 TIG Torch Support: Parts Lookup and Buying Checks

    CK300 TIG Torch Support

    The CK300 TIG Torch Support is a lookup item used to help identify the correct support parts for a CK300 torch setup. The available Weld Support Parts page describes it as a CK300 TIG torch support with Series 3 breakdown routing. For buyers, maintenance teams, and weld support staff, the main risk is not the support itself. The risk is ordering a part based on an assumed torch variant, cable routing, or connector layout without verifying the exact configuration first.

    This guide is built for parts lookup and buying checks. It focuses on what to inspect before ordering, how to confirm the support path, and how to avoid common fit-up errors. If you need the reference page, use the Weld Support Parts listing here: CK300 TIG Torch Support.

    Key Takeaways

    • CK300 TIG Torch Support is a lookup reference, not a stand-alone fitment claim.
    • Series 3 breakdown routing is listed on the source page; verify that your torch setup matches before buying.
    • Do not assume compatibility from torch model naming alone.
    • Check hose bundle routing, connector style, torch head access, and replacement path before release of purchase order.
    • If any detail is unclear, mark it Unknown (Verify) and confirm against the existing torch assembly or supplier documentation.

    What the lookup page tells you

    The Weld Support Parts page identifies the item as CK300 TIG torch support with Series 3 breakdown routing. That is enough to start a sourcing check, but not enough to approve a purchase without verification. For maintenance inventory work, treat the page as a routing reference and not as a full compatibility matrix.

    Before you order, confirm the torch family, the breakdown routing style, and the exact support location on the assembly. If your shop tracks torch repairs by asset number, use that record first. If the asset record is incomplete, inspect the torch directly.

    Buying checks before you release the order

    Use the following check, inspect, verify steps before buying:

    1. Check the torch identification. Confirm the torch is a CK300 unit or an assembly documented as CK300. If the marking is worn, record it as Unknown (Verify).
    2. Inspect the routing path. Determine whether the cable and hose bundle follows the same breakdown routing as the source page lists for Series 3.
    3. Verify the support point. Identify where the support interfaces with the torch assembly. Look for wear, clamp marks, abrasion, or distortion.
    4. Check the connector end. Confirm the end connection type from the existing torch assembly. Do not assume the support fits every connector variant.
    5. Review maintenance history. If the torch has been repaired or rebuilt, compare the current arrangement to the original asset record.
    6. Confirm replacement intent. Decide whether you need a direct replacement support, a routing match, or a temporary service solution. Do not mix those use cases.

    Support and troubleshooting checks

    If the torch support is already in service and the assembly has routing problems, use a simple troubleshooting sequence.

    Check for cable drag or poor bend control

    Inspect the entire torch lead path. Look for tight bends, crushed insulation, twist marks, or points where the bundle rubs the machine frame. If the support was selected for the wrong routing style, the torch may pull against the operator or bind during movement.

    Verify: move the torch through its normal working range and confirm the support does not force a sharp bend or snag point. If the movement is not smooth, the routing is incorrect or the support point is worn.

    Check for support wear at the contact surface

    Inspect the contact area where the support sits against the torch or bundle. Watch for grooves, flattened areas, heat discoloration, or looseness. A support that is worn or misaligned may hold the torch at a different angle than expected.

    Verify: compare the installed support to a known-good assembly if one is available. If there is no known-good unit, document the angle, offset, and clearances for review before ordering.

    Check for mismatch after torch rebuild

    Rebuilt torches often lose the original routing reference. A support that worked on one configuration may not work after a replacement handle, neck, or lead assembly has been fitted.

    Verify: check the rebuild record, part labels, and the current torch layout. If the rebuild data is missing, mark the related details Unknown (Verify) and confirm them before replacement.

    WSP lookup use case

    The Weld Support Parts listing is the current source reference for this item. Use it when you need a quick point of comparison against an existing torch setup, or when you are narrowing a parts request for a CK300 torch support with Series 3 breakdown routing. The page title and short description are the only confirmed details provided here. Anything beyond that should be treated as Unknown (Verify).

    Use the source page here: CK300 TIG Torch Support.

    Practical purchasing notes for maintenance buyers

    For procurement, the best control is to purchase from a verified match, not from a best guess. Collect the torch model, the routing type, the breakdown style, and any photos of the installed support. If the support is part of a larger torch service order, keep the support line item tied to the same asset tag or work order number.

    If a user requests a replacement and cannot explain the difference between torch body, lead routing, and support location, pause the order and inspect the machine side first. That saves time and reduces returns.

    Safety notes

    • Lock out and isolate the welding system before inspection or replacement.
    • Allow hot parts to cool before touching the torch or support.
    • Do not force a misfit support onto the torch assembly.
    • Inspect for damaged insulation, exposed conductor material, or crushed hose bundles before returning the torch to service.
    • If the routing condition is uncertain, remove the torch from service until the configuration is confirmed.

    FAQ

    Is the CK300 TIG Torch Support a universal part?

    No. The source page identifies a CK300 TIG torch support with Series 3 breakdown routing. Universal fit is not confirmed. Verify the exact torch and routing configuration before ordering.

    What should I compare before buying?

    Compare the torch identification, routing path, connector style, support point, and any rebuild history. If any item is unclear, mark it Unknown (Verify) and confirm it from the installed assembly.

    Can I use the lookup page alone to approve the purchase?

    No. The page is a starting point for identification. Use it with your torch inspection, asset records, and maintenance history before approval.

    What if the torch was rebuilt and the original routing is gone?

    Inspect the current assembly directly and compare it to the source page reference. If the rebuilt configuration does not match the documented routing, do not assume compatibility.

    Sources Checked

    For this item, only the source page details listed above were confirmed. All other technical specifics should be treated as Unknown (Verify) until matched against the actual torch assembly or the supplier’s documentation.

    Disclosure: As an Amazon Associate, Weld Support Parts may earn from qualifying purchases.

  • Techniweld, TE2T-116-10T, Tungsten, 2% Thoriated, RED, EWTh-2, 1/16 in x 7 in: Product Breakdown

    Techniweld, TE2T-116-10T, Tungsten, 2% Thoriated, RED, EWTh-2, 1/16 in x 7 in: Product Breakdown

    Product not found.
    “>Techniweld, TE2T-116-10T, Tungsten, 2% Thoriated, RED, EWTh-2, 1/16 in x 7 in

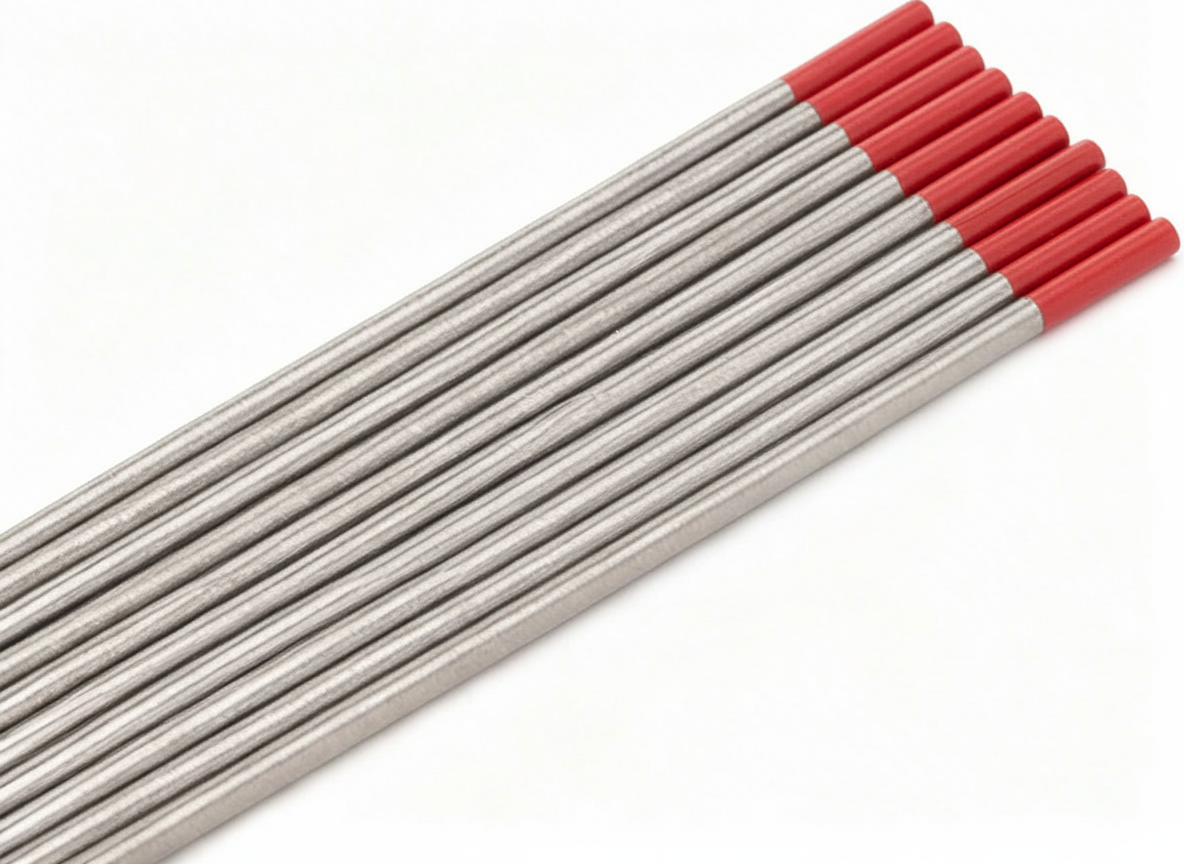
    Techniweld TE2T-116-10T is a 2% thoriated tungsten electrode in the red color code, classified as EWTh-2, and sized 1/16 in x 7 in. For TIG support teams, the practical question is not just what the part is, but where it fits in the shop process: storage, prep, installation, and troubleshooting. This breakdown stays focused on that use case.

    For DC TIG work, this type of tungsten is commonly selected for stable arc starting and consistent arc control. It is used across general ferrous TIG applications, but final process fit depends on the job, the power source, the amperage range, shielding gas setup, and the operator’s grinding and maintenance practice. If any of those variables are unclear, verify them before release to production.

    Key Takeaways

    What this part is used for

    An EWTh-2 tungsten electrode is a consumable for TIG welding. In simple terms, it carries the arc. The 1/16 in diameter indicates a small electrode size suited to lighter-duty TIG work or lower current applications, but the actual usable range is process- and machine-dependent. Do not assign a current limit without checking the welding procedure, torch package, and machine documentation.

    In a maintenance or fabrication setting, this electrode is often stocked as a general-purpose DC TIG option for steel and stainless steel work. That said, general use is not a substitute for job-specific verification. If a procedure calls for a different tungsten type, a different color code, or a different diameter, follow that requirement.

    How to inspect before use

    Before installation, inspect the electrode and packaging condition.

    Setup and handling checks

    Use the following checks when putting the tungsten into service:

    1. Check the torch fit: Verify the electrode seats correctly in the collet or electrode clamp. If fit is loose or binding, stop and confirm the torch consumable size. Unknown (Verify) if the current torch body supports 1/16 in without an adapter.
    2. Inspect grind direction: Grind lengthwise, not across the electrode, to reduce arc wander. Verify grinding wheels are dedicated to tungsten if contamination control is required by your shop standard.
    3. Verify tip shape: Use the tip geometry required by the procedure. If no procedure exists, request guidance from welding engineering or the machine OEM. Unknown (Verify) on exact tip angle because that depends on the application.
    4. Check shielding gas coverage: Poor gas coverage can look like a tungsten issue when the root cause is gas flow, leaks, or cup size mismatch.

    Troubleshooting support

    If the electrode is not performing as expected, isolate the issue before replacing parts.

    Product and parts notes

    This product is the tungsten electrode itself, not a complete torch package. It must be matched to a compatible TIG torch consumable setup. Because torch model compatibility was not provided, treat all torch fit details as Unknown (Verify). Do not assume it fits every collet body, back cap, or torch style without checking the torch system documentation.

    If this electrode is being purchased for inventory control, label it by part number, diameter, color code, and alloy class. That reduces mis-picks at the bench and makes it easier to track what was actually issued for a job.

    Safety notes

    Thoriated tungsten contains thorium. Shop handling practices should limit dust exposure, especially during grinding. Use local exhaust or other dust control methods required by site policy. Do not dry-sand or create unnecessary dust. Follow your facility’s exposure controls, PPE requirements, and disposal rules for spent or damaged electrodes.

    Also verify that the welding machine is de-energized or placed in a safe state before changing consumables. Treat a used tungsten as a sharp, hot, and potentially contaminated item until it is cooled and handled properly.

    FAQ

    Is Techniweld TE2T-116-10T only for DC TIG?
    It is commonly used for DC TIG applications, but final suitability depends on the job specification and the welding procedure. If the procedure calls for a different tungsten type, follow that requirement.

    Can I use this 1/16 in tungsten for any amperage range?
    No. The usable range depends on the power source, joint, gas coverage, torch setup, and the procedure. Unknown (Verify) for any exact amperage limit unless the welding specification states it.

    What should I check if the arc will not start cleanly?
    Check the tip grind, contamination, torch fit, gas flow, and work clamp. A poor start is often caused by setup or handling issues, not only the tungsten alloy.

    Does the red color code confirm EWTh-2?
    Red is the common identification for thoriated tungsten, but always verify the package label and part number. Color alone should not be the only control method in inventory or production.

    Sources Checked

    “>Techniweld TE2T-116-10T product listing
  • Provided task data for product title, size, classification, and short description
  • Related Arc Weld Part

    Techniweld, TE2T-116-10T, Tungsten, 2% Thoriated, RED, EWTh-2, 1/16 in x 7 in

    Techniweld, TE2T-116-10T, Tungsten, 2% Thoriated, RED, EWTh-2, 1/16 in x 7 in

    Techniweld TE2T-116-10T is a 2% thoriated tungsten electrode, color coded red and classified as EWTh-2, sized 1/16 in x 7 in. It is commonly used for DC TIG welding and offers reliable arc starting and stable performance on steel, stainless steel, and other common ferrous applications. This tungsten is a standard choice for operators who want consistent arc control and durable performance in general-purpose TIG work.

    View at Arc Weld Store
  • What Tungsten Sharpener Works With 5/32 Tungsten?

    Anchor Tungsten - 3/16" x 7" 2% Ground Tungsten Red, Pack of (5)
    “>Anchor Tungsten - 3/16" x 7" 2% Ground Tungsten Red, Pack of (5)

    If you are trying to sharpen 5/32 tungsten, the first question is not the grinder itself. It is whether the guide, collet, or holder accepts 5/32 in. tungsten without slop. Many sharpening tools are built around common sizes like 1/16, 3/32, 1/8, and 3/16. If 5/32 is not listed, assume it is unknown until verified.

    Key Takeaways

    What Usually Fails on 5/32 Tungsten

    Most tungsten sharpeners are limited by one of three things:

    If the tool was made for 1/8 in. tungsten, 5/32 in. may be too large. If it was made for 3/16 in., 5/32 in. may fit, but that still needs verification. Do not assume fit from visual size alone.

    How to Check Compatibility

    1. Look for the listed tungsten diameter range in the product instructions.
    2. Measure the guide bore or clamp opening if the manufacturer does not publish the range.
    3. Confirm whether the tool is meant for manual holding or fixed collet-style support.
    4. Check if the sharpener accepts straight rod only or also tapered/ground rods.
    5. Verify whether 5/32 in. is explicitly called out. If not, treat fit as Unknown (Verify).

    Troubleshooting Support

    Problem: Tungsten will not enter the guide

    Likely cause: the guide is undersized. Do not grind or force the rod into the opening. Use a tool sized for 5/32 in. or confirm whether the holder accepts a larger range.

    Problem: Tungsten rocks or wobbles in the holder

    Likely cause: the guide is oversized or worn. Wobble makes it harder to keep a consistent point. In that case, grinding quality drops and the rod can overheat unevenly.

    Problem: Point is inconsistent after sharpening

    Likely cause: the rod is not held square to the wheel or the fixture cannot center 5/32 in. correctly. Recheck the hold method and verify the angle setting.

    Problem: Rod overheats while sharpening

    Likely cause: excessive dwell time, wrong wheel, or poor support. Stop and let the tungsten cool. Overheating can damage the grind and contaminate the tip.

    Recommended Sharpening Method When 5/32 Fit Is Unknown

    If you do not have a sharpener confirmed for 5/32 in., use a grinder method with controlled support:

    If the tungsten is already ground, only touch up the point as needed. Excessive removal shortens the rod and can change performance.

    Product / Parts

    For replacement tungsten stock, see the available ArcWeld part below. Size compatibility for your sharpener still needs to be verified against the holder or guide opening.

    Anchor Tungsten - 3/16" x 7" 2% Ground Tungsten Red, Pack of (5)

    Anchor Tungsten – 3/16" x 7" 2% Ground Tungsten Red, Pack of (5)

    Discover the power and precision of the Anchor Tungsten – 3/16" x 7" 2% Ground Tungsten Red (Part Number: 12345). This high-quality tungsten material is designed for durability and performance, making it an essential addition for professionals and hobbyists alike. Each pack includes five pieces of ground tungsten rods measuring 3/16" in diameter and 7" in length. Constructed with 2% tungsten, these rods offer exce…

    View at Arc Weld Store

    Safety Notes

    FAQ

    Does every tungsten sharpener work with 5/32 tungsten?

    No. Many do not list 5/32 in. at all. If the size is not published, compatibility is Unknown (Verify).

    Can I use a 1/8 tungsten sharpener for 5/32?

    Not safely by assumption. A 1/8 sized guide may be too small. Verify the actual bore or clamp range before use.

    Is 5/32 tungsten common in TIG work?

    It is less common than 1/16, 3/32, 1/8, or 3/16 in. For that reason, some sharpeners do not support it directly.

    What is the safest option if my sharpener does not list 5/32?

    Use a grinder fixture or holder with a verified diameter range, or switch to a method that securely supports the rod without forcing it into the guide.

    Sources Checked

    Related Weld Support Guides

  • Why TIG Arc Wanders or Starts Hard

    Why TIG Arc Wanders or Starts Hard

    If the tig arc wandering or a TIG arc starts hard, the cause is usually in one of four areas: work clamp contact, tungsten preparation, shielding gas coverage, or torch consumables. Start with the basics and verify each part of the current path and gas path before changing machine settings.

    Key Takeaways

    • Poor ground path can make arc starts unstable.
    • Contaminated or poorly ground tungsten can cause arc wandering.
    • Low gas flow, leaks, or draft can disturb shielding and arc stability.
    • Damaged cups, collet bodies, or gas lenses can reduce shielding and control.
    • Do not assume the torch is the problem until the work clamp and tungsten are verified.

    Troubleshooting Steps

    1) Check the work clamp and ground path

    Make sure the work clamp is attached to clean metal with solid contact. Paint, rust, mill scale, oil, or loose clamp contact can interrupt current flow and make the arc hard to start or unstable once started.

    • Move the clamp closer to the weld area if the current path is long.
    • Inspect the clamp jaw, cable, and connector for heat damage or looseness.
    • Verify the workpiece is clean where the clamp lands.

    2) Inspect tungsten preparation

    TIG arc wandering often starts with the tungsten. A dirty, blunt, uneven, or contaminated tungsten will not focus the arc well. Grind the tungsten lengthwise and keep the tip consistent with the process requirements for your material and amperage.

    • Use a clean dedicated grinding wheel or method for tungsten only.
    • Remove contamination if the tungsten touched filler, the puddle, or the cup.
    • If the tip is balled, split, or uneven, replace or regrind it.

    3) Verify shielding gas coverage

    Gas issues can cause wandering starts, contamination, and erratic arc behavior. Check the cylinder flow, regulator, hose condition, torch seals, and cup coverage. Drafts in the work area can also break shielding gas coverage.

    • Verify gas is actually flowing at the torch.
    • Inspect hose connections and torch O-rings or seals, if equipped. Unknown (Verify).
    • Reduce air movement from fans, doors, or shop draft near the weld.
    • Confirm the gas type and flow rate are set for the job. Unknown (Verify).

    4) Inspect torch consumables

    Worn consumables can create inconsistent shielding and make arc starts less precise. Look at the cup, collet, collet body, and any gas lens components for cracks, buildup, or poor fit.

    • Replace cracked or heat-damaged cups.
    • Check for contamination inside the torch head.
    • Verify the consumables match the torch and tungsten size used. Unknown (Verify) if not confirmed by the torch model.

    5) Check start settings and process setup

    If the basics are correct, review start settings. Too little or too much start current, improper HF start behavior, or incorrect post-flow can affect arc initiation and stability. Exact settings depend on the machine and process. Unknown (Verify).

    • Confirm the machine is set for the intended TIG process.
    • Check foot pedal, torch switch, or remote input function.
    • Verify the tungsten size is appropriate for the current range. Unknown (Verify).

    When the Arc Wanders During the Weld

    If the arc starts correctly but wanders during travel, look for heat buildup, tungsten contamination, arc length changes, or shielding disruption from torch angle and stickout.

    • Keep tungsten stickout consistent.
    • Hold a stable torch angle.
    • Do not extend the tungsten farther than needed for access.
    • Recheck gas coverage if the weld area is tight or recessed.

    Product and Parts

    When consumables are worn or the torch needs a cleaner gas shield, a stubby gas lens kit can help improve visibility and access on compatible torches. Product compatibility below is provided only as listed.

    CK SGL-KITM TIG Accessory Kit, Stubby Gas Lens, 4GL, 1/16, 3/32, 1/8

    Short description: Complete TIG torch accessory kit from CK Worldwide featuring stubby gas lens design for improved visibility and precision. Compatible with CK Worldwide TIG torches 17, 18, and 26. Includes three gas lens sizes (4GL) and three collet body sizes (1/16, 3/32, 1/8) for versatile tungsten electrode compatibility. Essential consumables for TIG welding on mild steel, stainless, and aluminum.

    Use the listed product only where it matches the torch and tungsten setup. If torch model or consumable size is not confirmed, verify before ordering.

    CK SGL-KITM TIG Accessory Kit, Stubby Gas Lens, 4GL, 1/16, 3/32, 1/8

    CK SGL-KITM TIG Accessory Kit, Stubby Gas Lens, 4GL, 1/16, 3/32, 1/8

    Complete TIG torch accessory kit from CK Worldwide featuring stubby gas lens design for improved visibility and precision. Compatible with CK Worldwide TIG torches 17, 18, and 26. Includes three gas lens sizes (4GL) and three collet body sizes (1/16, 3/32, 1/8) for versatile tungsten electrode compatibility. Essential consumables for TIG welding on mild steel, stainless, and aluminum.

    View at Arc Weld Store

    Safety Notes

    • Shut power off before changing consumables or touching internal torch parts.
    • Allow hot tungsten and cups to cool before handling.
    • Do not grind tungsten in a way that contaminates the shop or exposes hands and eyes to dust.
    • Use local exhaust ventilation when welding and when grinding tungsten.
    • Do not weld with damaged leads, cracked torch parts, or leaking gas equipment.

    FAQ

    Why does TIG arc wandering happen right at start?

    The most common causes are poor ground contact, contaminated tungsten, or weak shielding gas coverage.

    Can a bad work clamp cause hard starts?

    Yes. A poor clamp connection can interrupt the current path and make arc initiation unreliable.

    Does tungsten shape matter?

    Yes. An uneven or contaminated tungsten can make the arc unstable and harder to direct.

    Can airflow affect TIG starts?

    Yes. Draft can disturb shielding gas and cause unstable starts or contamination.

    Sources Checked

    • Provided ArcWeld product data for CK SGL-KITM TIG Accessory Kit
    • Topic brief: troubleshoot arc starts, grounding, tungsten prep, and shielding gas issues
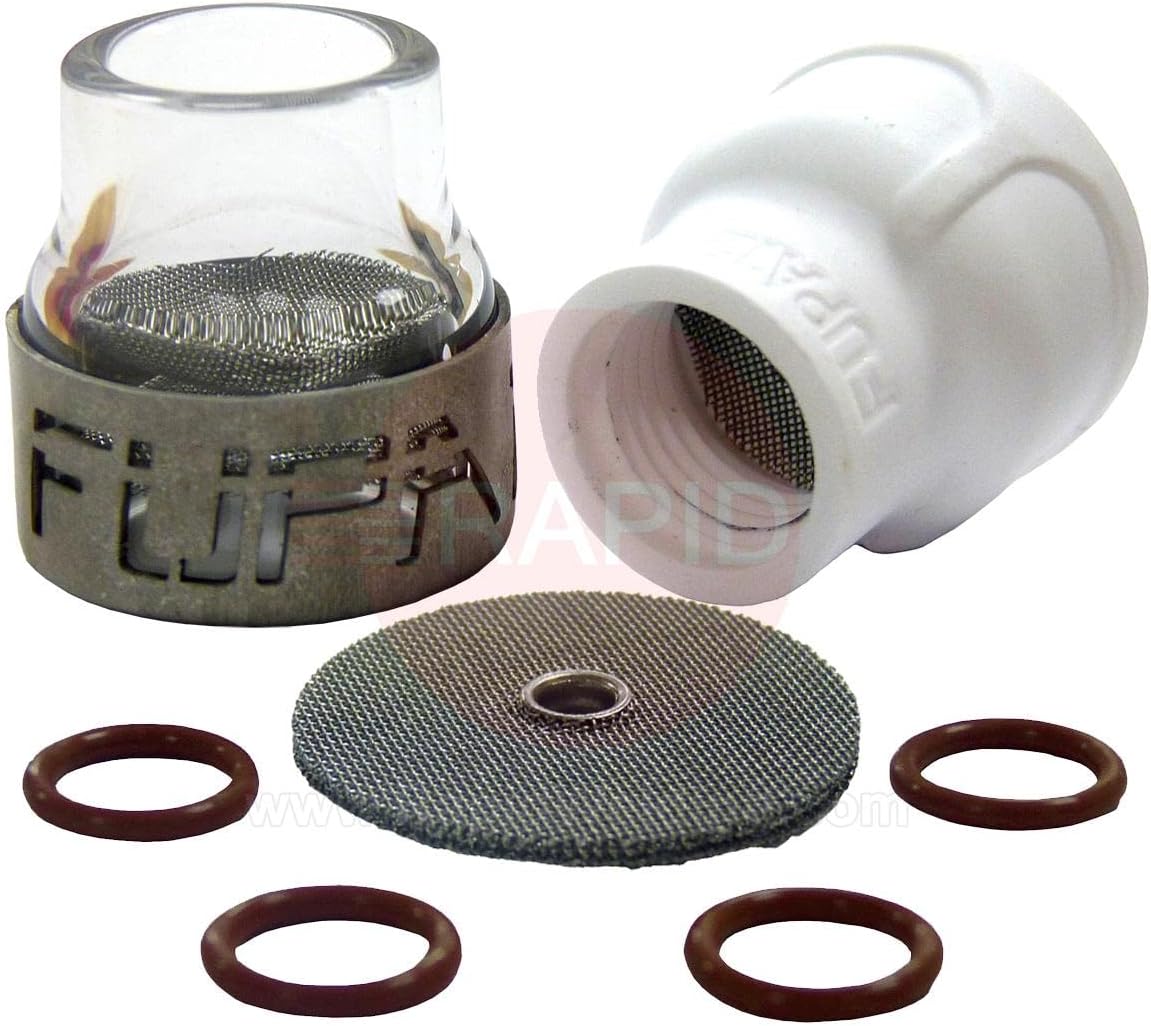
  • Furick Cup Dual FUPA #12 TIG Cup Kit (B09717HYGY): What It Is, When It Helps, and What to Compare

    Furick Cup Dual FUPA #12 TIG Cup Kit (B09717HYGY): What It Is, When It Helps, and What to Compare

    If you’re running TIG and you’re trying to improve coverage, visibility at the puddle, or consistency on longer beads, your cup setup matters more than most people think. A cup kit is not a magic fix, but it can reduce variables—especially when you’re troubleshooting gas coverage problems that look like “tungsten issues” or “bad filler” but are actually shielding-related.

    This post covers one specific Amazon kit so you can verify what you’re buying, compare it to alternatives, and avoid guessing on fitment.

    No products found.

    Product (verified)

    Amazon listing title: Furick Cup Dual FUPA #12 Welding Cup Kit w/Titanium Diffuser
    Verified ASIN: B09717HYGY
    Amazon URL used to confirm ASIN:https://www.amazon.com/Furick-Cup-Welding-Titanium-Diffuser/dp/B09717HYGY?tag=weldsupport-20

    What this is (plain-English)

    This is a TIG cup kit built around a #12 cup format with a diffuser component. In practice, cup/diffuser setups are used to shape and stabilize shielding gas flow at the nozzle, which can help when you’re pushing cup size, stickout, or trying to keep coverage stable around corners and transitions.

    Unknown (Verify): exact torch series compatibility (WP-17/18/26 vs WP-9/20), included parts list, and whether any adapters are required. Confirm on the listing and/or manufacturer documentation before buying.

    Who this is for

    • TIG welders who are actively troubleshooting coverage/oxidation issues and want to eliminate “cup setup” as a variable.
    • Shops that standardize torch consumables and want a known kit instead of mixing random cups/diffusers.
    • Anyone doing cosmetic stainless work where coverage consistency is obvious in the finish.

    When it’s not the right fix

    If your issue is actually gas supply, leaks, contaminated tungsten, or poor prep, a new cup kit won’t solve it. Treat this as a consumable/torch-end choice, not a process substitute.

    Performance & Use

    Cup setups affect how forgiving your shielding is. The right setup can make your results more repeatable; the wrong setup can make it harder to see what’s actually going wrong.

    What to compare before you buy

    • Torch series fitment: confirm your torch (WP-17/18/26, WP-9/20, etc.) and whether adapters are required (Unknown—Verify).
    • Cup size vs access: larger cups can help coverage but can block access in tight joints.
    • Diffuser style: verify what’s included and how it’s intended to be used (Unknown—Verify).
    • Consumable availability: can you easily replace cups/diffusers without buying the whole kit again?
    • Your typical stickout and joint type: long stickout and tight corners punish marginal shielding setups.

    Comparable Amazon picks (optional)

    (Verified ASINs; plain affiliate links only.)

    Setup checklist (quick)

    • Confirm torch model/series and consumable family before ordering (do not assume).
    • Inspect for leaks at torch head, back cap, and fittings before blaming the cup.
    • If you change cup/diffuser setup, change one variable at a time and document results.

    Safety note

    Shielding gas displaces oxygen. Use ventilation appropriate for the space, and do not treat “no visible smoke” as “safe air.” If you’re welding stainless or anything with coatings, fume control matters.

  • Miller 194722, Torch Adapter, Torch Di-917F, 125A to 150A (50 mm)

    Miller 194722, Torch Adapter, Torch Di-917F, 125A to 150A (50 mm)

    Intro
    If your TIG torch lead doesn’t match your machine’s output connector, you don’t have a welding problem—you have a fitment problem. The Miller 194722 torch adapter is meant to bridge that gap for specific air-cooled TIG torch setups. The key is verifying connector style and torch compatibility before you order.

    Key Takeaways

    • This is a fitment part. Confirm your machine output style and torch lead style first.
    • Compatibility is model- and connector-specific. If you guess, you’ll buy twice.
    • If any detail below is not confirmed for your setup, treat it as Unknown (Verify) and verify before purchase.

    Performance & Use
    This adapter is intended to connect certain air-cooled TIG torches to a specific output style. In practice, it matters most when you’re moving a torch between machines, upgrading to a machine with an international/DINSE-style output, or replacing a missing/incorrect adapter.

    What to compare before you buy

    • Machine output connection type (international/DINSE style vs other) — Unknown (Verify)
    • Output size: 50 mm is referenced for this part (verify your receptacle size)
    • Torch type and lead style (air-cooled, one-piece vs two-piece) — Unknown (Verify)
    • Torch family fitment: WP-17 / WP-9 / WP-50 / WP-3 are explicitly referenced for use (verify your exact torch variant)
    • Gas routing (gas-through vs separate line) — Unknown (Verify)

    Durability & Build
    Adapters fail from heat, poor contact, and repeated twisting. The practical check is whether the connection seats fully, locks correctly, and stays cool under normal duty. If the connection gets hot, stop and re-check contact surfaces and cable sizing (Unknown (Verify)).

    Power / Specs

    • Part number: 194722 (confirmed)
    • Described use: Air-cooled TIG torch adapter for Syncrowave 200 International (confirmed via manufacturer page)
    • Output size referenced: 50 mm (confirmed via ArcWeld.store snippet and common listing language; verify on your machine)
    • Amperage reference in name: 125A to 150A (as labeled; do not treat as a universal rating—verify for your torch/machine)

    Who It’s For

    • Shops running multiple TIG machines where torches get swapped
    • Anyone adapting a WP-17/WP-9-family air-cooled torch to a different output style
    • Maintenance teams replacing a missing adapter on legacy TIG equipment

    Quick FAQ
    Q: Will this fit every TIG machine with a DINSE connector?
    A: Unknown (Verify). “50 mm” is referenced, but connector standards and gas routing vary. Verify your machine’s output receptacle and torch lead type.

    Q: Does it work with water-cooled torches?
    A: Unknown (Verify). This part is described for air-cooled torch use; confirm your torch lead configuration.

    Q: What info should I email for fitment help?
    A: Machine model, torch model, and the exact part number you’re trying to fit. ArcWeld.store offers fitment help by email.

    Safety Notes (include verbatim closing line)
    A loose or incorrect connector can overheat, arc, and damage the machine output or torch lead. After installation, do a short test weld and check for heat at the connection.
    Always follow the manufacturer’s instructions and your shop’s safety procedures. If you’re unsure about fitment or ratings, verify before you buy or install.

    Where to Buy (ArcWeld.store link + optional Amazon fallback)

    ” target=”_blank” rel=”noreferrer noopener”>
    Miller 194722, Torch Adapter, Torch Di-917F, 125A to 150A

    Miller 194722, Torch Adapter, Torch Di-917F, 125A to 150A

    $70.33

    In Stock

    View Product
  • Listen with Audible