Tag: spatter removal

  • Choosing Abrasives for Weld Cleanup

    Choosing Abrasives for Weld Cleanup

    Bernard Clean Air E Fume Extraction Guns

    Choosing the right weld cleanup abrasives affects surface finish, base metal loss, and how much time the crew spends correcting the same joint twice. For welders, fabricators, and maintenance buyers, the goal is not to find one disc that does everything. The goal is to match the abrasive to the work: spatter removal, bead blending, beveling, edge prep, or final cleanup before coating.

    The wrong abrasive can load up fast, cut too aggressively, glaze over, or leave deep scratch patterns that create extra finishing steps. The right one removes material at the needed rate and leaves a surface that is ready for the next process.

    Key Takeaways

    • Match the abrasive to the job: spatter removal, weld blending, beveling, or surface prep.
    • Use aggressive products only where stock removal is required; avoid unnecessary base metal loss.
    • Check wheel condition, RPM rating, backing support, and fit before use.
    • Verify the finish requirement before choosing grit, bond, or disc style.
    • Do not assume a single product handles carbon steel, stainless, and aluminum equally well.

    Start With the Cleanup Task

    Before selecting a product, define the work. Weld cleanup usually falls into one of four categories:

    • Spatter removal: Breaking loose surface spatter without digging into the parent metal.
    • Bead blending: Reducing weld crown or smoothing a transition.
    • Beveling and edge prep: Creating a consistent edge profile for fit-up or repair.
    • Surface prep: Cleaning oxidation, scale, or coating residue before welding or finishing.

    Each task needs a different balance of cut rate, control, and finish. A coarse grinding wheel may be appropriate for beveling, but it is usually too aggressive for light spatter removal. A surface conditioning disc may clean a weld area well, but it may not remove heavy slag or scale efficiently.

    Common Abrasive Types and Where They Fit

    Grinding wheels are used when stock removal matters. They are suitable for beveling, weld reduction, and heavy cleanup. Check the wheel grade, diameter, thickness, and RPM rating before use. If any of these details are unknown, stop and verify them on the wheel label or product sheet.

    Fiber discs are common for general weld cleanup on flat or accessible surfaces. They can offer a controlled cut for blending and smoothing. The backing pad matters. A worn or incorrect backing pad can change the cut pattern and increase vibration.

    Flap discs combine cutting and finishing in one product. They are useful when the cleanup work needs a smoother transition than a hard grinding wheel leaves. They are often preferred for blending weld toes, but the exact grit and abrasive grain type should be selected based on the required finish. Unknown (Verify) if the finish standard is not specified.

    Surface conditioning pads and nonwoven discs are better when the goal is cleaning, not shaping. They can help remove light oxidation, discoloration, and fine weld residue. They are not the right choice for heavy weld buildup or beveling.

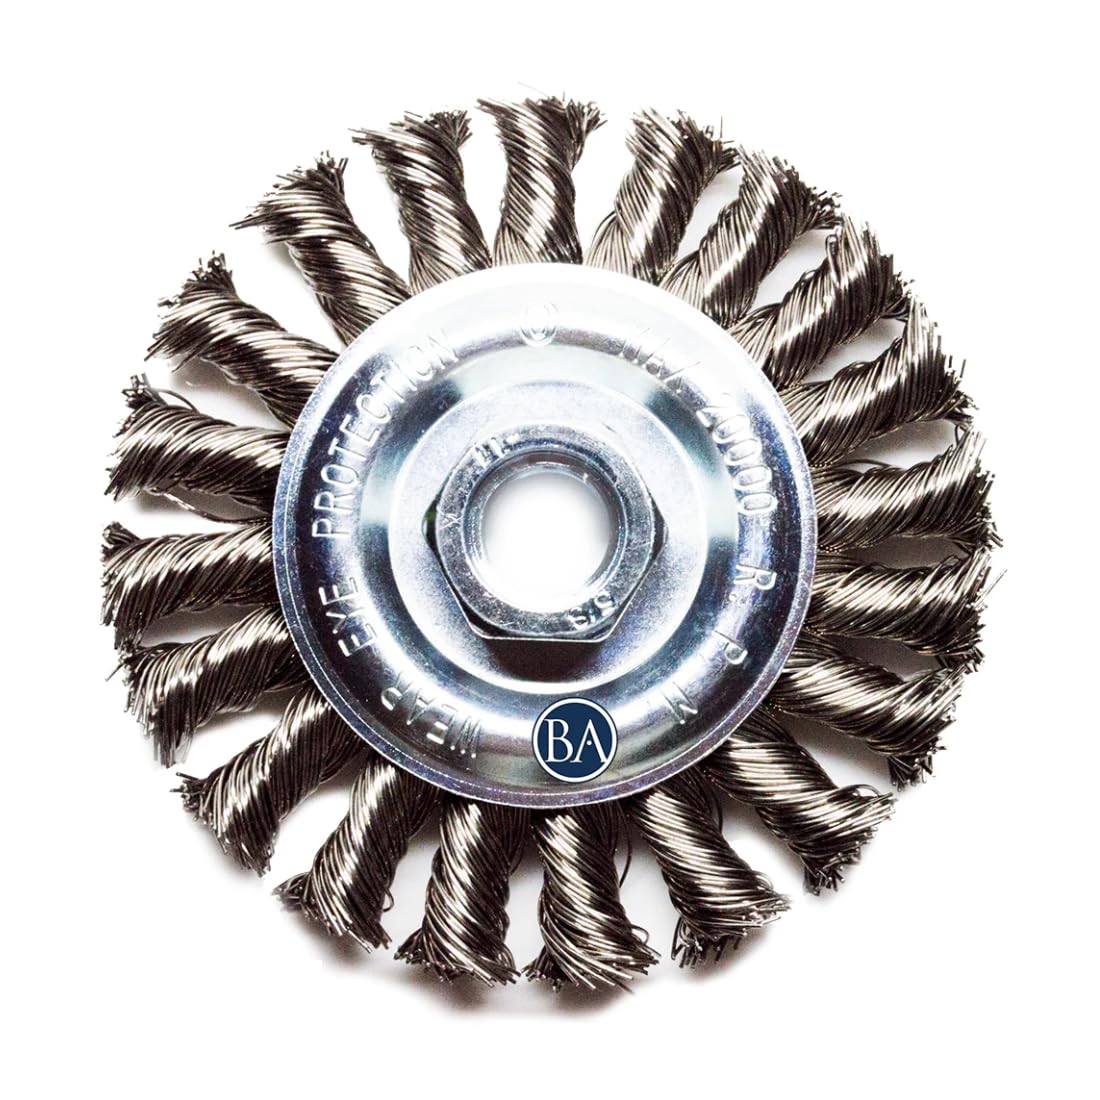
    Wire wheels and brushes are useful for light spatter, rust, and loose scale. They can be effective on irregular surfaces and around corners. Verify wire type, wheel construction, and maximum operating speed before use. If the base metal is soft or the part has a critical finish, test a small area first.

    How to Choose for Spatter, Bevels, and Prep

    For spatter cleanup: Start with the least aggressive option that clears the surface. Wire brushes, light grinding products, or conditioning discs may be enough. Avoid over-grinding the parent metal just to remove isolated spatter.

    For bevels: Choose a product that holds its shape and removes material consistently. Grinding wheels and some abrasive discs are better suited to this task than soft finishing products. Check the required angle and depth before starting. If the joint design is unclear, verify the drawing or repair procedure first.

    For weld prep: Clean oxide, scale, coating, and oil before striking an arc. A contaminated surface can cause porosity, lack of fusion, and repeated rework. If the base material condition is unknown, inspect the joint, clean a test area, and verify weldability before production work.

    Check, Inspect, Verify Before You Grind

    Check the task, the material, and the finish target. Confirm whether the job is heavy removal or light cleanup. Verify whether the workpiece is carbon steel, stainless, aluminum, or coated material. Do not assume the same abrasive is correct for all of them.

    Inspect the abrasive before mounting it. Look for cracks, chips, glazing, loose flaps, broken filaments, or damaged backing. Inspect the tool guard, flange surfaces, spindle, and backing pad. If the product is not clearly marked, do not use it until the rating is verified.

    Verify the operating limits. Match the wheel or disc RPM rating to the tool speed. Confirm mounting direction if the product has a directional face. Verify that the arbor, thread, or attachment system fits correctly. If the fit is uncertain, stop and confirm before startup.

    Troubleshooting Common Problems

    Problem: The abrasive loads up quickly.
    Check whether the material is soft, coated, or contaminated. Inspect the surface for paint, oil, or adhesive. Verify whether the grit is too fine for the job. A finer product can clog faster on heavy weld cleanup.

    Problem: The wheel cuts too aggressively.
    Inspect the product type and grade. Verify whether the tool speed is correct. If the abrasive is removing too much base metal, step down to a less aggressive product or use a more controlled technique.

    Problem: The finish is uneven.
    Check the operator angle, pressure, and pass pattern. Inspect the backing pad or support surface. Verify that the workpiece is stable and that the tool is not bouncing across the joint.

    Problem: The abrasive wears out too fast.
    Inspect the material hardness and the amount of slag or scale. Verify whether the product is intended for this application. A finishing product used on heavy bevel work will wear out early.

    WSP Lookup Section

    The current provided WSP lookup page is for Bernard Clean Air E Fume Extraction Guns. It is not an abrasive product page, so it should be treated as a source-backed support reference only. Use it when you need to confirm how WSP structures source-backed model rows, compatibility paths, and gated Amazon links. Do not use it to infer abrasive compatibility or abrasive specifications.

    If a job requires accessory support or related system verification, review the page details and then confirm the exact part or consumable through the source-backed listing. Since no abrasive product page was provided here, any abrasive-specific compatibility remains Unknown (Verify).

    Safety Notes

    • Wear eye, face, hand, and hearing protection appropriate to the task.
    • Use the wheel guard and side handle where required.
    • Keep sparks away from flammables, cables, gas hoses, and solvent containers.
    • Do not exceed the tool or abrasive speed rating.
    • Replace damaged abrasives immediately.
    • Control dust and metal debris according to site procedure.

    FAQ

    What is the best abrasive for weld spatter?
    There is no single best choice. Light spatter often comes off with a wire brush or conditioning disc, while heavier buildup may need a more aggressive abrasive. Verify the base material and avoid excessive stock removal.

    Can I use the same abrasive on carbon steel and stainless steel?
    Not automatically. Cross-contamination and finish requirements matter. Verify the abrasive type, previous use, and any site rules before moving between alloys.

    Should I use a flap disc or a grinding wheel for beveling?
    A grinding wheel is usually better for heavier beveling and stock removal. A flap disc may be better when you need more control or a smoother transition. Check the required bevel depth before choosing.

    How do I know when to replace an abrasive?
    Replace it when it is cracked, worn below safe limits, glazed, damaged, or no longer cutting as intended. Always inspect before mounting and verify the tool rating against the product label.

    Sources Checked

    For weld cleanup abrasives, the practical rule is simple: define the cleanup task, inspect the abrasive, verify the setup, and use the least aggressive product that meets the job requirement. That approach reduces rework, protects the base metal, and keeps cleanup consistent across shifts.

  • Title: Worn MIG Contact Tips Causing Porosity? Here’s the Fix

    Intro

    Your MIG welds look porous. You’ve checked your gas flow, cleaned the base metal, and verified your settings—but the problem persists. The culprit is often sitting right at the end of your gun: a worn contact tip. A damaged or burnt-back contact tip disrupts the electrical arc and wire feed, creating weak welds and wasted material. This guide walks you through diagnosis and replacement in under 10 minutes.

    Key Takeaways

    • Worn contact tips cause porosity, spatter, and inconsistent arc
    • Burnback happens when the tip overheats from improper voltage/wire speed ratio or poor contact
    • Replace tips every 50–100 hours of welding or when you see damage
    • Always match wire size to tip size (e.g., .035″ wire = .035″ tip)
    • Stock replacement tips on hand to avoid downtime

    The Problem

    A contact tip is a small copper tube that carries current to your wire. Over time, it erodes from heat and electrical wear. When the tip is damaged or burnt back, several things go wrong:

    • Poor electrical contact: The wire doesn’t seat properly, creating resistance and weak arc initiation.
    • Inconsistent wire feed: A damaged tip can catch or bind the wire, causing feed stutters.
    • Arc instability: The arc becomes erratic, leading to porosity and spatter.
    • Weld quality drops: Porosity, lack of fusion, and surface defects become common.

    You’ll notice:

    • Spatter clustering around the weld
    • Dull, unstable arc
    • Wire feed hesitation or grinding sounds
    • Visible burnback or erosion on the tip itself

    Why It Matters

    A bad weld costs money. Porosity weakens the joint, spatter wastes time cleaning, and rework eats into your schedule. In structural or pressure-vessel work, porosity can fail inspection. Replacing a $2–5 contact tip takes 2 minutes and prevents hours of rework.

    The Fix

    1. Power down the welder and wait 30 seconds.
    2. Unscrew the contact tip from the gun nozzle (usually hand-tight or one-quarter turn with a wrench).
    3. Inspect the old tip for burnback, erosion, or debris.
    4. Clean the gun nozzle with a wire brush to remove spatter buildup.
    5. Install the new tip, hand-tight. Don’t over-tighten.
    6. Test the wire feed before welding—pull the trigger briefly to confirm smooth feed.
    7. Strike a test bead on scrap to verify arc stability.

    Why This Product Solves It

    The S19391-1 Lincoln Style Contact Tip .035 – Arc Weld by Masterweld Pack of (25) is a direct replacement for Lincoln-style MIG guns. It’s made from high-quality copper, ensuring reliable electrical conductivity and durability. At .035″ bore, it matches the most common MIG wire size. A pack of 25 means you’ll always have spares on hand, eliminating downtime from tip searches.

    Product Link: S19391-1 Lincoln Style Contact Tip .035 - Arc Weld by Masterweld Pack of (25)

    ” target=”_blank” rel=”noreferrer noopener”>
    S19391-1 Lincoln Style Contact Tip .035 - Arc Weld by Masterweld Pack of (25)

    S19391-1 Lincoln Style Contact Tip .035 – Arc Weld by Masterweld Pack of (25)

    $30.75

    In Stock

    View Product

    What to Check Before You Buy

    • Wire size: Confirm your wire diameter (.023″, .030″, .035″, .045″). Tip size must match.
    • Gun compatibility: Lincoln-style guns (most common). If unsure, check your gun nameplate or contact ArcWeld support.
    • Thread pitch: Most tips are standard, but some older guns differ. Verify fitment before ordering.

    Real-World Use

    A fabrication shop running 8-hour shifts was seeing porosity in every third weld. The operator had replaced the liner and checked gas—but hadn’t changed the contact tip in 3 months. After swapping in fresh tips, arc stability returned immediately, and porosity dropped to near zero. Cost: $3 per tip. Downtime saved: 2 hours per week.

    Common Mistakes

    • Using the wrong tip size: A .045″ tip won’t work with .035″ wire. Confirm before installing.
    • Over-tightening the tip: Hand-tight is correct. Over-tightening can crack the nozzle.
    • Not cleaning the nozzle: Spatter buildup around the tip restricts gas flow and causes porosity.
    • Ignoring the liner: A worn liner can damage a new tip. If tips fail quickly, check the liner next.
    • Skipping the test bead: Always verify arc and feed before production welding.

    Safety Notes

    Always follow the manufacturer’s instructions and your shop’s safety procedures. If you’re unsure about fitment or ratings, verify before you buy or install.

    Related Reading

  • Rocaris 6 Pack Wire Wheel & Pen Brush Set: Carbon Steel for Weld Cleaning & Surface Prep

    Rocaris 6 Pack Wire Wheel & Pen Brush Set: Carbon Steel for Weld Cleaning & Surface Prep

    Introduction

    Weld spatter, slag, and rust don’t clean themselves. The Rocaris 6 Pack Carbon Steel Wire Wheel and Pen Brush Set is a versatile, affordable solution for post-weld cleanup and surface preparation. This post covers what’s in the set, how to use each brush type, and when to reach for alternatives.

    Key Takeaways

    • 6-piece set includes 2 cup brushes, 2 wheel brushes, and 2 pen brushes
    • 1/4″ hex shank fits most cordless drills and rotary tools
    • Carbon steel wire is durable for general weld cleaning and rust removal
    • Price point ($25–$40) makes it accessible for hobbyists and small shops
    • Not suitable for stainless steel (use stainless wire to avoid contamination)

    What’s Included

    The Rocaris 6 Pack contains:

    • 2 × Carbon steel cup brushes (conical shape for corners and edges)
    • 2 × Carbon steel wheel brushes (flat for broad surface coverage)
    • 2 × Carbon steel pen brushes (small, handheld for detail work)
    • All with 1/4″ hex shank for drill chuck compatibility

    Brush Types & Applications

    Brush TypeBest ForSpeed (RPM)Notes
    Cup BrushWeld spatter, corners, edges3,000–6,000Conical shape reaches tight areas
    Wheel BrushBroad surfaces, slag removal3,000–6,000Flat profile for even coverage
    Pen BrushDetail work, small parts, deburringHand or low-speedHandheld; no power tool needed

    Performance & Use

    Weld Cleaning Workflow

    1. Let the weld cool to room temperature (do not quench).
    2. Use a cup brush at 3,000–4,000 RPM to remove spatter and slag from the bead and heat-affected zone.
    3. Switch to a wheel brush for broad surface cleanup if needed.
    4. Use pen brushes for detail work, deburring, or hand-cleaning small components.

    Carbon Steel vs. Stainless Steel Wire

    Carbon steel wire is aggressive and cost-effective for mild steel and aluminum. Do not use on stainless steel welds — carbon steel particles can embed in the surface and cause rust spots (corrosion). For stainless, use stainless steel wire brushes only.

    Safety & Maintenance

    Always wear safety glasses when using rotating brushes. Loose wire can fly off at high speed. Keep the brush away from your hands and clothing.

    Inspect brushes before each use. Discard any with bent, missing, or damaged wires. Replace brushes when they become matted or lose cutting ability (typically after 20–40 hours of use, depending on material and RPM).

    What to compare before you buy

    • Wire material: Carbon steel is standard but aggressive; stainless steel brushes are required for stainless steel welding.
    • Brush size: The Rocaris set includes multiple sizes; verify that the included sizes match your typical cleanup tasks.
    • Shank compatibility: 1/4″ hex shank fits most cordless drills; confirm your tool accepts this size.
    • Speed rating: Do not exceed the recommended RPM; high-speed operation can cause wire breakage and flying debris.
    • Quantity: 6 pieces is a good starter set; consider buying extras if you weld frequently.

    Comparable Amazon picks (optional)

    No products found.

    When to Upgrade

    If you’re welding stainless steel regularly, invest in a stainless steel wire brush set to prevent contamination. If you’re running high-volume production, consider a dedicated weld cleaning station with a bench grinder and heavy-duty brushes.

    For light hobbyist work, the Rocaris set is more than adequate and will last months with proper care.

    Verdict

    The Rocaris 6 Pack is a practical, budget-friendly choice for post-weld cleanup and surface prep. The variety of brush types covers most common tasks, and the 1/4″ hex shank integrates with standard drills. The main limitation: carbon steel wire is not suitable for stainless steel. If your work includes stainless, plan for a separate stainless steel brush set.

  • Stream with Amazon Music