Tag: ground-clamp

  • Plasma Cutter Not Piercing Cleanly

    Hypertherm 220674 Plasma Cutting Shield - T45v Hand Cutting Shield, 1 Pack
    “>Hypertherm 220674 Plasma Cutting Shield - T45v Hand Cutting Shield, 1 Pack

    If a plasma cutter is not piercing cleanly, the usual cause is a setup problem rather than a major machine fault. Start with air quality, consumable condition, ground connection, torch angle, and pierce technique. Small errors in any of these areas can leave a ragged start, excessive dross, or a failed pierce.

    Key Takeaways

    • Poor air pressure or dirty air can cause weak arc start and unstable piercing.
    • Worn electrode, nozzle, shield, or swirl ring can make the pierce uneven.
    • Poor ground contact can stop the arc from transferring cleanly.
    • Wrong torch height or piercing too close to the work can blow molten metal back into the tip.
    • Use the manufacturer’s pierce settings when available. Unknown (Verify) if not documented.

    Troubleshooting Steps

    1. Check air pressure and air quality

    Plasma cutting depends on clean, dry, correctly regulated air. Low pressure can produce a weak, unstable arc. Water, oil, or heavy contamination can cause sputtering and poor pierce quality.

    • Confirm the compressor and regulator are set to the cutter’s required range. Unknown (Verify).
    • Drain the tank and filter bowls before testing.
    • Check for restricted hoses, couplers, or fittings.
    • If the machine has an air indicator or fault light, verify normal operation before cutting.

    2. Inspect consumables

    Worn or damaged consumables are a common reason a plasma cutter is not piercing cleanly. The electrode and nozzle must be in good condition for a focused arc.

    • Remove the torch shield and inspect the electrode, nozzle, and any retained parts.
    • Look for pitting, erosion, cracks, oval-shaped nozzle orifice, or heat damage.
    • Replace consumables as a set if wear is visible. Do not mix heavily worn parts with new parts unless the torch manual allows it. Unknown (Verify).
    • Verify the correct parts for the torch model before installation.

    3. Verify ground clamp placement

    Poor work return can make the arc start erratically and cause a messy pierce. The clamp must make solid metal-to-metal contact on clean material.

    • Move the ground clamp closer to the cut area if possible.
    • Remove paint, rust, mill scale, and heavy oxidation at the clamp point.
    • Check the clamp, cable, and connections for heat damage or looseness.

    4. Check pierce height and torch angle

    If the torch is too close, molten metal can blow back into the shield and nozzle. If it is too high, the arc can spread and fail to pierce cleanly.

    • Follow the machine’s pierce height guidance. Unknown (Verify).
    • Hold the torch square to the work unless the process calls for a drag or angle technique.
    • Keep your hand steady during the start of the pierce.

    5. Reduce pierce demand on thicker or coated material

    Thick plate, rusty plate, painted plate, and galvanized material can make piercing harder. Start with a clean spot if possible. If the plate is thick, give the arc enough time to fully transfer before moving.

    • Clear rust, coating, or scale at the pierce point when possible.
    • Let the arc establish before shifting into the cut.
    • Do not rush the cut move after the pierce. Moving too early can leave a blowout or incomplete hole.

    6. Check torch and machine condition

    If air, consumables, and grounding are correct but the pierce still fails, inspect the torch body, leads, and machine output for damage. Intermittent cable faults, heat damage, or loose connectors can reduce performance.

    • Inspect the torch head for heat damage or spatter buildup.
    • Check torch lead connectors for looseness or burn marks.
    • If available, compare performance on a known-good test piece.

    Product / Parts Support

    When consumables or shielding parts are worn, replace them with the correct torch parts. For hand cutting shield support, see:

    Hypertherm 220674 Plasma Cutting Shield - T45v Hand Cutting Shield, 1 Pack

    Hypertherm 220674 Plasma Cutting Shield – T45v Hand Cutting Shield, 1 Pack

    Introducing the Hypertherm 220674 Hand Cutting Shield, your essential companion for plasma cutting tasks. This high-quality plasma cutting shield is designed to protect both your workspace and yourself. Made by Hypertherm, a trusted name in plasma cutting technology, this product ensures superior performance and durability. The Hypertherm Hand Cutting Shield is perfect for both professionals and DIY enthusiasts. I…

    View at Arc Weld Store

    Hypertherm 220674 Plasma Cutting Shield – T45v Hand Cutting Shield, 1 Pack

    Use only if it matches the torch model and application. Compatibility for your machine is Unknown (Verify) unless confirmed by the torch manual or parts list.

    Safety Notes

    • Disconnect power before changing consumables or opening torch components.
    • Use proper face protection, gloves, long sleeves, and hearing protection.
    • Keep hands clear of the torch path and hot slag.
    • Ventilate the area when cutting coated or painted material.
    • Do not hold the torch over flammable material during test pierces.

    FAQ

    Why does my plasma cutter start but not pierce cleanly?

    Most often it is low air pressure, contaminated air, worn consumables, or poor ground contact.

    Can a bad shield cause poor piercing?

    Yes. A damaged or incorrect shield can affect arc focus and increase spatter. Verify the correct shield for the torch model.

    Should I drag the torch during the pierce?

    Only if the torch and process are designed for drag operation. Otherwise, maintain the correct standoff distance and start upright. Unknown (Verify).

    What is the fastest test for a bad pierce issue?

    Check air pressure, replace visibly worn consumables, and clean the ground point. Those three checks solve many start-up problems.

    Sources Checked

    Related Weld Support Guides

  • Why Does My Stick Welding Electrode Keep Sticking? (Fix in 15 Minutes)

    Why Does My Stick Welding Electrode Keep Sticking? (Fix in 15 Minutes)

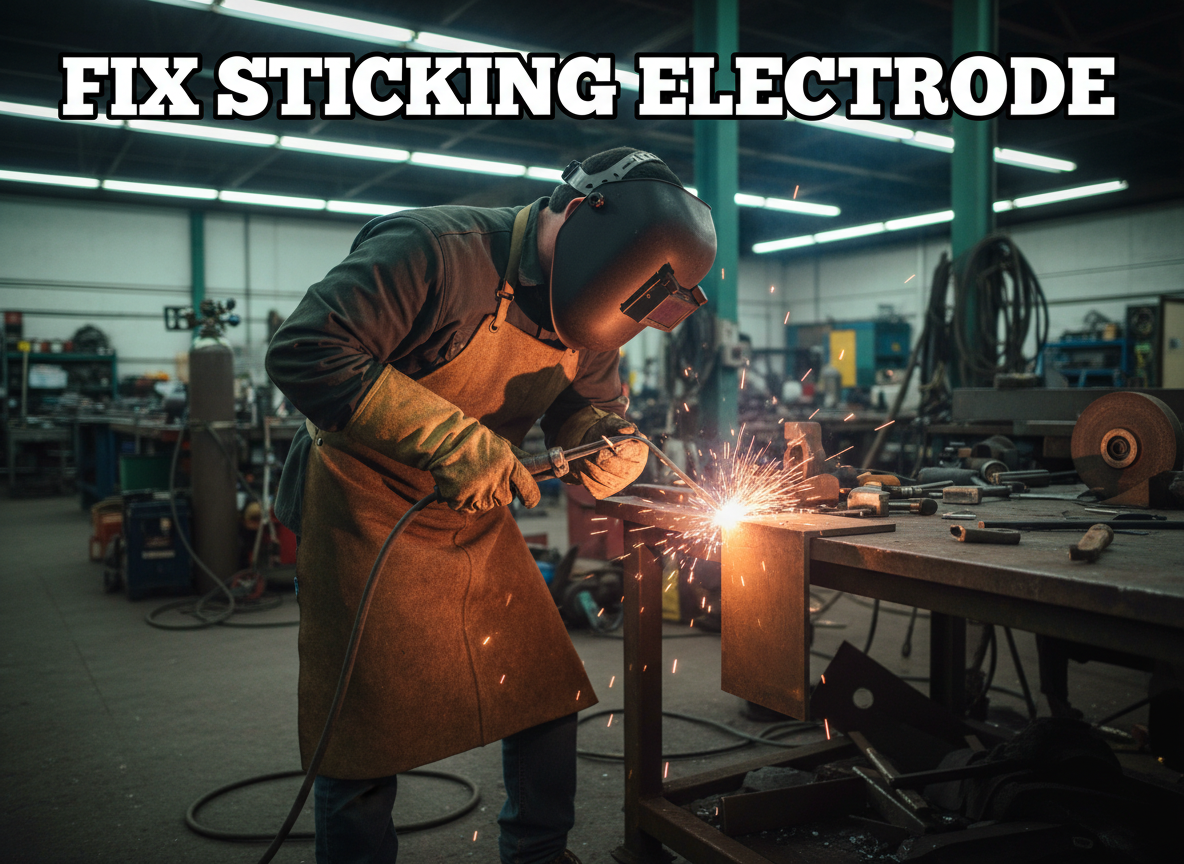
    Your electrode sticks to the workpiece, the arc dies, and you’re left wrestling with the rod. This is one of the most common stick welding problems—and it’s fixable. Low amperage, poor ground connection, and contaminated metal are the usual culprits. Here’s how to diagnose and fix it fast.

    Key Takeaways

    • Low amperage is the #1 cause of electrode sticking ($0 fix—just adjust the dial)
    • Poor ground clamp connection prevents proper current flow ($15–$40 for a new clamp)
    • Dirty or wet electrodes create weak arc initiation ($5–$15 for fresh rods)
    • Bad workpiece prep (rust, mill scale) makes arc unstable ($0–$20 for cleaning tools)
    • Fix time: 5–15 minutes for most issues

    Quick Diagnosis

    What you’re seeing:

    • Rod sticks immediately after striking
    • Arc dies or becomes very weak
    • Difficulty pulling the rod away from the workpiece
    • Electrode melts back into the holder

    Likely causes (ranked by frequency):

    1. Amperage set too low
    2. Ground clamp loose or corroded
    3. Electrode damp or old
    4. Workpiece dirty (rust, paint, mill scale)
    5. Worn electrode holder (weak jaw grip)

    Safety Notes

    • Arc flash hazard: Always wear a helmet with proper shade (ANSI Z87.1 compliant). Sticking electrodes often cause sudden arc flare-ups.
    • Fume exposure: Stick welding produces heavy fumes. Ensure adequate ventilation or use a respirator (ANSI Z136.1 rated for welding fumes).
    • Electrical shock: Disconnect power before inspecting the electrode holder or ground clamp.
    • Hot metal: Electrodes and workpiece are extremely hot. Use insulated gloves and let parts cool before handling.

    Step-by-Step Troubleshooting

    Step 1: Check Your Amperage (FREE)

    • Sticking almost always means you’re running too cold.
    • Increase amperage by 10–15 amps and try again.
    • Why: Low current can’t sustain a stable arc. The electrode cools too quickly and bonds to the workpiece.
    • Rule of thumb: For 1/8″ (3.2mm) 7018 rod, use 90–110A. For 5/32″ (4mm), use 120–150A.

    Step 2: Inspect Your Ground Clamp ($0–$40)

    • Check that the ground clamp is tight on clean, bare metal.
    • If the clamp is loose, tighten it. If it’s corroded, clean it with a wire brush or replace it.
    • Why: A loose or corroded ground connection increases resistance, reducing current flow to the workpiece.
    • What to check:
      • Is the clamp jaw making full contact?
      • Is the cable connection tight at the clamp?
      • Is the workpiece surface clean where the clamp sits?

    Step 3: Dry Your Electrodes ($5–$15)

    • If your rods have been exposed to humidity, they may be damp.
    • Store them in a dry rod oven or sealed container.
    • If you don’t have an oven, use fresh rods from a sealed package.
    • Why: Moisture in the flux coating weakens the arc and makes initiation difficult.

    Step 4: Clean Your Workpiece ($0–$20)

    • Remove rust, mill scale, paint, or dirt with a wire brush, wire wheel, or grinding stone.
    • Clean a 2–3 inch area around your intended weld.
    • Why: Contamination blocks current flow and creates a weak, unstable arc.

    Step 5: Check Your Electrode Holder ($15–$50)

    • Inspect the jaw for wear, corrosion, or damage.
    • If the jaw is worn, the clamp won’t grip the electrode firmly, causing poor contact.
    • Replace if necessary.

    Fix Options (Ranked)

    1. Adjustment (FREE)

    • Increase amperage by 10–15 amps.
    • Tighten ground clamp.
    • Clean workpiece.
    • When to use: First troubleshooting step. Works 70% of the time.

    2. Consumable Change (~$10–$50)

    • Replace old or damp electrodes with fresh rods.
    • Replace corroded ground clamp.
    • When to use: If rods are old or ground clamp is visibly corroded.

    3. Part Replacement (~$15–$50)

    • Replace worn electrode holder.
    • Replace damaged ground clamp.
    • When to use: If jaw is cracked, worn, or clamp is beyond cleaning.

    Recommended Fix: Upgrade Your Electrode Holder

    A quality electrode holder ensures consistent jaw grip and reliable current flow. The YESWELDER Welding Electrode Holder is a solid upgrade that prevents many sticking issues caused by poor contact.

    Why it works:

    • Pure copper construction for superior conductivity.
    • Heavy-duty jaw with strong bite force (300A rated).
    • Insulated handle stays cool during extended use.
    • Durable design resists wear and corrosion.

    When to use it:

    • Your current holder is worn or corroded.
    • You’re upgrading from a cheap or damaged stinger.
    • You want consistent, reliable arc initiation.

    When NOT to use it:

    • Your current holder is brand new and working fine.
    • The problem is low amperage or dirty workpiece (fix those first).

    YESWELDER Welding Electrode Holder pure copper Brass Materials 300AMP, for SMAW (MMA) Stick Electrode Welding
    • PURE COPPER: Our clamp has a higher copper content than others. Therefore, better conductivity, safer and more improved cable connection.
    • MAXIMUM AMPERAGE:Up to 300A.
    • COMFORTABLE OPERATION: Great for most ARC, Stick welding jobs. Easy to operate at a newly designed level for good hand clearance and better hold.
    • SAFETY DESIGN: Heat resistant handle, made of arc-resistant insulation and impact resistant material.
    • METHOD: This 300A welding electrode holder connects to the welding cable and conducts the welding current to the electrode. The insulated handle is used to guide the electrode over the weld joint and feed the electrode over the weld joint and feed the electrode into the weld puddle as it is consumed.

    Last update on 2026-06-26 / Affiliate links / Images from Amazon Product Advertising API

    Comparable Options

    Lincoln Electric Industrial 200 Amp Electrode Holder – Premium option with copper alloy jaw and ergonomic handle. Best for professional/production work. ~$27.

    Reboot 300AMP Electrode Holder – Budget-friendly, heavy-duty. Good for occasional use. ~$15–$18.

    Common Mistakes

    • Running too cold: Beginners often fear high amperage. Low current is the #1 cause of sticking. Increase heat.
    • Ignoring ground clamp corrosion: A corroded clamp looks fine but kills conductivity. Clean or replace it.
    • Using old, damp rods: Moisture in the flux weakens the arc. Store rods in a dry oven or sealed container.
    • Not cleaning the workpiece: Rust and mill scale block current. Always brush the area before welding.
    • Striking too slowly: Strike the rod quickly and confidently. A hesitant strike can cause sticking. Move the rod away immediately after arc initiation.

    FAQ (Snippet-Optimized)

    Q: Why does my electrode stick even at high amperage? A: Check your ground clamp. A loose or corroded clamp prevents current flow, regardless of amperage. Clean and tighten it.

    Q: Can damp electrodes cause sticking? A: Yes. Moisture in the flux coating weakens arc initiation. Store rods in a dry oven or sealed container.

    Q: How do I know if my ground clamp is bad? A: Look for corrosion, loose connections, or a worn jaw. If the clamp won’t tighten or the jaw is cracked, replace it.

    Q: Is sticking dangerous? A: Yes. A stuck electrode can cause sudden arc flare-ups and spatter. Always wear proper PPE and disconnect power if you need to free a stuck rod.

    Q: What’s the best amperage for 1/8″ 7018 rod? A: 90–110A. Check your rod box for the manufacturer’s recommendation—it varies by brand and coating.

    Next Steps

    Related troubleshooting guides:

    Upgrade your setup:

    For more welding fixes and gear options, see our full resource page: https://blog.weldsupportparts.com/links/

  • Try Amazon Prime Free