Hypertherm SmartSYNC 30–45A Cartridge Review Guide
An in-depth look at a game-changing consumable for CNC plasma cutting and manual fabrication
—
Introduction
The Hypertherm SmartSYNC 30–45A cartridge is a precision-engineered plasma cutting consumable designed to work with Hypertherm’s SYNC-compatible systems, including the Powermax 45 SYNC, Powermax65 SYNC, Powermax85 SYNC, and Powermax105 SYNC. Unlike traditional five-piece consumable stacks, the SmartSYNC cartridge condenses nozzle, electrode, and swirl ring configurations into one single, intelligent component.
This cartridge is ideal for manual plasma cutting, mechanized cutting, and gouging operations within the 30 to 45 amp range. It’s widely used by professional welders, fabricators, metal shop technicians, students, and engineers who require consistent arc quality, minimal downtime, and simplified consumable selection.
Where precise, efficient cutting matters, this cartridge delivers improved performance with minimized operator error—making it a go-to option in both busy fabrication shops and mobile job sites.
—
Types / Variants / Models
Hypertherm SmartSYNC cartridges are color-coded and uniquely labeled to reflect their intended application. For the 30–45A range, the most relevant variants include:
– Cutting Cartridges (30–45A)
– Color-coded: Yellow
– Designed for standard plasma cutting on mild steel, stainless steel, and aluminum.
– Used primarily in handheld or mechanized cutting modes.
– Gouging Cartridges (30–45A)
– Color-coded: Green
– Engineered for plasma gouging operations—removing welds or preparing joints.
– Provides a smooth gouge profile with reduced spatter.
– FineCut® Cartridges (up to 45A)
– Color-coded: Black
– Made for precision cutting of thin metals where a narrow kerf and clean edge are essential.
– Best for fabrication shops working on sheet metal or ornamental pieces.
Each cartridge is process-specific, eliminating the trial and error of selecting between torch parts or matching incorrect consumables.
—
Key Features and Specifications
The SmartSYNC 30–45A cartridge is more than a consumable—it’s a technically advanced solution for optimizing plasma system performance.
– Amperage Range: 30–45 amps
– Offers flexibility for medium-duty cutting and gouging tasks.
– SmartSYNC Compatibility:
– Designed exclusively for Powermax SYNC systems (Powermax65, 85, 105 SYNC).
– Enables automatic process setup, eliminating manual settings and wrong part configurations.
– All-in-One Design:
– Replaces traditional five-piece consumables with one rotating cartridge, simplifying inventory and changeouts.
– Embedded RFID Technology:
– Communicates cartridge type and usage data directly to the plasma power source.
– Logs arc starts and time to assist with preventive maintenance.
– Certifications:
– CE, RoHS compliant, and designed to meet ISO 9001:2015 standards.
– Ensures global safety, electrical, and environmental compliance.
– Precision Manufacturing:
– Machined to tight tolerances for optimal arc stability and cut consistency—especially relevant for CNC plasma tables.
—
Usage & Compatibility
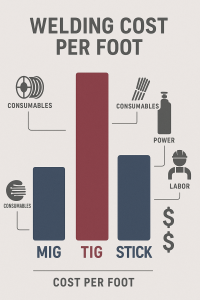
The SmartSYNC 30–45A cartridge is used primarily in plasma arc cutting systems, especially in manual hand-held torch setups and mechanized applications on CNC tables. It is not applicable to traditional SMAW (stick), GMAW (MIG), or GTAW (TIG) welding processes, but complements them in multiprocess fabrication environments.
Compatible Machines:
- Powermax45 SYNC
- Powermax65 SYNC
- Powermax85 SYNC
- Powermax105 SYNC
Benefits:
– Automatic setup means users don’t need to manually configure amperage or gas settings—perfect for less experienced welders.
– Minimized mistake rate when working under urgent production timelines or high throughput demands.
– Durable construction extends lifespan, reducing changeover frequency.
Drawbacks:
– Not backward compatible with all non-SYNC Powermax models. They are compatible with Duramax torch systems, with an adapter.
– Slightly higher upfront cost compared to traditional consumables (offset by longer operational life and fewer mistakes).
—
Common Applications
This cartridge is optimized for medium-duty industrial applications where precision and uptime are critical:
– Light structural fabrication
– Automotive bodywork and exhaust systems
– HVAC ductwork and assembly
– Farm equipment repair
– Sign fabrication with CNC tables
– Maintenance and repair operations (MRO)
Its robust duty cycle and versatility across mild steel, stainless steel, and aluminum make it ideal for multi-metal environments.
—
Tips & Best Practices
Setup Tips:
– Always insert with the cartridge fully rotated and locked into place—incorrect seating can cause arc instability.
– Use the SmartSYNC LCD screen (if equipped) to verify cartridge type before cutting.
– For precision work, use the FineCut variant and reduce travel speed for minimal dross.
Maintenance Tips:
– Inspect the cartridge after 5–10 hours of arc time for signs of nozzle wear.
– Use only a clean, dry air source—moisture or oil will reduce cartridge life.
– Store cartridges in a dust-free, temperature-controlled environment to prevent contamination.
Troubleshooting Common Issues:
– Inconsistent cut or gouge arc → Check for improper installation or worn electrode.
– Excessive dross → Replace with a new cartridge or evaluate travel speed/height.
– Torch error code → Verify you’re using a SYNC-supported machine and matching cartridge type.
—
Conclusion
The Hypertherm SmartSYNC 30–45A cartridge is a next-generation consumable that simplifies setup, improves cutting accuracy, and reduces downtime. Whether you’re a fabricator handling day-to-day cutting, a welding student learning precision arc control, or a field technician needing reliable gouging power, this cartridge delivers unmatched performance.
Its intelligent chip technology, durable build, and simplified design help maintain productivity even in demanding shop or field environments.
Key takeaway: If you’re using a Powermax SYNC system and regularly operate within the 30–45A range, upgrading to the SmartSYNC cartridge system can dramatically improve both performance and simplicity.
—
Affiliate Call to Action

Last update on 2026-03-06 / Affiliate links / Images from Amazon Product Advertising API
Check the latest price and availability on Amazon to ensure you’re stocked up with the right cartridge for your cutting needs.
—
Note to Readers:
This post may contain affiliate links. If you purchase through them, we may earn a small commission at no cost to you. Thank you for supporting our site.


 Conclusion
 Note for Readers: This post may contain affiliate links. If you purchase through them, we may earn a small commission at no cost to you. Thank you for supporting our site.
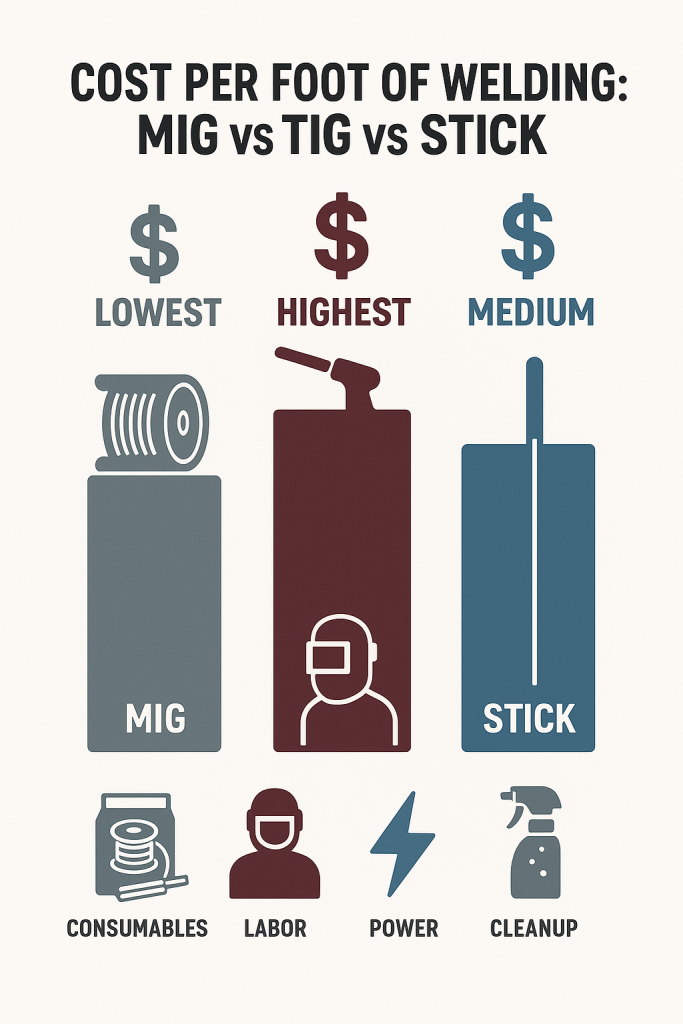
 MIG Welding (GMAW) – High Speed, Low Cost
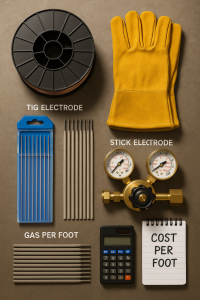
 Assumptions:
 MIG Welding Cost Example
 $0.89/ft