Category: Welding Products

  • Inweld 2 Gauge Premium Welding Cable 600 Volt – Black – Made in the USA (250 FEET): Product Breakdown

    Inweld 2 Gauge Premium Welding Cable 600 Volt – Black – Made in the USA (250 FEET): Product Breakdown

    Product not found.
    “>Inweld 2 Gauge Premium Welding Cable 600 Volt - Black - Made in the USA (250 FEET)

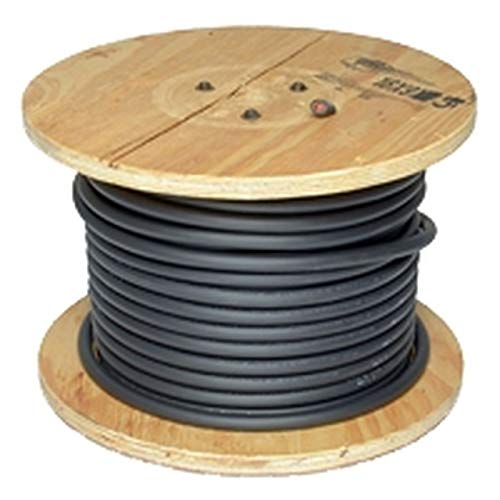
    Inweld 2 Gauge Premium Welding Cable 600 Volt – Black – Made in the USA (250 FEET) is a general-purpose welding lead product listed for welding, motor, generator, and battery lead use. For buyers and maintenance teams, the main questions are not just length and gauge. The real checks are conductor size, insulation condition, voltage rating, termination method, bend management, and whether the cable is being used within the equipment’s duty and current requirements. This breakdown focuses on practical inspection and support steps before installation or replacement.

    Key Takeaways

    • 2 gauge cable is a heavy lead size, but the correct application still depends on the machine, lead length, and current draw.
    • The listed product information confirms black color and 600 volt rating. Other technical details are Unknown (Verify) unless confirmed by the supplier data sheet.
    • Use the cable as a replaceable lead only after checking compatibility with lugs, connectors, and strain relief at the actual machine and work point.
    • Inspect the full cable length before service. Damage at the first few feet near the machine is common, but field abrasion can occur anywhere.
    • If the cable is used for motors, generators, or batteries, verify polarity, insulation condition, and termination security before energizing.

    What the Product Listing Tells You

    The available product description identifies this as a 2 gauge premium welding cable, black, rated 600 volts, and sold in a 250 foot length. The short description also notes use for welding leads plus motors, generators, and batteries. Nominal diameter is listed as .420 inch. Anything beyond that, including strand construction, jacket material, temperature rating, ampacity, or certification status, is Unknown (Verify) unless you have the manufacturer data sheet in hand.

    For purchasing, that means you should not assume the cable is suitable for every lead replacement job just because the gauge looks right. Verify the machine output, lead routing, and termination hardware before release to the floor.

    Practical Check, Inspect, Verify Steps

    Before purchase or issue from stock

    • Check the required lead length against the job. Do not cut a 250 foot reel without confirming the actual takeoff plan.
    • Inspect the end use: welding lead, generator lead, battery lead, or other equipment lead. Unknown (Verify) for each specific application unless the equipment manual approves it.
    • Verify the connector style needed at both ends. Lugs, clamps, and receptacles must match the machine and cable size.

    During installation

    • Check that the cable path avoids sharp edges, hot work zones, and moving equipment.
    • Inspect for kinks, flat spots, jacket cuts, burned areas, and crushed sections before pulling the cable into service.
    • Verify all terminations are mechanically secure and properly crimped or attached per your shop standard.

    During service

    • Check the first sign of overheating at plugs, lugs, and connection points.
    • Inspect for insulation wear where the cable crosses floors, carts, or hang points.
    • Verify that the cable is not being loaded beyond the equipment’s intended duty cycle. Current capacity is Unknown (Verify) for this listing without a published data sheet.

    Troubleshooting Common Cable Problems

    Problem: cable feels stiff or difficult to route

    • Check whether the cable was stored tightly coiled or exposed to cold conditions.
    • Inspect for jacket cracking or flat memory from improper storage.
    • Verify the routing path is not forcing too-tight bends. Rework the path before blaming the cable.

    Problem: connection runs hot

    • Check the lug or clamp fit at the termination.
    • Inspect for oxidation, looseness, and damaged strands near the crimp.
    • Verify the connection is clean, tight, and sized for 2 gauge cable.

    Problem: visible jacket damage

    • Check whether the damage is only surface abrasion or if strands are exposed.
    • Inspect the entire run, not just the obvious fault point.
    • Verify the cable is removed from service if the conductor is compromised. Do not continue use based on appearance alone.

    Product and Parts Section

    For this article, the referenced product is the only listed ArcWeld item:

    Product not found.

    “>Inweld 2 Gauge Premium Welding Cable 600 Volt – Black – Made in the USA (250 FEET)

    ArcWeld product shortcode:

    Inweld 2 Gauge Premium Welding Cable 600 Volt - Black - Made in the USA (250 FEET)

    Inweld 2 Gauge Premium Welding Cable 600 Volt – Black – Made in the USA (250 FEET)

    2 Gauge Premium Welding Cable – Black – 600 Volts – Welding lead- Leads for Motors, Generators, Batteries – Nominal Diameter is .420"

    View at Arc Weld Store

    Use the product page as the source of record for the listing details. If your purchasing team needs confirmation on strand count, jacket type, or agency approvals, request the datasheet or manufacturer confirmation. Do not assume those details from gauge and voltage rating alone.

    How Buyers Should Evaluate This Cable

    For maintenance buyers, the right process is simple: match the cable to the actual job, then verify the connection hardware and routing. A 250 foot reel is useful in fabrication shops, service trucks, and plant maintenance areas where long lead runs or multiple cut lengths are needed. The tradeoff is inventory control. Once a long reel is cut, the remaining stock must still be tracked by size and condition.

    When replacing damaged leads, compare the old lead to the new one only as a starting point. The old cable may have been undersized, overloaded, or repaired incorrectly. Use the replacement as an opportunity to correct the root cause: poor routing, poor storage, or wrong connector selection.

    Safety Notes

    • De-energize equipment before handling or replacing any lead.
    • Do not use damaged cable with exposed conductors, burned jacket, or loose terminations.
    • Keep cables out of pinch points, hot slag paths, and traffic lanes.
    • Use only termination methods approved by your shop procedure and the equipment manufacturer.
    • If the cable is used outside welding service, verify the application with the equipment manual. Unknown (Verify) where not documented.

    FAQ

    Is this cable only for welding?

    No. The listing also mentions motors, generators, and batteries. That does not mean every installation is approved. Verify the end use against the equipment manual and your internal standards.

    Can I assume the ampacity from the 2 gauge size?

    No. Ampacity depends on insulation type, duty cycle, installation conditions, ambient temperature, and lead length. The listing does not provide enough data for a reliable ampacity claim. Unknown (Verify).

    What should I inspect first on a used welding lead?

    Start with the terminations, then inspect the first several feet near the machine, then walk the full length looking for cuts, burns, crushing, and splices. Verify continuity and insulation condition before returning it to service.

    Is the 250 foot length a finished assembly?

    The available listing shows a 250 foot cable product, but assembly details such as end fittings are Unknown (Verify). Confirm whether you are buying bulk cable or a pre-terminated lead set before ordering.

    Sources Checked

    • ArcWeld product page: Inweld 2 Gauge Premium Welding Cable 600 Volt – Black – Made in the USA (250 FEET)
    • Provided product short description and listing data from the task record

    This draft uses only the provided product reference. No WSP lookup pages or filler metal finder pages were provided for this task, so none were included.

  • Harris 2-1/2″ x 1/4″ NPT Bottom Mount Gauge – Polished Brass Case – 1 Each (0-4000 PSI): Product Breakdown

    Harris 2-1/2″ x 1/4″ NPT Bottom Mount Gauge – Polished Brass Case – 1 Each (0-4000 PSI): Product Breakdown

    Product not found.
    “>Harris 2-1/2" x 1/4" NPT Bottom Mount Gauge - Polished Brass Case - 1 Each (0-4000 PSI)

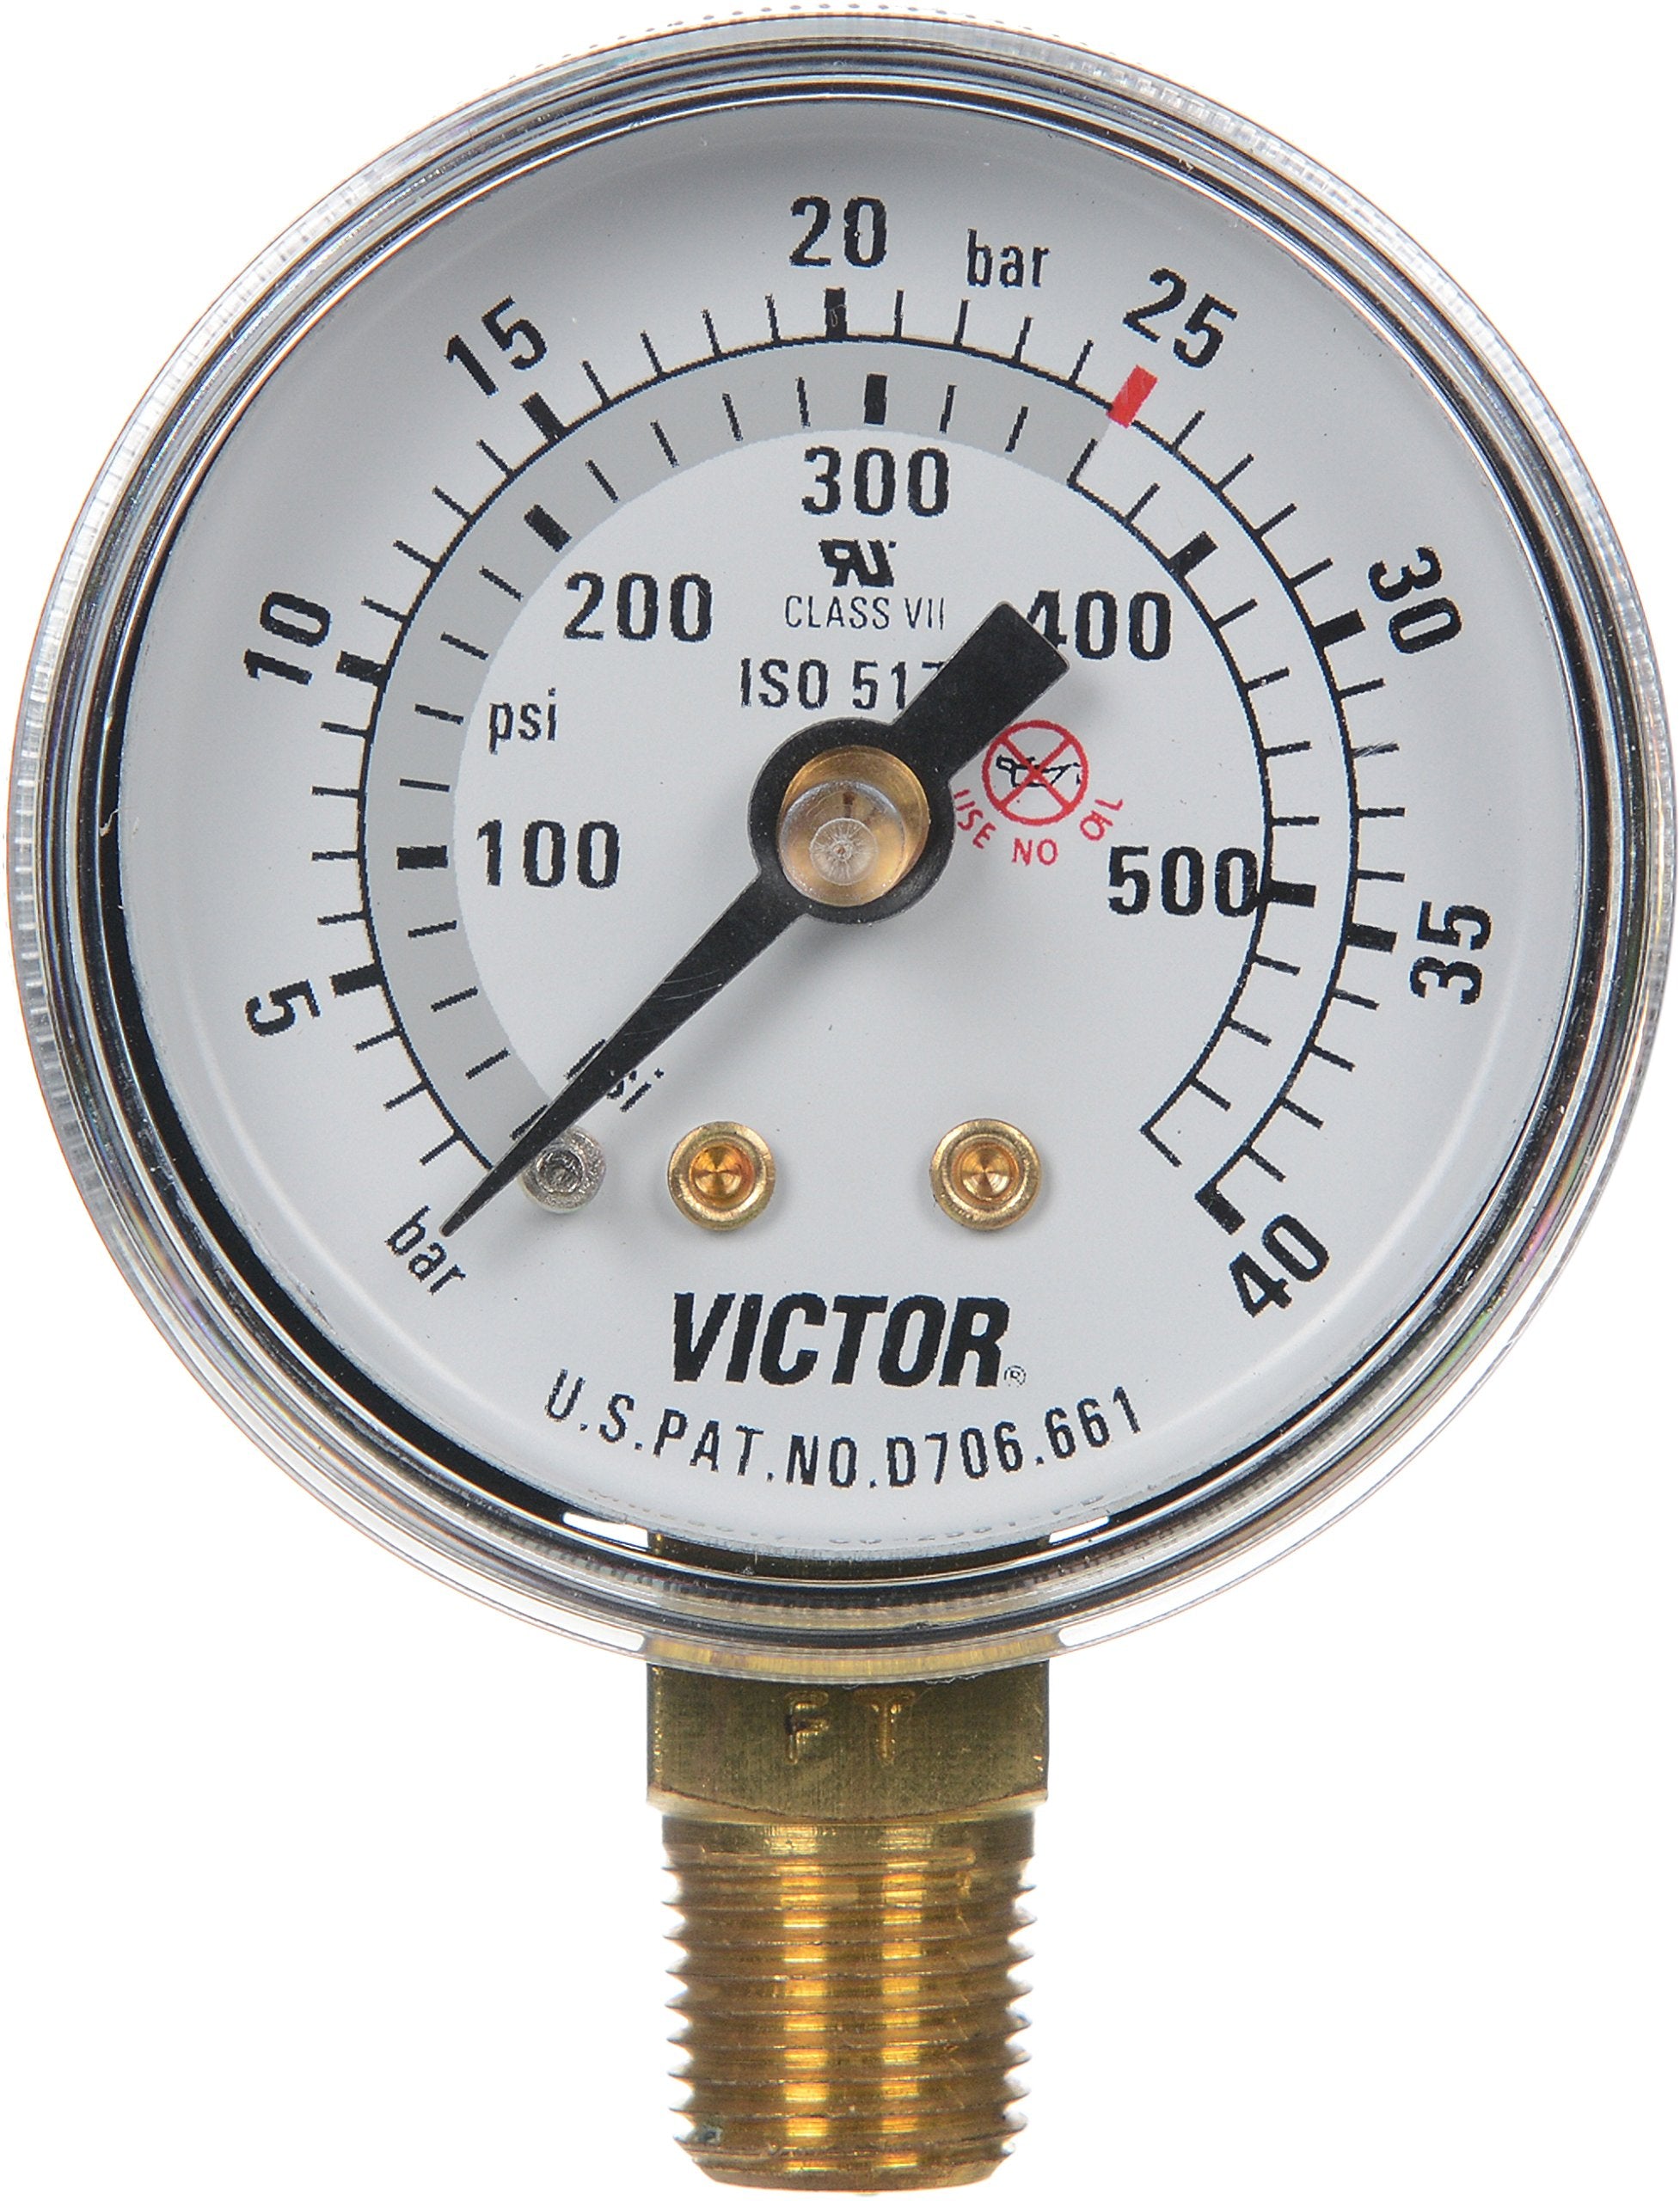
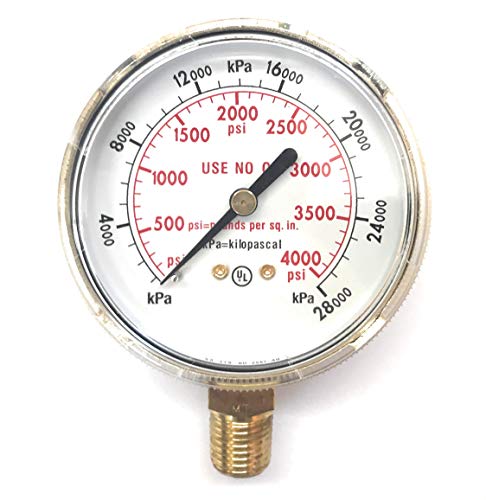
    This gauge is a simple service component, but it still needs the same level of attention as any other pressure-control part on a welding setup. The listed product is a Harris 2-1/2" x 1/4" NPT bottom mount gauge with a polished brass case, marked 0-4000 PSI. That makes it a general pressure-indication gauge for gas or pressure systems where the connection, range, and physical mount match the application. Do not assume it is correct for a specific regulator or gas service without checking the actual equipment specification.

    Key Takeaways

    What to check before you buy

    Before ordering, work through the same fit-check process you would use on any pressure instrument. Start with the connection. A 1/4" NPT gauge will not install correctly if the regulator outlet, manifold port, or adapter uses a different size or thread type. Verify whether the port is male or female, and confirm whether the installation requires thread sealant, a seal washer, or a different style of connection. NPT is a tapered pipe thread, so a loose-looking engagement is not enough to confirm compatibility.

    Next, confirm range. A 0-4000 PSI gauge may be too high for some low-pressure systems because it can make readings harder to interpret at the lower end. It may also be too low for systems that can exceed the upper limit. Always check the equipment range requirement first. If the installation point sees pressure pulses or transient spikes, choose a gauge that safely exceeds the maximum expected pressure. Do not guess.

    Finally, verify physical fit. The gauge is 2-1/2 inches in size, but you should still inspect the available panel space, clearance for the case, and viewing angle. If the gauge face is blocked by other fittings, a guard, cabinet, or hose bundle, it will not be useful in service.

    Troubleshooting and support checks

    If the gauge does not read as expected

    If pressure fluctuates or the reading is unstable

    If the gauge leaks after installation

    Product and parts notes

    Based on the provided product data, the confirmed details are limited to the gauge size, mount style, thread type, brass case, and pressure range. Unknown (Verify): internal movement type, dial material, accuracy class, exact gas compatibility, backlighting, and certification details. Do not fill in those blanks from assumption. If the application depends on a specific standard, the buyer should verify the manufacturer documentation or the equipment manual before purchase.

    Use this part as a direct replacement only after you compare the old gauge to the new one side by side. Match the connection, range, mounting orientation, and visible case style. If anything differs, stop and verify the application instead of forcing the part to fit.

    Practical inspection steps in the shop

    1. Inspect the gauge lens for cracks, clouding, or impact marks before installation.
    2. Check the case and bezel for dents, corrosion, or deformation.
    3. Verify that the pointer returns smoothly to zero when the gauge is not pressurized, if that condition can be confirmed safely.
    4. Inspect the system connection for debris, sealant residue, or thread wear.
    5. Verify the gauge range is readable from the normal operating position.

    If the gauge is used in a maintenance setting, include it in periodic inspection with the rest of the regulator assembly. Pressure gauges often fail gradually. A broken lens, a fogged face, or a drifting pointer is a service warning, not cosmetic damage.

    Safety notes

    FAQ

    Is this gauge for low-pressure or high-pressure service?

    The listed range is 0-4000 PSI. That is the confirmed specification. Whether it is suitable for your service depends on the actual system pressure and the required operating range. Verify against the equipment manual.

    Will a 1/4" NPT gauge fit any regulator?

    No. It only fits equipment with a matching 1/4" NPT port and compatible sealing method. Always inspect the existing connection before ordering.

    Can I use this gauge as a direct replacement if the old one looks similar?

    Not without verification. Match the thread, mount style, pressure range, and panel clearance. Similar appearance does not guarantee interchangeability.

    What should I do if I cannot confirm compatibility?

    Stop and verify the host equipment documentation, the port size, and the service conditions. If the details remain unknown, treat the fit as Unknown (Verify) until confirmed.

    Sources Checked

    Note: No WSP lookup page, filler metal finder page, or internal links were provided for this task, so none were used.

    Related Arc Weld Part

    Harris 2-1/2" x 1/4" NPT Bottom Mount Gauge - Polished Brass Case - 1 Each (0-4000 PSI)

    Harris 2-1/2" x 1/4" NPT Bottom Mount Gauge – Polished Brass Case – 1 Each (0-4000 PSI)

    2-1/2" bottom mounted gauge. 1/4" pipe thread. Brass body and case. 0-4000 PSI

    View at Arc Weld Store
  • When to Replace Welding Ground Clamps

    Product not found.
    “>Lenco EG-300, 300 Amp, Welding Ground Clamp, Pack of (1)

    Welding ground clamp replacement is not based on age alone. Replace a clamp when it no longer provides stable contact, runs hot, or shows physical damage that affects current transfer. A weak ground path can cause arc instability, excessive heat, voltage drop, and poor weld consistency.

    Key Takeaways

    When a Ground Clamp Should Be Replaced

    Replace a welding ground clamp when you see any of the following:

    If the clamp must be repositioned often to maintain a stable arc, the contact path is no longer reliable. That is a maintenance issue, not just a setup issue.

    What Heat at the Clamp Means

    Heat buildup usually indicates resistance. Resistance can come from dirty contact surfaces, loose hardware, undersized components, damaged cable strands, or a worn clamp body. A ground clamp that gets hot is losing efficiency and may also damage the cable or connector over time.

    Do not assume heat is normal because the clamp is carrying current. A properly functioning clamp should transfer current without excessive temperature rise at the contact points.

    How to Check Conductivity

    Use a basic support check before replacing the clamp:

    1. Inspect the clamp body, jaws, fasteners, and cable connection.
    2. Clean visible oxide, scale, oil, and paint from the clamp contact area.
    3. Tighten any loose mechanical joints.
    4. Check the workpiece contact point for scale, rust, and coatings.
    5. Run a controlled weld and watch for heat, arcing at the clamp, or unstable arc behavior.

    If the clamp still runs hot or the arc remains unstable after cleaning and tightening, replacement is justified.

    Troubleshooting Support

    Arc starts then becomes erratic

    Possible causes include poor clamp contact, cable damage, or contamination at the work clamp point. Verify the clamp grip first, then inspect the cable and work surface.

    Clamp gets hot quickly

    Possible causes include loose joints, corrosion, worn jaws, or a damaged conductor path. If the clamp is older and already shows wear, replace it instead of continuing to clean it.

    Visible sparking at the clamp

    That usually means the clamp is not making full contact. Inspect for paint, rust, scale, or jaw wear. If the contact faces are damaged, the clamp should be replaced.

    Weld quality changes when the clamp is moved

    This points to inconsistent grounding. Check the entire ground path, not just the clamp body. A good clamp should produce the same result when properly attached to clean metal.

    Product / Parts Reference

    Lenco EG-300, 300 Amp, Welding Ground Clamp, Pack of (1)

    The EG-300 is a light duty welding ground clamp with a large Lenco contact area, steel construction, and copper alloy jaws. Use it when replacing a worn clamp in setups where the existing clamp no longer provides consistent grounding.

    ArcWeld reference:

    Lenco EG-300, 300 Amp, Welding Ground Clamp, Pack of (1)

    Lenco EG-300, 300 Amp, Welding Ground Clamp, Pack of (1)

    The EG-300 welding ground clamp is best used for light duty welding. With its large "Lenco" contact area, steel construction and copper alloy jaws, the EG-300 extends cable life and reduces energy use.

    View at Arc Weld Store

    Compatibility, duty limits, and fit: Unknown (Verify).

    Safety Notes

    FAQ

    How often should a welding ground clamp be replaced?

    There is no fixed interval. Replace it based on wear, heat buildup, loss of grip, and conductivity problems.

    Can I clean a worn clamp instead of replacing it?

    Yes, if the problem is only surface contamination. If the jaws are worn, the body is damaged, or heat returns after cleaning, replace the clamp.

    Does a bad ground clamp affect weld quality?

    Yes. Poor grounding can cause unstable arc starts, erratic arc behavior, and added heat in the cable path.

    What is the main sign that replacement is overdue?

    Recurring heat at the clamp after cleaning and tightening is a strong sign that the clamp is no longer making a dependable connection.

    Sources Checked

    Related Weld Support Guides

  • Weld Wall: Built for Welders Who Actually Build Things

    Most welding websites only show polished finished products.

    Perfect welds. Perfect lighting. Perfect shops.

    That is not real life.

    Real welding is shop repairs at 7 PM. Fabrication projects halfway through completion. Burned-up consumables. Homemade fixtures. Broken brackets. Rusty farm repairs. Custom fabrication ideas. Trial and error.

    That is what Weld Wall is for.

    Weld Wall is a community page where welders can share projects, ask questions, post fabrication photos, troubleshoot equipment problems, and help other welders solve real-world issues.

    Whether you run a fabrication shop, weld in the field, work on maintenance, build projects at home, or are just learning, this page is built to give welders a place to share what they are working on.

    Key Takeaways

    • Share fabrication projects and welding photos
    • Ask troubleshooting and equipment questions
    • Learn from real welders and real shop experience
    • Build a searchable archive of practical welding knowledge
    • Connect welding projects directly with parts, consumables, and support guides

    Why We Built Weld Wall

    One of the biggest problems in welding is that useful information disappears.

    A welder solves a problem once…
    Then the knowledge gets buried inside:

    • old forum threads
    • Facebook comments
    • text messages
    • jobsite conversations
    • or memory

    Meanwhile, thousands of incredible fabrication projects never get shared outside one local shop.

    Weld Wall is designed to help preserve that knowledge.

    Not corporate marketing.

    Not fake “perfect” fabrication content.

    Real projects.
    Real troubleshooting.
    Real shop experience.

    What Can Be Posted on Weld Wall?

    If it involves welding, fabrication, cutting, repair work, consumables, or shop equipment, it belongs here.

    Fabrication Projects

    • Welding tables
    • Trailer builds
    • Pipe fabrication
    • Structural repairs
    • Custom brackets
    • CNC plasma projects
    • Aluminum fabrication
    • Shop carts and tool storage
    • Farm and heavy equipment repairs

    Welding Questions

    • MIG wire feed problems
    • TIG tungsten contamination
    • Plasma consumable wear
    • Shielding gas issues
    • Welding helmet problems
    • PAPR airflow issues
    • Burnback troubleshooting
    • Arc instability
    • Consumable compatibility

    Shop Setup Ideas

    • Welding booth layouts
    • Ventilation systems
    • Fume extraction setups
    • Tool organization
    • DIY fixtures and jigs
    • Workbench ideas
    • Consumable storage

    More Than a Project Gallery

    The long-term goal of Weld Wall is bigger than just posting photos.

    Every project, repair, or troubleshooting post helps build a real-world welding knowledge base.

    A simple project discussion today might help another welder later:

    • Identify the correct consumable
    • Solve a wire feed issue
    • prevent a wrong-part order
    • improve plasma cut quality
    • fix shielding gas problems
    • Choose the right torch setup

    That kind of practical knowledge is difficult to find in manufacturer manuals alone.

    Built Around Real Welding Experience

    Weld Support Parts was built from years inside the welding supply industry helping customers identify the correct parts, consumables, and replacements. ()

    One thing became obvious:

    Most welders learn fastest from other welders.

    That is exactly what Weld Wall is meant to support.

    Future Ideas for Weld Wall

    As the community grows, Weld Wall may expand into:

    • machine-specific project sections
    • fabrication categories
    • troubleshooting archives
    • shop spotlight features
    • consumable compatibility discussions
    • welding process sections
    • community-voted builds
    • linked troubleshooting guides

    Over time, this could become one of the most useful welding project and troubleshooting archives online.

    Share Your Project

    If you have:

    • a fabrication build
    • a welding repair
    • a custom shop setup
    • a project in progress
    • or a welding problem you are trying to solve

    Post it on the Weld Wall.

    The welding industry gets better when knowledge is shared.

    Visit the Weld Wall

    👉 https://blog.weldsupportparts.com/welding-wall/

    Related Guides

    FAQ

    What is Weld Wall?

    Weld Wall is a community welding page where welders can share fabrication projects, welding photos, troubleshooting questions, and shop ideas.

    Can beginners post projects?

    Yes. Weld Wall is open to all skill levels.

    Can I ask welding equipment questions?

    Yes. MIG, TIG, plasma, helmets, consumables, torches, PPE, and troubleshooting discussions are all welcome.

    Is Weld Wall only for professional welders?

    No. Hobbyists, students, fabricators, maintenance welders, farm welders, and professionals are all welcome.

    Safety Notes

    Always follow proper welding safety procedures:

    • Wear ANSI Z87.1 eye protection
    • Use welding gloves and FR clothing
    • Ensure adequate ventilation
    • Follow equipment manufacturer instructions
    • Use proper respiratory protection where required
  • Steel Welding Table, Strong Hand Nomad TS3020 (Review)

    Steel Welding Table, Strong Hand Nomad TS3020 (Review)

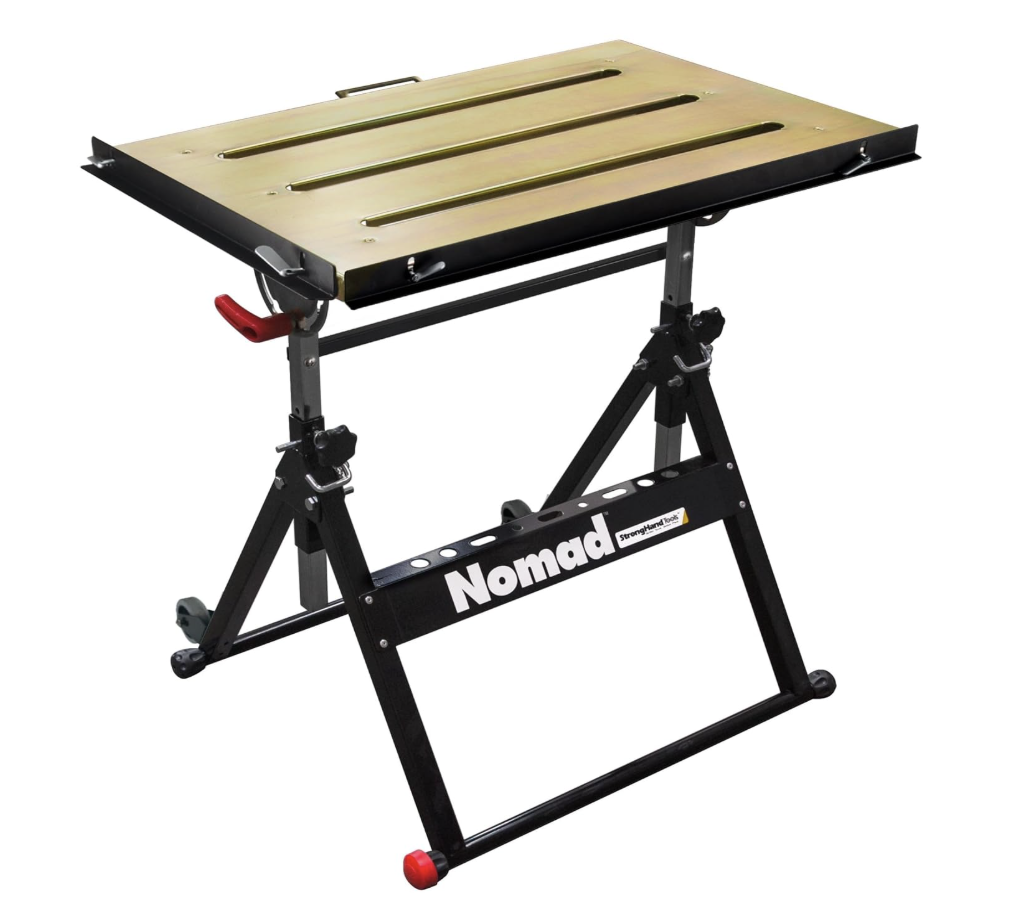
    The Strong Hand Nomad TS3020 is one of the most versatile budget welding tables available. Instead of a fixed plate with a fixturing hole grid, the Nomad uses 28 mm (1.1″) wide slotted steel plates, adjustable height, angle tilting, retractable guide rails, and rolling casters — making it ideal for hobby welders, light fabrication, and mobile workstations.

    Below is a full breakdown of build quality, usability, rigidity, and how it compares to cheaper stamped-steel folding tables.

    Key Takeaways

    • 28 mm slotted tabletop supports clamping, squaring, and part positioning.
    • Adjustable height and tilt (0°, 30°, 90°) improve access and ergonomics.
    • Casters + leveling foot make it easy to roll, park, and stabilize.
    • Retractable guide rails help with repeatable positioning and part alignment.
    • Best for MIG/TIG/light fabrication, not heavy hammering or large weldments.

    Where to Buy

    Amazon
    Strong Hand Tools Nomad TS3020 —

    No products found.

    Overview

    The Strong Hand Nomad is built as a flexible, portable welding station for small shops and home fabricators who want more capability than a folding table without jumping to a high-cost precision plate.

    Key features include:

    • 30″ × 20″ approx. working area
    • Height adjustment: 26″–32″
    • Angle adjustment: flat / 30° / 90°
    • Three steel slats with 28 mm gaps for clamps and locking pliers
    • Built-in rails that flip up or down for stops, alignment, or material control

    It’s targeted at welders who need mobility, quick setup, and practical clamping options — not a precision fixturing grid.

    Build Quality & Construction

    Tabletop

    • Three-piece steel slat surface, spaced with 1.1“ (28 mm) slots
    • Supports standard locking pliers, C-clamps, F-clamps, and slot-style accessories
    • Slots allow slag to drop and improve airflow during welding

    Frame & Legs

    • Powder-coated steel
    • Adjustable height driven by a pin-and-sleeve system
    • Angle tilt mechanism is solid for the price but not for high-weight loads

    Mobility & Leveling

    • Two casters for rolling
    • One eccentric leveling foot to lock the table down during welding

    Strength & Capacity

    • Suitable for:
      • Light frame fabrication
      • Small assemblies
      • Brackets and hobby projects
    • Not built for:
      • Heavy beating/hammering
      • Large straightening jobs
      • High-load structural work

    Performance in the Shop

    Clamping & Setup

    Slots allow versatile clamping angles and creative fixturing. Rails help repeat work without dedicated tooling.

    Flatness

    Good enough for typical hobby and light fabrication tasks.
    Not comparable to a BuildPro or precision-machined plate.

    Portability

    Easily moved around a small shop — one-person maneuvering is normal.

    Heat Handling

    Handles MIG and TIG without issues. Avoid:

    • Heavy carbon-arc gouging
    • Very high amperage preheat processes

    Comparison: Nomad TS3020 vs. Low-End Folding Tables

    FeatureNomad TS3020 Low-End Folding Tables (Hobart/generic)
    SurfaceSteel slats w/ 28 mm slotsThin stamped steel
    ClampingClamps through slats; guide railsMinimal / limited
    AdjustabilityHeight + tilt (0°, 30°, 90°)None
    MobilityCasters + leveling footFixed legs
    RigidityModerateLow
    Best ForLight fab, welding setupsOccasional hobby use

    If you need flexible work angles and real clamping options, the Nomad is dramatically more capable.

    Best Uses

    • MIG/TIG hobby fabrication
    • Light frame assembly
    • Small brackets
    • Prep work, layout, and tool setup
    • On-site/mobile welding

    Not ideal for:

    Heavy hammering, structural beams, engine stand repairs, or high-load fixturing.

    Safety Notes

    • Use ANSI Z87.1 eye protection when adjusting clamps or locking mechanisms.
    • Keep slats free of slag and spatter to maintain grounding continuity.
    • Stabilize the table with the leveling foot before welding.
    • Always attach your welding ground to the workpiece or a dedicated lug.

    FAQ

    Is the Nomad TS3020 a good first welding table?
    Yes — excellent for beginners who need adjustability and clamping slots.

    Can it replace a precision fixturing table?
    No. It’s for light fabrication, not precision assemblies.

    Does it accept 5/8″ or 16 mm fixturing tools?
    No. This is a slotted table, not a hole-grid system.

    Is it stable enough for heavier work?
    Light to moderate only; not for heavy hammering.

    Sources Checked

    • Strong Hand Tools TS3020 product materials
    • Manufacturer angle/height specs
    • Slot sizing and rail mechanism documentation

  • Welding Products Overview: MIG, TIG & Stick Gear Guide

    Welcome to our comprehensive guide on welding products! Whether you’re into MIG, TIG, or Stick welding, choosing the right gear makes all the difference.

    MIG Welding: Ideal for beginners and production work. Explore machines, consumables and accessories for smooth, spatter-free welds.

    TIG Welding: Perfect for precision and exotic metals. Learn about torches, tungsten, and consumables that deliver beautiful beads.

    Stick Welding: Rugged and versatile. Discover dependable electrode holders, ground clamps and electrodes for various metals.

    You can browse our full range of welding products on ArcWeld.Store to find the gear that suits your projects best.

  • Try Amazon Prime Free