Category: Welding Accessories
-
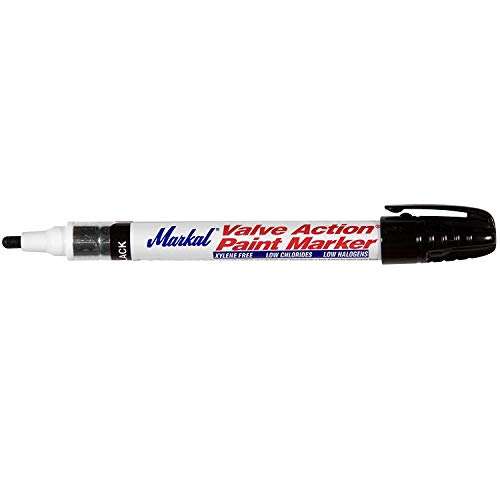
Markal 96823, Valve Action Black Paint Marker, Pack of (1): Product Breakdown
“>
The Markal 96823, Valve Action Black Paint Marker, Pack of (1) is a shop marking tool for layout, identification, and field marking where a standard ink marker is not enough. The product information provided identifies it as a real paint marker with valve action, a replaceable fiber nib, and a stated dry time of about 3 minutes. For welders, fabricators, and maintenance teams, the main value is simple: a marker that lays down visible paint on work surfaces and is built for repeated use.
Key Takeaways
- Valve action releases paint as needed for continuous marking.
- The marker uses real paint, not standard pen ink.
- Stated dry time is 3 minutes.
- Lead-free and low halogens are listed features.
- The fiber nib is replaceable, which supports full use of the marker body.
- Overall product weight is listed as 0.1 pounds.
Where this marker fits in a welding and fabrication shop
A black paint marker is generally used for part identification, cut lines, fit-up notes, and general shop marking on surfaces where visibility matters. The valve-action design helps control paint flow, which is useful when marking long runs or repeated notes. If you need a mark that stays visible through handling, the real-paint format is usually more practical than a standard felt-tip marker.
This is not a process-control device. It does not approve materials, procedures, or weld parameters. Use it as a shop marking tool only.
Check, inspect, verify before use
- Check the surface: Verify the material is suitable for paint marking. Clean, dry surfaces usually give better visibility. Unknown (Verify) on adhesion to coated, oily, or heavily oxidized surfaces.
- Inspect the nib: Make sure the fiber nib is present, seated, and not damaged before first use.
- Verify flow: Test on scrap or a non-critical area to confirm paint release before marking production parts.
- Check drying time: The stated dry time is 3 minutes, but actual dry time can vary with surface condition, film thickness, temperature, and airflow. Verify on your actual work surface.
- Inspect for contamination: If the marker has been stored open or in a dirty area, verify the nib is not clogged before relying on it for layout.
Troubleshooting and support
If the marker does not perform as expected, use a simple inspection sequence before replacing it.
- No paint transfer: Check that the nib is fully engaged. Then verify the tip is primed per normal paint-marker practice. If flow does not start, inspect for clogging or drying at the nib.
- Weak or uneven line: Verify the surface is not dusty, oily, or excessively rough. Inspect the nib for wear. The replaceable fiber nib is intended to support continued use once the tip wears.
- Excessive paint release: Check whether the marker is being pressed too hard. Valve-action markers are meant to release paint as needed; too much pressure can flood the line.
- Poor visibility: Verify the base material color and finish. Black paint may be difficult to read on dark or contaminated surfaces.
Handling and use notes
The listed features suggest a marker designed for straightforward manual use in the shop or field. Because it is a paint marker, treat it as a consumable that can dry out if left uncapped or handled incorrectly. Keep the cap secured when not in use. If the nib becomes worn, the replaceable tip supports continued use without discarding the entire body immediately.
Use the marker for identification and layout only. Do not assume the mark remains permanent under grinding, blasting, heat, solvent exposure, or weather. Unknown (Verify) on resistance to these conditions because no additional performance data was provided.
Product and parts notes
Provided product information for the Markal 96823 identifies these details:
- Product type: Marker
- Category: Paint
- Marker style: Valve action
- Nib: Fiber nib, replaceable
- Paint type: Real paint
- Lead status: Lead-free
- Halogens: Low halogens
- Dry time: 3 minutes
- Overall product weight: 0.1 pounds
Any use beyond those statements should be treated as Unknown (Verify). Do not assume surface chemistry, temperature limits, or chemical resistance without a current manufacturer data sheet or direct product confirmation.
Safety notes
- Use the marker in a ventilated area if you are sensitive to paint odors.
- Avoid skin and eye contact with wet paint.
- Keep away from ignition sources unless the manufacturer documentation states otherwise. Unknown (Verify) on flammability details.
- Do not mark parts where paint contamination is prohibited without verifying downstream process requirements.
- Follow local shop rules for solvent, paint, and waste handling.
FAQ
Is the Markal 96823 a standard ink marker?
No. The provided product information identifies it as a real paint marker with valve action.Can it be used on any metal surface?
Unknown (Verify). Surface condition matters, and no full compatibility list was provided. Test on scrap or a non-critical area first.Does the marker dry fast enough for shop use?
The stated dry time is 3 minutes. Actual dry time can change based on surface, film thickness, and environment, so verify on the part being marked.Can the nib be replaced?
Yes. The provided information states that the fiber nib is replaceable.Sources Checked
- ArcWeld product page: Markal 96823, Valve Action Black Paint Marker, Pack of (1)
- Provided product summary fields for features and dimensions
Related Arc Weld Part
Markal 96823, Valve Action Black Paint Marker, Pack of (1)
434-96823 Features: -Marks with real paint, dries in 3 minutes. -Nib releases paint as needed for continuous marking. -Lead-free, low halogens. -The fiber nib is replaceable to assure complete use of each marker. Product Type: -Markers. Category: -Paint. Dimensions: Overall Product Weight: -0.1 Pounds.
View at Arc Weld Store
Markal 96270, Silver Steak Markal PRO Holder, Pack of (1): Replacement Part Breakdown
The Markal 96270, Silver Steak Markal PRO Holder, Pack of (1) is best treated as a consumable support item in a marking system, not as a standalone process-critical welding component. For maintenance buyers, shop leads, and support teams, the main question is simple: when a holder starts to fail, what should you inspect before you replace it, and what should you verify after it arrives?
This guide breaks the part down from a service and support angle. It does not assume undocumented compatibility, dimensions, or internal construction details. Where technical details are not confirmed here, they are listed as Unknown (Verify).
Key Takeaways
- The Markal 96270 listing identifies a replacement holder item, but exact internal build details are Unknown (Verify).
- Before ordering a replacement, inspect the current holder for wear, binding, cracked body parts, or poor lead/marking retention.
- After receipt, verify fit, actuation, retention, and general condition before putting it into service.
- Do not assume compatibility with other Markal holders or marking formats unless confirmed by the seller or your internal part records.
- Use the Amazon product listing only as a product reference point; do not rely on it for undocumented repair guidance.
What This Part Is Used For
The product name indicates a Markal PRO holder associated with Silver Steak marking use. In practice, holders in this category are used to secure and present a marking stick or similar consumable in a controlled way. The exact operating method for this specific unit is Unknown (Verify), so support teams should confirm the current tool design before attempting repair, disassembly, or substitution.
If the holder is being used in a fabrication or maintenance environment, common failure symptoms include poor retention, inconsistent feed, damaged locking features, or a body that no longer holds alignment. Those symptoms do not prove the holder is the only problem. The marking stick, operator handling, storage conditions, or contamination can also be involved.
Inspection Checklist Before Replacement
Use this sequence before writing off the holder:
- Inspect the body. Look for cracks, bent sections, gouges, or heat damage.
- Check retention surfaces. Verify the part still grips the marking material consistently.
- Check movement. If the holder has a sliding or advancing function, verify it moves without sticking.
- Inspect for debris. Clean out dust, metal fines, and marker residue.
- Verify operator handling. Check whether the tool is being dropped, over-tightened, or stored in a way that causes premature wear.
If any of these checks fail, document the condition with photos and note whether the problem is intermittent or continuous. That record helps avoid repeating the same failure after replacement.
Troubleshooting Support Steps
1) Holder will not retain the marking stick
Check: Confirm the stick type matches the holder’s intended size and format. Exact fit data is Unknown (Verify).
Inspect: Look for worn jaws, damaged guides, or missing internal parts.
Verify: Test with a known good marking stick from the same inventory lot if available.
2) Advancement feels stiff or inconsistent
Check: Make sure the unit is not loaded with broken fragments or compacted dust.
Inspect: Examine sliding interfaces for contamination, bending, or corrosion.
Verify: Clean the holder and repeat the movement test before replacing the unit.
3) Marking quality has declined
Check: Confirm the issue is not in the marking material itself.
Inspect: Review the tip presentation and whether the holder is keeping the stick aligned.
Verify: Compare output against a known good holder under the same operator and surface conditions.
Product and Parts Notes
The only confirmed product detail provided here is the Amazon ASIN reference for the Markal 96270, Silver Steak Markal PRO Holder, Pack of (1): B074WGYF21. No additional specifications, dimensions, or repair kits are verified in the source data available for this draft.
If you are building a replacement-part record, capture the following internally:
- Original part name and ASIN reference
- Observed failure mode
- Date removed from service
- Any matching model or lot data from packaging
- Operator notes on fit, feel, and performance
Do not assume a “similar” holder will work as a direct substitute unless the vendor or your own verified records confirm it.
Support and Ordering Considerations
For buyers, the main risk is ordering on description alone. The product title suggests a specific Markal PRO holder variant, but the available source data does not confirm cross-compatibility with other holder bodies, refill formats, or accessories. Keep that uncertainty in the purchase record and verify against your own approved-use list before standardizing the part.
If the existing holder is failing repeatedly, review the root cause before replacement. Storage, contamination, impact damage, and incorrect loading are common contributors in marking tool service problems. A replacement part will not fix a handling issue.
Safety Notes
- Wear appropriate hand protection when inspecting used marking tools with sharp or worn edges.
- Do not force a jammed mechanism apart unless the tool design and service method are confirmed.
- Keep solvents, compressed air, and cleaning methods compatible with your site procedures.
- Remove the holder from service if cracks, breakage, or loose internal parts are found.
- Use lockout, housekeeping, and tool-control practices where required by site policy.
FAQ
Is this a complete tool or a replacement support part?
The product name indicates a holder product. Exact internal configuration is Unknown (Verify), so confirm whether your application treats it as a complete tool, a replacement component, or a consumable support item.
Can I use it with other Markal products?
Not enough verified data is available here to confirm compatibility. Treat compatibility as Unknown (Verify) unless your internal part records or the seller confirm it.
What should I check before buying a replacement?
Inspect the existing holder for wear, binding, damage, and contamination. Verify the marking material type, the loading method, and any model identifiers from the old unit before placing an order.
What if the new holder still does not work properly?
Verify the marking stick or consumable, the loading method, and the operator technique. If the failure repeats, document the issue and compare the new part against the removed part for fit and function.
Sources Checked
- Amazon product reference provided in the task: Markal 96270, Silver Steak Markal PRO Holder, Pack of (1), ASIN B074WGYF21
- No WSP lookup page provided
- No filler metal finder page provided
- No internal links provided
Note: This draft intentionally avoids unverified specifications, pricing, certifications, and compatibility claims. Use internal records or supplier confirmation to complete any unresolved technical details.
Matched Replacement Option
No products found.
Disclosure: As an Amazon Associate, Weld Support Parts may earn from qualifying purchases.
Markal 96100 Red-Riter Welders Pencil for Torch-Resistant Marks During Metal Layout and Fabrication, Red (Pack of 12) Made in USA: Replacement Part Breakdown
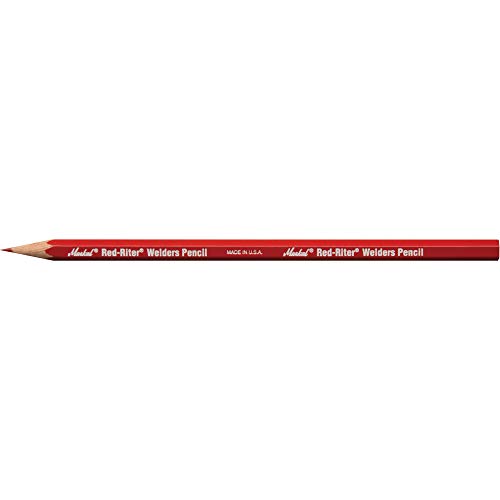
Layout marks are part of the job. If the line is wrong, the cut is wrong, the fit-up is wrong, and the time loss shows up fast. The Markal 96100 Red-Riter Welders Pencil is used for metal layout and fabrication marking where a durable visible line is needed. For buyers and shop teams, the main question is not whether it writes. The question is what it does well, what it does not do, and how to verify it matches the job before you buy in quantity.
Key Takeaways
- Use this type of marking pencil for layout work where standard shop markers may fail or become hard to read.
- Confirm the marking surface, visibility, and cleanup method before using it on production parts.
- Do not assume torch resistance or heat survival on every alloy, coating, or process without testing.
- Pack quantity, packaging, and origin are provided by the listing; technical fit still needs shop verification.
What this product is for
The Markal 96100 Red-Riter is a welders pencil used for layout and fabrication marking. In a shop setting, that usually means part identification, cut lines, reference marks, and fit-up notes on metal. The red color improves contrast on many surfaces, but the actual readability depends on the base material, mill scale, finish, lighting, and whether the part is oily or dusty.
For maintenance buyers, this is a consumable marking tool, not a repair part. The listing is for a pack of 12. Beyond that, technical details such as core composition, marking temperature limit, or exact surface compatibility are Unknown (Verify) from the provided source set.
Practical check, inspect, verify
Before stocking or issuing this pencil to the shop, run a basic verification process.
- Check the surface: Identify the most common materials in your workflow: carbon steel, stainless, coated plate, tube, or cast parts.
- Inspect visibility: Test the red mark under shop lighting and on the actual base material, not just on clean test coupons.
- Verify transfer: Make one layout mark, handle the part normally, and confirm the line remains readable through cutting, grinding, and fit-up handling.
- Check cleanup: Confirm whether the mark must be removed before welding, painting, inspection, or coating.
- Verify process fit: If the part will be exposed to heat, preheat, or torch work, test on scrap first. Do not assume the mark will survive unchanged.
Troubleshooting support
If the mark does not perform as expected, isolate the failure point.
- Mark is too faint: Inspect the surface for oil, rust, mill scale, or heavy oxide. Clean the area and retest.
- Mark wipes off too easily: Verify whether the part is handled with gloves, wiped with solvent, or exposed to abrasion before use.
- Mark burns away during heat work: Check the actual process temperature at the mark location. Torch resistance claims should be verified in your own application.
- Mark interferes with downstream work: Confirm whether your procedure requires removal before welding or coating.
For a related consumables reference, see 17-Piece TIG Welding Torch Kit for WP-17/18/26: Complete Consumables Breakdown and How to Identify and Replace Compatible TIG Torch Consumables for Optimal Welding Performance. Those guides cover the same kind of shop discipline: identify the job, verify the fit, and do not assume compatibility.
Product and parts note
This item is a marking tool, not a machine component. There are no replacement parts listed in the provided sources. If your team treats marking pencils as controlled consumables, confirm ordering units, storage method, and issue process internally. Product details such as exact lead construction, temperature performance, or certification status are Unknown (Verify) from the available source set.
The allowed Amazon registry reference for this product is ASIN B005YT1Z7O. The approved product shortcode is
Last update on 2026-07-14 / Affiliate links / Images from Amazon Product Advertising API
 Markal 96100 Red-Riter Welders Pencil for Torch-Resistant Marks During Metal Layout and Fabrication, Red (Pack of 12) Made in USA
WSP lookup section
No WSP lookup page was provided for this topic. Because of that, there is no source lookup URL to cite or cross-check in this draft.
Safety notes
- Do not use any marking tool on a part without understanding whether the mark must be removed before welding, coating, or final inspection.
- Keep marking tools away from open flame, hot slag, and direct torch exposure unless you have verified performance in your own process.
- Store consumables dry and clean to reduce contamination of marked parts.
- If the mark is applied to a part that will go into a controlled process, verify the mark material will not create contamination or quality issues.
FAQ
Is the Markal 96100 Red-Riter suitable for all metal surfaces?
No. Surface performance depends on the material, finish, contamination, and lighting. Test on the actual substrate before shop-wide use.
Does it have verified torch-resistant performance?
The product is described as torch-resistant in the listing title, but the exact limit and application boundary are Unknown (Verify) from the provided sources. Validate it in your process before relying on the claim.
Is this a replacement part or a consumable?
It is a consumable marking tool, not a machine replacement part. No spare components were provided in the source set.
Can it be used for fit-up and layout on fabricated assemblies?
Yes, that is the intended use case. Still verify line visibility, durability, and cleanup requirements on your specific assembly and workflow.
Sources Checked
- Provided Amazon registry reference for ASIN B005YT1Z7O
- Allowed internal link: 17-Piece TIG Welding Torch Kit for WP-17/18/26: Complete Consumables Breakdown
- Allowed internal link: How to Identify and Replace Compatible TIG Torch Consumables for Optimal Welding Performance
Bottom line: the Markal 96100 Red-Riter is a layout consumable for welding and fabrication work. Verify its visibility, cleanup behavior, and heat exposure performance in your own shop before standardizing it across jobs.
Disclosure: As an Amazon Associate, Weld Support Parts may earn from qualifying purchases.
Related Weld Support Guides
Soapstone vs Welders Pencil for Layout
Choosing between soapstone vs welders pencil comes down to the job, the base material, and how much the mark has to survive heat, handling, or cleaning before weld-out. Both tools are common in fabrication shops, maintenance work, and field fit-up. Neither is universal. The better choice depends on visibility, surface condition, and how the mark will be used during layout, cutting, or weld prep.
Key Takeaways
- Soapstone is the more common choice for rough layout on steel and other hot work areas.
- Welders pencils can be better where a smaller, more controlled line is needed.
- Heat resistance, mark visibility, and surface cleanliness matter more than tool preference.
- Do not assume a marking tool is suitable for every metal or finish. Verify on scrap first.
- For uncertain compatibility with your process, use Weld Support Parts lookup to check parts and accessory notes.
Soapstone: When it makes sense
Soapstone is widely used for weld layout because it leaves a visible mark on steel and can be applied quickly across plate, pipe, and structural members. It is useful for fit-up marks, cut lines, reference points, and general shop layout. In many shops, it is preferred for its ease of use and clear contrast on dark or scaled material.
For practical use, check the surface first. Heavy mill scale, rust, paint, oil, or slag can reduce line quality. If the mark has to stay visible through handling or preheat, inspect how the mark behaves on your actual base metal. Do not assume a line will survive grinding, brushing, or heating. Verify on scrap from the same job.
Welders pencil: When it makes sense
A welders pencil is typically used for more controlled layout work where a finer line is useful. That can help on tight fit-ups, small parts, and detailed marks where a broad soapstone line may be too heavy. In some applications, a pencil-style marker gives better point control and less material spread on the surface.
The downside is that fine marks can be harder to see on rough, dark, or dirty surfaces. If the part is scaled or the mark must be read from a distance, the line may be too light. Inspect legibility under actual shop lighting, not just at the bench. If the mark will be exposed to heat, verify how quickly it fades or changes.
Compare the two by job condition
Use soapstone when: you need quick layout on steel, a visible line on larger parts, or broad marks for cutting and fit-up.
Use a welders pencil when: you need a finer line, more precise placement, or a smaller marking footprint.
Neither is ideal when: the surface is oily, wet, heavily scaled, or finished in a way that requires a special marking method. In that case, check the process requirements and verify before marking production parts.
Troubleshooting and support: check, inspect, verify
If your layout marks are failing, work through the issue in a simple sequence.
- Check the surface. Is the metal clean enough for the mark to adhere visually? Remove oil, water, loose scale, and dust.
- Inspect the line quality. Is the line too wide, too light, or smearing under handling?
- Verify visibility under real conditions. Look at the mark under the same lighting and viewing angle used in the shop or field.
- Check heat exposure. If the mark disappears during preheat or tack welding, test a different tool on scrap.
- Inspect the tool itself. Broken points, contamination, or worn edges can reduce line quality.
- Verify with a trial mark. Before starting a production run, test the marking method on the actual material and finish.
If you need parts, accessories, or help finding the right item family, use the Weld Support Parts lookup. It is the right place to verify notes before you order or apply a tool to the job.
WSP lookup section
Weld Support Parts provides a lookup entry point for welding parts, accessories, and verified compatibility notes. For layout tools and related support items, start here: Find welding parts faster. Use the site to confirm whether the item or support part matches your machine, process, or application. Do not rely on assumption when the job depends on a specific marking method or accessory fit.
Practical shop guidance
If the work is structural steel, general fabrication, or repair welding, soapstone is often the default because it is simple and visible. If the work is detail-oriented, repetitive, or requires tighter line control, a welders pencil may be the better fit. Many shops keep both on hand because different jobs need different line styles.
Keep in mind that layout tools are only part of the control plan. A clear mark is not enough if the job traveler, drawing, or fit-up sequence is unclear. Verify dimensions, orientation, and reference edges before you mark. Once the line is on the part, re-check the part against the print or work order before cutting or welding.
Safety notes
- Do not mark on hot metal unless the tool and process are intended for that condition. Verify first.
- Keep marks away from critical surfaces if the process requires a clean finish or special coating prep.
- Use ventilation and standard shop PPE during layout, grinding, or cleaning.
- Do not assume any marking material is acceptable for every welding procedure or inspection standard. Check the job requirements.
FAQ
Is soapstone better than a welders pencil?
Not always. Soapstone is usually better for broad, visible layout on steel. A welders pencil is better when you need a finer line. Choose based on the job.
Will soapstone hold up to welding heat?
It can survive some heat exposure, but performance varies by surface condition and process. Verify on scrap under real job conditions before relying on it.
Can I use a welders pencil on dirty steel?
It may work, but line visibility can be poor on scale, rust, oil, or paint. Clean the surface or test a different marking method.
Which one is better for precision layout?
A welders pencil often gives better point control for tighter marks. Soapstone can still work for precision if the line width is acceptable and the surface is suitable.
Sources Checked
- Weld Support Parts homepage and lookup entry point: https://www.weldsupportparts.com/index.html
Bottom line: soapstone vs welders pencil is not a contest with one winner. Use soapstone for fast, visible shop layout. Use a welders pencil for tighter control. Check the material, inspect the mark, and verify performance before the job moves forward.
VEVOR Welding Cart Review: 2-Drawer Welder Cart Setup, Fitment, and Safety Checks
The VEVOR 2-drawer welding cart is a buyer-intent shop upgrade for welders who are tired of storing a MIG welder, TIG machine, plasma cutter, leads, clamps, gloves, tips, nozzles, flap discs, and shielding gas gear in separate piles. ASIN B0DQY2MFZK is listed as a VEVOR welding cart with two drawers, a lockable cabinet, tank storage safety chains, swivel front casters, rear wheels, and a listed 350 lb static weight capacity.
This is not a torch consumable or a replacement gun, so fitment is less about thread size and more about whether your machine footprint, cylinder setup, cords, and consumable storage workflow actually match the cart. A good welding cart reduces setup time, keeps spare parts close, and helps prevent the classic problem of replacing the wrong consumable because your tips, nozzles, liners, and PPE are scattered across the shop.
Key Takeaways
- Best use: garage, maintenance, farm, small fabrication, and mobile shop organization for MIG, TIG, plasma, and multi-process setups.
- Verified ASIN: B0DQY2MFZK, VEVOR welding cart, 2 drawers, lockable cabinet, 17.7 in D x 13.6 in W x 36.6 in H listed product dimensions.
- Main buying reason: organize the welder, PPE, ground clamp, torch lead, contact tips, nozzles, electrodes, flap discs, and small spare parts in one movable station.
- Fitment check: confirm welder footprint, cylinder diameter, cart height, lead routing, door swing, and total loaded weight before ordering.
- Safety check: compressed gas cylinders still need to be secured upright and handled according to OSHA, shop, and manufacturer requirements.
Problem / Context: When a Welding Cart Becomes a Real Upgrade
A welding cart usually becomes worth buying when the welder is no longer the only item you need to move. Once you add shielding gas, a ground clamp, MIG gun, TIG torch, plasma torch, regulator, flowmeter, gloves, helmet, grinder, flap discs, contact tips, nozzles, diffuser spares, wire brush, anti-spatter, tungsten, filler rod, and consumable packs, the setup gets messy fast.
That clutter creates real troubleshooting problems. A missing contact tip can turn into wasted time. A scratched helmet lens can make the puddle hard to see. A nozzle packed with spatter can be ignored because the spare nozzles are across the shop. A welding cart is not just storage; it is a workflow tool that keeps replacement parts close enough to actually use.
For a shop-built option and layout ideas, compare this cart against the Weld Support Parts guide to DIY welding cart organization.
Root Causes This Cart Helps Solve
- Consumables are not stored near the welder. Contact tips, nozzles, tungsten, electrodes, and lenses are easy to lose when they are not kept in one station.
- Cords and leads drag on the floor. Loose leads get stepped on, kinked, rolled over, or contaminated with grinding dust and spatter.
- Small replacement parts get mixed together. MIG tips from different gun families should not be dumped into one drawer without labels.
- Gas bottle handling is treated casually. A cart with chains helps, but the cylinder still needs correct upright securing and safe handling.
- Troubleshooting takes too long. If your spare tips, nozzles, lenses, gloves, and drive-roll tools are organized, you are more likely to fix the actual failure instead of tuning around it.
Solution: Use the Cart as a Welding Station, Not Just a Shelf
The best way to use this VEVOR cart is to build a repeatable welding station. Put the machine on the open shelf, keep high-use consumables in the top drawer, keep tools and PPE in the second drawer or cabinet, and use the lower lockable space for items that should not wander around the shop.
Do not overload the cart just because the listing shows a high static weight rating. Static weight is not the same as rolling over rough concrete, cords, thresholds, weld spatter, grinding dust, or uneven shop floors. The real-world check is loaded stability, cylinder security, machine footprint, caster tracking, and whether the cart remains controllable when turning.
Product Recommendation
Best overall pick for this post: VEVOR Welding Cart, 2 Drawers Welder Cart Heavy Duty with Anti-Theft Lockable Cabinet, Tank Storage Safety Chains, and 360-degree swivel wheels. This is the verified ASIN supplied for this build.

VEVOR Welding Cart, 2 Drawers Welder Cart Heavy Duty with Anti-Theft Lockable Cabinet, 350LBS Static Weight Capacity, 360° Swivel Wheels, Tank Storage Safety Chains for MIG TIG Welder, Plasma Cutter
- Strong Weight Capacity: Our welding cart with drawers supports up to 350 lbs of static weight and 300 lbs of dynamic weight with ease. Effortless handling various heavy loads, it’s perfect for storing and transporting MIG, TIG welding machine, plasma cutter and more welding equipment, meeting the needs of demanding professional tasks.
- Spacious Storage Space: Our MIG welder cart is equipped with a spacious open-top shelf, 2 drawers, an anti-theft lockable cabinet, and 4 multi-functional brackets, providing ample and flexible storage space. It effortlessly accommodates various welding machine and tools, enhancing your work efficiency and maintaining a tidy and efficient workspace.
- Easy to Move: Two 2.9-inch (7.3cm) front swivel casters support 360-degree flexible rotation, and two 7-inch (17.8cm) large rear casters ensure the stability of transportation especially with heavy loads. High-quality PVC wheels absorb shock, provide silent operation without floor scratches. Anti-slip handle makes pushing and pulling labor-saving.
- Secure Gas Cylinder Placement: Our plasma cutter welding cart features 2 gas cylinder slots and 2 safety chains, preventing cylinder slippage and ensuring secure placement. Perfectly suitable for oxygen cylinders, acetylene cylinders, nitrogen cylinders, and more. Keep your gas cylinders remain stable and safe during transport and welding works.
- Durable Construction: This heavy-duty rolling welding cart is constructed with 1.0mm thickened steel plate that offers exceptional strength and withstands heavy-duty use, resistant to oxidation and deformation. Upper Tray Size: 13.6 x 17.7 in, Drawer Size: 15.6 x 9.8 x 5.9 in, Lockable Cabinet Size: 17.3 x 14.0 x 11.8 in, Whole Cart Size: 18.3 x 36.2 x 36.4 in.
Last update on 2026-07-14 / Affiliate links / Images from Amazon Product Advertising API
Comparison Table
| Buying angle | VEVOR fit | What to verify before buying |
|---|---|---|
| Budget option | Good fit if you want a ready-made cart instead of fabricating one from scratch. | Confirm current Amazon price, shipping, and return policy. |
| Best overall use | Strong fit for organizing a welder, PPE, consumables, small tools, and a shielding gas setup. | Measure welder footprint against the listed top shelf size and total cart dimensions. |
| Heavy-duty option | Listed with 350 lb static capacity and 300 lb dynamic capacity in available product data. | Do not treat static capacity as jobsite abuse capacity. Check wheel quality and floor conditions. |
| Upgrade path | Add labeled bins for contact tips, nozzles, lenses, flap discs, tungsten, and small replacement parts. | Keep different gun families separated to avoid installing the wrong consumable. |
| Related accessory | Pairs well with spare contact tips, nozzle gel, helmet cover lenses, gloves, and flap discs. | Verify every consumable by gun, torch, helmet, and process before reordering. |
| Preventative item | Use the cart to keep spare PPE and front-end MIG consumables within reach. | Recommended spare quantity: keep at least 10 contact tips per active MIG wire size and 2–4 spare nozzles per active gun family. |
What Wears Out First Around a Welding Cart Setup
The cart itself is usually not the first thing that wears out. The first failures usually happen to the parts stored on it or dragged around it: contact tips, nozzles, diffuser threads, torch leads, work clamp cables, helmet cover lenses, grinder discs, gloves, and small plastic bins.
- Contact tips: Replace when the bore is oval, spatter-packed, tight, blue, pitted, or causing burnback.
- MIG nozzles: Clean or replace when spatter blocks gas coverage or the nozzle no longer seats correctly.
- Diffusers: Inspect when you see porosity, repeated burnback, or unstable arc starts.
- Helmet lenses: Replace when the view is hazy, scratched, or forcing you to lift the hood too often.
- Gloves: Replace when heat protection, seams, or dexterity are compromised.
- Cables and leads: Inspect for cuts, crushed areas, tight kinks, hot spots, and poor connections.
Visual Wear Indicators
- Cart leans, rocks, or twists when loaded.
- Wheels bind, chatter, or refuse to track straight under load.
- Cylinder chains do not hold the bottle firmly upright.
- Drawer slides bind after grinding dust or spatter exposure.
- Lead hooks or storage brackets bend under cable weight.
- Consumable drawers become mixed and unlabeled.
- Machine overhangs the shelf or blocks airflow.
Common Misdiagnosis
A welding cart will not fix poor welding settings, a bad liner, wrong contact tip size, dirty base metal, poor gas coverage, or an undersized machine. It fixes organization and workflow. That matters because better organization makes the right troubleshooting step easier.
For example, repeated MIG burnback is usually a feed-path or consumable problem, not a cart problem. Keep spare tips on the cart, then use the WSP MIG contact tip burnback troubleshooting guide to confirm whether the tip, liner, drive rolls, spool drag, or settings are the real cause.
If Ignored
- Consumables get reused too long because replacements are hard to find.
- Wrong contact tips get installed because different tip families are mixed together.
- Gas cylinders may be moved or stored without enough attention to upright securing.
- Leads get kinked, damaged, contaminated, or pinched under wheels.
- Welding defects take longer to diagnose because the shop has no organized replacement station.
- PPE gets treated as optional because gloves, lenses, and glasses are not stored near the work area.
Recommended Shop Setup
- Top shelf: Welder, plasma cutter, or compact multi-process unit with enough space for ventilation and cable exit.
- Top drawer: High-use consumables: contact tips, nozzles, tungsten, collets, electrodes, flap discs, anti-spatter, and wire brushes.
- Second drawer: PPE spares: cover lenses, safety glasses, ear plugs, marker, soapstone, and glove backups.
- Lockable cabinet: Higher-value tools, spare regulator accessories, specialty consumables, and labeled small-parts boxes.
- Side hooks/brackets: Ground clamp, MIG gun lead, TIG torch, work lead, and extension leads routed without tight kinks.
- Cylinder area: Bottle secured upright with both chains engaged, valve protected when appropriate, and hoses routed away from sparks and hot metal.
Recommended Spare Quantity
| Item | Minimum spare quantity | Why it belongs on the cart |
|---|---|---|
| MIG contact tips | 10 per active wire size | Burnback and tip wear stop work immediately. |
| MIG nozzles | 2–4 per active gun family | Spatter buildup can cause poor gas coverage and porosity. |
| MIG diffusers | 1–2 per active gun family | Heat damage and blocked gas ports can mimic setting problems. |
| Helmet cover lenses | 5–10 | A clear view improves puddle control and reduces bad starts. |
| Flap discs | 5–10 mixed grits | Prep and cleanup are part of the welding workflow. |
| Gloves | 1 backup pair | Damaged gloves lead to unsafe shortcuts. |
| Tungsten or electrodes | One labeled pack per active size | Prevents process changes from turning into shop delays. |
Compatible Consumables To Check
A cart can hold consumables for several welding processes, but the cart does not make those consumables interchangeable. Label each bin by machine, gun, torch, wire size, and process.
- MIG contact tips: verify gun series, thread, tip length, and wire diameter.
- MIG nozzles: verify nozzle style, bore, slip-on vs threaded fit, and diffuser compatibility.
- MIG diffusers: verify gun family and front-end consumable system.
- TIG cups and gas lenses: verify torch series, tungsten diameter, collet, and collet body style.
- Plasma electrodes and nozzles: verify torch model, amperage, shield, swirl ring, and cut mode.
- Helmet lenses: verify helmet model, outer cover lens size, inner lens size, and ADF requirements.
Related Parts Breakdown
No confirmed WSP parts breakdown was found for the VEVOR welding cart itself. For the consumables that usually get stored on a welding cart, use the exact gun or torch breakdown before ordering replacement parts.
- For Miller MIG consumables, check the Miller M-25 gun parts breakdown.
- For Lincoln MIG consumables, check the Lincoln Magnum 250L gun parts breakdown.
- For ESAB/Tweco-style front-end checks, compare the Tweco Fusion 180 gun parts breakdown or the Tweco Fusion 250 gun parts breakdown.
- For general consumable lookup paths, start with MIG accessories and consumable support.
Replacement Gun Or Torch Options
If you are buying this cart because your current welding station is overloaded, inspect the gun and torch before assuming storage is the only problem. A new cart is a good time to check gun cable kinks, liner drag, trigger condition, nozzle seat, diffuser threads, work clamp condition, and torch lead routing.
Use the cart drawers to separate replacement gun parts from general shop hardware. Do not mix Miller M-Series, Lincoln Magnum, Tweco, Bernard, Tregaskiss, Hobart, Binzel-style, and import consumables unless each compartment is clearly labeled.
Related Failures
- MIG contact tip burnback from worn tips, liner drag, or feed-path restriction.
- MIG porosity from poor gas coverage, dirty material, leaks, wind, or blocked nozzle/diffuser areas.
- MIG diffuser clogging from spatter-blocked gas ports and overheating.
- Welding helmet visibility issues from scratched lenses, wrong shade setup, or poor ADF selection.
FAQ
Is the VEVOR B0DQY2MFZK welding cart a good buy?
It is a good candidate if the listed dimensions, shelf size, wheel layout, cylinder area, and weight capacity match your welding setup. It is most useful for organizing a compact MIG, TIG, plasma, or multi-process setup with related consumables and PPE.
Will this cart fit every welder?
No. Verify the welder footprint, machine weight, ventilation clearance, lead exit direction, and total loaded weight. Do not assume compatibility from the word “welding cart” alone.
Can I store a gas cylinder on this cart?
The product listing describes tank storage safety chains, but you still need to secure compressed gas cylinders upright and follow OSHA, manufacturer, and shop safety procedures. Confirm cylinder size, chain height, bottle stability, and valve protection before moving the cart.
What should I keep in the drawers?
Use the drawers for high-repeat consumables and small parts: contact tips, nozzles, diffusers, tungsten, collets, helmet cover lenses, flap discs, wire brushes, soapstone, gloves, and spare PPE. Label by gun, torch, wire size, and process.
Does a welding cart prevent burnback or porosity?
Not directly. It prevents disorganization. Burnback and porosity still need proper troubleshooting, but a well-stocked cart keeps the replacement contact tips, nozzles, diffusers, and PPE close enough to fix the issue quickly.
Should I build a welding cart or buy this one?
Build one if you need a custom footprint, oversized cylinder area, heavy jobsite wheels, or a layout for a very specific machine. Buy a ready-made cart if the listed dimensions match your equipment and you want faster shop organization.
Safety Notes
- Disconnect input power before servicing a welder, feeder, torch, gun, or plasma cutter.
- Do not roll a loaded cart over cables, hoses, rough thresholds, slag, or unstable floor surfaces.
- Keep cylinders secured upright with suitable chains, straps, or steadying devices.
- Close cylinder valves when work is finished, when cylinders are empty, or when cylinders are moved.
- Keep cylinders away from hot metal, sparks, flame, and areas where they can become part of an electrical circuit.
- Do not overload drawers, shelves, brackets, or hooks beyond what the cart can safely handle.
- Wear proper welding PPE, including helmet, safety glasses, gloves, and protective clothing appropriate for the process.
Sources Checked
- Amazon product listing for ASIN B0DQY2MFZK: VEVOR Welding Cart, 2 Drawers Welder Cart Heavy Duty with Anti-Theft Lockable Cabinet.
- Additional indexed product data for VEVOR WT-178 / B0DQY2MFZK to cross-check listed dimensions, weight, and capacity claims.
- OSHA 1926.350 gas welding and cutting requirements for compressed gas cylinder handling and upright securing.
- OSHA interpretation on compressed gas cylinders on portable carts.
- Weld Support Parts blog: DIY welding cart organization, MIG burnback, MIG porosity, MIG diffuser clogging, and helmet buying guidance.
- Weld Support Parts breakdown pages for Miller M-25, Lincoln Magnum 250L, Tweco Fusion 180, Tweco Fusion 250, and MIG accessories.
Welding Cable Connector Compatibility Guide (DINSE, Tweco, Camlock & Stud Types)
Welding cable connectors are one of the most commonly mismatched components in welding setups. Connector size, amperage rating, cable gauge, polarity configuration, and machine-side receptacle type all affect compatibility. Using the wrong connector can cause overheating, intermittent arc starts, voltage drop, damaged receptacles, or unsafe cable heating.
This guide breaks down common welding cable connector types, fitment verification steps, compatibility concerns, inspection procedures, and common wrong-part mistakes before ordering replacement connectors or cable assemblies.
Key Takeaways
- DINSE-style connectors are common on modern TIG, Stick, and multiprocess welders.
- Connector size must match both cable gauge and machine receptacle size.
- Tweco, Camlock, Stud, and DINSE connectors are not universally interchangeable.
- Overheated connectors usually indicate loose crimps, undersized cable, or worn contact surfaces.
- Always verify connector gender, amperage class, and cable size before ordering.
- Machine manufacturers may use proprietary connector configurations.
- Loose or oxidized connections increase resistance and arc instability.
What Welding Cable Connectors Do
Welding cable connectors provide a removable high-current electrical connection between the welding machine and the work lead, electrode holder, TIG torch, spool gun, or extension lead.
A properly fitted connector minimizes resistance while maintaining mechanical retention under vibration, heat, and repeated cable movement.
Poor connector fitment commonly causes:
- Hot cable ends
- Arc instability
- Hard starts
- Voltage loss
- Burned receptacles
- Intermittent output
- Melted insulation near the connector
Common Welding Cable Connector Types
| Connector Type | Common Applications | Typical Amp Range | Common Cable Sizes | Compatibility Notes |
|---|---|---|---|---|
| DINSE 10-25 | Light TIG, inverter Stick welders | Up to ~200A | #6 to #2 AWG | Small-body DINSE connector; verify receptacle diameter |
| DINSE 35-50 | Multiprocess, MIG, TIG, Stick | 200A–400A | #2 to 2/0 AWG | Common on mid-size industrial welders |
| DINSE 50-70 | Heavy industrial welding | 400A+ | 1/0 to 4/0 AWG | Larger connector body and pin diameter |
| Tweco-style | Older MIG systems | Varies | Varies | Often machine-specific |
| Camlock | Engine drives, field welding | High amperage | 1/0 to 4/0 AWG | Quick-connect field cable systems |
| Stud/Lug | Permanent machine installs | Varies | Varies | Requires proper torque and insulation protection |
Compatibility varies by manufacturer. Connector naming is not always standardized across imported welders and aftermarket cable kits.
Compatibility Notes
Before ordering a replacement cable connector, verify:
- Machine model
- Connector family (DINSE, Camlock, Tweco, Stud)
- Connector size class
- Male vs female connector orientation
- Cable gauge
- Maximum amperage
- Torch or electrode holder compatibility
- Polarity setup
- Panel receptacle diameter
- Set-screw vs crimp termination style
Unknown (Verify) if your machine uses proprietary connector dimensions or adapter systems.
Common Symptoms of Connector Problems
| Symptom | Likely Cause | Inspection Check | Recommended Fix |
|---|---|---|---|
| Connector gets hot | Loose connection or undersized cable | Inspect crimps and contact surfaces | Replace connector or upgrade cable size |
| Arc cuts out intermittently | Worn connector fit | Check connector retention and rotation | Replace worn mating pair |
| Burn marks near receptacle | High resistance connection | Inspect oxidation and spring tension | Clean or replace connector |
| Machine output unstable | Incorrect connector sizing | Verify DINSE size class | Install proper connector size |
| Cable insulation melting | Excessive resistance heat | Check lug termination and amperage load | Replace damaged cable assembly |
What Usually Wears Out First
- Connector spring tension surfaces
- Copper contact areas
- Set-screw retention points
- Cable crimp joints
- Insulation near the connector neck
- Twist-lock retention tabs
Heat cycling and repeated twisting accelerate wear on DINSE-style connectors.
Visual Wear Indicators
- Discolored copper
- Melted insulation
- Loose fit in machine receptacle
- Black carbon tracking
- Pitting on contact surfaces
- Cable jacket cracking near strain relief
- Connector wobble during insertion
Test & Inspection Steps
- Disconnect machine input power.
- Inspect connector body for heat damage or cracking.
- Verify cable gauge matches connector rating.
- Check for loose set screws or failed crimps.
- Inspect receptacle spring tension.
- Look for oxidation or contamination on mating surfaces.
- Perform low-load test weld and monitor connector heat buildup.
- Replace both mating connectors if excessive wear exists.
Field Fix vs Proper Fix
| Issue | Temporary Field Fix | Proper Repair |
|---|---|---|
| Loose connector fit | Clean contacts and tighten hardware | Replace worn connector pair |
| Overheating lug | Reduce amperage temporarily | Install properly crimped connector |
| Oxidized contact surfaces | Light cleaning | Replace damaged connector surfaces |
| Damaged cable jacket | Temporary insulation wrap | Replace cable section |
Common Wrong-Part Mistakes
- Ordering DINSE 10-25 when machine uses 35-50
- Matching connector body shape but not pin diameter
- Using undersized connectors on high-amperage leads
- Assuming imported welders use standard DINSE sizing
- Installing aluminum lugs in high-cycle copper systems
- Using set-screw connectors on fine-strand cable without proper retention
- Ignoring cable gauge compatibility
Replacement Notes
When replacing welding cable connectors:
- Replace overheated connectors immediately
- Inspect both mating halves
- Verify cable flexibility and strand condition
- Use proper crimp tooling where required
- Maintain clean copper contact surfaces
- Match amperage class to machine duty cycle
Related Failure Paths
- Arc instability from voltage drop
- Burned machine receptacles
- Electrode holder overheating
- Work clamp resistance issues
- TIG torch hard-start problems
- Premature cable insulation failure
Safety Notes
- Never handle energized connectors.
- Replace connectors showing thermal damage.
- Improper cable repairs can create fire hazards.
- Loose connections increase resistance heat rapidly under load.
- Always disconnect machine power before inspection.
- Use properly rated PPE when testing live welding circuits.
Internal Links
- Welding Cable & Connector Kits (25–50ft Heavy-Duty)
- Welding Cable Guide: Lead Length & Sizes Explained
- Welding Electrode Holder: Choose the Best for Stick Welding
- STARTECWELD TIG 17F Series TIG Torch Support
- Weldtec WT-17F Torch Kit Compatibility Notes
FAQ
Are all DINSE connectors interchangeable?
No. DINSE connectors vary by size class and pin diameter. Verify connector series before ordering.
Can I use a larger connector on smaller cable?
Possibly, but cable retention and current transfer may suffer if the connector is not sized correctly.
Why does my connector get hot during welding?
Usually due to resistance caused by loose crimps, oxidation, undersized cable, or worn contact surfaces.
Should both connector halves be replaced together?
Recommended when wear or overheating exists on both mating surfaces.
Do imported inverter welders always use standard DINSE sizes?
Unknown (Verify). Some imported machines use non-standard receptacle dimensions.
Next Step
Before ordering replacement welding cable connectors, verify machine receptacle size, cable gauge, amperage class, and connector family. Connector mismatch is one of the most common causes of overheating and intermittent welding performance problems.
Sources Checked
- Manufacturer welding cable documentation
- DINSE connector sizing references
- Welding machine service manuals
- Weld Support Parts technical articles
- AWS welding cable handling guidance
- OSHA electrical safety guidance
Miller Bobcat 265 Accessories Guide: What Fits, What to Buy, and What to Verify
The Miller Bobcat 265 is a truck-friendly engine-driven welder/generator built for maintenance, repair, farm, ranch, fabrication, structural work, auxiliary power, and field welding. This guide organizes the most useful Bobcat 265 accessories by job-site need: screen protection, remote start/stop, battery charging, running gear, covers, spool guns, weld leads, and power adapters.
The goal is simple: help Bobcat 265 owners identify compatible Miller part numbers, decide which accessories matter first, and avoid buying the wrong add-on for the wrong machine configuration.

Last update on 2026-07-14 / Affiliate links / Images from Amazon Product Advertising API
Key Takeaways
- The Bobcat 265 supports Stick, DC TIG, MIG, flux-cored, air carbon arc gouging with 3/16-inch carbons, and plasma cutting when paired with compatible optional equipment.
- The Bobcat 265 output range is 20–265 amps for DC Stick/TIG and 14–30 volts for MIG/flux-cored welding.
- Auxiliary power is rated at 11,000 watts peak and 9,500 watts continuous.
- Several accessories are model- or option-specific, especially battery charge/jump cables, LP tank mounting, gas cylinder mounting, ArcReach accessories, and remote start/stop fobs.
- For most owners, the highest-priority accessories are a protective cover, screen protector, full KVA plug or adapter cord, weld leads, and the correct running gear or protective cage.
- Amazon ASIN verification is required before adding AAWP boxes for accessories beyond the supplied main product ASIN.
Bobcat 265 Product Context
The Bobcat 265 is not just a welder. It is also a mobile generator platform, which changes the accessory strategy. A shop machine usually needs consumables and leads. A truck-mounted Bobcat also needs covers, cable management, lifting and mobility gear, power adapters, weather protection, and maintenance spares.
Miller lists the Bobcat 265 as a DC CC/CV engine-driven welder for Stick, TIG, MIG, flux-cored, gouging, and auxiliary power use. The data sheet also identifies a 10-pin receptacle for direct spool gun connection, full auxiliary power at any weld setting, optional ArcReach technology, optional battery charge/crank assist, and optional remote start/stop on Rehlko gas models.
For owners comparing MIG-related add-ons, see our related article on the Millermatic 252 MIG welder. For smaller shop MIG setups, see the Millermatic 211 buying guide. For process-adjacent welding posts, browse the MIG Support archive and the welding equipment archive.
What Wears Out First or Gets Damaged First
On a field welder like the Bobcat 265, the first parts to suffer are usually not internal machine parts. They are the exposed accessories that take jobsite abuse.
- LCD screen area: scratches, glare, dust, rain exposure, impact, and grinding debris.
- Covers: UV wear, tears, mildew, exhaust heat mistakes, and wind damage.
- Weld leads: clamp wear, cracked insulation, loose lugs, heat damage, and cable cuts.
- Remote start/stop fob: loss, impact, water exposure, or pairing issues.
- Battery charge/jump cables: insulation damage, clamp wear, plug damage, and incorrect machine pairing.
- Running gear and tires: punctures, bent handles, caster wear, and overloaded movement across rough ground.
- Power plugs and adapters: heat, loose fit, cracked housings, and wrong NEMA configuration.
Common Misdiagnosis
Many Bobcat accessory problems look like welder problems at first. A hard-to-read display can look like an interface failure when the real issue is sun glare or a scratched screen. A tool that will not run properly can look like generator trouble when the real issue is the wrong plug, wrong adapter, or startup wattage. Poor MIG performance can look like a Bobcat issue when the actual limitation is the wire feeder, spool gun setup, liner, contact tip, shielding gas, or wire selection.
Before assuming the machine is faulty, check the accessory chain: leads, clamps, plugs, cable length, feeder setup, fob pairing, cover fit, and whether the part is intended for the exact Bobcat 265 configuration.
Best Bobcat 265 Accessories by Use Case
| Use Case | Miller Part Number | Accessory | Fit / Compatibility Notes | Amazon ASIN Status |
|---|---|---|---|---|
| LCD protection | 301742 | Screen Protector Kit | Listed for Bobcat 265 and Trailblazer 330 engine-driven welders. | Unknown (Verify) |
| Sun glare and display weather protection | 301714 | Sun Shade | Compatible with all Bobcat 265 and Trailblazer 330 engine-driven welders per Miller data sheet. | Unknown (Verify) |
| Remote start spare or replacement | 286385 | Remote Start/Stop Fob | For Bobcat 265 units equipped with remote start/stop. Verify machine option before buying. | Unknown (Verify) |
| Battery charging / jump assist | 300422 | 25-foot Battery Charge/Jump Cables with Plug | Required separately for Bobcat 265 battery charge/crank assist models. Verify exact machine option. | B004HF2R78 found on non-US Amazon result; US availability Unknown (Verify) |
| Full auxiliary power connection | 119172 | Full KVA Plug | 120/240 V, 50 A NEMA 14-50P plug for full KVA receptacle. | Unknown (Verify) |
| Adapter for 240 V equipment | 300517 | Full KVA Adapter Cord | NEMA 14-50P to NEMA 6-50R. Useful for compatible Millermatic and Spectrum 240 V plug setups. | Unknown (Verify) |
| Gasoline engine maintenance | 284083 | Engine Tune-Up Kit for Rehlko CH730 gas | Includes air, fuel, and oil filters plus two spark plugs. | Unknown (Verify) |
| LP engine maintenance | 252838 | Engine Tune-Up Kit for Rehlko CH730 LP | Includes air, fuel, and oil filters plus two spark plugs. | Unknown (Verify) |
| Vanguard engine maintenance | 293399 | Engine Tune-Up Kit for Vanguard | Includes air, fuel, and oil filters plus two spark plugs. | Unknown (Verify) |
| Rough jobsite movement | 301706 | Off-Road Running Gear with Never Flat Tires | Includes four heavy-duty 15-inch tires and rugged handle. | Unknown (Verify) |
| Protection plus mobility | 301707 | Off-Road Running Gear with Protective Cage and Never Flat Tires | Adds rugged protective cage and cable holders. | Unknown (Verify) |
| Mixed-surface movement | 301708 | Multi-Terrain Running Gear with Never Flat Tires | Includes two 15-inch tires, two 8-inch rubber swivel casters, and heavy-duty handle. | Unknown (Verify) |
| Machine protection | 301709 | Protective Cage with Cable Holders | Can be used with running gear, gas cylinder mounting assembly, or trailer. | Unknown (Verify) |
| Gas shielding cylinder support | 301711 | Gas Cylinder Mounting Assembly | Gas models only. Not for use with LP tank mounting assembly. Not recommended with protective cover. | Unknown (Verify) |
| LP tank support | 301710 | Hose and LP Tank Mounting Assembly | LP model only. Not for use with gas cylinder mounting assembly. Not recommended with protective cover. | Unknown (Verify) |
| No cage / no running gear cover | 301712 | Protective Cover | For use without protective cage or running gear. | |
| Cage or running gear cover | 301713 | Protective Cover | For use with protective cage and/or running gear. | Unknown (Verify) |
| Aluminum MIG expansion | 300497 | Spoolmate 200 Spool Gun | Rated 160 amps at 60% duty cycle with 20-foot cable per data sheet. | Unknown (Verify) |
| Higher-duty spool gun setup | 130831 | Spoolmatic 30A Spool Gun | Rated 200 amps at 100% duty cycle with 30-foot cable per data sheet. | Unknown (Verify) |
| Stick welding lead package | 173851 | 2/0 Stick Cable Set, 50 ft. | 50-foot electrode cable with holder and 50-foot work cable with clamp. 350 A, 100% duty cycle. | Unknown (Verify) |
| Longer stick lead package | 043952 | 2/0 Stick Cable Set, 100/50 ft. | 100-foot electrode cable with holder and 50-foot work cable with clamp. 300 A, 100% duty cycle. | Unknown (Verify) |
Recommended Shop Setup
For a practical Bobcat 265 setup, start with protection and power connection accessories before buying process expansion gear. A screen protector, sun shade, correct protective cover, full KVA plug or adapter, and weld lead set protect the machine and make it usable on more jobs.
- Budget setup: screen protector, correct protective cover, full KVA plug, and a basic stick lead set.
- Best overall setup: screen protector, sun shade, protective cage with cable holders, full KVA adapter cord, and 2/0 weld leads.
- Heavy-duty setup: off-road running gear with protective cage, cable holders, long weld leads, spare fob, and battery charge/jump cables if the machine has that option.
- Aluminum upgrade path: Spoolmate 200 or Spoolmatic 30A, plus correct aluminum wire, shielding gas setup, and spare contact tips.
- Generator-use setup: full KVA plug, full KVA adapter cord, properly rated extension cords, and a weather-protected storage plan.
Recommended Spare Quantity
| Accessory / Spare | Recommended Quantity | Why Keep It |
|---|---|---|
| Screen Protector Kit 301742 | 2–3 | Cheap protection for the LCD display area; replace when scratched or damaged. |
| Remote Start/Stop Fob 286385 | 1 spare | Useful for fleet trucks, shared machines, or jobsites where fobs get lost. |
| Full KVA Plug 119172 | 1 | Useful when building or repairing power connection setups. |
| Full KVA Adapter Cord 300517 | 1 | Helpful when running compatible 240 V welding or cutting equipment from the Bobcat. |
| Battery Charge/Jump Cables 300422 | 1 set | Only for Bobcat units equipped with battery charge/crank assist. |
| Engine Tune-Up Kit | 1 kit per engine type | Match the kit to Rehlko gas, Rehlko LP, or Vanguard. Do not mix engine kits. |
| Protective Cover | 1 correct cover | Choose 301712 or 301713 depending on cage/running gear configuration. |
Accessory Fit Notes That Matter
- Remote start/stop fob 286385 only makes sense for Bobcat machines equipped with remote start/stop.
- ArcReach is optional and is not available on the Battery Charge/Crank Assist model according to the data sheet.
- Battery charge/jump cables 300422 must be ordered separately for battery charge/crank assist use.
- Gas cylinder mounting assembly 301711 is for gas models only and is not for use with the LP tank mounting assembly.
- Hose and LP tank mounting assembly 301710 is for LP models only and is not for use with the gas cylinder mounting assembly.
- Protective cover 301712 is for use without protective cage or running gear.
- Protective cover 301713 is for use with protective cage and/or running gear.
- Spool gun use depends on correct 10-pin connection, wire, gas, and process setup.
If Ignored
Ignoring accessory fit can get expensive. A wrong cover may not fit over running gear or a protective cage. A missing screen protector can leave the LCD display scratched by grinding dust and jobsite debris. A missing full KVA adapter can stop you from using compatible 240 V equipment. A missing battery charge/jump cable set can make the charge/crank assist option unusable when you actually need it.
The biggest risk is assuming every Bobcat 265 accessory fits every Bobcat 265 configuration. The LP model, gas model, ArcReach model, battery charge/crank assist model, and remote start/stop model do not all use the same add-ons.
Product Recommendations
Use the supplied Bobcat 265 ASIN for the main product box. Accessory ASINs should be added only after Amazon listing verification. The part numbers below are manufacturer-verified from the data sheet, but most accessory ASINs still need Amazon confirmation before AAWP shortcodes are inserted.
Last update on 2026-07-14 / Affiliate links / Images from Amazon Product Advertising API
Best First Add-On: Screen Protector Kit 301742
The screen protector is the easiest preventative accessory to justify because the Bobcat 265 uses a digital display for weld process, parameters, fuel level, maintenance, and machine-use information. If the screen is hard to read or scratched, setup and maintenance checks become more frustrating.
Amazon ASIN: Unknown (Verify)
Best Visibility Upgrade: Sun Shade 301714
The sun shade is a practical upgrade for truck beds, outdoor repair work, farm/ranch use, and construction sites where glare makes the display harder to read. It is listed as compatible with all Bobcat 265 and Trailblazer 330 engine-driven welders.
Amazon ASIN: Unknown (Verify)
Best Fleet Spare: Remote Start/Stop Fob 286385
A spare remote start/stop fob makes sense if the machine is shared across a crew or mounted on a truck where the operator is often away from the welder. Verify that the Bobcat 265 has remote start/stop before buying.
Amazon ASIN: Unknown (Verify)
Best Battery Assist Accessory: 25-Foot Battery Charge/Jump Cables 300422
The Bobcat 265 battery charge/crank assist option requires battery charge/jump cables to be ordered separately. This is not a universal Bobcat accessory. Buy it only for the correct battery charge/crank assist configuration.
Amazon ASIN: B004HF2R78 found on non-US Amazon search result. US availability: Unknown (Verify)
Comparison Table: Which Accessory Should You Buy First?
| Priority | Accessory | Best For | Buy Before |
|---|---|---|---|
| 1 | Screen Protector Kit 301742 | Preventing scratches and impact damage to the LCD area. | Cosmetic upgrades. |
| 2 | Protective Cover 301712 or 301713 | Outdoor storage, truck beds, dust, rain, and shop grime. | Spool guns or process expansion. |
| 3 | Full KVA Plug 119172 or Adapter Cord 300517 | Using the Bobcat as a practical generator platform. | Extra specialty accessories. |
| 4 | Weld Lead Set 173851 or 043952 | Stick welding, field repairs, structural work, and farm repair. | Spool gun upgrades if Stick is your main use. |
| 5 | Sun Shade 301714 | Outdoor work where glare affects the display. | Extra fobs unless you manage a crew. |
| 6 | Remote Start/Stop Fob 286385 | Fleet trucks, shared machines, and noise/fuel control. | Only after verifying remote start/stop compatibility. |
| 7 | Spoolmate 200 or Spoolmatic 30A | Aluminum MIG expansion. | Only after confirming your process needs and setup. |
| 8 | Battery Charge/Jump Cables 300422 | Battery charge/crank assist models. | Only if your Bobcat has that option. |
Related Failures
- Poor Stick arc starts caused by worn work clamp, undersized leads, loose lugs, or bad cable connections.
- MIG wire feeding issues caused by wrong spool gun setup, drive roll mismatch, liner drag, or contact tip wear.
- Display visibility problems caused by sun glare, scratches, dust, or missing screen protection.
- Generator output complaints caused by wrong adapter, wrong plug, excessive extension cord length, or tool startup wattage.
- Battery assist complaints caused by missing 300422 jump cables or buying the accessory for the wrong machine configuration.
- Cover fit problems caused by ordering the no-cage cover for a machine with running gear or protective cage.
FAQ
Does the Bobcat 265 include weld leads?
Verify the specific package before buying. The data sheet lists Miller weld lead sets as accessories, including 173851 and 043952.
Does the Bobcat 265 support a spool gun?
Yes, the Bobcat 265 data sheet lists a standard 10-pin receptacle for simple spool gun connection and identifies Spoolmate 200 and Spoolmatic 30A as related accessories. Verify your exact setup, wire, gas, and gun before buying.
Which Bobcat 265 cover do I need?
Use 301712 for a machine without protective cage or running gear. Use 301713 for a machine with protective cage and/or running gear.
Do I need the 300422 battery charge/jump cables?
Only if your Bobcat 265 has the battery charge/crank assist option. The data sheet notes that battery charge/jump cables 300422 must be ordered separately.
Does ArcReach work on every Bobcat 265?
No. ArcReach is an option, and the data sheet notes that ArcReach is not available on the Battery Charge/Crank Assist model.
Can I use the gas cylinder mounting assembly on an LP Bobcat 265?
No. The gas cylinder mounting assembly 301711 is for gas models only. The LP model uses hose and LP tank mounting assembly 301710.
Should I buy Bobcat 265 accessories from Amazon?
Amazon can be useful for verified accessories, but part-number matching matters. Use the Miller part number, confirm machine compatibility, and do not rely on a listing title alone. If an ASIN cannot be verified, treat it as Unknown (Verify).
Safety Notes
- Shut the welder down before installing covers, cages, screen protectors, plugs, adapters, or wiring accessories.
- Do not cover a hot engine-driven welder immediately after operation.
- Use properly rated plugs, cords, and adapters for auxiliary power loads.
- Check tool startup wattage before assuming a generator can start and run the load.
- Keep welding cables away from sharp edges, exhaust heat, moving tires, and pinch points.
- Verify local rules for spark arrestors when operating in grassland, brush, forest-covered land, or regulated areas.
- Use proper PPE for Stick, TIG, MIG, flux-cored, gouging, cutting, grinding, and generator maintenance work.
Sources Checked
- Miller Bobcat 265 English data sheet, ED/4.46, issued January 2026.
- MillerWelds Bobcat 265 LP product and accessories page.
- MillerWelds 301714 sun shade accessory page.
- MillerWelds 301742 screen protector accessory page.
- MillerWelds 286385 remote start/stop fob accessory page.
- Cyberweld accessory pages for 301742, 301714, 286385, 300422, 300497, and 130831.
- Amazon search result for supplied main ASIN B0FV129GTM.
- Amazon non-US search result for Miller 300422, ASIN B004HF2R78.
Welding Cable Connector Compatibility Guide (Dinse, Tweco, Cam-Lok & Stud Types)
Welding cable connectors are one of the most overlooked compatibility points in a welding setup. A mismatched connector can create overheating, voltage drop, intermittent arc starts, loose cable retention, or complete machine incompatibility.
This compatibility guide covers the most common welding cable connector types used on MIG, TIG, Stick, plasma, and work lead setups. It focuses on connector identification, fitment verification, amperage considerations, cable sizing, and common wrong-part mistakes.
Key Takeaways
- Dinse-style connectors are the most common modern welding connector system.
- Connector size must match both cable gauge and machine receptacle size.
- Tweco-style, Cam-Lok, lug, and stud connections are still widely used.
- Overheated connectors usually indicate loose fitment, undersized cable, or oxidation.
- Never assume “universal fit” for welding cable connectors.
- Verify polarity style, connector gender, cable size, and amperage rating before ordering.
What Welding Cable Connectors Do
Welding cable connectors transfer welding current between the machine, torch, electrode holder, work clamp, or extension leads. They also provide quick disconnect capability for portable welders and field setups.
A properly matched connector reduces resistance and heat buildup while maintaining stable arc performance. Poor connections increase resistance, which causes overheating, poor starts, unstable arc behavior, and connector damage.
Common Welding Cable Connector Types
| Connector Type | Common Use | Typical Amperage Range | Verify Before Ordering | Notes |
|---|---|---|---|---|
| Dinse 10-25 | Light TIG/Stick | Up to ~200A | Plug diameter and cable size | Common on inverter welders |
| Dinse 35-50 | MIG/TIG/Stick | 200A–400A | Machine receptacle size | Most common shop connector |
| Dinse 50-70 | Industrial welders | 400A+ | Cable gauge and machine port | Heavy-duty applications |
| Tweco-style | Older MIG/Stick | Varies | Thread style and polarity setup | Still common in fabrication shops |
| Cam-Lok | Engine drives | High amperage | Male/female orientation | Field welding and power distribution |
| Stud/Lug | Transformer welders | Varies | Bolt size and lug dimensions | Often permanent installations |
Compatibility Notes
Connector compatibility depends on several factors:
- Machine connector receptacle size
- Connector family (Dinse, Tweco, Cam-Lok, Stud)
- Cable gauge
- Maximum amperage
- Polarity configuration
- Torch or electrode holder compatibility
- Connector gender/orientation
- OEM machine design
Verify machine connector size before ordering. Some inverter welders use smaller Dinse 10-25 ports while industrial machines commonly use 35-50 or larger connectors.
Some TIG torch kits include 105Z57 or proprietary adapter blocks that may not directly fit every machine. Verify connector configuration before replacing torches or leads.
Common Symptoms of Incorrect Connector Fitment
| Symptom | Likely Cause | Inspection Check | Proper Fix |
|---|---|---|---|
| Connector overheating | Loose fit or oxidation | Inspect contact surfaces | Replace damaged connector |
| Hard arc starts | High resistance connection | Check connector seating | Clean or replace connector |
| Voltage drop | Undersized cable or connector | Verify cable gauge | Upgrade cable/connector size |
| Intermittent arc | Loose locking mechanism | Inspect twist-lock engagement | Replace worn connector |
| Burned connector body | Overloaded amperage | Check duty cycle and amp draw | Install higher-rated connector |
What Usually Wears Out First
- Connector contact surfaces
- Twist-lock retention tabs
- Insulating sleeves
- Cable strain reliefs
- Crimped lug terminations
- Oxidized copper contact points
Heat cycling and repeated disconnects gradually loosen connector tolerances. Once the fit becomes loose, resistance increases rapidly and connector overheating usually follows.
Visual Wear Indicators
- Brown or dark discoloration near contacts
- Melted insulation
- Loose connector engagement
- Visible arcing marks
- Green corrosion on copper
- Cracked insulation boots
- Excessive cable flex near connector
Inspection Steps
- Disconnect power from the welding machine.
- Inspect both male and female connector surfaces.
- Check for looseness in twist-lock engagement.
- Verify cable crimp integrity.
- Inspect insulation for heat damage.
- Check cable gauge against machine amperage.
- Look for oxidation or contamination.
- Confirm connector size matches machine receptacle.
Field Fix vs Proper Fix
| Condition | Temporary Field Fix | Proper Repair |
|---|---|---|
| Loose connector fit | Clean contacts | Replace worn connector |
| Minor oxidation | Light abrasive cleaning | Replace heavily pitted contacts |
| Damaged insulation | Temporary wrap only | Replace connector assembly |
| Heat discoloration | Reduce amperage temporarily | Install correct-rated connector |
| Loose crimp | Unknown (Verify) | Replace/crimp properly |
Common Wrong-Part Mistakes
- Ordering Dinse 10-25 when machine requires 35-50
- Using undersized cable with high-amperage connectors
- Assuming all “Dinse” connectors are identical
- Ignoring connector gender orientation
- Installing aluminum lugs in high-cycle copper applications
- Using worn extension connectors with new leads
- Mixing incompatible aftermarket adapters
What To Verify Before Ordering
- Machine make and model
- Connector family
- Connector size
- Cable gauge
- Maximum amperage
- Duty cycle requirements
- Torch or electrode holder style
- Extension lead compatibility
- Polarity setup
- OEM part number
If unsure, verify connector diameter directly using calipers instead of relying on visual estimation.
Related Failure Paths
- Ground clamp overheating
- Arc instability
- Excessive voltage drop
- MIG wire feed surging
- TIG high-frequency starting issues
- Burned work leads
- Damaged machine receptacles
- Cable insulation failure
Related Support Articles
- Welding Cable & Connector Kits (25–50ft Heavy-Duty)
- Welding Cable Guide: Lead Length & Sizes Explained
- Welding Electrode Holder: Choose the Best for Stick Welding
- STARTECWELD TIG 17F Series: 150 Amp Air-Cooled TIG Torch
- Weldtec WT-17F-12RT TIG Torch Kit
Safety Notes
- Disconnect machine power before servicing connectors.
- Never handle overheated connectors without gloves.
- Loose welding connections can create fire hazards.
- Inspect connectors regularly in high-duty-cycle environments.
- Use cable sizes rated for machine output.
- Follow OSHA and manufacturer electrical safety procedures.
FAQ
Are all Dinse connectors interchangeable?
No. Dinse connectors vary by diameter and amperage class. Verify exact size before ordering.
Can I use a larger connector on a smaller machine?
Unknown (Verify). The machine receptacle must physically match the connector.
Why do my welding cable connectors get hot?
Heat usually indicates loose fitment, corrosion, undersized cable, or excessive amperage load.
How often should welding cable connectors be replaced?
Replacement intervals vary by duty cycle, amperage, environment, and connection frequency.
Can bad connectors affect weld quality?
Yes. High resistance connections contribute to unstable arc behavior and voltage drop.
Next Step
Before replacing welding leads, torches, or work clamps, verify connector compatibility first. Matching connector family, size, cable gauge, and amperage rating prevents overheating, unstable arc performance, and expensive machine-side damage.
Sources Checked
- Manufacturer Dinse connector sizing references
- OEM welding machine manuals
- Weld Support Parts support articles
- AWS welding cable guidance
- Industry cable sizing charts
SALI 6 Pack Wire Cup Brush (4″) for Angle Grinder: What It’s Good For and What to Check
Category: Surface Prep/Cleaning
Cluster: Surface Prep & Cleaning (wire wheels, flap discs, rust/paint removal)
If you do any amount of weld cleanup, mill scale removal, or paint/rust stripping, a knotted wire cup brush is one of the fastest ways to get back to clean metal. The catch is that wire cups can be a bad fit (wrong arbor), run rough, or shed wire if you push them past what they’re built for.
This guide covers what the SALI 6 Pack Wire Cup Brush (4″) is, where it makes sense in a welding workflow, and what to compare before you buy so you don’t end up with a brush that doesn’t fit your grinder or doesn’t match the job.
SALI 6 Pack Wire Cup Brush, 4 Inch Twisted Knotted Cup Brush for Grinders, with 5/8-11 Inch Arbor for Heavy Cleaning Rust, Stripping and Abrasive, for Angle Grinder
- [SAFETY] Equipped with an internal fixing plate to avoid flying wire breakage during use and ensure consistency.
- [High Quality Carbon Steel Wire] Reliable, long life, safe, smooth and easy to use.
- [Excellent Design] Innovative spiral knotting and crimping brush structure, thick knot cup design is perfect for heavy-duty polished surface finishes, crimping design provides maximum flexibility and fatigue resistance.
- [Wide Range of Uses] High speed and easy to use is ideal for removing rust, corrosion and paint. cleaning metal surfaces, also works well to remove rust, paint and corrosion.
- Before proceeding, please wear the necessary protective clothing as well as install the wire cup brush to the correct angle grinder.
Last update on 2026-07-14 / Affiliate links / Images from Amazon Product Advertising API
Performance & use (what it’s for)
A 4-inch twisted/knotted wire cup brush is typically used for:
- Removing light-to-moderate rust and paint from steel
- Cleaning weld areas before rework (especially around spatter and surface contamination)
- Stripping coatings on brackets, frames, and plate before welding
- Fast cleanup on structural shapes where a flap disc would be slower
Where it’s not the right tool: precision blending, finish work, or anything where you need controlled material removal. For that, flap discs or grinding wheels are usually the better choice.
What to compare before you buy
- Arbor/thread size: confirm your grinder spindle matches the brush’s thread (common is 5/8″-11 in the U.S.).
- Brush diameter vs guard clearance: confirm the cup clears your guard and doesn’t contact it under load.
- Wire type and aggressiveness: knotted wire is more aggressive than crimped; choose based on how much material you can safely remove.
- Max RPM rating: match the brush rating to your grinder’s no-load RPM (do not exceed).
- Workpiece risk: wire cups can throw wire and debris—plan PPE and shielding accordingly.
Comparable Amazon picks (optional)
- AUPREX 5 Pack Knotted Wire Cup Brush for Angle Grinder (ASIN B09MJZ91XY): https://www.amazon.com/dp/B09MJZ91XY?tag=weldsupport-20
- DeWalt Accessories DW4910 Knot Cup Brush (ASIN B00004RHAL): https://www.amazon.com/dp/B00004RHAL?tag=weldsupport-20
When a wire cup brush beats a flap disc (and when it doesn’t)
Use a wire cup brush when you need speed and you’re removing surface contamination (rust/paint/scale) more than shaping metal. It’s also useful when you want to avoid gouging edges the way a hard wheel can.
Use a flap disc when you need:
- Controlled blending on weld toes
- Smoother finish before paint
- Predictable material removal on edges and corners
Fitment checklist (quick)
Before you click “buy,” confirm:
- Your grinder spindle thread (commonly 5/8″-11 in the U.S.; verify your model)
- Your guard size and whether it can stay installed during use
- Your grinder’s max RPM
- The surfaces you’ll hit most (flat plate vs corners vs inside angles)
Safety notes (wire wheels are not forgiving)
Wire cup brushes can throw wire and launch debris. Treat them like a cutting/grinding operation:
- Wear safety glasses plus a face shield
- Gloves and long sleeves help with wire “needle” injuries
- Keep bystanders clear and avoid brushing toward your body
- Don’t exceed rated RPM and don’t use a damaged brush
Bottom line
If you want a multi-pack of 4″ knotted wire cup brushes for routine weld prep and cleanup, this SALI set is the right category of tool—just make sure the arbor/thread and RPM rating match your grinder, and use the right PPE every time.
Rocaris 6 Pack Wire Wheel & Pen Brush Set: Carbon Steel for Weld Cleaning & Surface Prep
Introduction
Weld spatter, slag, and rust don’t clean themselves. The Rocaris 6 Pack Carbon Steel Wire Wheel and Pen Brush Set is a versatile, affordable solution for post-weld cleanup and surface preparation. This post covers what’s in the set, how to use each brush type, and when to reach for alternatives.
Key Takeaways
- 6-piece set includes 2 cup brushes, 2 wheel brushes, and 2 pen brushes
- 1/4″ hex shank fits most cordless drills and rotary tools
- Carbon steel wire is durable for general weld cleaning and rust removal
- Price point ($25–$40) makes it accessible for hobbyists and small shops
- Not suitable for stainless steel (use stainless wire to avoid contamination)
What’s Included
The Rocaris 6 Pack contains:
- 2 × Carbon steel cup brushes (conical shape for corners and edges)
- 2 × Carbon steel wheel brushes (flat for broad surface coverage)
- 2 × Carbon steel pen brushes (small, handheld for detail work)
- All with 1/4″ hex shank for drill chuck compatibility
Brush Types & Applications
| Brush Type | Best For | Speed (RPM) | Notes |
|---|---|---|---|
| Cup Brush | Weld spatter, corners, edges | 3,000–6,000 | Conical shape reaches tight areas |
| Wheel Brush | Broad surfaces, slag removal | 3,000–6,000 | Flat profile for even coverage |
| Pen Brush | Detail work, small parts, deburring | Hand or low-speed | Handheld; no power tool needed |
Performance & Use
Weld Cleaning Workflow
- Let the weld cool to room temperature (do not quench).
- Use a cup brush at 3,000–4,000 RPM to remove spatter and slag from the bead and heat-affected zone.
- Switch to a wheel brush for broad surface cleanup if needed.
- Use pen brushes for detail work, deburring, or hand-cleaning small components.
Carbon Steel vs. Stainless Steel Wire
Carbon steel wire is aggressive and cost-effective for mild steel and aluminum. Do not use on stainless steel welds — carbon steel particles can embed in the surface and cause rust spots (corrosion). For stainless, use stainless steel wire brushes only.
Safety & Maintenance
Always wear safety glasses when using rotating brushes. Loose wire can fly off at high speed. Keep the brush away from your hands and clothing.
Inspect brushes before each use. Discard any with bent, missing, or damaged wires. Replace brushes when they become matted or lose cutting ability (typically after 20–40 hours of use, depending on material and RPM).
What to compare before you buy
- Wire material: Carbon steel is standard but aggressive; stainless steel brushes are required for stainless steel welding.
- Brush size: The Rocaris set includes multiple sizes; verify that the included sizes match your typical cleanup tasks.
- Shank compatibility: 1/4″ hex shank fits most cordless drills; confirm your tool accepts this size.
- Speed rating: Do not exceed the recommended RPM; high-speed operation can cause wire breakage and flying debris.
- Quantity: 6 pieces is a good starter set; consider buying extras if you weld frequently.
Comparable Amazon picks (optional)
- ZORUNNA 6 Inch Fine Crimped Wire Wheel for Bench Grinder — Larger, for bench grinders; higher RPM tolerance; verify ASIN.
- Benchmark Abrasives 4″ x 1/2″ Standard Twist Knot Wire Wheel — Specialized for weld cleaning; single brush; higher price.

Rocaris 6 Pack Carbon Steel Wire Wheel and Pen Brush Set with 1/4-Inch Hex Shank for Rust Removal, Corrosion and Scrub Surfaces
- 6 Pack Wire Brush Set: This package includes: 2 pcs carbon steel cup brush, 2 pcs wheel brush, 2 pcs pen brush with 1/4 inch hex shank. Hardened steel wire long maximum 4500 RPM.
- Attaches to Most Power Drill: 1/4″ Shank Hex quick change shanks are use in all Types of drills and die grinders 4500 Max RPM.
- Black Steel Wire: Carefully selected premium wire steel, bound & balanced expertly & properly together for unsurpassed knotted integrity for longer life, safety, smoothness & ease of use.
- Wide Applications: Easily and smoothly remove heavy corrosion, rust, paint, spatter and scale removal while also clean weld edges, debur metal and paint.
- Looking for a tool to clean your vehicle, shed, or boat? This steel wire pen brush is just what you need to get those hard-to-reach areas. It’s the perfect accessory for your garage or workshop.
Last update on 2026-07-14 / Affiliate links / Images from Amazon Product Advertising API
When to Upgrade
If you’re welding stainless steel regularly, invest in a stainless steel wire brush set to prevent contamination. If you’re running high-volume production, consider a dedicated weld cleaning station with a bench grinder and heavy-duty brushes.
For light hobbyist work, the Rocaris set is more than adequate and will last months with proper care.
Verdict
The Rocaris 6 Pack is a practical, budget-friendly choice for post-weld cleanup and surface prep. The variety of brush types covers most common tasks, and the 1/4″ hex shank integrates with standard drills. The main limitation: carbon steel wire is not suitable for stainless steel. If your work includes stainless, plan for a separate stainless steel brush set.
