Welding fumes and grinding dust are a real exposure problem—especially when you’re doing short, frequent welds and “just dealing with it.” The issue is fit: most respirators either hit the inside of your hood, block your view, or fog your lens. This page focuses on low-profile, helmet-compatible half masks with verified filtration specs from the manufacturer.
Where to Buy (Fast Links) ArcWeld.store (if available):
- Miller LPR-100 Gen. II: N/A
- 3M 7502 (7500 Series): N/A
- 3M 6200 (6000 Series): N/A
Amazon (verified ASINs):
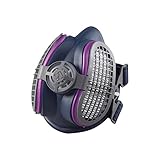
- Miller LPR-100 Half Mask Respirator (Odor Relief):
Last update on 2026-04-08 / Affiliate links / Images from Amazon Product Advertising API
- 3M 7502 Half Facepiece (7500 Series, Medium):
 3M Medium 7500 Series Half Face Air Purifying Respirator
- APR Masks
- Manufacturer: 3M
- Made in: United States
Last update on 2026-04-07 / Affiliate links / Images from Amazon Product Advertising API
- 3M 6200 Half Facepiece (6000 Series, Medium):
 3M 6200 Half Mask for Use With 6000 Series Cartridges, Face Piece
- 3M 6200, Series 6000 Half Facepiece Respirator
- Use with 3M 6000 Series Cartridges
- Use against a variety of gases, vapors and particulate hazards according to NIOSH approvals
Last update on 2026-04-07 / Affiliate links / Images from Amazon Product Advertising API
Key Takeaways
- Low-profile matters: if the mask pushes your hood forward, you’ll stop wearing it.
- P100 particulate filtration is the baseline for welding fume particulates (verify your hazard and compliance needs).
- Comfort drives compliance: silicone facepieces and better exhalation design reduce hot spots and fogging.
- Always confirm fit and do a seal check; the “best” respirator is the one that seals on your face every time.
Comparison Table
| Model | Key Specs (Manufacturer) | Best For |
|---|---|---|
| Miller LPR-100 Gen. II Half Mask (ML00995 shown) | P100 particulate filter; 99.97% filtration; low-profile design; downward-facing exhaust valve (fog/heat reduction) | Welders needing a purpose-built low-profile mask under most hoods |
| 3M Half Facepiece 7502 (7500 Series, Medium) | Silicone facepiece; 3M Cool Flow Valve; bayonet filter connection; approx. 135 g (facepiece weight) | All-day comfort + better seal feel; good choice if you already run 3M bayonet filters |
| 3M Half Facepiece 6200 (6000 Series, Medium) | 3 sizes (6100/6200/6300); soft lightweight elastomer; bayonet filter connection; approx. 82 g (facepiece weight) | Budget-friendly reusable half mask; lighter facepiece |
Top Pick (Most Helmet-Friendly) If your #1 requirement is “fits under the hood without messing up my view,” start with the Miller LPR-100 Gen. II. It’s designed around welding-helmet clearance and includes a downward exhaust design intended to reduce heat buildup and lens fogging. Amazon:
Last update on 2026-04-08 / Affiliate links / Images from Amazon Product Advertising API
Product Picks (Details)
- Miller LPR-100 Gen. II Half Mask Respirator (Odor Relief) — ASIN: B01BZAHQMS Why it’s on this list: This is one of the few half masks marketed specifically around welding helmet fitment, with a low-profile shape that’s meant to stay out of your sightline.
Key specs (Manufacturer):
- Filter type: P100 particulate filter
- Filtration: 99.97% filtration of airborne particles and aerosols (oil-based and non-oil-based)
- Design: low-profile to fit under most welding helmets
- Exhaust: downward-facing exhaust valve (intended to reduce heat buildup and lens fogging)
Best for:
- MIG/flux-core and general shop welding where fume particulates are the primary concern
- Welders who won’t wear a bulky mask under a hood
Where to buy:
- ArcWeld.store: N/A
- Amazon:
Last update on 2026-04-08 / Affiliate links / Images from Amazon Product Advertising API
- 3M Half Facepiece Reusable Respirator 7502 (7500 Series, Medium) — ASIN: B004HXBCMG Why it’s on this list: The 7500 series is a comfort-first upgrade path (silicone facepiece + valve design). If you already use 3M bayonet filters/cartridges, this is a practical long-term setup.
Key specs (Manufacturer):
- Facepiece material: silicone
- Valve: 3M Cool Flow Valve
- Connection: 3M bayonet-style filter/cartridge connection
- Weight (approx.): 135 g (facepiece)
Best for:
- Longer wear time (comfort and seal feel)
- Shops standardized on 3M bayonet filters/cartridges
Where to buy:
- ArcWeld.store: N/A
- Amazon:
3M Medium 7500 Series Half Face Air Purifying Respirator
- APR Masks
- Manufacturer: 3M
- Made in: United States
Last update on 2026-04-07 / Affiliate links / Images from Amazon Product Advertising API
- 3M Half Facepiece Reusable Respirator 6200 (6000 Series, Medium) — ASIN: B001QF9C5C Why it’s on this list: This is the common “get started” reusable half mask. It’s lighter on the facepiece weight and widely supported with 3M bayonet filters/cartridges.
Key specs (Manufacturer):
- Sizes: 6100 (S), 6200 (M), 6300 (L)
- Facepiece: soft, lightweight elastomeric design
- Connection: 3M bayonet-style filter/cartridge connection
- Weight (approx.): 82 g (facepiece)
Best for:
- Budget-conscious buyers who still want a reusable system
- Occasional welding/grinding where you want a dedicated half mask
Where to buy:
- ArcWeld.store: N/A
- Amazon:
3M 6200 Half Mask for Use With 6000 Series Cartridges, Face Piece
- 3M 6200, Series 6000 Half Facepiece Respirator
- Use with 3M 6000 Series Cartridges
- Use against a variety of gases, vapors and particulate hazards according to NIOSH approvals
Last update on 2026-04-07 / Affiliate links / Images from Amazon Product Advertising API
Buying Guide: How to Choose a Welding Respirator That Fits Under Your Hood
- Start with clearance, not filtration marketing
If it hits your chin area and pushes the hood out, you’ll stop wearing it. Low-profile shape and exhaust direction matter. - Match filters to the hazard (do not guess)
P100 handles particulates. Welding environments can also involve gases/vapors depending on process, coatings, cleaners, and ventilation. If you need OV/acid gas protection, confirm the correct cartridge/filter combo and compliance requirements. - Comfort = compliance
Silicone facepieces and better valve designs typically reduce pressure points and heat. If it’s miserable, it won’t get used. - Do a seal check every time
Facial hair, strap tension, and hood pressure can break the seal. A respirator that leaks is not doing the job.
FAQ
- Will these respirators fit under every welding helmet? No. “Fits under most” is common language, but helmet shell shape, headgear position, and how low you run the hood all change clearance. Verify by donning the respirator, then lowering the hood fully and checking for contact points.
- Is a P100 filter “enough” for welding fumes? P100 is a common baseline for particulate filtration, but “enough” depends on the specific exposure (process, material, coatings, ventilation, duration) and your safety program requirements. Verify against your shop’s hazard assessment and applicable regulations.
- What causes lens fogging when wearing a respirator under a hood? Warm exhaled air moving upward, plus restricted airflow under the hood. Downward exhaust designs and better exhalation valves can help, but fit and hood airflow still matter.
- Can I use the same respirator for grinding and welding? Often yes (particulates), but confirm the correct filter type and replacement interval. Grinding dust loads filters quickly and increases breathing resistance.
Safety Notes (Minimum Baseline)
- Eye/face protection: Use safety glasses that meet ANSI Z87.1 under the hood when appropriate for your task and shop rules.
- PPE reminder: Respirators only work with a proper seal. Perform a user seal check each time you put it on.
- Ventilation still matters: Local exhaust/airflow reduces exposure and improves comfort.
- If you are welding on coated/painted/galvanized material: stop and verify the correct respiratory protection and controls for that specific hazard.
[SOURCES & VERIFICATION] Sources Checked (Manufacturer specs only)
- Miller LPR-100 Gen. II Series Half Mask Respirator spec sheet (PDF): https://www.millerwelds.com/-/media/miller-electric/import/specsheets/file/ay46-lpr100-gen-ii-series-half-mask-respirator–english.pdf
- Miller LPR-100 product page (respiratory category): https://www.millerwelds.com/safety/respiratory/half-mask-respirators-m00469
- 3M Half Facepiece Respirator 7500 Series specifications (PDF): https://multimedia.3m.com/mws/media/1152038O/3m-half-facepiece-respirator-7500-series-specifications.pdf
- 3M 6000 Series reusable half mask data sheet (PDF): https://multimedia.3m.com/mws/media/1730559O/3m-6000-series-reusable-half-mask-data-sheet.pdf
Amazon ASIN Verification (product pages)
- Miller LPR-100 Half Mask Respirator (Odor Relief) — ASIN B01BZAHQMS: https://www.amazon.com/Miller-LPR-100-Respirator-Relief-ML00995/dp/B01BZAHQMS
- 3M 7502 Half Facepiece (Medium) — ASIN B004HXBCMG: https://www.amazon.com/dp/B004HXBCMG
- 3M 6200 Half Facepiece (Medium) — ASIN B001QF9C5C: https://www.amazon.com/dp/B0DC957RBK (page references ASIN B001QF9C5C; verify seller listing is genuine 3M before publishing)