Bernard Q3015AE8EMC MIG Gun Review & Buying Guide
Note for Readers: This post may contain affiliate links. If you purchase through them, we may earn a small commission at no cost to you. Thank you for supporting our site.
—
Introduction
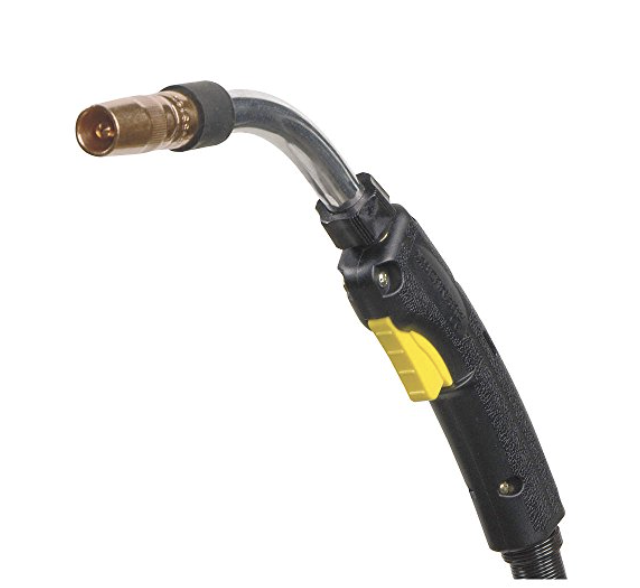
The Bernard Q3015AE8EMC MIG Gun is a professional-grade, air-cooled MIG welding gun built for precision, durability, and consistent performance in demanding fabrication settings. This model is part of Bernard’s renowned Q-Gun series—engineered with input from working welders to optimize comfort and control.
Used widely by professional welders, metal fabricators, students in welding programs, and production engineers, the Q3015AE8EMC is designed for medium- to heavy-duty MIG welding applications. Its modular design, superior ergonomics, and robust construction make it a trusted tool in industrial and custom fabrication environments.
—
Types / Variants / Models
The Q-Gun series by Bernard features several modular variations built around amperage rating, neck type, handle style, cable length, and trigger configurations. The Q3015AE8EMC refers to a specific configuration:
– Q30 – Indicates a 300-amp MIG gun.
– 15 – Refers to a 15-foot cable length.
– A – Straight handle style.
– E – Rotatable neck.
– 8 – Centefire Consumables.
– EMC – Setup for .045 wire, Miller-style power pin for compatibility with Miller MIG welders, and conventional liner.
Other Common Variants:
– Q4012AE8CM – 400A, 12-ft cable, centerfire consumables.
– Q3012AE4EMC – 300A, smaller angled neck for tighter spaces.
– Q5015AE8 – 500A version for high-amp, long-duration welds.
Each model serves a different purpose:
– Use lower amp variants (Q300) for medium fabrication and job shops.
– Use higher amp models (Q400/Q500) for heavy industry, shipbuilding, and structural steel.
—
Key Features or Specifications
The Bernard Q3015AE8EMC MIG Gun is engineered with performance-driven design considerations. Key specifications and real-world benefits include:
– 300 Amp Rated, Air-Cooled
→ Suitable for medium-duty MIG applications such as mild steel, stainless, and aluminum in both short arc and spray transfer modes.
– 15-ft Cable Assembly
→ Offers an extended welding radius for large workpieces and spacious fabrication tables without resistance or drag.
– Miller-Style Power Pin (MC)
→ Enhances compatibility with Miller-style MIG machines. Simple plug-and-play setup.
– Ergonomic Straight Handle (A)
→ Comfortable grip with better torch angle control, reducing wrist fatigue during long welds.
– Rotatable Neck (E) and Centerfire Consumable (8)
→ Neck rotates 360° for improved access in tight or awkward positions. Built for high-durability applications like trailer manufacturing and structural work.
– Centerfire™ Consumables Compatibility
→ Tool-less tip change, long life, and excellent electrical conductivity. Reduces downtime and increases arc-on time.
– Trigger Guard
→ Protects from accidental activation, improving user safety in shop and field conditions.
Certifications: Compliant with AWS and ANSI standards for industrial welding equipment.
—
Usage & Compatibility
The Bernard Q3015AE8EMC is built primarily for GMAW (Gas Metal Arc Welding), also referred to as MIG welding. It is not compatible with processes like SMAW (stick), GTAW (TIG), or FCAW without significant modifications or adapters.
Machine Compatibility:
This Euro-style MIG gun pairs seamlessly with:
– European MIG welders (EMC pin)
– Many inverter and synergic MIG machines requiring quick-connect
– Compatible with machines like Fronius, EWM, and Lorch via Euro connector
Pros:
– Durable and reliable for production environments
– Superior ergonomics for extended use
– Highly modular—users can upgrade cable or change handle/neck
Cons:
– Not compatible with Euro-Quick machines using Euro connections unless using adapters
– May be overkill for light apartment/hobby use
—
Common Applications
The Q3015AE8EMC MIG Gun is frequently used in:
– Manufacturing assembly
– Automotive fabrication
– Trailering and mobile welding units
– Agricultural machinery repair
– Heavy equipment servicing
Its 300-amp rating make it especially effective in:
– Mild steel MIG welding (manufacturing and structural environments)
– Aluminum jobs requiring solid feed performance and steady pull
– Stainless applications in food-grade or chemical environments
Why It’s Ideal:
– Rotatable neck and long cable provide excellent reach
– Strong build means fewer service interruptions
– Optimized for semi-automatic and robotic feeder setups
—
Tips & Best Practices
Setup Tips:
– Always check compatibility with your machine’s power pin input.
– Use Centerfire™ contact tips—inserting them with a simple push ensures electrical contact without tools.
Usage Tips:
– For spray transfer, ensure you use a proper shielding gas mix (e.g., 90% Argon/10% CO₂).
– Clean contact tip and nozzle weekly to prevent spatter buildup and voltage drop.
Maintenance Tips:
– Replace liner every 2-3 months with heavy use.
– Apply anti-spatter solution to extend nozzle life.
Troubleshooting Tips:
– Erratic arc? Check for worn contact tip or dirty liner.
– Wire feed issues? Inspect the drive roll tension and liner path.
—
Conclusion
The Bernard Q3015AE8EMC MIG Gun delivers consistent, professional-grade performance for welders who demand durability, ergonomic comfort, and flexibility. Whether you’re a full-time fabricator in a job shop or an engineer optimizing a production floor, this 300A MIG gun excels in both function and longevity.
Its long cable, rotatable neck, and Euro-pin compatibility make it especially versatile for European welding equipment and dynamic MIG jobs in field or shop settings.
—
Want to know if the Bernard Q3015AE8EMC is right for your welding rig?
Check the specs and current pricing below:
Bernard, Q3015AE8EMC, MIG Welding Gun, 300 A, 15 Ft. L, Miller
- Dry Wipe Roll, Wipe Type General Purpose Wipe, Jumbo Perforated Roll, Product Series WYPALL(R) X60, Absorbency Level Moderate, Wet Strength Level Better, Blue, Minimum Cleanroom Standards None, Hydroknit, Lint Level Standard, Roll Length 1,228 ft, Sheet Length 12 1/4 in, Sheet Width 12 1/2 in, Number of Sheets 1,100, Ply 1
Last update on 2026-03-06 / Affiliate links / Images from Amazon Product Advertising API
Find the best deal and ensure compatibility with your setup on Amazon today.