Tag: TIG consumables

  • TIG Torch Consumable Wear Signs: Cup Cracks, Collet Slip, Gas Lens Clogs, and Dirty Tungsten

    Worn TIG torch consumables usually show up as dirty tungsten, rough arc starts, porosity, black soot, poor gas coverage, tungsten slipping, cup cracking, and inconsistent bead color. The problem is often not the welder. It is usually in the torch front end: cup, collet, collet body, gas lens, back cap, O-ring, insulator, or tungsten.

    Start by checking the parts that control gas flow and tungsten grip. A cracked cup leaks shielding gas. A worn collet lets the tungsten slide or sit off-center. A clogged gas lens disrupts argon flow. A damaged back cap O-ring can pull air into the torch. If the tungsten turns black, the weld gets sooty, or the arc wanders after consumables heat up, inspect the torch before changing amperage or blaming the machine.

    Related TIG support checks include why TIG tungsten turns black, TIG porosity troubleshooting, TIG cup size selection, and sooty TIG weld gas coverage fixes.

    Common Symptoms

    SymptomLikely Worn ConsumableFirst Check
    Tungsten slips or pulls backCollet, collet body, back capInspect collet grip and correct tungsten size
    Black or gray tungstenCup, gas lens, O-ring, gas leakVerify argon flow and post-flow
    Porosity appears suddenlyCracked cup, clogged gas lens, leaking torchInspect cup and gas lens screen
    Arc wandersContaminated tungsten, loose collet, worn collet bodyRegrind tungsten and check clamp force
    Soot around weldPoor gas coverage, damaged cup, turbulent flowCheck cup size, gas lens, and torch angle
    Cup keeps crackingOverheating, impact, wrong cup setupCheck amperage, cup fit, and torch cooling

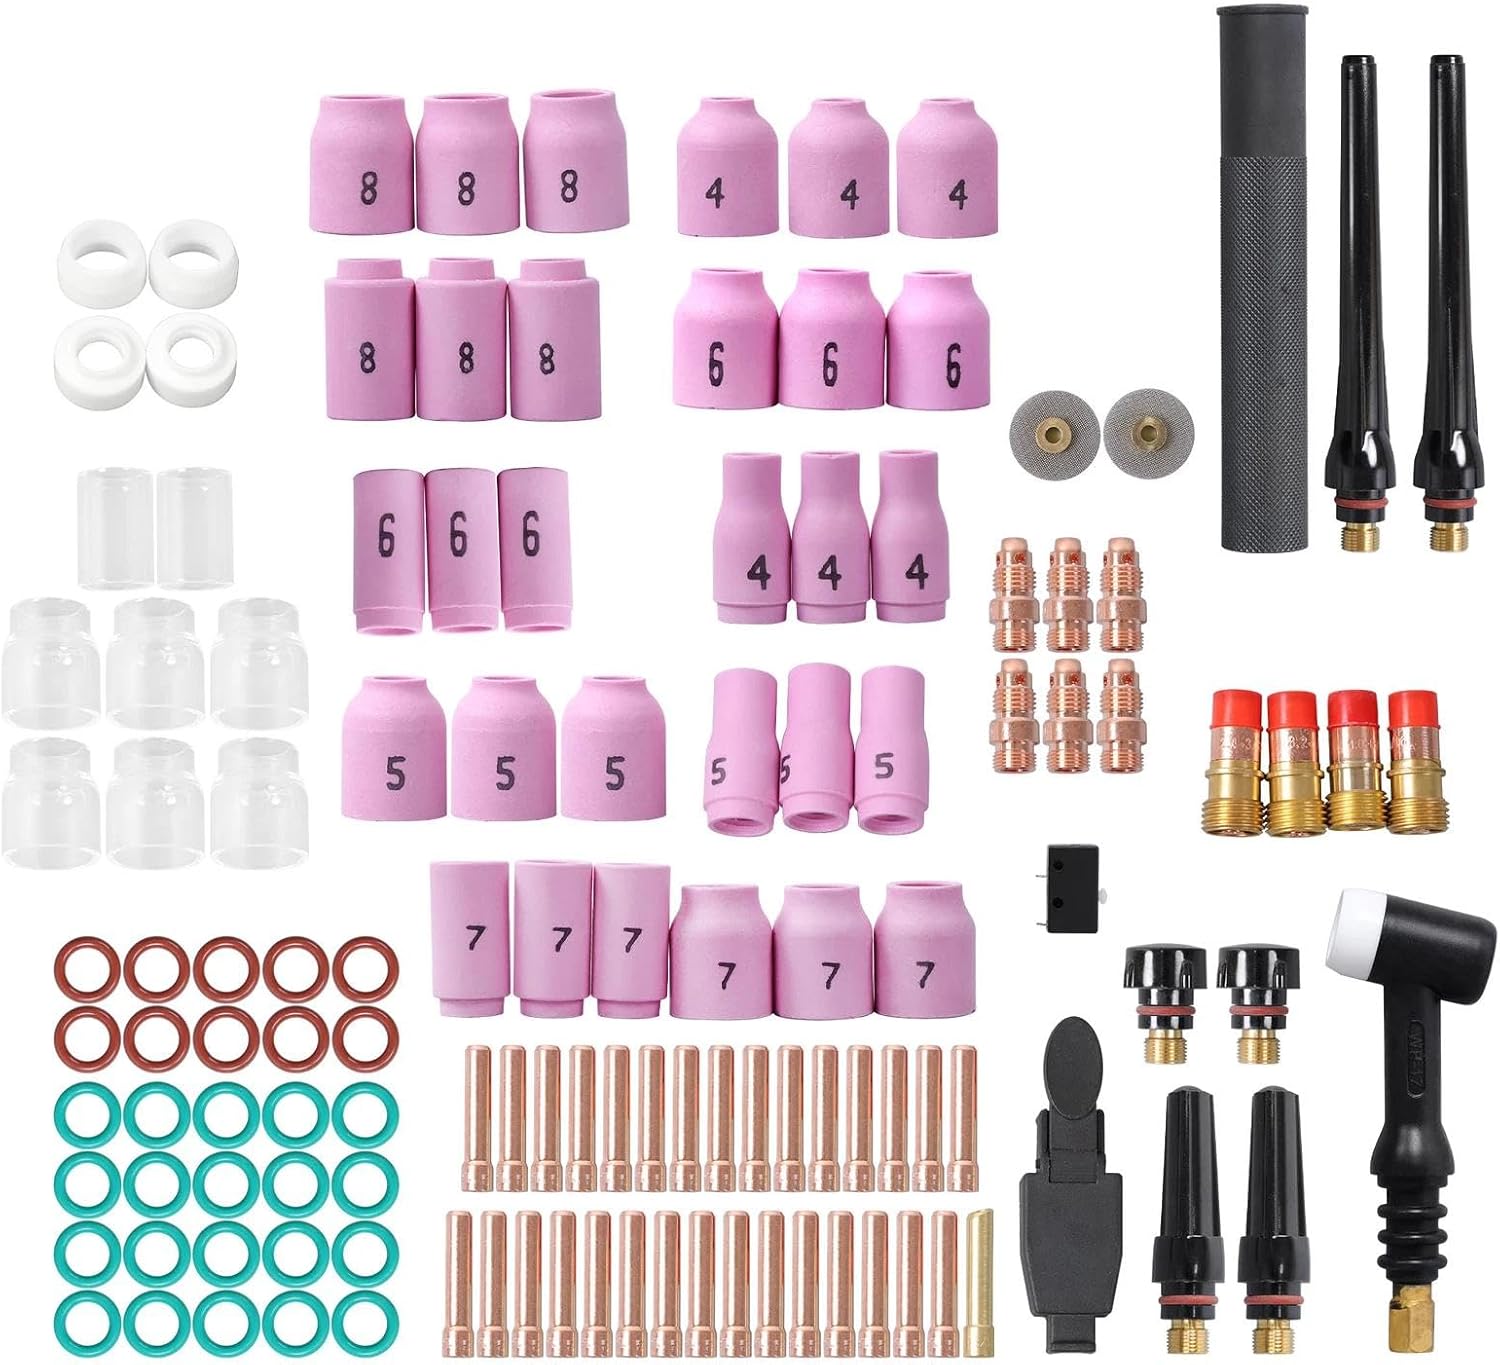
    What Each TIG Consumable Does

    • Cup/nozzle: directs shielding gas around the tungsten and weld pool.
    • Collet: grips the tungsten when the back cap is tightened.
    • Collet body: holds the collet and positions the tungsten in the torch.
    • Gas lens: smooths gas flow and improves coverage, especially with longer stickout.
    • Back cap: tightens the collet and seals the rear of the torch.
    • O-rings and insulators: prevent gas leaks and keep torch parts sealed and aligned.
    • Tungsten: carries the arc; contamination or overheating changes arc shape immediately.

    Visual Wear Indicators

    PartWear SignsReplace When
    CupCracks, chips, white/brown heat marks, spatter, metal dustCracked, leaking, loose, or no longer shielding evenly
    ColletSplit end spread open, burn marks, weak grip, oval boreTungsten slips or will not center
    Collet bodyDamaged threads, poor seating, discoloration, loose fitCollet will not tighten or tungsten sits crooked
    Gas lensClogged screen, dark deposits, crushed mesh, blocked holesGas flow becomes uneven or soot/porosity continues
    Back capCracked body, damaged threads, missing or flat O-ringGas leaks or tungsten will not clamp correctly
    Insulator/gasketBurned edges, cracks, missing seal, loose cup fitCup leaks, torch heats unevenly, or gas coverage fails

    Inspection Steps

    1. Let the torch cool. Ceramic cups, tungsten, and copper parts can stay hot after short welds.
    2. Remove the cup. Check for cracks, chips, dirt, and signs of gas leakage.
    3. Remove the tungsten. If it is black, crusted, split, balled unexpectedly, or contaminated, regrind or replace it.
    4. Inspect the collet. Match it to the tungsten diameter. Replace it if grip is weak or the split end is distorted.
    5. Inspect the collet body or gas lens. Look for blocked screens, damaged threads, and heat discoloration.
    6. Check the back cap and O-ring. A damaged seal can cause gas coverage problems that look like bad argon.
    7. Reassemble with matching parts. Do not mix standard cups with gas lens hardware unless the setup is designed for it.
    8. Test gas flow at the cup. Confirm steady argon flow before striking an arc.
    9. Run one test bead. Keep amperage and travel unchanged so the consumable change is the isolated variable.

    Test Procedures

    Tungsten grip test: Install the correct tungsten and tighten the back cap normally. If the tungsten slides with light hand pressure, inspect the collet, collet body, and back cap threads.

    Gas coverage test: Weld a short bead with clean tungsten, clean base metal, and no drafts. If bead color improves after replacing the cup or gas lens, the old consumable was disturbing gas flow.

    Post-flow test: Watch the tungsten after arc stop. If it turns blue, gray, or black quickly, check post-flow, back cap seal, cup damage, gas lens blockage, and hose leaks.

    Field Fix vs Proper Fix

    ProblemField FixProper Fix
    Tungsten slippingTighten back cap slightlyReplace worn collet and verify tungsten diameter
    Dirty gas lensBrush or blow out lightlyReplace clogged or damaged screen assembly
    Cracked cupSwap cup immediatelyMatch cup type to torch, amperage, and joint access
    Black tungstenIncrease post-flowRepair leaks and replace bad cup, O-ring, or gas lens
    Arc wandersRegrind tungstenFix collet grip, tungsten contamination, and gas coverage

    Common Wrong-Part Mistakes

    • Buying TIG cups by size number only without confirming torch series.
    • Using a 17/18/26 collet on a 9/20-style torch or the reverse.
    • Installing a gas lens without the matching cup and insulator setup.
    • Using a collet that does not match tungsten diameter.
    • Replacing tungsten repeatedly while ignoring a leaking back cap O-ring.
    • Running long tungsten stickout with a standard collet body when gas lens coverage is needed.

    Compatibility Notes

    TIG consumables must match the torch family, tungsten diameter, cup style, gas lens or standard collet body setup, and back cap style. Common 17/18/26-style consumables are larger than 9/20-style consumables and should not be treated as interchangeable. If the torch has been replaced in the field, do not order consumables by welder model alone.

    Related Failure Paths

    • TIG porosity from cracked cups, poor gas lens flow, or leaking O-rings.
    • Dirty tungsten from insufficient post-flow or gas leakage.
    • Arc wander from weak collet grip or contaminated tungsten.
    • Black soot from turbulent argon flow or damaged front-end parts.
    • Cup overheating from excess amperage, wrong cup setup, or poor torch cooling.

    Safety Notes

    • Let hot torch parts cool before disassembly.
    • Use eye protection when grinding tungsten or cleaning cups.
    • Disconnect power before deeper torch or machine service.
    • Secure argon cylinders and use ventilation during test welds.
    • Follow shop procedures for thoriated tungsten handling and grinding dust control.

    Sources Checked

    • Weld Support Parts TIG cup, gas lens, tungsten discoloration, and porosity support pages.
    • ESAB/TBi TIG torch consumable guidance.
    • Grainger TIG gas lens and collet body descriptions.
    • Weldmonger TIG torch consumables overview.
  • Miller Diversion 180 vs Lincoln Square Wave 205: TIG Welder Comparison for AC/DC Aluminum, Steel, and Shop Repair

    The Lincoln Square Wave 205 is the stronger choice if you want more TIG output, built-in Stick capability, pulse, AC frequency, and AC balance control. The Miller Diversion 180 is simpler and easier for occasional AC/DC TIG use, but it is more limited: TIG only, lower top-end amperage, heavier weight, and fewer arc-shaping controls. For aluminum practice, motorsports, stainless, light fabrication, and users who want to grow into more machine control, the Square Wave 205 has the better long-term TIG support path.

    The Diversion 180 still has value where simplicity matters most. Its setup is built around selecting material and thickness instead of tuning multiple TIG variables. That makes it easy for home users who do not want to manage pulse, AC frequency, balance, or Stick settings. The tradeoff is reduced adjustability when the weld problem is heat control, cleaning action, bead width, or electrode behavior.

    Quick Comparison

    ItemMiller Diversion 180Lincoln Square Wave 205
    ProcessesAC/DC TIGAC/DC TIG and AC/DC Stick
    Input power115/230 V, single phase120/230 V, single phase
    TIG output range10–125 A on 115 V; 10–180 A on 230 V8–125 A on 120 V; 8–205 A on 230 V
    Rated TIG output on high input150 A at 20%; 180 A at 10%205 A at 25%; 160 A at 60%; 130 A at 100%
    Weight50 lb36 lb
    Included TIG torchWeldcraft A-150 / WP-17 style torchCaliber 17 TIG Torch Ready-Pak
    ControlsSimplified material/thickness setupLCD setup with pulse, AC frequency, AC balance
    Best fitSimple hobby TIGHobby, repair, light fabrication, TIG growth, Stick backup

    Where the Square Wave 205 Wins

    • More TIG output: 205 A top TIG output on 230 V gives more headroom than the Diversion 180.
    • Better control range: pulse, AC frequency, and AC balance help with heat input, bead width, cleaning action, and aluminum puddle control.
    • Stick capability: AC/DC Stick support makes it useful for repair work where TIG is not the fastest process.
    • Lighter package: 36 lb vs 50 lb matters for mobile shop, classroom, motorsports, and garage use.
    • Lower minimum TIG output: 8 A minimum can help on thin material compared with 10 A minimum on the Diversion 180.

    Where the Diversion 180 Still Makes Sense

    • Simpler setup: power up, choose material, set thickness/amperage, and weld.
    • Good basic AC/DC TIG package: it includes a foot control, A-150/WP-17 style torch, regulator/flow gauge, work cable, and MVP plugs.
    • Good for low-complexity users: if the buyer does not want adjustable AC balance, pulse, or Stick functions, fewer settings can be an advantage.
    • Known WP-17 consumable path: the included A-150/WP-17 style torch uses common 10N-series style consumables. Verify exact torch body and front-end parts before ordering.

    Compatibility Notes

    Do not order TIG parts by welder model alone. Order by torch series, tungsten diameter, collet style, cup system, connector, and whether the torch uses a standard collet body or gas lens. The Miller package references a Weldcraft A-150 / WP-17 style torch. The Lincoln Square Wave 205 package references a Caliber 17 TIG Torch Ready-Pak and a Caliber 17/18/26 medium-duty parts kit. Treat those as different torch-support ecosystems until the torch label and parts list are verified.

    Consumables and Support Parts To Verify Before Ordering

    • Torch family: WP-17/A-150 style vs Caliber 17/18/26 style
    • Tungsten diameter: commonly 1/16 in, 3/32 in, or 1/8 in depending on amperage
    • Collet and collet body size
    • Gas lens vs standard collet body
    • Cup series and cup size
    • Back cap length
    • Remote connector: RJ45 on Diversion 180; 6-pin remote receptacle listed for Square Wave 205
    • Input plug/adapters and breaker capacity

    Common Wrong-Part Mistakes

    • Buying “17 torch” consumables without confirming the actual torch brand and front-end series.
    • Assuming a Miller WP-17 kit fits the Lincoln Caliber torch without checking the parts kit cross-reference.
    • Ordering a gas lens body but keeping standard cups that do not match the gas lens setup.
    • Buying tungsten by color only instead of matching diameter, current range, material, and AC/DC use.
    • Replacing tungsten for arc instability while ignoring worn collets, loose back caps, or cracked cups.

    Buying Recommendation

    Choose the Lincoln Square Wave 205 if you want a better long-term machine for learning TIG, aluminum control, pulse practice, Stick repair, and setup flexibility. Choose the Miller Diversion 180 only if the main priority is a simple AC/DC TIG machine with a beginner-friendly interface, and you do not need Stick or advanced AC controls.

    Related TIG Support Paths

    Safety Notes

    Confirm input voltage, plug type, breaker size, grounding, shielding gas, PPE, and ventilation before welding. TIG welding and tungsten grinding require eye, hand, skin, and respiratory protection. Follow the operator manual and the applicable WPS for code work.

  • TIG Tungsten Contamination Troubleshooting: Black Specks, Arc Wander, Dirty Starts, and Re-Grind Checks

    TIG tungsten contamination usually comes from one of five places: the tungsten touched the puddle, the filler rod hit the electrode, shielding gas was interrupted, the tungsten was ground on a dirty wheel, or the torch consumables are leaking or loose. The fix is not to keep welding through it. Stop, cut back or re-grind the contaminated tungsten, verify gas coverage, inspect the collet/gas lens/cup, and test on clean scrap before returning to the part.

    Contaminated tungsten can show up as black specks in the bead, gray or black weld edges, arc wandering, hard starts, sputtering, excessive balling, or a weld puddle that will not stay centered. On critical work, assume the contaminated section of weld may need to be removed and re-welded. Do not treat tungsten inclusions as cosmetic.

    Common Symptoms

    SymptomLikely CauseFirst Check
    Black specks in beadTungsten dipped or flaked into puddleInspect tip under good light
    Arc wanders or splitsDirty grind, off-center point, contaminated tipRe-grind lengthwise on clean wheel
    Gray/black weld surfacePoor shielding, long stickout, post-flow too shortCheck argon flow, leaks, cup, gas lens
    Tungsten balls excessivelyToo much amperage for diameter, wrong polarity/process setupVerify tungsten size, type, current, polarity
    Tungsten slipsWorn collet or collet bodyPull-test electrode after tightening

    Fast Diagnosis Procedure

    1. Stop welding immediately. Do not keep running a bead after dipping the tungsten.
    2. Remove the tungsten. Look for melted filler, dark oxidation, a balled end, cracks, or an off-center point.
    3. Cut back if dipped. If base metal or filler is fused into the tip, cut off the bad section before grinding.
    4. Re-grind lengthwise. Grind marks should run with the electrode, not around it.
    5. Check gas coverage. Verify cylinder valve, regulator, hose leaks, torch O-rings, cup condition, and post-flow.
    6. Inspect torch consumables. Replace cracked cups, loose collets, damaged gas lenses, and worn collet bodies.
    7. Run a scrap test. Use clean scrap, same filler, same amperage, and same torch angle before returning to the job.

    What Wears Out First

    The tungsten tip gets blamed first, but the support parts often cause repeat contamination. A worn collet can let the electrode move. A damaged collet body can create poor current transfer. A clogged or damaged gas lens can disturb shielding gas. A cracked cup can pull air into the weld zone. A loose back cap or damaged rear seal can also create gas problems that look like bad tungsten prep.

    Inspection Steps

    • Tungsten: verify diameter, alloy/color code, grind direction, point symmetry, and contamination at the tip.
    • Collet: confirm it matches the tungsten diameter and grips without over-tightening.
    • Collet body/gas lens: inspect threads, seating face, screen condition, and gas flow path.
    • Cup: check for cracks, spatter, chips, or poor seating.
    • Gas system: confirm argon, hose condition, regulator flow, torch leaks, and post-flow time.
    • Base/filler metal: clean oil, oxide, mill scale, moisture, coating, and grinder residue before blaming the machine.

    Common Wrong-Part Mistakes

    • Buying a collet that does not match tungsten diameter.
    • Using a standard collet body when the cup setup requires a gas lens body.
    • Mixing torch series parts between 9/20 and 17/18/26-style torches.
    • Assuming all cups fit all torch heads.
    • Ordering tungsten by color only without confirming diameter, current type, and application.
    • Replacing tungsten repeatedly while leaving a worn collet body or leaking cup in service.

    Compatibility Notes

    Before ordering TIG support parts, verify torch series, tungsten diameter, cup thread/style, gas lens or standard collet body, back cap length, power connector, cooling type, amperage range, and process polarity. Lincoln’s parts guide identifies TIG torch support items such as tungsten electrodes, collets, collet bodies, gas lens collet bodies, alumina nozzles, back caps, and connection adapters. Match by torch family and consumable system, not by appearance alone.

    Field Fix vs Proper Fix

    ConditionField FixProper Fix
    Dipped tungstenStop and re-grindCut back contaminated section, re-grind, remove affected weld if required
    Dirty grind wheelUse clean side of wheelUse dedicated tungsten grinder or dedicated wheel
    Cracked cupReplace cupInspect full front-end stack for gas leakage
    Worn colletInstall spare colletReplace collet and inspect collet body threads/taper
    Oxidized tungsten after stopIncrease post-flowVerify post-flow setting, torch leak points, and gas purity

    Related Failure Paths

    Safety Notes

    Wear eye, hand, and respiratory protection appropriate for welding and tungsten grinding. Use local extraction when grinding tungsten dust. Allow hot torch parts to cool before handling. If thoriated tungsten is used, follow your employer’s safety procedure and SDS requirements. For code, sanitary, pressure, aerospace, or structural work, follow the applicable WPS and inspection requirements before accepting or repairing a contaminated weld.

  • Weldmark 13N26 TIG Collet Body Review: .040″ Replacement Parts for #9, #20, and #25 TIG Torches

    If your TIG torch setup uses a #9, #20, or #25 style torch, the Weldmark 13N26 collet body is a small but important consumable to keep on hand. This 5-pack is made for .040″ tungsten setups and helps hold the collet and tungsten in the proper position during TIG welding.

    Weldmark TIG Collet Body #9, 20, 25 Torch Pk = 5 (13N26 – .040″)
    • Weldmark by CK Worldwide
    • Used with #9, 20, and 25 Tig Torches

    Last update on 2026-06-26 / Affiliate links / Images from Amazon Product Advertising API

    Key Takeaways

    • Fits #9, #20, and #25 TIG torch styles.
    • Made for .040″ tungsten setups.
    • Sold as a 5-pack.
    • Useful for shop inventory, repair kits, and TIG consumable drawers.
    • Verify torch compatibility before ordering.

    What This Product Is

    The Weldmark 13N26 is a TIG torch collet body. It threads into the front end of a compatible TIG torch and works with the collet, tungsten, cup, and back cap to hold the electrode securely.

    This part is listed for:

    ItemDetail
    ProductWeldmark TIG Collet Body
    Part Number13N26
    Tungsten Size.040″
    Torch Fitment#9, #20, #25
    Pack Size5
    ASINB071LQVCMK

    Best For

    This part is best for welders who already run #9, #20, or #25 TIG torches and need replacement front-end consumables.

    Common use cases:

    • TIG torch maintenance
    • Replacing worn collet bodies
    • Stocking consumables for a fab shop
    • Keeping spare TIG parts in a service kit
    • Supporting .040″ tungsten applications

    Pros and Cons

    Pros

    • Comes in a 5-pack
    • Common TIG consumable size
    • Fits popular #9, #20, and #25 torch styles
    • Small part that is easy to stock in bulk

    Cons

    • Only for .040″ tungsten
    • Not universal across all TIG torches
    • Specs should be verified against your torch setup before buying

    Compatibility Notes

    This listing indicates compatibility with #9, #20, and #25 TIG torches. Before ordering, confirm:

    • Your torch series
    • Tungsten diameter
    • Existing collet body part number
    • Cup and collet compatibility

    If you are switching tungsten sizes, you may also need matching collets and cups.

    Where to Buy

    Amazon option:

    Weldmark TIG Collet Body #9, 20, 25 Torch Pk = 5 (13N26 – .040″)
    • Weldmark by CK Worldwide
    • Used with #9, 20, and 25 Tig Torches

    Last update on 2026-06-26 / Affiliate links / Images from Amazon Product Advertising API

    Affiliate disclosure: As an Amazon Associate, Weld Support Parts may earn from qualifying purchases.

    Safety Notes

    TIG torch consumables are small parts, but they still affect weld quality and torch reliability. Always inspect your torch front end before welding.

    Basic checks:

    • Confirm all torch parts are tight before use.
    • Do not weld with damaged cups, collets, or collet bodies.
    • Wear proper welding PPE.
    • Use ANSI Z87.1-rated eye protection when grinding, cutting, or working near welding operations.
    • Follow your machine, torch, and tungsten manufacturer’s setup guidance.

    FAQ

    What torch does the Weldmark 13N26 fit?

    This listing identifies it for #9, #20, and #25 TIG torch styles.

    What tungsten size is this for?

    This version is for .040″ tungsten.

    Is this a single part or a pack?

    This listing is for a 5-pack.

    Will this fit every TIG torch?

    No. TIG torch parts are not universal. Verify your torch series and part number before ordering.

    What other parts may I need with it?

    Depending on your setup, you may also need matching collets, cups, back caps, and tungsten.

    Sources Checked

    • Uploaded Arc Weld / Amazon inventory export
    • Product title and ASIN from inventory file
    • Unknown specs not confirmed beyond uploaded product data

  • Best TIG Gas Lens Kit for Sooty Welds (Clean Shielding)

    Black soot and dirty tungsten usually point back to shielding gas coverage—either turbulence, leaks, or a setup that can’t maintain a stable argon envelope. A gas lens kit is one of the simplest upgrades to stabilize coverage, especially with longer stickout or tight joints.
    Not sure if this is your issue? See the full troubleshooting guide → TIG Welds Turning Black and Sooty? Fix Gas Coverage Fast

    STARTECHWELD 45V26 TIG Gas Lens 3/32” Gas Lens collet body Fit TIG WP17, WP18, WP26 (5 Pack) 45V26
    • TIG Gas Lens 45V26 Tig Torch Gas Lens 3/32”
    • Work With: TIG 17, 18, 26 Series Torches
    • 3/32″ Tungsten Electrodes Standard 10N Series Collet
    • 54N Series Gas Lens Ceramic Cups Setup
    • Pack of 5

    Last update on 2026-06-26 / Affiliate links / Images from Amazon Product Advertising API

    Key Takeaways

    • A gas lens helps create more stable, laminar shielding gas flow
    • Better coverage can reduce soot, oxidation, and tungsten contamination
    • Match the kit to your torch family (commonly 17/18/26 style)
    • Replace damaged screens/cups—dirty hardware can cause “mystery” contamination
    • If specs aren’t clearly listed, treat it as Unknown (Verify) before buying

    Product Picks (verify fitment before ordering)

    1) 45V26 TIG Gas Lens (3/32 in) — TOP PICK (Most common fix)

    Short description: A standard 45V26-reference gas lens collet body for common 17/18/26-style TIG torches.
    Key specs (manufacturer verified): Ref number 45V26; intended for 3/32 in (2.4 mm) tungsten; torch family 17/18/26 (Verify exact torch compatibility).
    Best for: Most welders seeing soot/dirty tungsten after switching cups, changing stickout, or fighting inconsistent coverage.
    ArcWeld link: N/A
    Amazon:

    STARTECHWELD 45V26 TIG Gas Lens 3/32” Gas Lens collet body Fit TIG WP17, WP18, WP26 (5 Pack) 45V26
    • TIG Gas Lens 45V26 Tig Torch Gas Lens 3/32”
    • Work With: TIG 17, 18, 26 Series Torches
    • 3/32″ Tungsten Electrodes Standard 10N Series Collet
    • 54N Series Gas Lens Ceramic Cups Setup
    • Pack of 5

    Last update on 2026-06-26 / Affiliate links / Images from Amazon Product Advertising API

    2) 17/18/26 Gas Lens Kit (cups + lens + collets)

    Short description: A bundled kit can be the fastest way to replace multiple wear items at once (cups, collets, lens).
    Key specs: Unknown (Verify)
    Best for: If your cup is chipped, your lens screen is dirty, and you want a clean reset.
    ArcWeld link: N/A
    Amazon:
    Unknown (Verify)

    Still deciding? Compare these options below.

    STARTECHWELD 45V26 TIG Gas Lens 3/32” Gas Lens collet body Fit TIG WP17, WP18, WP26 (5 Pack) 45V26
    • TIG Gas Lens 45V26 Tig Torch Gas Lens 3/32”
    • Work With: TIG 17, 18, 26 Series Torches
    • 3/32″ Tungsten Electrodes Standard 10N Series Collet
    • 54N Series Gas Lens Ceramic Cups Setup
    • Pack of 5

    Last update on 2026-06-26 / Affiliate links / Images from Amazon Product Advertising API

    3) Jumbo Cup Gas Lens Kit (for longer stickout)

    Short description: Larger cups can improve coverage in joints where you need extra tungsten stickout.
    Key specs: Unknown (Verify)
    Best for: Corners, fillets, and tight access where coverage breaks down.
    ArcWeld link: N/A
    Amazon:
    Unknown (Verify)

    Buying Guide: How to Choose

    • Torch family fit (17/18/26 vs other): Don’t assume—verify your torch style before ordering.
    • Tungsten diameter: Match the lens/collet body to your tungsten size (common: 1/16 in, 3/32 in, 1/8 in).
    • Cup size and access: Bigger cups can help coverage but may not fit tight joints.
    • Quality and consistency: If listings don’t clearly state reference numbers (like 45V26) and fitment, treat as Unknown (Verify).

    FAQ

    What does a gas lens actually change?
    It helps straighten and stabilize gas flow, so coverage is less turbulent and more consistent.

    Can too much gas cause soot?
    Yes. Excess flow can create turbulence that pulls air into the shield.

    Do I still need to regrind tungsten after soot shows up?
    Yes. Once contaminated, it’s faster and more reliable to regrind than to “burn it clean.”

    Will a gas lens fix leaks or bad gas?
    No. Fix leaks, confirm 100% argon, and check connections first.

    Safety Notes

    Use appropriate PPE and ensure eye protection meets ANSI Z87.1. Maintain ventilation—shielding issues can tempt people to hover and “test” the arc repeatedly, increasing UV exposure.

  • TIG Torch Slipping Tungsten? Your Collet Body Is Worn (Here’s the Fix)

    Intro

    You’re TIG welding and the tungsten keeps slipping out of the collet. You tighten the back cap, it holds for a few seconds, then slides again. The arc starts inconsistent, the puddle wanders, and your bead looks rough. The problem isn’t the tungsten—it’s a worn collet body that can’t grip anymore.

    Key Takeaways

    • Tungsten slipping is almost always caused by a worn or damaged collet body, not the tungsten itself
    • A collet body wears from repeated insertion and removal of tungsten
    • Replacement collet bodies are cheap ($5–$15) and take 30 seconds to swap
    • Gas coverage improves dramatically with a fresh collet body
    • Keep spares on hand for every torch size you use

    The Problem

    A worn collet body shows up as:

    • Tungsten slides out even when the back cap is tight
    • Inconsistent arc initiation
    • Poor gas coverage (visible oxidation on the weld)
    • Difficulty maintaining arc length
    • Collet body threads are stripped or loose

    The collet is a small tapered sleeve that grips the tungsten. Every time you insert or remove tungsten, the collet compresses and expands. Over hundreds of cycles, the taper wears out. The grip weakens. Eventually, no amount of back cap tightening will hold the tungsten in place.

    Why It Matters

    A slipping tungsten means an unstable arc. Your puddle control suffers. Weld quality drops. On precision work (aerospace, stainless, thin-wall), a wandering arc is a reject. On production runs, it’s rework and lost time. Plus, a loose tungsten can break mid-weld and contaminate your shielding gas.

    The Fix

    1. Disconnect the torch and let it cool. Safety first.
    1. Unscrew the back cap and remove the old collet body.
    1. Inspect the threads. If they’re stripped, you may need a new torch head (rare).
    1. Install the new collet body. Slide it in and hand-tighten the back cap.
    1. Insert tungsten and tighten firmly. The tungsten should not move when you pull on it.
    1. Test the arc. You should see immediate improvement in arc stability and gas coverage.

    Why This Product Solves It

    The TIG Gas Lens Collet Body #17, 18, 26 Torch 2PK (45V27-1/8″) is a direct replacement for standard TIG torches and includes a gas lens design that improves shielding gas flow. The tapered bore is precision-machined to grip tungsten consistently, and the gas lens allows larger tungsten stick-out for better visibility and control. Two-pack means you have a spare.

    Product Link:  Product not found.

    “>
    Product not found.
     

    What to Check Before You Buy

    • Torch series: This fits #17, #18, and #26 torches (most common sizes)
    • Tungsten size: This collet is sized for 1/8″ (3.2mm) tungsten
    • Gas lens compatibility: Confirm your torch head accepts a gas lens (most do)
    • Thread type: Standard collet body threads (verify if you have an older torch)

    Real-World Use

    A TIG fabricator working on stainless tubing noticed poor gas coverage and arc wander. Swapped the collet body. Tungsten stayed put, arc was stable, and the bead came out clean. One collet body lasted 18 months before needing replacement.

    Common Mistakes

    • Tightening the back cap excessively (damages the new collet body)
    • Using the wrong collet size for your tungsten diameter (loose fit)
    • Not replacing the collet body when it’s visibly worn (keeps struggling with slipping)
    • Forgetting to clean the collet body threads before installation (cross-threading)
    • Buying a single collet body instead of keeping spares (downtime when it fails)

    Safety Notes

    Always let the torch cool before handling. Collet bodies get hot during welding. Wear gloves when removing hot components. If tungsten slips during welding, stop immediately—a loose electrode can break and contaminate your argon supply.

    Always follow the manufacturer’s instructions and your shop’s safety procedures. If you’re unsure about fitment or ratings, verify before you buy or install.

    Related Reading

  • TIG Torch Consumables Wearing Out Fast? Stock Up With This 123-Piece Kit

    TIG Torch Consumables Wearing Out Fast? Stock Up With This 123-Piece Kit

    Intro: TIG torch consumables wear out fast—especially with aluminum or stainless jobs. This 123-piece kit gives WP-17/18/26 users a complete, ready-to-go stock of nozzles, collets, and gas lenses for pro-level results without the downtime of waiting for parts.

    Key Takeaways

    • 123 pieces: nozzles, collets, gas lenses, and ceramic cups for WP-17/18/26 torches
    • Precision-manufactured for reliable fit and consistent gas coverage
    • Heatproof glass cups and alumina nozzles resist cracking under high temps
    • Supports both AC and DC TIG work; ideal for aluminum, stainless, and mild steel
    • One-time stock eliminates repeated small orders and shop delays

    PHUOC LOC THO for TIG Welding Torch Kit 123 Pcs Stubby Lens, Alumina Nozzle, Collets
    • For TIG Welding Torch Kit 123 Pcs Stubby Lens, Alumina Nozzle, Collets
    • Includes 123 pieces for TIG welding torch kit, featuring stubby lens, alumina nozzle, and collets for welding applications.
    • components like alumina nozzle and collets reliable performance and precise welding results with TIG torch kit 123 Pcs.
    • Upgrade Your Gear, Upgrade Your Performance – Choose Our Reliable Replacement Parts.
    • To ensure a perfect fit and make an informed decision, we encourage you to carefully review both the product’s dimensions and visually inspect it in the provided photos.

    Last update on 2026-06-26 / Affiliate links / Images from Amazon Product Advertising API

    Performance & Use

    All parts are precision-manufactured for reliable fit and gas coverage. Designed for both AC and DC TIG work (verify for your machine). Suits most US-shop WP-17/18/26 torches.

    What to compare before you buy

    • Torch compatibility: Verify your torch model (WP-17, WP-18, or WP-26) before ordering
    • Collet sizes: Kit includes 0.040″, 1/16″, 3/32″, and 1/8″ collets—confirm your electrode diameter
    • Glass vs. ceramic: Kit includes both heatproof glass cups and alumina nozzles; choose based on your material and duty cycle
    • Gas lens setup: Verify whether you run stubby or regular gas lens configuration
    • Storage: Check if included storage case or organizer meets your shop layout needs

    Comparable Amazon picks (optional)

    Durability & Build

    Heatproof glass cups and alumina nozzles resist cracking under high temps. All collets and lenses are built for repeated use—ideal for daily welding or instructional settings. Precision tolerances ensure tight, consistent seals that minimize gas leakage and porosity.

    Who It’s For

    • TIG welders running WP-17/18/26 torches on aluminum, stainless, or mild steel
    • Fabrication shops that need backup consumables in stock to avoid downtime
    • Instructors teaching TIG welding who need a complete parts kit for multiple torch setups
    • Hobbyists and pros upgrading from single-part orders to bulk stock

    Quick FAQ

    Q: Will this fit my torch?
    A: Compatible with WP-17, WP-18, WP-26 (verify torch model before ordering).

    Q: Are all parts included for aluminum and stainless?
    A: Yes, supports both (verify machine settings and gas type).

    Q: Are the cups glass or ceramic?
    A: Both heatproof glass and alumina nozzles included.

    Q: Can I use this for AC and DC TIG?
    A: Yes (verify for your machine).

    Q: Does it include a storage case?
    A: Unknown (Verify on listing).

    Safety Notes

    • Always allow torch to cool before handling consumables
    • Inspect collets and gas lenses for cracks or damage before use; replace if compromised
    • Verify gas flow and coverage before starting production welds
    • Follow ANSI Z49.1 safety standards for TIG welding
  • TIG Gas Lens Cups Cracking? Replace Them Before Porosity Hits

    Intro

    Your TIG welds are starting to show porosity or inconsistent gas coverage. You’ve checked your argon flow, regulator pressure, and torch angle. Everything checks out—except the welds still look rough.

    The problem might be hiding in plain sight: a cracked or worn gas lens cup.

    A damaged gas lens cup disrupts shielding gas flow, allowing air to contaminate the weld pool. Even a hairline crack can cause porosity that ruins structural welds. Unlike contact tips, gas lens cups get less attention—but they’re just as critical.

    Key Takeaways

    • Cracked or worn gas lens cups allow air into the shielding gas stream
    • Porosity, discoloration, and rough beads are signs of gas coverage failure
    • Gas lens cups wear faster with high amperage or prolonged duty cycles
    • Replacement is quick and inexpensive—$2–$8 per cup
    • Proper fitment requires matching your torch size and collet type

    The Problem

    A gas lens cup (also called a ceramic cup or nozzle) sits at the end of your TIG torch and directs shielding gas around the weld pool. Over time, thermal cycling and spatter impact cause:

    • Cracks: Hairline fractures that let air seep in
    • Erosion: The ceramic wears thin, reducing gas flow efficiency
    • Discoloration: Brown or white deposits indicate heat stress and gas leakage
    • Porosity: Air contamination creates gas pockets in the weld

    A cracked cup might look minor, but even a 1mm hairline fracture is enough to ruin a structural weld.

    Why It Matters

    Porosity from a bad gas lens cup is expensive:

    • Rework: Cutting out and re-welding porosity costs hours of labor
    • Inspection failures: Radiographic or ultrasonic testing will reject porosity
    • Safety risk: Porosity weakens the joint and can cause failure under load
    • Material waste: Scrap parts and wasted filler material
    • Reputation: Failed welds on customer parts damage trust

    A $5 replacement cup prevents all of this.

    The Fix

    Replace your gas lens cup as part of routine torch maintenance:

    1. Stop the welder and let the torch cool (5–10 minutes for high-amperage work)
    2. Unscrew the nozzle from the torch head (usually hand-tight or with a small wrench)
    3. Remove the collet body (the small metal piece holding the cup)
    4. Slide out the old cup and inspect the collet body for damage
    5. Install the new cup (check the size: 3/8″, 7/16″, 1/2″, etc.)
    6. Re-assemble: Collet body → new cup → nozzle
    7. Hand-tighten and resume welding

    Total time: 3–5 minutes.

    Why This Product Solves It

    The CK TIG Gas Lens Collet Body (available in multiple sizes) is a precision replacement for standard TIG torches (#17, #18, #26). It includes the collet body and gas lens cup assembly, ensuring proper gas flow and consistent shielding.

    Key benefits:

    • Precision fit: Engineered for standard torch sizes
    • Improved gas coverage: Larger diameter design provides better shielding gas distribution
    • Durability: Quality ceramic resists thermal cracking
    • Compatibility: Works with most standard TIG torches
    • Affordable: Packs of 2 cover extended service intervals

    Replace every 100–200 hours of welding or immediately if you see porosity or discoloration.

    What to Check Before You Buy

    • Torch size: Standard torches are #17, #18, or #26 (small torches are #9, #20, #24W, #25)
    • Cup size: Available in 3/8″ (3/32″), 7/16″ (1/8″), 1/2″ (5/32″), and larger
    • Collet type: Standard collet body vs. gas saver (gas saver is more efficient but less common)
    • Fitment: Unknown (Verify) — confirm your torch model and cup size before ordering

    Real-World Use

    A stainless steel fabrication shop doing heavy TIG work at 150–200 amps noticed porosity on every other weld. They replaced the gas lens cup and the porosity disappeared. The old cup had a hairline crack invisible to the naked eye. Now they replace cups every 150 hours as preventive maintenance.

    Common Mistakes

    • Ignoring discoloration: Brown or white staining on the cup is a sign of gas leakage—replace it immediately
    • Wrong cup size: Installing a 3/8″ cup on a 1/2″ collet body leaves gaps and allows air in
    • Over-tightening the nozzle: Hand-tight is enough; over-tightening can crack the cup
    • Not cleaning the torch head: Spatter and oxidation on the torch head can interfere with gas flow—clean it when you replace the cup
    • Waiting for complete failure: Replace cups at the first sign of porosity, not after multiple failed welds

    Safety Notes

    • Always wear ANSI Z87.1-rated safety glasses or a helmet when welding
    • Let the torch cool for 5–10 minutes before removing the cup—ceramic cups retain heat and can cause burns
    • Ensure proper ventilation; TIG welding produces fumes that require respiratory protection (OSHA guidelines)
    • Never touch the cup or nozzle immediately after welding

    Always follow the manufacturer’s instructions and your shop’s safety procedures. If you’re unsure about fitment or ratings, verify before you buy or install.

    Where to Buy

    Available at ArcWeld.store (stock and shipping: Unknown – verify)

  • Read with Kindle Unlimited