Tag: porosity

  • Bad Gas Coverage in MIG Welds? Replace Your Nozzle

    Intro

    Your MIG welds are porous, and you can see the problem: the shielding gas isn’t covering the weld pool. The arc is exposed, hydrogen from the air contaminates the molten metal, and porosity results. The fix isn’t always a regulator adjustment—it’s often a worn or wrong nozzle. A damaged nozzle restricts gas flow and creates dead zones where the arc isn’t protected. This guide shows you how to diagnose and fix it in 5 minutes.

    Key Takeaways

    • A worn or wrong nozzle restricts gas flow and causes porosity
    • Copper nozzles conduct heat better and last longer than steel
    • Nozzle orifice size affects gas coverage (5/8″ is standard for most MIG guns)
    • Replace nozzles every 100–150 hours of welding or when spatter buildup is visible
    • Always clean the nozzle before replacing it—spatter can be deceptive

    The Problem

    A MIG nozzle is a copper tube that directs shielding gas around the arc. Over time, spatter welds itself to the nozzle, restricting the gas opening. When the orifice is blocked or worn, gas coverage becomes inconsistent.

    What happens:

    • Reduced gas flow: Spatter buildup narrows the opening, starving the arc of protection.
    • Dead zones: Gas doesn’t reach the entire weld pool, leaving unprotected areas.
    • Hydrogen absorption: Unshielded molten metal absorbs hydrogen from air, creating porosity.
    • Weak welds: Porosity reduces tensile strength and can fail inspection.

    You’ll see:

    • Porosity clustered in the weld center or edges
    • Spatter stuck to the nozzle (sometimes thick)
    • Dull or inconsistent arc appearance
    • Gas leaks or hissing sounds around the gun

    Why It Matters

    Porosity is a weld defect. In structural work, it can fail X-ray or ultrasonic inspection. In production, rework costs time and material. A $5 nozzle replacement prevents hours of grinding and rewelding. It also improves weld aesthetics and reduces spatter cleanup.

    The Fix

    1. Power down the welder and wait 30 seconds.
    2. Unscrew the nozzle from the gun (usually hand-tight or one-quarter turn).
    3. Inspect the nozzle for spatter buildup, erosion, or damage.
    4. Clean the nozzle with a wire brush or soak it in acetone to remove spatter.
    5. If cleaning doesn’t restore flow, install a new nozzle (hand-tight).
    6. Verify gas flow by listening for a steady hiss when you pull the trigger.
    7. Test on scrap to confirm porosity is gone.

    Why This Product Solves It

    The Miller Nozzle Replacement – N-A5800C AccuLock S Large Thread-On Nozzle, 5/8″ Orifice, Copper is a direct replacement for Miller AccuLock S guns. It’s made from high-quality copper, which conducts heat efficiently and resists spatter adhesion better than steel. The 5/8″ orifice is standard for most MIG work, providing optimal gas coverage. A pack of 10 ensures you always have replacements ready.

    Product Link: Miller Nozzle Replacement - N-A5800C AccuLock S Large Thread-On Nozzle, 5/8" Orifice, Copper

    ” target=”_blank” rel=”noreferrer noopener”>
    Miller Nozzle Replacement - N-A5800C AccuLock S Large Thread-On Nozzle, 5/8" Orifice, Copper

    Miller Nozzle Replacement – N-A5800C AccuLock S Large Thread-On Nozzle, 5/8" Orifice, Copper

    $193.27 – Pack of 10

    In Stock

    View Product

    What to Check Before You Buy

    • Gun compatibility: AccuLock S guns (Miller, Bernard, and clones). Check your gun nameplate.
    • Orifice size: 5/8″ is standard. Some specialty guns use 1/2″ or 3/4″. Verify before ordering.
    • Thread type: Most nozzles are standard thread-on. Older guns may use different connections.
    • Material: Copper is best for durability. Avoid steel nozzles if possible.

    Real-World Use

    A pipeline crew was struggling with porosity on 3/8″ structural steel. They’d checked gas pressure (correct), wire feed (smooth), and base metal (clean). The nozzle had 6 months of spatter buildup—so thick it looked like a different part. After cleaning and replacing with a fresh nozzle, porosity disappeared. The old nozzle’s orifice had shrunk from 5/8″ to nearly 1/2″ due to spatter.

    Common Mistakes

    • Ignoring spatter buildup: Clean before you replace. Sometimes cleaning alone fixes the problem.
    • Using the wrong orifice size: A 1/2″ nozzle won’t provide full coverage. Confirm size before buying.
    • Not checking gas pressure: A worn nozzle combined with low pressure makes porosity worse. Verify regulator setting.
    • Over-tightening the nozzle: Hand-tight is correct. Over-tightening can crack the gun.
    • Forgetting to test: Always run a test bead on scrap before production welding.

    Safety Notes

    Always follow the manufacturer’s instructions and your shop’s safety procedures. If you’re unsure about fitment or ratings, verify before you buy or install.

    Related Reading

  • Why Your TIG Welds Have Porosity (And How to Fix It in 15 Minutes)

    Why Your TIG Welds Have Porosity (And How to Fix It in 15 Minutes)

    Porosity in TIG welds—those small gas pockets trapped in the bead—kills strength and fails inspections. The good news: most porosity is caused by three fixable issues: contaminated gas, weak shielding coverage, or dirty base metal. Fix these, and your welds clean up fast.

    Key Takeaways

    • Porosity is caused by gas entrapment, not arc problems—focus on shielding and cleanliness
    • Diagnose in 5 minutes: check gas flow, inspect the torch, and clean your base metal
    • Most fixes cost under $20 and take less than 15 minutes
    • Gas lens collet bodies improve shielding coverage and reduce porosity risk
    • Test on scrap before returning to production

    Quick Diagnosis

    What you’ll see:

    • Small holes or bubbles in the weld bead (visible after cooling)
    • Bead surface looks rough or pitted
    • Porosity appears randomly or consistently across the weld

    Likely causes (ranked by frequency):

    1. Gas flow too low or regulator leaking
    2. Contaminated filler wire or tungsten
    3. Weak gas shielding (torch too far from work, wind, or bad gas lens)
    4. Dirty base metal (rust, mill scale, oil)
    5. Arc length too long or tungsten dipped in the puddle

    Safety Notes

    • Eye Protection: Use ANSI Z87.1-rated helmet with correct shade (typically #10–#12 for TIG). Porosity inspection requires close-up viewing—use a magnifying glass if needed.
    • Ventilation: TIG produces less fume than MIG or stick, but always weld in ventilated space or use a fume extractor. Tungsten inert gas (argon) is inert but displaces oxygen—ensure adequate air circulation.
    • Electrical Safety: Disconnect the welder before inspecting the torch or changing consumables.
    • Compressed Gas: Argon cylinders are pressurized. Never drop or expose to heat. Check regulator connections for leaks using soapy water (never a flame).

    Step-by-Step Troubleshooting

    Step 1: Check Gas Flow (Free)

    • Set regulator to 15–20 CFH (cubic feet per hour) for TIG.
    • Listen for a steady hiss at the torch nozzle.
    • If flow is weak or silent, check for kinks in the gas line or a leaking regulator.
    • Why: Low gas flow leaves the weld unshielded, allowing oxygen and nitrogen to enter the puddle and form gas pockets.

    Step 2: Inspect the Torch and Gas Lens (Free)

    • Remove the torch from the cable and look inside the nozzle.
    • Check for spatter buildup, cracks, or discoloration on the gas lens or collet body.
    • If the gas lens is damaged or heavily spattered, replace it (see “Recommended Fix” below).
    • Why: A damaged or dirty gas lens creates turbulence in the shielding gas stream, reducing coverage and trapping gas in the weld.

    Step 3: Clean the Base Metal (Free)

    • Use a wire brush, grinding wheel, or stainless steel brush to remove rust, mill scale, and oxidation.
    • Wipe with a clean cloth to remove dust and oils.
    • Weld within a few minutes of cleaning (oxidation returns quickly).
    • Why: Contaminants on the base metal release gases when heated, which get trapped in the molten puddle.

    Step 4: Test Arc Length and Technique (Free)

    • Keep the tungsten 1/8″ to 3/16″ above the base metal.
    • Maintain a steady, smooth arc without dipping the tungsten into the puddle.
    • Avoid moving the torch too fast or too far from the work.
    • Why: Long arc length weakens gas coverage. Dipping the tungsten introduces tungsten oxide and moisture, causing porosity.

    Step 5: Check Filler Wire and Tungsten (Low Cost)

    • Inspect the filler wire for dirt, rust, or kinks. Replace if contaminated.
    • Check the tungsten for cracks, balling, or discoloration. Replace if damaged.
    • Use the correct tungsten size for your amperage (typically 1/16″ to 3/32″ for most hobby/shop work).
    • Why: Contaminated consumables introduce gases and oxides directly into the weld.

    Fix Options (Ranked)

    1. Adjustment (Free)

    • Increase gas flow to 15–20 CFH.
    • Clean the base metal thoroughly.
    • Reduce arc length and improve torch angle.
    • Best for: First-time porosity or occasional issues.

    2. Consumable Replacement (~$10–$30)

    • Replace the filler wire spool if old or contaminated.
    • Replace the tungsten electrode if cracked or balled.
    • Best for: Consistent porosity after adjustments fail.

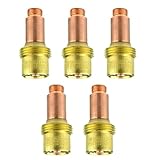
    3. Gas Lens Collet Body Replacement (~$15–$25)

    • Replace the gas lens and collet body to restore shielding coverage.
    • Improves gas flow pattern and reduces turbulence.
    • Best for: Persistent porosity despite clean base metal and correct gas flow.

    Recommended Fix (Product Section)

    Why a gas lens collet body works: A gas lens is a small brass component inside the torch that organizes the shielding gas flow into a smooth, laminar stream. Over time, spatter and oxidation clog the lens, creating turbulence and weak coverage. Replacing it restores full shielding and eliminates porosity caused by weak gas coverage.

    When to use it:

    • After cleaning the base metal and confirming gas flow are correct, but porosity persists.
    • When the old gas lens shows visible spatter, cracks, or discoloration.
    • As routine maintenance every 50–100 hours of welding.

    When NOT to use it:

    • If gas flow is low—fix the regulator first.
    • If the base metal is dirty—clean it before replacing the lens.
    • If the tungsten is dipped in the puddle—improve technique first.

    What to check before buying:

    • Verify your torch model (WP-17, WP-18, WP-26, WP-9, WP-20, WP-25, or SR series).
    • Confirm the collet size matches your tungsten diameter (typically 3/32″ for standard work).
    • Check that the package includes both the gas lens and collet body (some sell lens only).
    • Ensure the product is in stock and ships quickly (you’ll want to test immediately).
    • Look for 4+ star reviews from verified welders.
    STARTECHWELD 45V26 TIG Gas Lens 3/32” Gas Lens collet body Fit TIG WP17, WP18, WP26 (5 Pack) 45V26
    • TIG Gas Lens 45V26 Tig Torch Gas Lens 3/32”
    • Work With: TIG 17, 18, 26 Series Torches
    • 3/32″ Tungsten Electrodes Standard 10N Series Collet
    • 54N Series Gas Lens Ceramic Cups Setup
    • Pack of 5

    Last update on 2026-03-27 / Affiliate links / Images from Amazon Product Advertising API

    Comparable Options

    If you prefer a larger pack or different torch size, consider:

    • 10-Pack 45V26 Collet Bodies (B07KCXHF4G): Same specs, larger quantity for shops doing frequent replacements.
    • Assorted Gas Lens Kit (B081LKNHGS): Multiple sizes (45V26, 45V27, 45V43) if you run different torch models.

    Common Mistakes

    • Assuming porosity is an arc problem. It’s not—porosity is a gas/contamination problem. Check shielding first.
    • Running gas flow too high. Above 25 CFH, excess gas creates turbulence and actually increases porosity. Stick to 15–20 CFH.
    • Skipping base metal cleaning. Rust and mill scale are the #1 cause of porosity in production shops. Always clean before welding.
    • Replacing the gas lens without checking the regulator. If the regulator leaks or is set too low, a new lens won’t help.
    • Ignoring tungsten contamination. If the tungsten is cracked or oxidized, replace it. A bad tungsten will cause porosity no matter how clean the base metal is.

    FAQ (Snippet-Optimized)

    Q: What causes porosity in TIG welding? Porosity is caused by gas entrapment—usually from weak shielding (low gas flow, damaged gas lens, wind), contaminated base metal, or a dipped tungsten. Fix shielding and cleanliness first.

    Q: How do I know if my gas lens is bad? Look inside the torch nozzle. If you see spatter buildup, cracks, or heavy discoloration, replace it. A clean lens should look bright and smooth.

    Q: Can I fix porosity by adjusting amperage? No. Amperage doesn’t cause porosity—gas coverage and cleanliness do. Adjust gas flow, clean the base metal, and check the torch instead.

    Q: How often should I replace my gas lens? Every 50–100 hours of welding, or whenever you see visible spatter or discoloration. Shops doing high-volume work replace them weekly.

    Q: Will a new gas lens fix all my porosity? Only if the porosity is caused by weak shielding. If the base metal is dirty or gas flow is low, a new lens alone won’t fix it. Address all three: gas flow, cleanliness, and torch condition.

    Next Steps

    For more TIG troubleshooting and gear guidance, check out these related posts:

    For more welding fixes and gear options, see our full resource page: https://blog.weldsupportparts.com/links/

  • TIG Gas Lens Cups Cracking? Replace Them Before Porosity Hits

    Intro

    Your TIG welds are starting to show porosity or inconsistent gas coverage. You’ve checked your argon flow, regulator pressure, and torch angle. Everything checks out—except the welds still look rough.

    The problem might be hiding in plain sight: a cracked or worn gas lens cup.

    A damaged gas lens cup disrupts shielding gas flow, allowing air to contaminate the weld pool. Even a hairline crack can cause porosity that ruins structural welds. Unlike contact tips, gas lens cups get less attention—but they’re just as critical.

    Key Takeaways

    • Cracked or worn gas lens cups allow air into the shielding gas stream
    • Porosity, discoloration, and rough beads are signs of gas coverage failure
    • Gas lens cups wear faster with high amperage or prolonged duty cycles
    • Replacement is quick and inexpensive—$2–$8 per cup
    • Proper fitment requires matching your torch size and collet type

    The Problem

    A gas lens cup (also called a ceramic cup or nozzle) sits at the end of your TIG torch and directs shielding gas around the weld pool. Over time, thermal cycling and spatter impact cause:

    • Cracks: Hairline fractures that let air seep in
    • Erosion: The ceramic wears thin, reducing gas flow efficiency
    • Discoloration: Brown or white deposits indicate heat stress and gas leakage
    • Porosity: Air contamination creates gas pockets in the weld

    A cracked cup might look minor, but even a 1mm hairline fracture is enough to ruin a structural weld.

    Why It Matters

    Porosity from a bad gas lens cup is expensive:

    • Rework: Cutting out and re-welding porosity costs hours of labor
    • Inspection failures: Radiographic or ultrasonic testing will reject porosity
    • Safety risk: Porosity weakens the joint and can cause failure under load
    • Material waste: Scrap parts and wasted filler material
    • Reputation: Failed welds on customer parts damage trust

    A $5 replacement cup prevents all of this.

    The Fix

    Replace your gas lens cup as part of routine torch maintenance:

    1. Stop the welder and let the torch cool (5–10 minutes for high-amperage work)
    2. Unscrew the nozzle from the torch head (usually hand-tight or with a small wrench)
    3. Remove the collet body (the small metal piece holding the cup)
    4. Slide out the old cup and inspect the collet body for damage
    5. Install the new cup (check the size: 3/8″, 7/16″, 1/2″, etc.)
    6. Re-assemble: Collet body → new cup → nozzle
    7. Hand-tighten and resume welding

    Total time: 3–5 minutes.

    Why This Product Solves It

    The CK TIG Gas Lens Collet Body (available in multiple sizes) is a precision replacement for standard TIG torches (#17, #18, #26). It includes the collet body and gas lens cup assembly, ensuring proper gas flow and consistent shielding.

    Key benefits:

    • Precision fit: Engineered for standard torch sizes
    • Improved gas coverage: Larger diameter design provides better shielding gas distribution
    • Durability: Quality ceramic resists thermal cracking
    • Compatibility: Works with most standard TIG torches
    • Affordable: Packs of 2 cover extended service intervals

    Replace every 100–200 hours of welding or immediately if you see porosity or discoloration.

    What to Check Before You Buy

    • Torch size: Standard torches are #17, #18, or #26 (small torches are #9, #20, #24W, #25)
    • Cup size: Available in 3/8″ (3/32″), 7/16″ (1/8″), 1/2″ (5/32″), and larger
    • Collet type: Standard collet body vs. gas saver (gas saver is more efficient but less common)
    • Fitment: Unknown (Verify) — confirm your torch model and cup size before ordering

    Real-World Use

    A stainless steel fabrication shop doing heavy TIG work at 150–200 amps noticed porosity on every other weld. They replaced the gas lens cup and the porosity disappeared. The old cup had a hairline crack invisible to the naked eye. Now they replace cups every 150 hours as preventive maintenance.

    Common Mistakes

    • Ignoring discoloration: Brown or white staining on the cup is a sign of gas leakage—replace it immediately
    • Wrong cup size: Installing a 3/8″ cup on a 1/2″ collet body leaves gaps and allows air in
    • Over-tightening the nozzle: Hand-tight is enough; over-tightening can crack the cup
    • Not cleaning the torch head: Spatter and oxidation on the torch head can interfere with gas flow—clean it when you replace the cup
    • Waiting for complete failure: Replace cups at the first sign of porosity, not after multiple failed welds

    Safety Notes

    • Always wear ANSI Z87.1-rated safety glasses or a helmet when welding
    • Let the torch cool for 5–10 minutes before removing the cup—ceramic cups retain heat and can cause burns
    • Ensure proper ventilation; TIG welding produces fumes that require respiratory protection (OSHA guidelines)
    • Never touch the cup or nozzle immediately after welding

    Always follow the manufacturer’s instructions and your shop’s safety procedures. If you’re unsure about fitment or ratings, verify before you buy or install.

    Where to Buy

    Available at ArcWeld.store (stock and shipping: Unknown – verify)

  • Worn MIG Contact Tips Causing Porosity? Here’s the Fix

    Intro

    Your MIG welds are coming out porous, weak, or with inconsistent penetration. You’ve checked your gas flow, wire speed, and voltage—everything looks right. The culprit? A worn contact tip.

    A degraded contact tip creates poor electrical contact with the wire, causing arc instability and incomplete fusion. This is one of the most overlooked failure points in MIG welding, and it’s costing you time and rework.

    Key Takeaways

    • Worn contact tips cause porosity, spatter buildup, and weak welds
    • Signs: Pitting, erosion, or a loose fit on the wire
    • Replace every 50–100 hours of welding or when you notice performance drop
    • Proper fitment matters: match your wire size (.023″, .030″, .035″, .045″)
    • Quality replacement tips prevent downtime and improve weld quality

    The Problem

    A contact tip is a consumable that wears with every pass. As current flows through it to the wire, the tip gradually erodes and pits. When it gets too worn, it can’t maintain consistent electrical contact, causing:

    • Arc instability: Erratic arc behavior, spatter, and poor fusion
    • Porosity: Gas pockets trapped in the weld due to arc interruption
    • Weak beads: Inconsistent penetration and bead profile
    • Spatter buildup: Excess spatter around the nozzle area

    Most shops don’t replace tips until they fail completely—by then, you’ve already scrapped parts.

    Why It Matters

    Worn contact tips don’t just make bad welds; they cost money:

    • Rework: Porosity and weak fusion mean cutting out bad sections and re-welding
    • Downtime: Troubleshooting a worn tip wastes 30 minutes to hours
    • Material waste: Scrap parts and wasted filler material add up fast
    • Safety: Weak welds on structural or pressure-bearing work are a liability

    A $5–$15 contact tip replacement takes 2 minutes and prevents all of this.

    The Fix

    Replace your contact tip as part of routine maintenance:

    1. Stop the welder and let it cool for 30 seconds
    2. Unscrew the nozzle (usually 1/2″ or 5/8″ wrench)
    3. Remove the old tip by hand or with a tip puller
    4. Install the new tip hand-tight, then snug with the nozzle
    5. Re-install the nozzle and resume welding

    That’s it. Total time: under 2 minutes.

    Why This Product Solves It

    The Bernard AccuLock S Contact Tip is a direct replacement for Miller AccuLock S guns (MDX-100, MDX-250, and compatible systems). It maintains precise electrical contact with the wire, delivering stable arc and consistent penetration.

    Key benefits:

    • Exact fitment: Engineered for AccuLock S guns—no guessing
    • Reliable contact: Precision-molded for tight wire fit and stable arc
    • Affordable: Pack of 10 tips covers months of welding
    • Compatible: Works with .030″, .035″, and .045″ wire (check your size)

    Replace every 50–100 hours or when you notice spatter or porosity. Preventive replacement beats troubleshooting a failed tip mid-job.

    What to Check Before You Buy

    • Your gun type: This is for Miller AccuLock S guns (MDX-100, MDX-250). If you use a Lincoln, ESAB, or Tweco gun, you need a different tip
    • Wire size: Available in .030″, .035″, and .045″—match your setup
    • Quantity: Pack of 10 is standard; one tip lasts 50–100 hours depending on duty cycle
    • Fitment: Unknown (Verify) — confirm your gun model before ordering

    Real-World Use

    A fabrication shop running steady MIG work replaces contact tips every 2–3 weeks. One worn tip caused 4 hours of rework on a structural assembly before they realized the problem. Now they replace tips every 50 hours as preventive maintenance. No more porosity, no more downtime.

    Common Mistakes

    • Waiting too long to replace: Worn tips degrade weld quality for days before failing completely
    • Wrong size: Installing a .035″ tip in a .045″ gun (or vice versa) causes loose fit and arc instability
    • Not cleaning the nozzle: Spatter buildup on the nozzle can also cause arc issues—clean it when you replace the tip
    • Over-tightening: Hand-tight is enough; over-tightening can crack the tip
    • Ignoring porosity: If you see porosity, replace the tip immediately—it’s the first thing to check

    Safety Notes

    • Always wear ANSI Z87.1-rated safety glasses or a helmet when welding
    • Let the gun cool for 30 seconds before removing the nozzle—contact tips can retain heat
    • Ensure proper ventilation; MIG welding produces fumes that require respiratory protection (OSHA guidelines)
    • Never touch the tip or nozzle immediately after welding—they will cause burns

    Always follow the manufacturer’s instructions and your shop’s safety procedures. If you’re unsure about fitment or ratings, verify before you buy or install.

    Where to Buy

    Available at ArcWeld.store (stock and shipping: Unknown – verify)

  • Listen with Audible