Tag: Gas-Lens

  • TIG Welding Gas Lens Kit: Complete 58-Piece Consumables Set for WP-17/18/26 Torches

    The Problem: Worn Consumables Kill Weld Quality

    TIG torches demand precision. A single worn nozzle, cracked collet, or degraded gas lens throws off your shielding, creates porosity, and wastes time re-striking. Most welders wait until failure to replace consumables—a costly mistake.

    The Alffun 58-piece TIG gas lens kit eliminates guesswork. It’s a complete replacement set for WP-17, WP-18, and WP-26 torches, covering every consumable you’ll need in one purchase.

    What’s Inside the Kit

    • 20 collets (various sizes for different electrode diameters)
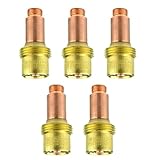
    • 8 collet bodies (stubby and standard)
    • 25 alumina gas cups/nozzles (#12 standard size)
    • 3 back cups (torch head protection)
    • 2 gaskets (seal integrity)

    This breadth means you’re covered for electrode swaps, torch repairs, and emergency replacements without waiting for shipping.

    Why Gas Lens Matters for Shielding

    A gas lens distributes argon evenly around the electrode. A worn lens creates dead zones—areas where shielding gas doesn’t reach the weld pool. Result: oxidation, porosity, and weak beads.

    The alumina nozzles in this kit are durable and resistant to spatter buildup. They maintain consistent gas flow across multiple welding sessions.

    Compatibility & Fit

    Torch Models Supported:

    • Lincoln PTA-17, PTA-18, PTA-26
    • Miller WP-17, WP-18, WP-26
    • ESAB WP-series torches
    • Most aftermarket WP-compatible torches

    Electrode Sizes: The 20 collets cover 0.020″ to 3/32″ (0.5mm to 2.4mm) electrodes.

    Gas Type: Argon (standard TIG shielding gas).

    Performance & Use

    Alffun 58pcs TIG Welding Torches Gas Lens Kit Collet Body Alumina Nozzle Consumables Kit Fit WP-17/18/26 Series TIG Welding Torch Accessories
    • Set includes:3pcs Back cup, 20 collets, 8pcs collet body, 25pcs Alumina gas cup/ nozzle, 2 gasket
    • Fine workmanship: precise made makes it combined very well to machine.100% brand new and high quality Durable and reliable to use
    • provide a good welding performance, gives welders an comfortable feeling during the welding job.
    • 25 Alumina ceramic cups 10N series size #4, #5, #6, #7 and #8. 5-pcs for each size.20 collets 0.040″, 1/16″, 3/32″ and 1/8″. 5-pcs for each size.8 collet bodies 0.040″, 1/16″, 3/32″ and 1/8″. 2-pcs for each size.3 Tungsten back caps at Long, Medium and Short. 1-pcs for each size.2 gasket for regular ceramic cup setup.
    • This kit fits all 17 26 series air cooled welding torches and 18 series water cooled torches, Lincoln PTA-17 PTA-17V PTA-26 PTA-26V PTW-18 Tig Welding Torches. Applicable machine such as Rilon,Riland,Jasic,Mitech,Chiry,UNT,Krypton,Longetivity,Berlan, etc.

    Last update on 2026-05-11 / Affiliate links / Images from Amazon Product Advertising API

    What to Compare Before You Buy

    • Nozzle Material: Alumina vs. ceramic vs. copper. Alumina (this kit) resists spatter better but is more brittle; ceramic is softer; copper conducts heat faster but wears quicker.
    • Collet Variety: Does the kit include stubby collets? (Yes, 8 total.) Stubby collets reduce heat and improve control in tight spaces.
    • Quantity & Price Per Unit: 58 pieces at ~$25–$35 = ~$0.43–$0.60 per consumable. Compare to buying individual nozzles at $2–$5 each.
    • Torch Compatibility: Verify your torch model (WP-17/18/26 or equivalent). Check your manual or torch label.
    • Warranty & Returns: Check Amazon return policy; most consumables kits allow 30-day returns for defects.

    Comparable Amazon Picks (Optional)

    How to Install Consumables

    1. Disconnect the torch from the power source and gas supply.
    1. Unscrew the back cap (large nut at the torch head).
    1. Remove the old collet and nozzle by hand or with a small wrench.
    1. Insert the new collet into the torch body (small end first).
    1. Slide the new nozzle over the electrode and collet.
    1. Screw the back cap hand-tight, then snug with a wrench (do not over-tighten).
    1. Reconnect gas and power.

    Test with a scrap piece before production welding.

    Storage & Shelf Life

    Store consumables in a dry, cool place. Alumina nozzles don’t degrade over time, but collets can crack if dropped or over-torqued. Keep extras in a labeled container for quick access.

    When to Replace Consumables

    • Nozzle: Spatter buildup reduces gas flow; clean with a soft brush or replace if cracked.
    • Collet: Replace if it no longer grips the electrode firmly or shows visible cracks.
    • Gas Lens: Replace if the electrode no longer sits centered in the nozzle.
  • Why Your TIG Welds Have Porosity (And How to Fix It in 15 Minutes)

    Why Your TIG Welds Have Porosity (And How to Fix It in 15 Minutes)

    Porosity in TIG welds—those small gas pockets trapped in the bead—kills strength and fails inspections. The good news: most porosity is caused by three fixable issues: contaminated gas, weak shielding coverage, or dirty base metal. Fix these, and your welds clean up fast.

    Key Takeaways

    • Porosity is caused by gas entrapment, not arc problems—focus on shielding and cleanliness
    • Diagnose in 5 minutes: check gas flow, inspect the torch, and clean your base metal
    • Most fixes cost under $20 and take less than 15 minutes
    • Gas lens collet bodies improve shielding coverage and reduce porosity risk
    • Test on scrap before returning to production

    Quick Diagnosis

    What you’ll see:

    • Small holes or bubbles in the weld bead (visible after cooling)
    • Bead surface looks rough or pitted
    • Porosity appears randomly or consistently across the weld

    Likely causes (ranked by frequency):

    1. Gas flow too low or regulator leaking
    2. Contaminated filler wire or tungsten
    3. Weak gas shielding (torch too far from work, wind, or bad gas lens)
    4. Dirty base metal (rust, mill scale, oil)
    5. Arc length too long or tungsten dipped in the puddle

    Safety Notes

    • Eye Protection: Use ANSI Z87.1-rated helmet with correct shade (typically #10–#12 for TIG). Porosity inspection requires close-up viewing—use a magnifying glass if needed.
    • Ventilation: TIG produces less fume than MIG or stick, but always weld in ventilated space or use a fume extractor. Tungsten inert gas (argon) is inert but displaces oxygen—ensure adequate air circulation.
    • Electrical Safety: Disconnect the welder before inspecting the torch or changing consumables.
    • Compressed Gas: Argon cylinders are pressurized. Never drop or expose to heat. Check regulator connections for leaks using soapy water (never a flame).

    Step-by-Step Troubleshooting

    Step 1: Check Gas Flow (Free)

    • Set regulator to 15–20 CFH (cubic feet per hour) for TIG.
    • Listen for a steady hiss at the torch nozzle.
    • If flow is weak or silent, check for kinks in the gas line or a leaking regulator.
    • Why: Low gas flow leaves the weld unshielded, allowing oxygen and nitrogen to enter the puddle and form gas pockets.

    Step 2: Inspect the Torch and Gas Lens (Free)

    • Remove the torch from the cable and look inside the nozzle.
    • Check for spatter buildup, cracks, or discoloration on the gas lens or collet body.
    • If the gas lens is damaged or heavily spattered, replace it (see “Recommended Fix” below).
    • Why: A damaged or dirty gas lens creates turbulence in the shielding gas stream, reducing coverage and trapping gas in the weld.

    Step 3: Clean the Base Metal (Free)

    • Use a wire brush, grinding wheel, or stainless steel brush to remove rust, mill scale, and oxidation.
    • Wipe with a clean cloth to remove dust and oils.
    • Weld within a few minutes of cleaning (oxidation returns quickly).
    • Why: Contaminants on the base metal release gases when heated, which get trapped in the molten puddle.

    Step 4: Test Arc Length and Technique (Free)

    • Keep the tungsten 1/8″ to 3/16″ above the base metal.
    • Maintain a steady, smooth arc without dipping the tungsten into the puddle.
    • Avoid moving the torch too fast or too far from the work.
    • Why: Long arc length weakens gas coverage. Dipping the tungsten introduces tungsten oxide and moisture, causing porosity.

    Step 5: Check Filler Wire and Tungsten (Low Cost)

    • Inspect the filler wire for dirt, rust, or kinks. Replace if contaminated.
    • Check the tungsten for cracks, balling, or discoloration. Replace if damaged.
    • Use the correct tungsten size for your amperage (typically 1/16″ to 3/32″ for most hobby/shop work).
    • Why: Contaminated consumables introduce gases and oxides directly into the weld.

    Fix Options (Ranked)

    1. Adjustment (Free)

    • Increase gas flow to 15–20 CFH.
    • Clean the base metal thoroughly.
    • Reduce arc length and improve torch angle.
    • Best for: First-time porosity or occasional issues.

    2. Consumable Replacement (~$10–$30)

    • Replace the filler wire spool if old or contaminated.
    • Replace the tungsten electrode if cracked or balled.
    • Best for: Consistent porosity after adjustments fail.

    3. Gas Lens Collet Body Replacement (~$15–$25)

    • Replace the gas lens and collet body to restore shielding coverage.
    • Improves gas flow pattern and reduces turbulence.
    • Best for: Persistent porosity despite clean base metal and correct gas flow.

    Recommended Fix (Product Section)

    Why a gas lens collet body works: A gas lens is a small brass component inside the torch that organizes the shielding gas flow into a smooth, laminar stream. Over time, spatter and oxidation clog the lens, creating turbulence and weak coverage. Replacing it restores full shielding and eliminates porosity caused by weak gas coverage.

    When to use it:

    • After cleaning the base metal and confirming gas flow are correct, but porosity persists.
    • When the old gas lens shows visible spatter, cracks, or discoloration.
    • As routine maintenance every 50–100 hours of welding.

    When NOT to use it:

    • If gas flow is low—fix the regulator first.
    • If the base metal is dirty—clean it before replacing the lens.
    • If the tungsten is dipped in the puddle—improve technique first.

    What to check before buying:

    • Verify your torch model (WP-17, WP-18, WP-26, WP-9, WP-20, WP-25, or SR series).
    • Confirm the collet size matches your tungsten diameter (typically 3/32″ for standard work).
    • Check that the package includes both the gas lens and collet body (some sell lens only).
    • Ensure the product is in stock and ships quickly (you’ll want to test immediately).
    • Look for 4+ star reviews from verified welders.
    STARTECHWELD 45V26 TIG Gas Lens 3/32” Gas Lens collet body Fit TIG WP17, WP18, WP26 (5 Pack) 45V26
    • TIG Gas Lens 45V26 Tig Torch Gas Lens 3/32”
    • Work With: TIG 17, 18, 26 Series Torches
    • 3/32″ Tungsten Electrodes Standard 10N Series Collet
    • 54N Series Gas Lens Ceramic Cups Setup
    • Pack of 5

    Last update on 2026-05-11 / Affiliate links / Images from Amazon Product Advertising API

    Comparable Options

    If you prefer a larger pack or different torch size, consider:

    • 10-Pack 45V26 Collet Bodies (B07KCXHF4G): Same specs, larger quantity for shops doing frequent replacements.
    • Assorted Gas Lens Kit (B081LKNHGS): Multiple sizes (45V26, 45V27, 45V43) if you run different torch models.

    Common Mistakes

    • Assuming porosity is an arc problem. It’s not—porosity is a gas/contamination problem. Check shielding first.
    • Running gas flow too high. Above 25 CFH, excess gas creates turbulence and actually increases porosity. Stick to 15–20 CFH.
    • Skipping base metal cleaning. Rust and mill scale are the #1 cause of porosity in production shops. Always clean before welding.
    • Replacing the gas lens without checking the regulator. If the regulator leaks or is set too low, a new lens won’t help.
    • Ignoring tungsten contamination. If the tungsten is cracked or oxidized, replace it. A bad tungsten will cause porosity no matter how clean the base metal is.

    FAQ (Snippet-Optimized)

    Q: What causes porosity in TIG welding? Porosity is caused by gas entrapment—usually from weak shielding (low gas flow, damaged gas lens, wind), contaminated base metal, or a dipped tungsten. Fix shielding and cleanliness first.

    Q: How do I know if my gas lens is bad? Look inside the torch nozzle. If you see spatter buildup, cracks, or heavy discoloration, replace it. A clean lens should look bright and smooth.

    Q: Can I fix porosity by adjusting amperage? No. Amperage doesn’t cause porosity—gas coverage and cleanliness do. Adjust gas flow, clean the base metal, and check the torch instead.

    Q: How often should I replace my gas lens? Every 50–100 hours of welding, or whenever you see visible spatter or discoloration. Shops doing high-volume work replace them weekly.

    Q: Will a new gas lens fix all my porosity? Only if the porosity is caused by weak shielding. If the base metal is dirty or gas flow is low, a new lens alone won’t fix it. Address all three: gas flow, cleanliness, and torch condition.

    Next Steps

    For more TIG troubleshooting and gear guidance, check out these related posts:

    For more welding fixes and gear options, see our full resource page: https://blog.weldsupportparts.com/links/

Stream with Amazon Music