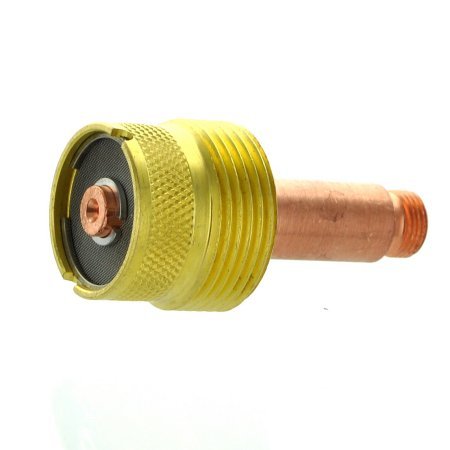
Tag: collet body

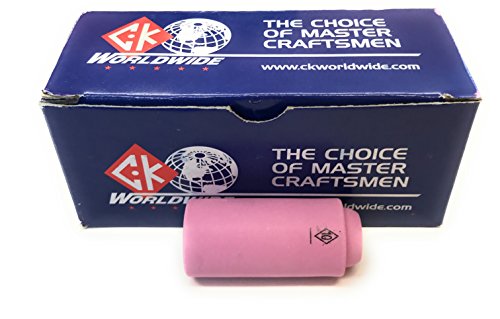
  • Weldmark By CK Alumina Nozzle For Standard Collet Body Torch # 17,18,26 PK = 10 (10N45 – #10-5/8″)

    Weldmark By CK Alumina Nozzle For Standard Collet Body Torch # 17,18,26 PK = 10 (10N45 – #10-5/8″)

    Product not found.
    “>Weldmark By CK Alumina Nozzle For Standard Collet Body Torch # 17,18,26 PK = 10 (10N45 - #10-5/8")

    The Weldmark By CK Alumina Nozzle For Standard Collet Body Torch # 17,18,26 PK = 10 (10N45 – #10-5/8″) is a TIG ceramic cup set listed for standard collet body torches in the 17, 18, and 26 series. For buyers and maintenance teams, the main job of this part is simple: it directs shielding gas and helps define the gas envelope at the torch end. If the cup is chipped, loose, or mismatched to the torch setup, arc shielding can become less consistent and tungsten access becomes harder to control.

    This draft is a product breakdown, not a procedure approval. Final fit depends on the torch build, collet body style, cup size, and the rest of the consumable stack. Verify the full assembly before use.

    Key Takeaways

    • Listed as a 10-pack ceramic cup set for TIG torch sizes 17, 18, and 26.
    • Intended for use with a standard collet body torch setup.
    • Part designation includes 10N45 and #10-5/8" in the product title.
    • Actual fit should be verified against the torch body, collet body, and gas cup thread/interface details.
    • Unknown (Verify): exact material formulation, dimensional tolerances, and any torch-brand cross-compatibility beyond the listed series.

    What This Part Does

    An alumina nozzle, often called a ceramic cup, sits at the front of the TIG torch and helps shape shielding gas coverage around the tungsten and weld puddle. In routine shop use, it is a wear part. Common failure modes are chips from impact, heat stress, contamination, and cross-threading or mis-seating in the torch stack.

    For maintenance buyers, the practical value is consistency. A cup that is intact and properly seated gives the operator a stable front end. A damaged cup can cause gas disruption, poor visibility, or repeated torch rework. If your team sees recurring cup damage, the problem may be handling, torch storage, or a worn supporting consumable rather than the cup alone.

    Check, Inspect, Verify Before Use

    1. Check the torch series. Confirm the torch is in the listed 17, 18, or 26 family. If the torch model is not known, stop and verify it from the torch body markings or service records.
    2. Inspect the cup edge. Look for chips, cracks, glaze loss, or oval wear. Do not install a cup with visible damage at the rim or threads/interface area.
    3. Verify the collet body style. The product is listed for a standard collet body torch. If the torch uses a different front-end arrangement, fit is Unknown (Verify).
    4. Check the seat and threads. Make sure the cup seats smoothly without forcing. Cross-threading, rough engagement, or wobble indicates mismatch or damage elsewhere in the stack.
    5. Confirm the weld access needs. Cup size affects reach and visibility. If access is tight, compare the front-end layout with the job geometry before starting production.

    Troubleshooting Support

    If the cup breaks repeatedly, the part may not be the root cause. Use these checks to isolate the issue.

    • If the cup chips on startup: Inspect the torch front end for misalignment, damaged seats, or a loose assembly.
    • If shielding seems unstable: Verify the gas diffuser, collet body, and tungsten stickout are correct for the setup. Do not assume the cup alone is the issue.
    • If the cup will not thread or seat correctly: Stop and inspect for the wrong torch series, damaged threads, or an incompatible front-end component.
    • If visibility is poor: Check whether the cup size matches the task. A larger cup can improve gas coverage but may reduce access in tight joints.

    For a related repair discussion on torch front-end wear, see TIG Torch Slipping Tungsten? Your Collet Body Is Worn (Here’s the Fix). For another front-end consumable review, see Weldmark 13N26 TIG Collet Body Review: .040" Replacement Parts for #9, #20, and #25 TIG Torches.

    Product and Parts Notes

    The product title identifies this as a Weldmark by CK alumina nozzle set in a 10-pack. The listed torch families are 17, 18, and 26. Beyond that, several details remain Unknown (Verify), including exact dimensional compatibility with every standard collet body variant, finish differences by production lot, and any manufacturer-specific substitution guidance.

    When the front-end parts are mixed across brands, the safest approach is to treat the listing as a starting point only. Verify the torch series, collet body, back cap style, and the cup interface before buying in quantity. This matters most in maintenance stock, where one wrong consumable can sit on the shelf and still create downtime when issued to the floor.

    How Buyers Should Verify Stocking Need

    • Confirm which torch series are used most often in the shop.
    • Check whether operators are using standard collet body front ends or a different setup.
    • Inspect the failure history: chips, cracking, or poor fit often point to handling or assembly issues.
    • Verify whether the same cup size is used across all procedures, or only on specific joints and access conditions.

    Safety Notes

    • Do not use cracked or chipped ceramic cups.
    • Allow hot torch parts to cool before inspection or replacement.
    • Verify shielding gas flow and torch assembly before striking an arc.
    • Wear appropriate eye and hand protection when handling torch consumables.
    • If there is any fit doubt, remove the part and verify the torch front end before weld production.

    FAQ

    Is this cup for all TIG torches?
    No. The product title lists torches 17, 18, and 26. Compatibility with other torches is Unknown (Verify).

    Is this a standard collet body part?
    The listing says it is for a standard collet body torch. Final fit still depends on the exact torch front-end setup, so verify before issue.

    Can I use a damaged ceramic cup for a short repair?
    No. A damaged cup can disrupt shielding gas and create unstable conditions at the torch front end. Replace it.

    What should I check if the cup keeps cracking?
    Inspect the torch assembly, handling method, storage, and the rest of the front-end consumables. Repeated cracking often indicates a setup or use issue rather than a cup-only problem.

    Sources Checked

    • ArcWeld product page: Weldmark By CK Alumina Nozzle For Standard Collet Body Torch # 17,18,26 PK = 10 (10N45 – #10-5/8″)
    • Provided internal links on TIG torch collet body wear and related front-end parts

    Note: No WSP lookup page or filler metal finder page was provided for this draft, so none were included.

    Related Arc Weld Part

    Weldmark By CK Alumina Nozzle For Standard Collet Body Torch # 17,18,26 PK = 10 (10N45 - #10-5/8")

    Weldmark By CK Alumina Nozzle For Standard Collet Body Torch # 17,18,26 PK = 10 (10N45 – #10-5/8")

    Premium quality TIG ceramic cups 10N series (10-pk) for TIG welding torch 17, 18 and 26 series

    View at Arc Weld Store

    Related Weld Support Guides

  • Weldmark TIG Collet Body #9, 20, 25 Torch Pk = 5 (13N29-1/8″): Replacement Part Breakdown

    When a TIG torch starts acting up, the collet body is one of the first parts to inspect. A worn or mismatched collet body can cause tungsten slippage, poor gas flow, heat buildup, and inconsistent arc starts. For maintenance buyers and welding support teams, the key is not just replacing a small part, but verifying the torch series, the tungsten size, and the wear condition before the order is placed.

    This breakdown covers the Weldmark TIG Collet Body #9, 20, 25 Torch Pk = 5 (13N29-1/8″) listed under ASIN B0728LD49J. Product naming suggests it is intended for Torch #9, #20, and #25 applications, but final fit should always be confirmed against the torch body, cup, collet, and tungsten setup in service. If your torch uses a different consumable family, do not assume interchangeability.

    Key Takeaways

    • Collet bodies are wear parts. Replace them when the tungsten slips, the bore is deformed, or gas coverage becomes erratic.
    • Check the torch series first. A part listed for #9, #20, and #25 torches may not fit every torch branded as TIG-compatible.
    • Use the tungsten diameter, cup size, and back cap arrangement as verification points before ordering.
    • If the existing part is heat-blued, rounded out, cracked, or packed with debris, treat it as a service failure and inspect the rest of the torch stack.

    What This Part Does

    The collet body holds the collet and tungsten assembly in alignment inside the torch. It also contributes to shielding gas routing through the torch front end. If the bore is worn or contaminated, the tungsten may not clamp properly. That can show up as wandering arc starts, inconsistent stickout, or a tungsten that slowly creeps backward under vibration or heat cycling.

    This is a support component, not a process-setting part. Replacing it does not fix the wrong amperage, the wrong gas, or a poor purge setup. It only restores the mechanical condition needed for normal torch operation.

    Inspect Before You Replace

    Use a flashlight and clean gloves. Remove the cup, collet, tungsten, and back cap. Then work through these checks:

    • Check the bore: Look for oval wear, scoring, or tungsten marking inside the collet body.
    • Inspect the threads: Verify the front-end threads are not stripped, cross-threaded, or packed with spatter and dust.
    • Examine heat damage: Blueing, discoloration, and softened edges can indicate excessive heat or poor gas coverage.
    • Verify collet grip: A loose tungsten after tightening usually means the collet body, the collet, or both are worn.
    • Check for contamination: Grinding dust, oxides, and anti-spatter residue can interfere with gas flow and clamping.

    If the torch has a history of overheating, also inspect the torch head, cable bend relief, gas hose routing, and the regulator flow setting. A consumable failure may be a symptom, not the root cause.

    Troubleshooting Support: Check, Inspect, Verify

    Check: Is the tungsten sliding even after tightening? If yes, confirm the collet size, the collet condition, and the collet body bore.

    Inspect: Compare the removed part to the replacement. Look for length, thread form, and shoulder geometry. Do not rely on appearance alone if the torch family is not known.

    Verify: Match the torch model and the consumable family before installation. If documentation is missing, treat the compatibility as Unknown (Verify).

    Check: Is arc behavior unstable only after torch servicing? That can point to a misassembled front end, damaged insulators, or a missing component.

    Inspect: Confirm the stack-up order from back cap to tungsten. A small assembly error can create gas leaks or poor electrical contact.

    Verify: The cup, collet, collet body, and tungsten size must all belong to the same service configuration.

    Product / Parts Notes

    The product linked for this article is the Weldmark TIG Collet Body #9, 20, 25 Torch Pk = 5 (13N29-1/8″) on Amazon, ASIN B0728LD49J. The registry identifies it as a verified Amazon affiliate product. Specific dimensional and material details were not provided in the source set here, so those remain Unknown (Verify).

    Use the product listing as a parts reference only after you confirm:

    • torch series or torch model
    • tungsten diameter
    • collet body thread and length requirements
    • cup and insulator stack compatibility

    Do not order based on the description alone if your torch is unmarked, heavily modified, or using mixed consumables from more than one family.

    Related Internal Reading

    Safety Notes

    • Disconnect the machine or isolate the torch before servicing consumables.
    • Let the torch cool before handling the front end. Heat damage can make small parts look normal while still being unsafe to touch.
    • Do not force threaded parts together. Cross-threading can ruin the torch head or insulator stack.
    • If shielding gas leaks or the torch runs hot after reassembly, stop and recheck the stack before welding.

    FAQ

    How do I know the collet body is worn?

    Look for a tungsten that no longer holds securely, visible bore wear, burned discoloration, or distorted threads. If the tungsten slips after normal tightening, the part is likely worn or contaminated.

    Can I use this collet body in any TIG torch?

    No. The listing indicates Torch #9, #20, and #25 applications, but the actual torch family must be verified. If the torch model is unknown, treat compatibility as Unknown (Verify).

    Is this a fix for poor arc starts by itself?

    Sometimes, but not always. A new collet body can correct poor tungsten grip or damaged gas routing. It will not fix wrong gas settings, bad tungsten prep, contamination, or a damaged torch cable.

    Should I replace the collet too?

    Yes, inspect it closely. If the collet is flattened, oxidized, or no longer grips well, replace it with the collet body so the front-end stack starts from a known condition.

    Sources Checked

    • Forge OS ASIN registry entry for B0728LD49J
    • Provided Amazon affiliate product shortcode for B0728LD49J
    • Allowed internal links listed for this draft

    Matched Replacement Option

    No products found.

    Disclosure: As an Amazon Associate, Weld Support Parts may earn from qualifying purchases.

    Related Weld Support Guides

  • Weldmark TIG Collet Body #9, 20, 25 Torch Pk = 5 (13N28-3/32″): Replacement Part Breakdown

    When a TIG torch starts losing tungsten grip, feeding becomes inconsistent, or the setup feels loose after normal maintenance, the collet body is one of the first parts to inspect. For #9, #20, and #25 style torches, the Weldmark TIG Collet Body #9, 20, 25 Torch Pk = 5 (13N28-3/32″) is a replacement part option listed under ASIN B0723DSV2H. This article breaks down what the part does, how to inspect the torch before replacing it, and what to verify so you do not swap parts blindly.

    Key Takeaways

    • The collet body is a wear part that affects tungsten clamping, electrical contact, and gas flow path.
    • Before replacement, inspect the torch for damage, contamination, and fit issues that may mimic a worn collet body.
    • Confirm torch series and tungsten size compatibility by measurement and part verification, not assumption.
    • If fit is uncertain, use Unknown (Verify) rather than forcing a part into service.
    • Keep a known-good spare set on hand for troubleshooting, but verify the torch setup before installation.

    What this part does

    A TIG collet body sits inside the torch head and supports the collet and tungsten assembly. In practical terms, it helps hold the tungsten centered, supports electrical conduction through the torch consumable stack, and maintains the internal path for shielding gas. If the collet body is worn, deformed, contaminated, or mismatched to the torch setup, the operator may see erratic tungsten retention, overheating at the front end, or inconsistent arc behavior.

    For this Weldmark part, the listing identifies it as a replacement for #9, #20, and #25 torch applications and references 3/32 in. in the product name. Do not treat that as a blanket approval for every torch branded as a #9, #20, or #25. Verify the torch model, front-end configuration, and consumable stack before use.

    Inspect before you replace

    Use a short inspection sequence before ordering or installing a new part.

    • Check the torch head threads and seating surfaces. Look for galling, cross-threading, carbonized residue, or impact damage.
    • Inspect the collet body bore. Verify whether the tungsten slips, binds, or shows off-center wear marks.
    • Inspect the collet. A damaged collet can make a good collet body look bad. Look for crushed slots, discoloration, or loss of spring tension.
    • Verify the gas cup and insulator stack. A cracked cup, missing insulator, or poor seating can cause symptoms that are not caused by the collet body.
    • Check tungsten size. If the tungsten does not match the consumable stack, clamping issues are expected.

    If the torch has been run hot, dropped, or exposed to grinding debris, inspect the entire front end, not just the visible tip components. Many replacement decisions fail because the real issue is contamination or damaged mating surfaces.

    Troubleshooting steps: verify the root cause first

    If the torch is slipping tungsten or the front end is unstable, work through the following sequence.

    1. Check tungsten diameter. Verify the tungsten matches the installed collet and collet body stack. If uncertain, measure it.
    2. Inspect the collet slots. A collet that has lost spring force can cause slip even when the collet body is serviceable.
    3. Inspect the collet body bore and exterior. Look for rounding, cracks, or discoloration from overheating.
    4. Verify all components seat fully. A partially assembled stack can mimic a worn part.
    5. Confirm the torch series. Do not assume every #9, #20, or #25 front end uses the same geometry. Verify against the torch documentation or direct measurement.

    If symptoms remain after cleaning and reassembly, replace the suspect collet body with a known-good part and re-test. If the problem disappears, the removed part was likely the source. If not, continue outward to the collet, insulator, cup, and torch head condition.

    Product and parts section

    The product provided for this topic is the Weldmark TIG Collet Body #9, 20, 25 Torch Pk = 5 (13N28-3/32″) under ASIN B0723DSV2H. Use this as a replacement part reference for the listed torch family only after you verify the torch setup, tungsten size, and front-end consumables.

    Practical use note: replacement parts like this are best treated as maintenance stock, not as a substitute for diagnosis. If a torch is failing repeatedly, do not just replace the collet body and move on. Inspect torch heat damage, contamination, power cable condition, and back-end connection integrity.

    What to verify on receipt:

    • Part identity matches the order description.
    • Package quantity matches the listing.
    • Threads and bore are clean, undamaged, and free of debris.
    • Fit is confirmed against the actual torch body before service.

    Amazon product reference: Weldmark TIG Collet Body #9, 20, 25 Torch Pk = 5 (13N28-3/32″)

    Replacement workflow

    Follow a simple replacement workflow to reduce repeat failures.

    1. Power down and isolate the welding system.
    2. Disassemble the torch front end.
    3. Clean the gas cup, insulator, collet, and surrounding parts.
    4. Inspect the old collet body for scoring, heat tint, or distorted threads.
    5. Install the replacement only after confirming it seats correctly.
    6. Reassemble with the correct consumable stack and verify tungsten fit.
    7. Test arc start and gas coverage on a controlled setup before returning the torch to production.

    If the torch still performs poorly after replacement, stop and re-check the entire front-end stack. A new part will not correct an incorrect assembly or a damaged torch body.

    Safety notes

    • Isolate electrical power before disassembling any torch.
    • Allow hot parts to cool before handling.
    • Do not force threaded parts. Cross-threaded components can fail in service.
    • Use eye protection when cleaning front-end consumables.
    • Do not rely on visual similarity alone for compatibility. Verify by torch model, measurement, or documentation.

    FAQ

    How do I know if the collet body is worn out?

    Common signs include poor tungsten grip, inconsistent fit after cleaning, visible scoring, heat discoloration, or repeated front-end instability after the collet itself has been checked. Verify the entire stack before blaming the collet body.

    Can I use this part in any #9, #20, or #25 torch?

    No. The product title indicates those torch families, but you still need to verify the actual torch model and consumable geometry. Treat the listing as a starting point, not a universal compatibility claim.

    What should I check if the tungsten still slips after replacement?

    Check the collet condition, tungsten diameter, thread seating, cup assembly, and torch head damage. Also verify that the tungsten is properly sized for the installed consumable stack.

    Is this part a full torch repair kit?

    No. It is a replacement collet body listing. If the torch has broader damage, you may need additional consumables or a deeper torch inspection.

    Sources Checked

    • Provided Amazon ASIN registry entry: B0723DSV2H
    • Provided product name: Weldmark TIG Collet Body #9, 20, 25 Torch Pk = 5 (13N28-3/32″)
    • Allowed internal link: https://blog.weldsupportparts.com/2026/04/30/weldmark-13n26-tig-collet-body-review-040-replacement-parts-for-9-20-and-25-tig-torches/
    • Allowed internal link: https://blog.weldsupportparts.com/2026/03/24/tig-torch-slipping-tungsten-your-collet-body-is-worn-heres-the-fix/

    Related reading: Weldmark 13N26 TIG Collet Body Review: .040″ Replacement Parts for #9, #20, and #25 TIG Torches

    Support article: TIG Torch Slipping Tungsten? Your Collet Body Is Worn (Here’s the Fix)

    Matched Replacement Option

    No products found.

    Disclosure: As an Amazon Associate, Weld Support Parts may earn from qualifying purchases.

    Related Weld Support Guides

  • Weldmark TIG Collet Body #9, 20, 25 Torch Pk = 5 (13N27-1/16″) Replacement Part Breakdown

    The Weldmark TIG Collet Body #9, 20, 25 Torch Pk = 5 (13N27-1/16″) is a replacement torch component used in the collet stack. In practical terms, this part helps locate and support the tungsten and collet assembly inside the torch head. If the tungsten slips, the arc becomes inconsistent, or the consumable stack will not assemble correctly, the collet body is one of the first parts to inspect.

    This article is a buyer and troubleshooting guide for maintenance teams, welders, and parts buyers who need to verify whether the part is the right replacement before ordering. Use the checks below to confirm condition, fit, and application. Do not assume compatibility from the torch size alone. Verify the torch model, internal thread pattern, and consumable family before installation.

    Key Takeaways

    • This is a replacement collet body for TIG torch consumable stacks, not a universal part.
    • Fit depends on torch series and consumable system. Verify the torch before ordering.
    • Wear, heat damage, and cross-threading can cause tungsten slippage and poor arc stability.
    • If the tungsten will not clamp securely, inspect the full stack: collet, collet body, back cap, and cup.
    • Use the product listing as a reference point only. Confirm dimensions and compatibility in your own setup.

    What the part does

    The collet body sits inside the TIG torch head and works with the collet to hold the tungsten in position. When the internal bore or external thread area is worn, the tungsten may not stay fixed. That can show up as a wandering arc, inconsistent stickout, or visible damage to the consumable stack.

    For support teams, the most useful question is not simply “is the part available?” It is “does the torch need this part, and does the replacement match the torch body and consumable family?” In many cases, the failure is not the collet body alone. A worn collet, cracked cup, damaged insulator, or heat-distorted back cap can create the same complaint.

    Troubleshooting: when to suspect the collet body

    • Tungsten slips even when the collet is tightened correctly.
    • Arc starts are inconsistent after repeated tungsten regrinds and resets.
    • Threads feel rough, gritty, or no longer engage smoothly.
    • Consumables overheat, discolor, or show localized galling near the torch head.
    • The torch requires more tightening than usual to hold the electrode.

    Check

    Remove the cup, back cap, collet, and tungsten. Check the collet body for heat tint, spatter, nicks, deformation, or thread damage. Look for signs that the bore is no longer round or that the electrode seat is worn.

    Inspect

    Inspect the mating parts as a set. A damaged collet can mimic a bad collet body. A bent tungsten can also make the assembly feel loose or unstable. If the torch head has been dropped, inspect for cracked insulators and distorted internal hardware.

    Verify

    Verify the torch model and consumable series before ordering a replacement. If the torch identification is unreadable, compare the current parts to a known sample from the same torch family. When compatibility is uncertain, record it as Unknown (Verify) and do not release the order until confirmed.

    Replacement decision points

    Replace the collet body when the wear is mechanical and repeatable. That includes damaged threads, obvious heat distortion, or a bore that no longer supports the tungsten properly. If the only issue is poor arc quality, do not stop at the collet body. Check gas coverage, tungsten condition, power settings, and work lead connection as well.

    If the torch has repeated overheating, address the cause before installing new parts. A replacement consumable will not solve a cooling issue, an oversize tungsten for the application, or abuse from excessive duty cycle.

    Product / parts section

    The referenced product is the Weldmark TIG Collet Body #9, 20, 25 Torch Pk = 5 (13N27-1/16″). The available ASIN in the Forge OS registry is B071SHY115. Use the product box below as the checkout reference point.

    No products found.

    Before purchase, verify the following:

    • Torches supported by this part in your shop.
    • Whether the torch uses this exact collet body style or a different consumable family.
    • Required tungsten diameter and matching collet size. Unknown (Verify) if not documented.
    • Whether the part count in the package matches your maintenance requirement.

    Install and support checks

    1. Power down the welding machine and isolate the torch.
    2. Disassemble the cup, back cap, collet, and tungsten.
    3. Clean the torch head threads and consumable seats.
    4. Compare the old and new collet body side by side.
    5. Hand-start threads only. Do not force engagement.
    6. Install the tungsten and confirm it clamps securely without excessive force.
    7. Test the torch on a controlled setup before returning it to production.

    If the torch still slips after replacement, verify the collet size, tungsten diameter, and mating consumables. Also check for heat damage in the torch head. Do not keep tightening hardware past normal hand torque just to make the tungsten stay put.

    Related support articles

    Safety notes

    • Shut down and isolate the power source before disassembly.
    • Allow hot torch parts to cool before handling.
    • Do not use damaged consumables that will not thread or seat correctly.
    • If the torch shows heat damage beyond the consumable stack, remove it from service until inspected.
    • Use PPE when handling worn tungsten, sharp collet edges, or contaminated parts.

    FAQ

    How do I know if the collet body is the problem?

    Start with the symptom. If the tungsten slips, the threads feel damaged, or the torch head shows repeatable wear at the same point, inspect the collet body. If the issue is only arc instability, verify the entire torch setup before replacing parts.

    Can I confirm compatibility from the product title alone?

    No. The title is a starting point, not proof of fit. Verify the torch series, consumable family, and tungsten size before ordering. If documentation is incomplete, mark the match as Unknown (Verify).

    What else should be replaced with a worn collet body?

    Inspect the collet, tungsten, cup, back cap, and insulator. Replace any part that is cracked, heat damaged, or no longer threads and seats correctly. A worn collet body often appears alongside other consumable wear.

    Does a new collet body fix poor arc performance by itself?

    Not always. It may fix tungsten clamping issues, but arc quality also depends on gas flow, tungsten prep, work clamp condition, and machine settings. Verify the full system.

    Sources Checked

    • Provided Amazon product registry reference for ASIN B071SHY115
    • Allowed internal link: Weldmark 13N26 TIG Collet Body Review
    • Allowed internal link: TIG Torch Slipping Tungsten? Your Collet Body Is Worn (Here’s the Fix)

    For maintenance buyers, the main decision is simple: verify the torch family, inspect the full consumable stack, and replace the collet body only when the wear pattern supports it. That keeps the order accurate and reduces repeat failures in the field.

    Disclosure: As an Amazon Associate, Weld Support Parts may earn from qualifying purchases.

    Related Weld Support Guides

  • Gas Lens vs Standard Collet Body

    CK17 TIG Torch Support

    Choosing between a gas lens and a standard collet body affects shielding gas coverage, tungsten access, and how the torch behaves around joints, corners, and root passes. The right choice depends on the weld joint, cup size, torch access, and how much arc stability you need. It is not a one-parts-fits-all decision.

    This comparison covers practical differences, what to inspect when TIG shielding is inconsistent, and how to verify the torch setup before you blame the power source or the filler metal.

    Key Takeaways

    • A gas lens is used to straighten and distribute shielding gas more evenly at the cup outlet.
    • A standard collet body is simpler and commonly used where access is open and gas coverage is already adequate.
    • Gas lens setups are often chosen when the tungsten needs to stick out farther from the cup. Exact extension limits vary by setup and should be treated as Unknown (Verify).
    • Standard collet bodies can be acceptable for basic joints, but shielding can be less forgiving if stickout, cup position, or gas flow is not controlled.
    • If you see oxidation, gray tungsten, or erratic arc starts, inspect the torch consumables before changing machine settings.

    Gas Lens vs Standard Collet Body: What Changes

    A standard collet body holds the collet and tungsten in a direct flow path. It is a basic torch consumable and works in many general TIG applications. A gas lens adds a diffuser element that helps smooth the shielding gas stream before it exits the cup. That can improve coverage around the tungsten and weld puddle.

    In practical terms, a gas lens is usually chosen when the torch needs better gas shielding at the work area, especially on open-root work, stainless, or places where the torch angle is awkward. A standard collet body can still weld cleanly when the cup is positioned properly and the gas flow is controlled. The tradeoff is less gas management margin.

    Do not assume one is always better. The torch, cup size, tungsten size, gas flow rate, and joint access all affect results. If those variables are unknown, verify them before changing consumables.

    When a Gas Lens Makes Sense

    Use a gas lens when you need better shielding stability and more tolerance for tungsten extension. That usually matters on tight joints, inside corners, or when visibility requires a longer tungsten reach.

    Check the following before switching:

    • Is the cup size appropriate for the joint?
    • Is the tungsten clean and properly sharpened?
    • Is the gas path free of leaks, cracks, or missing parts?
    • Is the flow meter set to a value that matches the setup? Exact flow is application dependent and may be Unknown (Verify).

    Inspect the diffuser screen or internal gas distribution path for damage, spatter, dirt, or cross-threading. A damaged lens can create poor shielding and turbulence.

    Verify that the cup, collet, and backcap parts match the torch system in use. The allowed WSP lookup page for this topic is the CK17 TIG Torch Support, which provides Series 3 breakdown routing. If you are matching a torch body or consumable family, confirm the actual torch model and consumable series before ordering.

    When a Standard Collet Body Is Enough

    A standard collet body is often enough for flat-position welds, open access joints, and routine TIG work where the tungsten stays close to the cup. It is also a simpler setup with fewer internal parts to inspect.

    Check for these signs that the standard body is doing its job:

    • The arc starts cleanly without wandering.
    • The tungsten stays bright and free of visible contamination.
    • The weld area does not show gray or sugary oxidation.
    • Gas coverage remains stable through the full weld pass.

    Inspect the collet body threads, collet seating, and cup fit. A loose cup or damaged threads can defeat both standard and gas lens setups.

    Verify that the tungsten size, collet size, and cup style are correct for the torch. If those details are not documented, label them Unknown (Verify) and confirm against the actual torch assembly.

    Troubleshooting Support: Symptoms and Checks

    If weld quality drops, start with the consumables before adjusting the machine.

    Symptom: Tungsten turns gray or contaminated

    • Check whether the cup is cracked or loose.
    • Inspect the tungsten for dip contact, oxidation, or a damaged point.
    • Verify gas coverage at the joint before increasing amperage or changing filler.

    Symptom: Arc feels unstable or wanders

    • Check for a loose collet or poor tungsten clamp.
    • Inspect the torch neck and consumable stack for misalignment.
    • Verify that the tungsten protrusion is within the limits of the setup. Exact limits are Unknown (Verify).

    Symptom: Shielding is weak at the edges of the puddle

    • Check for drafts, fan air, or torch angle changes.
    • Inspect the gas lens screen or collet body passages for blockage.
    • Verify cup size and gas coverage against the joint geometry.

    Practical Selection Guide

    If the job gives you room and the weld is straightforward, start with the simpler setup that matches your existing torch parts. If the weld is more sensitive to shielding or requires longer tungsten extension, a gas lens is often the better test setup.

    For maintenance buyers and support teams, the key is not to overbuy mixed parts without identifying the torch family first. Confirm the torch model, breakdown, and consumable series. The CK17 support page is the only provided WSP lookup reference for this topic, so use it as the routing point and verify the actual fit before purchase.

    Safety Notes

    • Turn off the power source before changing torch consumables.
    • Let hot cups and tungsten cool before handling.
    • Do not force threaded parts. Cross-threaded components can cause leaks and poor shielding.
    • Use proper ventilation when TIG welding, especially on stainless, coated, or unknown base materials.
    • Keep shielding gas cylinders secured and follow site gas handling procedures.

    FAQ

    Is a gas lens always better than a standard collet body?

    No. A gas lens can improve gas coverage, but a standard collet body may be fully adequate for open access welds. The better choice depends on the joint, torch angle, and required tungsten extension.

    Can I swap a gas lens into any TIG torch?

    Not safely without verifying the torch model and consumable series. Compatibility is Unknown (Verify) unless the torch family and part series are confirmed through the actual breakdown or parts listing.

    Why does my tungsten still oxidize with a gas lens?

    Possible causes include a leak, loose cup, draft, contaminated tungsten, or incorrect setup. Inspect the full torch stack and verify gas coverage before changing to a different consumable style.

    Should I change flow rate when switching from standard collet body to gas lens?

    Maybe, but there is no universal setting. Flow depends on cup size, tungsten extension, joint access, and gas type. If the correct setting is not documented, mark it Unknown (Verify) and test methodically.

    Sources Checked

    Use the torch breakdown, confirm the consumable series, and verify the actual setup in the shop before standardizing one consumable style over the other.

    Disclosure: As an Amazon Associate, Weld Support Parts may earn from qualifying purchases.

    Related Weld Support Guides

  • TIG Tungsten Contamination Troubleshooting: Black Specks, Arc Wander, Dirty Starts, and Re-Grind Checks

    TIG tungsten contamination usually comes from one of five places: the tungsten touched the puddle, the filler rod hit the electrode, shielding gas was interrupted, the tungsten was ground on a dirty wheel, or the torch consumables are leaking or loose. The fix is not to keep welding through it. Stop, cut back or re-grind the contaminated tungsten, verify gas coverage, inspect the collet/gas lens/cup, and test on clean scrap before returning to the part.

    Contaminated tungsten can show up as black specks in the bead, gray or black weld edges, arc wandering, hard starts, sputtering, excessive balling, or a weld puddle that will not stay centered. On critical work, assume the contaminated section of weld may need to be removed and re-welded. Do not treat tungsten inclusions as cosmetic.

    Common Symptoms

    SymptomLikely CauseFirst Check
    Black specks in beadTungsten dipped or flaked into puddleInspect tip under good light
    Arc wanders or splitsDirty grind, off-center point, contaminated tipRe-grind lengthwise on clean wheel
    Gray/black weld surfacePoor shielding, long stickout, post-flow too shortCheck argon flow, leaks, cup, gas lens
    Tungsten balls excessivelyToo much amperage for diameter, wrong polarity/process setupVerify tungsten size, type, current, polarity
    Tungsten slipsWorn collet or collet bodyPull-test electrode after tightening

    Fast Diagnosis Procedure

    1. Stop welding immediately. Do not keep running a bead after dipping the tungsten.
    2. Remove the tungsten. Look for melted filler, dark oxidation, a balled end, cracks, or an off-center point.
    3. Cut back if dipped. If base metal or filler is fused into the tip, cut off the bad section before grinding.
    4. Re-grind lengthwise. Grind marks should run with the electrode, not around it.
    5. Check gas coverage. Verify cylinder valve, regulator, hose leaks, torch O-rings, cup condition, and post-flow.
    6. Inspect torch consumables. Replace cracked cups, loose collets, damaged gas lenses, and worn collet bodies.
    7. Run a scrap test. Use clean scrap, same filler, same amperage, and same torch angle before returning to the job.

    What Wears Out First

    The tungsten tip gets blamed first, but the support parts often cause repeat contamination. A worn collet can let the electrode move. A damaged collet body can create poor current transfer. A clogged or damaged gas lens can disturb shielding gas. A cracked cup can pull air into the weld zone. A loose back cap or damaged rear seal can also create gas problems that look like bad tungsten prep.

    Inspection Steps

    • Tungsten: verify diameter, alloy/color code, grind direction, point symmetry, and contamination at the tip.
    • Collet: confirm it matches the tungsten diameter and grips without over-tightening.
    • Collet body/gas lens: inspect threads, seating face, screen condition, and gas flow path.
    • Cup: check for cracks, spatter, chips, or poor seating.
    • Gas system: confirm argon, hose condition, regulator flow, torch leaks, and post-flow time.
    • Base/filler metal: clean oil, oxide, mill scale, moisture, coating, and grinder residue before blaming the machine.

    Common Wrong-Part Mistakes

    • Buying a collet that does not match tungsten diameter.
    • Using a standard collet body when the cup setup requires a gas lens body.
    • Mixing torch series parts between 9/20 and 17/18/26-style torches.
    • Assuming all cups fit all torch heads.
    • Ordering tungsten by color only without confirming diameter, current type, and application.
    • Replacing tungsten repeatedly while leaving a worn collet body or leaking cup in service.

    Compatibility Notes

    Before ordering TIG support parts, verify torch series, tungsten diameter, cup thread/style, gas lens or standard collet body, back cap length, power connector, cooling type, amperage range, and process polarity. Lincoln’s parts guide identifies TIG torch support items such as tungsten electrodes, collets, collet bodies, gas lens collet bodies, alumina nozzles, back caps, and connection adapters. Match by torch family and consumable system, not by appearance alone.

    Field Fix vs Proper Fix

    ConditionField FixProper Fix
    Dipped tungstenStop and re-grindCut back contaminated section, re-grind, remove affected weld if required
    Dirty grind wheelUse clean side of wheelUse dedicated tungsten grinder or dedicated wheel
    Cracked cupReplace cupInspect full front-end stack for gas leakage
    Worn colletInstall spare colletReplace collet and inspect collet body threads/taper
    Oxidized tungsten after stopIncrease post-flowVerify post-flow setting, torch leak points, and gas purity

    Related Failure Paths

    Safety Notes

    Wear eye, hand, and respiratory protection appropriate for welding and tungsten grinding. Use local extraction when grinding tungsten dust. Allow hot torch parts to cool before handling. If thoriated tungsten is used, follow your employer’s safety procedure and SDS requirements. For code, sanitary, pressure, aerospace, or structural work, follow the applicable WPS and inspection requirements before accepting or repairing a contaminated weld.

  • Weldmark 13N26 TIG Collet Body Review: .040″ Replacement Parts for #9, #20, and #25 TIG Torches

    If your TIG torch setup uses a #9, #20, or #25 style torch, the Weldmark 13N26 collet body is a small but important consumable to keep on hand. This 5-pack is made for .040″ tungsten setups and helps hold the collet and tungsten in the proper position during TIG welding.

    No products found.

    Key Takeaways

    • Fits #9, #20, and #25 TIG torch styles.
    • Made for .040″ tungsten setups.
    • Sold as a 5-pack.
    • Useful for shop inventory, repair kits, and TIG consumable drawers.
    • Verify torch compatibility before ordering.

    What This Product Is

    The Weldmark 13N26 is a TIG torch collet body. It threads into the front end of a compatible TIG torch and works with the collet, tungsten, cup, and back cap to hold the electrode securely.

    This part is listed for:

    ItemDetail
    ProductWeldmark TIG Collet Body
    Part Number13N26
    Tungsten Size.040″
    Torch Fitment#9, #20, #25
    Pack Size5
    ASINB071LQVCMK

    Best For

    This part is best for welders who already run #9, #20, or #25 TIG torches and need replacement front-end consumables.

    Common use cases:

    • TIG torch maintenance
    • Replacing worn collet bodies
    • Stocking consumables for a fab shop
    • Keeping spare TIG parts in a service kit
    • Supporting .040″ tungsten applications

    Pros and Cons

    Pros

    • Comes in a 5-pack
    • Common TIG consumable size
    • Fits popular #9, #20, and #25 torch styles
    • Small part that is easy to stock in bulk

    Cons

    • Only for .040″ tungsten
    • Not universal across all TIG torches
    • Specs should be verified against your torch setup before buying

    Compatibility Notes

    This listing indicates compatibility with #9, #20, and #25 TIG torches. Before ordering, confirm:

    • Your torch series
    • Tungsten diameter
    • Existing collet body part number
    • Cup and collet compatibility

    If you are switching tungsten sizes, you may also need matching collets and cups.

    Where to Buy

    Amazon option:

    No products found.

    Affiliate disclosure: As an Amazon Associate, Weld Support Parts may earn from qualifying purchases.

    Safety Notes

    TIG torch consumables are small parts, but they still affect weld quality and torch reliability. Always inspect your torch front end before welding.

    Basic checks:

    • Confirm all torch parts are tight before use.
    • Do not weld with damaged cups, collets, or collet bodies.
    • Wear proper welding PPE.
    • Use ANSI Z87.1-rated eye protection when grinding, cutting, or working near welding operations.
    • Follow your machine, torch, and tungsten manufacturer’s setup guidance.

    FAQ

    What torch does the Weldmark 13N26 fit?

    This listing identifies it for #9, #20, and #25 TIG torch styles.

    What tungsten size is this for?

    This version is for .040″ tungsten.

    Is this a single part or a pack?

    This listing is for a 5-pack.

    Will this fit every TIG torch?

    No. TIG torch parts are not universal. Verify your torch series and part number before ordering.

    What other parts may I need with it?

    Depending on your setup, you may also need matching collets, cups, back caps, and tungsten.

    Sources Checked

    • Uploaded Arc Weld / Amazon inventory export
    • Product title and ASIN from inventory file
    • Unknown specs not confirmed beyond uploaded product data

  • TIG Gas Lens Compatibility Guide: 45V26 Gas Lens for WP-17, WP-18, and WP-26 Torches

    Why this matters

    If your TIG arc is wandering, the tungsten is overheating, or shielding gas coverage is inconsistent, the gas lens setup may be the problem. A correct gas lens collet body helps smooth gas flow and improves shielding around the tungsten.

    If you are setting up a WP-17WP-18, or WP-26 style torch, the 45V26 family is a common front-end consumable to verify first. This guide is about fitment, not guesswork. Check the torch body, tungsten size, and cup setup before ordering.

    When to replace or upgrade the front end

    • Arc starts feel unstable
    • Gas coverage looks uneven
    • Tungsten contamination happens often
    • The collet body is worn, pitted, or damaged
    • You need a setup matched to a standard TIG torch body

    Compatibility table

    Part typePart numberCompatible modelsVerifiedNotesUse cases
    Gas lens collet body45V26WP-17, WP-18, WP-26Verified on Amazon listing3/32″ size listed; confirm tungsten diameter before orderingGeneral TIG front-end setup
    Gas lens body45V2617/18/26-style TIG torchesVerified on Amazon listingCheck cup and collet compatibility before installMild steel, stainless, aluminum TIG work

    Copy table

    AAWP box: 

    No products found.

    What to verify before you buy

    • Torch model: WP-17WP-18, or WP-26
    • Tungsten diameter: match the 3/32″ size if that is your setup
    • Cup size: confirm your cup and back cap arrangement
    • Collet body thread and front-end style: match the torch family, not just the size

    Recommended use case

    Choose this setup if you want a standard TIG consumable path for a common 17/18/26-series torch and you need a verified 45V26 replacement path.

    Safety note

    Disconnect power before changing TIG consumables. Verify torch and consumable fitment against the manufacturer documentation before use. For procedure-controlled welding, follow the applicable welding code and work instructions.

  • TIG Torch Slipping Tungsten? Your Collet Body Is Worn (Here’s the Fix)

    Intro

    You’re TIG welding and the tungsten keeps slipping out of the collet. You tighten the back cap, it holds for a few seconds, then slides again. The arc starts inconsistent, the puddle wanders, and your bead looks rough. The problem isn’t the tungsten—it’s a worn collet body that can’t grip anymore.

    Key Takeaways

    • Tungsten slipping is almost always caused by a worn or damaged collet body, not the tungsten itself
    • A collet body wears from repeated insertion and removal of tungsten
    • Replacement collet bodies are cheap ($5–$15) and take 30 seconds to swap
    • Gas coverage improves dramatically with a fresh collet body
    • Keep spares on hand for every torch size you use

    The Problem

    A worn collet body shows up as:

    • Tungsten slides out even when the back cap is tight
    • Inconsistent arc initiation
    • Poor gas coverage (visible oxidation on the weld)
    • Difficulty maintaining arc length
    • Collet body threads are stripped or loose

    The collet is a small tapered sleeve that grips the tungsten. Every time you insert or remove tungsten, the collet compresses and expands. Over hundreds of cycles, the taper wears out. The grip weakens. Eventually, no amount of back cap tightening will hold the tungsten in place.

    Why It Matters

    A slipping tungsten means an unstable arc. Your puddle control suffers. Weld quality drops. On precision work (aerospace, stainless, thin-wall), a wandering arc is a reject. On production runs, it’s rework and lost time. Plus, a loose tungsten can break mid-weld and contaminate your shielding gas.

    The Fix

    1. Disconnect the torch and let it cool. Safety first.
    1. Unscrew the back cap and remove the old collet body.
    1. Inspect the threads. If they’re stripped, you may need a new torch head (rare).
    1. Install the new collet body. Slide it in and hand-tighten the back cap.
    1. Insert tungsten and tighten firmly. The tungsten should not move when you pull on it.
    1. Test the arc. You should see immediate improvement in arc stability and gas coverage.

    Why This Product Solves It

    The TIG Gas Lens Collet Body #17, 18, 26 Torch 2PK (45V27-1/8″) is a direct replacement for standard TIG torches and includes a gas lens design that improves shielding gas flow. The tapered bore is precision-machined to grip tungsten consistently, and the gas lens allows larger tungsten stick-out for better visibility and control. Two-pack means you have a spare.

    Product Link:  Product not found.

    “>
    Product not found.
     

    What to Check Before You Buy

    • Torch series: This fits #17, #18, and #26 torches (most common sizes)
    • Tungsten size: This collet is sized for 1/8″ (3.2mm) tungsten
    • Gas lens compatibility: Confirm your torch head accepts a gas lens (most do)
    • Thread type: Standard collet body threads (verify if you have an older torch)

    Real-World Use

    A TIG fabricator working on stainless tubing noticed poor gas coverage and arc wander. Swapped the collet body. Tungsten stayed put, arc was stable, and the bead came out clean. One collet body lasted 18 months before needing replacement.

    Common Mistakes

    • Tightening the back cap excessively (damages the new collet body)
    • Using the wrong collet size for your tungsten diameter (loose fit)
    • Not replacing the collet body when it’s visibly worn (keeps struggling with slipping)
    • Forgetting to clean the collet body threads before installation (cross-threading)
    • Buying a single collet body instead of keeping spares (downtime when it fails)

    Safety Notes

    Always let the torch cool before handling. Collet bodies get hot during welding. Wear gloves when removing hot components. If tungsten slips during welding, stop immediately—a loose electrode can break and contaminate your argon supply.

    Always follow the manufacturer’s instructions and your shop’s safety procedures. If you’re unsure about fitment or ratings, verify before you buy or install.

    Related Reading

  • Stream with Amazon Music